Inland Seas 200
Inland Seas Reef Octopus OCTO Classic 1000 HOB Protein Skimmer Instruction Manual
Model: OCTO Classic 1000 (Model Number: 200)
Brand: Inland Seas
1. Introduction
This manual provides detailed instructions for the safe and efficient installation, operation, and maintenance of your Reef Octopus OCTO Classic 1000 Hang-On-Back (HOB) Protein Skimmer. Please read this manual thoroughly before use to ensure optimal performance and longevity of your product.
The Reef Octopus OCTO Classic 1000 HOB Protein Skimmer is designed for aquariums up to 130 gallons (light bio-load), 50 gallons (medium bio-load), and 60 gallons (heavy bio-load). It features an external pump for easy installation and maintenance, a low-profile body, and solid acrylic construction.
2. General Safety Guidelines
- Always disconnect power to the skimmer and any other aquarium equipment before performing maintenance or handling.
- Ensure your hands are dry when plugging or unplugging the power cord.
- Do not operate the skimmer if any part is damaged or malfunctioning. Contact customer support for assistance.
- Keep the skimmer and all electrical connections away from water to prevent electric shock.
- This product is designed for indoor aquarium use only. Do not use it for purposes other than its intended use.
- Keep out of reach of children and pets.
3. Package Contents
Your Reef Octopus OCTO Classic 1000 HOB Protein Skimmer bundle includes the following items:
- Reef Octopus OCTO Classic 1000 HOB Protein Skimmer unit
- Reef Octopus Aquatrance 1000s Pinwheel Pump
- Collection Cup with Drain Tube
- Air Silencer
- Inlet and Outlet Tubing/Piping
- Mounting Screws and O-rings
- MarineAndReef Reefractometer
- MarineAndReef Aquarium Cleaning Towel (19" x 15")
4. Setup and Installation
Follow these steps to assemble and install your protein skimmer:
- Unpack Components: Carefully remove all components from the packaging and lay them out on a clean, flat surface.
- Rinse Components: Rinse the skimmer body, collection cup, pump, and all tubing with warm water using a clean brush to remove any manufacturing oils or residues.
- Assemble Pump and Diffuser: Attach the diffuser to the top of the Aquatrance 1000s pump. Hand-tighten the collar screw to secure it, but do not overtighten.
- Connect Air Hose: Attach the yellow air hose to the designated port on the pump.
- Attach Inlet Pipe: Securely attach the inlet pipe to the pump using a gentle side-to-side motion.
- Insert Pump Assembly into Skimmer Body: Gather the air hose, inlet tube, and pump's electrical cord. Gently lower the pump, diffuser, and inlet assembly into the skimmer body as shown in the product images.
- Install Clear Inside Plate: Insert the clear inside plate into the grooves next to the inlet and push it down until it sits flush with the top of the skimmer body.
- Secure Internal Components: Hand-tighten the screw through the hole near the top of the skimmer body to secure everything in place.
- Assemble Inlet Tubing: Place the small O-ring over the short inlet tube. Connect the two inlet tubing pieces together, ensuring the O-ring is on the outside of the skimmer body.
- Mount Outlet Tube: Mount the outlet tube to the skimmer body.
- Install Collection Cup Lid: Install the lid with the attached silencer. Ensure the airline hose is threaded through the opening in the corner of the lid.
- Prepare Collection Cup: Install the large O-ring and drain tube into the collection cup. Place the collection cup into the skimmer body. During the initial 2-4 week break-in period, ensure the O-ring is situated at the bottom of the collection cup.
- Mount Skimmer to Aquarium: Loosen the mounting screws on the skimmer. Hang the protein skimmer onto the side of your aquarium. Gently hand-tighten the screws until the skimmer sits parallel to the aquarium. Do not overtighten.
- Prime the Pump: To start the skimmer, begin by filling the skimmer body with saltwater until it flows out the outlet pipe. Remove the silencer lid and the air hose from the silencer. Place the air hose into the skimmer body below the water line to prime the pump. Plug in the pump and wait several minutes until all air is flushed from the inlet tubes. Once water is flowing from the outlet tube without air bubbles, the pump is primed.
- Final Air Hose Connection: Reattach the air hose to the silencer and place the lid back on top of the skimmer.
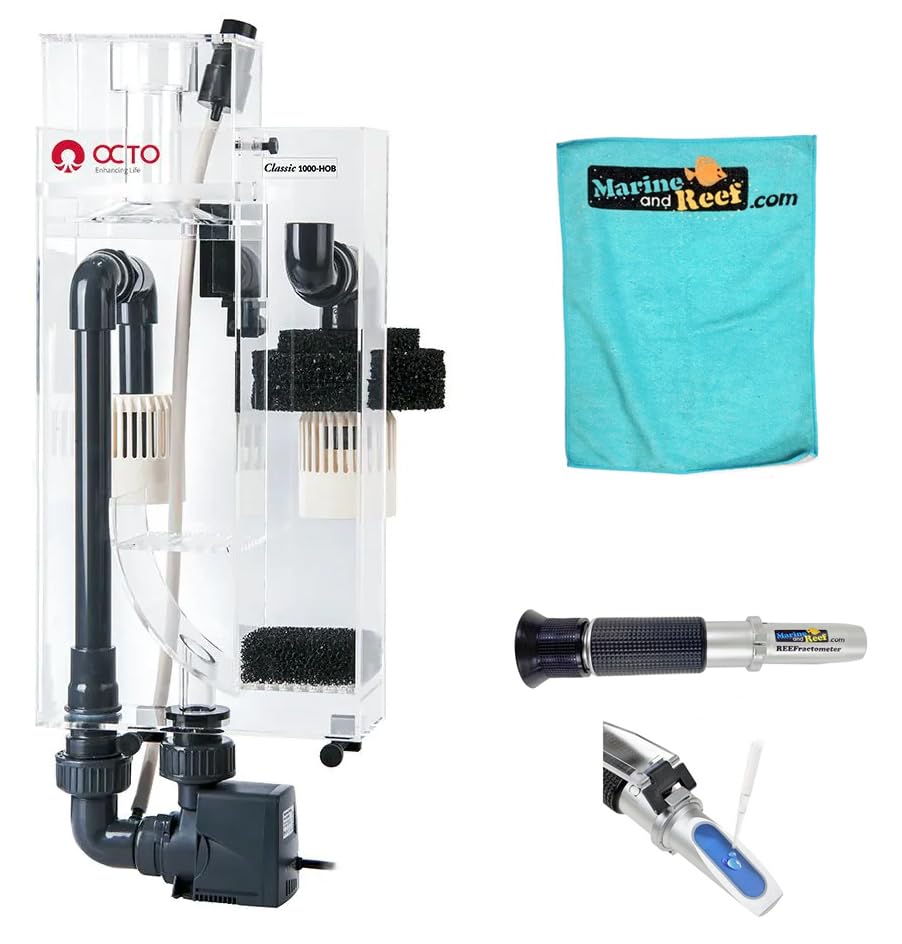
Image: Assembled Reef Octopus OCTO Classic 1000 HOB Protein Skimmer.
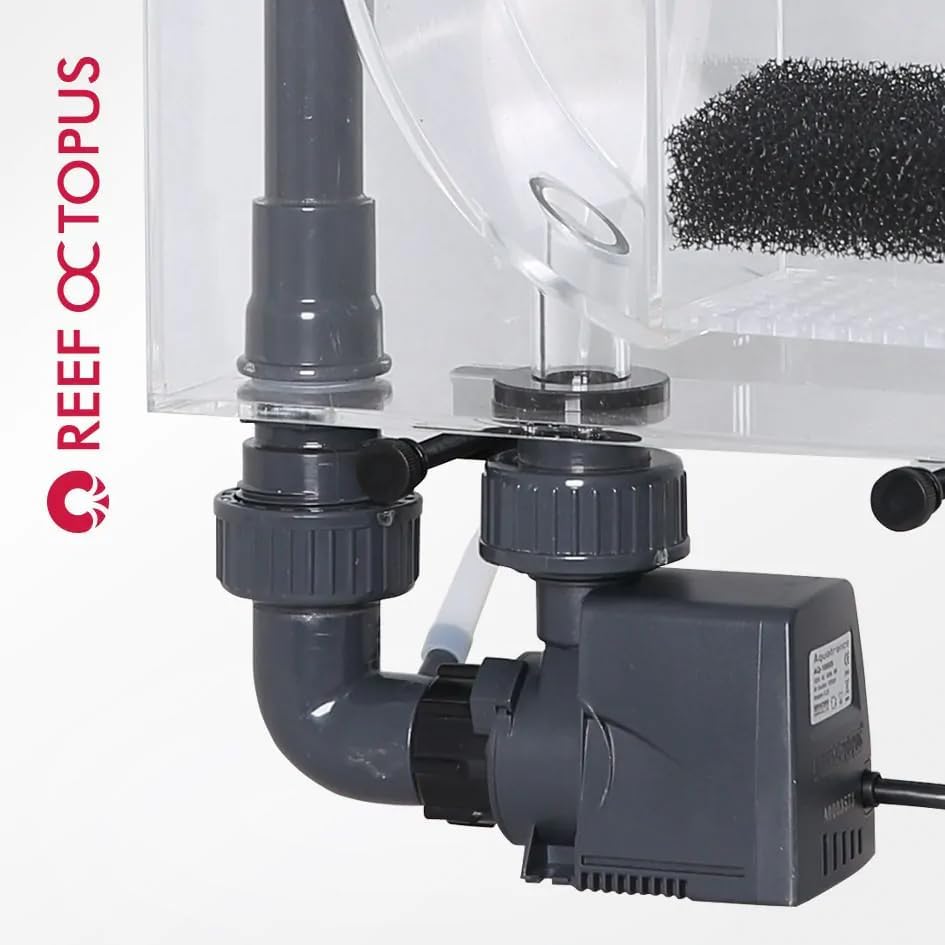
Image: Close-up view of the Aquatrance 1000s pump connected to the diffuser.

Image: Filter sponge and a component of the inlet system.
Video: Unboxing and setup guide for a similar hang-on-back protein skimmer, demonstrating general assembly steps.
5. Operating Instructions
Initial Break-in Period
Allow your skimmer to break in for two to four weeks. During this period, the skimmer may produce inconsistent foam or no foam at all. This is normal as manufacturing oils and residues are removed. Ensure the large O-ring on the collection cup is situated at the bottom during this phase to allow for easier collection of initial skimmate.
Adjusting Skimmer Performance
After the break-in period, you can adjust the O-ring on the collection cup to raise it. The goal is to have the bubbles just about touch the collection cup lid. This will optimize skimmate production. Adjustments may be needed periodically based on your aquarium's bio-load and water parameters.
6. Maintenance
Collection Cup Cleaning
The collection cup should be emptied and cleaned regularly, typically every few days or as needed. The frequency depends on your aquarium's bio-load. To clean, simply remove the cup, discard the skimmate, and rinse the cup and lid with warm water. A soft brush can be used to remove stubborn residue.
Pump and Skimmer Body Cleaning
Periodically, or if performance decreases, the pump and skimmer body should be cleaned. Disassemble the skimmer as per the setup instructions in reverse. Clean all parts with warm water and a soft brush. Pay special attention to the impeller and air intake to ensure they are free of blockages. Reassemble once clean.
7. Troubleshooting
| Problem | Possible Cause | Solution |
|---|---|---|
| No foam or inconsistent foam production | New skimmer (break-in period), water parameters, air intake blockage | Allow 2-4 weeks for break-in. Check salinity and water parameters. Ensure air intake is clear. |
| Skimmer overflowing | Water level too high, air intake too low, recent water change/additives | Adjust water level or air intake. Avoid using oily additives. |
| Low skimmer performance | Dirty pump/impeller, clogged air intake, incorrect water level | Clean pump and air intake. Adjust water level in the skimmer body. |
| Excessive noise | Air intake blockage, pump vibration, loose components | Check air silencer and hose for blockages. Ensure pump is securely placed. Tighten all connections. |
8. Specifications
| Feature | Detail |
|---|---|
| Model Number | 200 |
| Material | Plastic |
| Color | Grey, Red & Clear |
| Product Dimensions | 8"L x 3.5"W x 17"H |
| Recommended Aquarium Size (Light Bio-load) | Up to 130 gallons |
| Recommended Aquarium Size (Medium Bio-load) | Up to 50 gallons |
| Recommended Aquarium Size (Heavy Bio-load) | Up to 60 gallons |
| Pump Type | Reef Octopus Aquatrance 1000s Pinwheel Pump |
| Pump Wattage | 9W |
| Air Draw | 420 LPH / 15 SCFH |
| Water Draw | 350 LPH / 92 GPH |
| Item Weight | 10.68 pounds |

Image: Technical diagram showing dimensions for CLSC-1000HOB and CLSC-2000HOB models.
9. Warranty and Support
For warranty information or technical support, please refer to the documentation provided with your purchase or contact the manufacturer directly. Keep your proof of purchase for any warranty claims.