Introduction
This manual provides essential information for the installation, operation, and maintenance of the BQTEC D3161-A12 GS 3 Motherboard. Designed for compatibility with Esprimo P700, P710, and E710 systems, this motherboard features an Intel Q75 chipset and LGA1155 socket, supporting high-performance Intel processors and up to 32GB of DDR3 RAM. Its mATX form factor and comprehensive connectivity options, including USB 2.0, USB 3.0, DisplayPort, COM, DVI, LAN, and PCIe x16, ensure versatile integration and reliable performance for your computing needs.
Setup and Installation
Before beginning installation, ensure your system is powered off and disconnected from the power source. Wear an anti-static wrist strap to prevent electrostatic discharge (ESD) damage to components.
1. Motherboard Overview
Familiarize yourself with the layout of the BQTEC D3161-A12 GS 3 motherboard. The image below highlights key components and connectors.
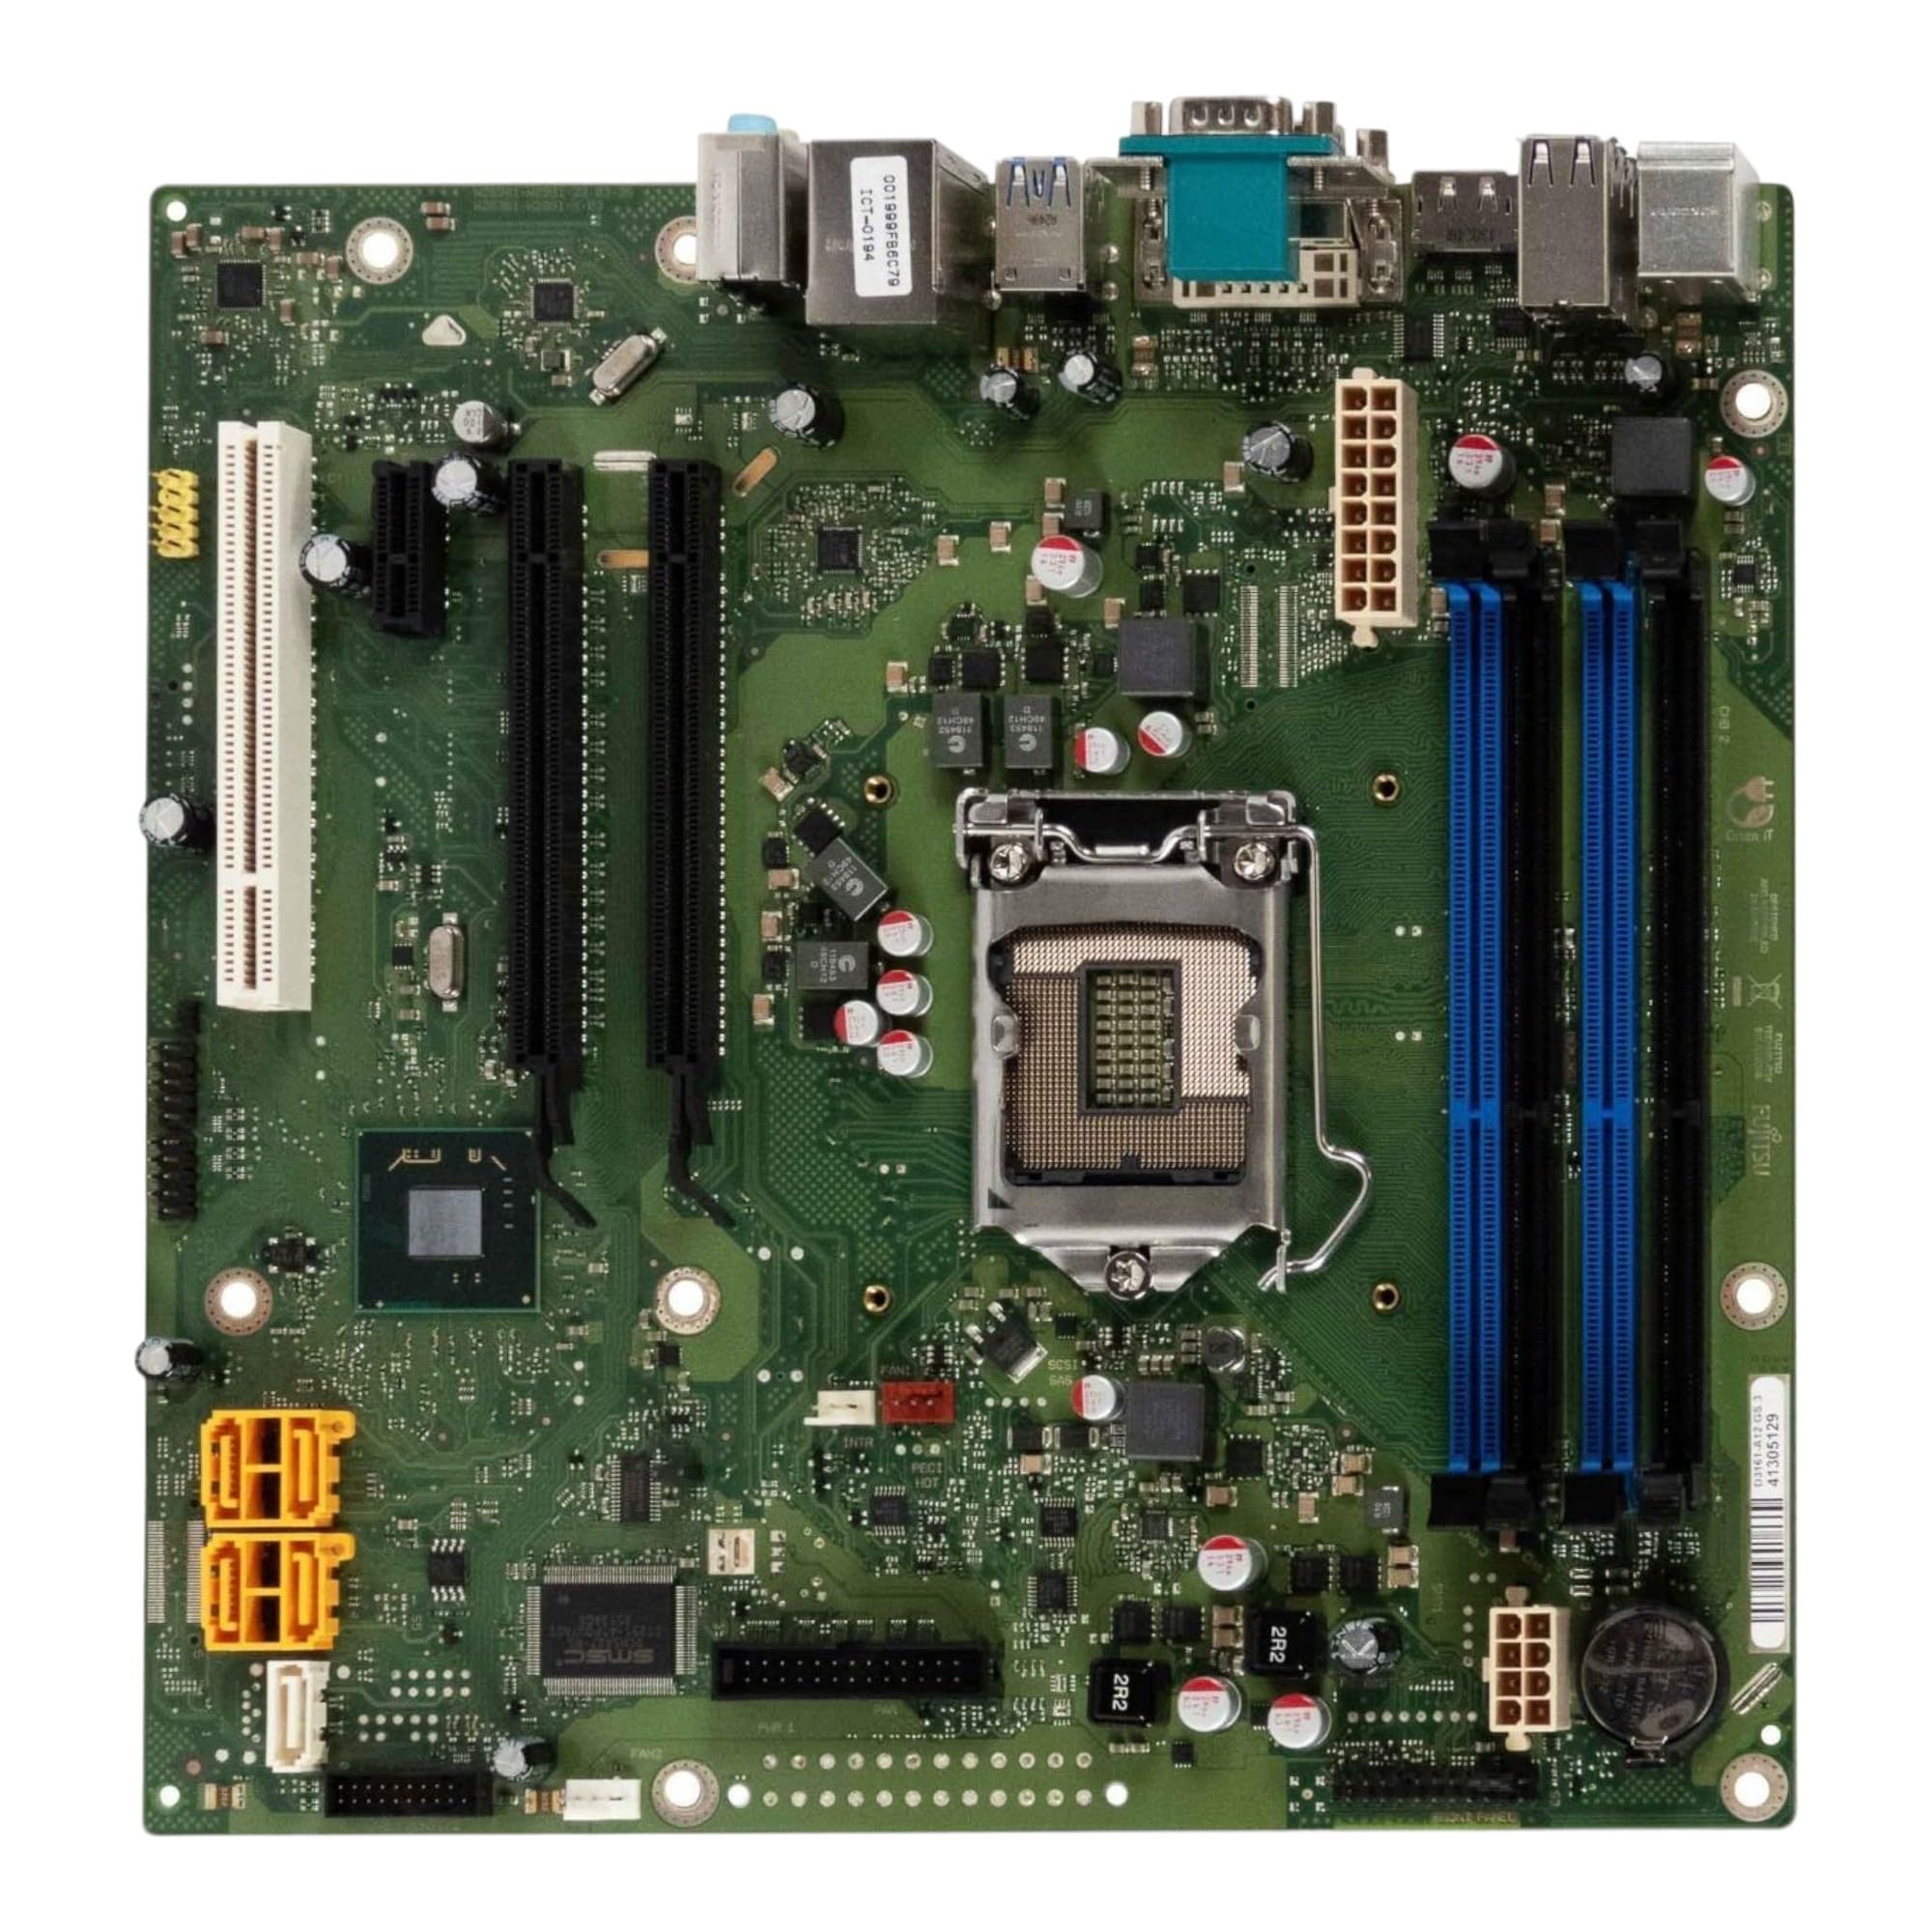
Figure 1: BQTEC D3161-A12 GS 3 Motherboard. This image displays the full motherboard, showing the LGA1155 CPU socket at the center, four blue and black DDR3 RAM slots to the left, various power connectors (yellow and white) on the right, and the rear I/O panel with USB, DisplayPort, DVI, LAN, and audio ports on the left edge. PCIe slots are visible towards the bottom right.
2. CPU Installation (LGA1155)
- Locate the LGA1155 CPU socket on the motherboard.
- Gently push down the load lever and pull it to the side to open the CPU socket cover.
- Carefully align the CPU with the socket, matching the golden triangle on the CPU with the indicator on the socket. Do not force the CPU into the socket.
- Once the CPU is seated correctly, close the socket cover and push the load lever back into place until it locks.
- Apply a thin, even layer of thermal paste to the top of the CPU.
- Install the CPU cooler according to its manufacturer's instructions.
3. RAM Installation (DDR3)
- Identify the four DDR3 DIMM slots. For optimal performance, install RAM modules in matching pairs (e.g., slots 1 and 3, or 2 and 4).
- Open the clips at both ends of the DIMM slot.
- Align the RAM module with the slot, ensuring the notch on the module matches the key in the slot.
- Press down firmly on both ends of the RAM module until the clips snap into place, securing the module.
4. Peripheral and Power Connections
- 24-pin ATX Power Connector: Connect the main power supply cable to this connector.
- 4-pin/8-pin CPU Power Connector: Connect the CPU power cable from the power supply.
- SATA Ports: Connect your storage devices (HDDs/SSDs) to the available SATA ports.
- Front Panel Connectors: Connect the power button, reset button, HDD LED, power LED, and front panel audio/USB headers according to the pinout diagram in your chassis manual.
- Expansion Slots: Install graphics cards or other expansion cards into the PCIe x16 or other available PCIe slots.
- Rear I/O Ports: Connect peripherals such as keyboard, mouse, monitor (via DisplayPort or DVI), network cable (LAN), and audio devices to the corresponding ports.
5. Chassis Installation
Mount the motherboard into your mATX compatible chassis using the appropriate standoffs and screws. Ensure all connections are secure before closing the chassis.
Operating Instructions
After completing the hardware installation, connect your monitor, keyboard, and mouse. Power on your system.
- Initial Boot: The system will perform a Power-On Self-Test (POST). If an operating system is not installed, the system may prompt you to install one or enter the BIOS/UEFI setup.
- BIOS/UEFI Access: To enter the BIOS/UEFI setup, press the designated key (commonly Del, F2, or F10) during the POST sequence. Refer to your system's documentation for the exact key.
- Operating System Installation: Follow the instructions provided with your operating system to install it on your storage device.
- Driver Installation: After installing the operating system, install the necessary drivers for the motherboard's chipset, integrated graphics (if used), LAN, and audio. These are typically available from the system manufacturer's website.
Maintenance
Regular maintenance helps ensure the longevity and stable performance of your motherboard and system.
- Dust Removal: Periodically clean dust from inside your computer case, especially from the CPU cooler, chipset heatsink, and fan vents. Use compressed air or a soft brush. Ensure the system is powered off and unplugged before cleaning.
- Driver Updates: Keep your motherboard drivers updated. Check the system manufacturer's website for the latest BIOS/UEFI firmware and driver releases.
- BIOS/UEFI Updates: Only update the BIOS/UEFI if necessary, following the manufacturer's specific instructions carefully. Incorrect BIOS/UEFI updates can render the motherboard inoperable.
- Cable Management: Ensure internal cables are neatly routed to improve airflow and prevent interference.
Troubleshooting
This section provides solutions to common issues you might encounter.
- No Power:
- Check if the power supply unit (PSU) is connected correctly to the motherboard (24-pin ATX and 4/8-pin CPU power).
- Ensure the power cable is securely plugged into the PSU and the wall outlet.
- Verify the power switch on the PSU is in the 'ON' position.
- Confirm the front panel power button connector is correctly attached to the motherboard.
- No Display:
- Ensure the monitor is connected to the correct video output (DisplayPort, DVI) on the motherboard or discrete graphics card.
- Check if the RAM modules are properly seated in their slots. Try reseating them.
- If using a discrete graphics card, ensure it is fully seated in the PCIe slot and has adequate power connected.
- Try booting with only one RAM module installed.
- System Instability/Crashes:
- Check CPU and GPU temperatures to ensure they are within safe operating limits.
- Verify that all power connectors are secure.
- Run memory diagnostic tools to check for faulty RAM.
- Ensure all drivers are up to date.
- Peripheral Not Detected:
- Try connecting the peripheral to a different USB port.
- Ensure the peripheral's drivers are installed.
- Check BIOS/UEFI settings to ensure USB ports are enabled.
Specifications
| Feature | Detail |
|---|---|
| Brand | BQTEC |
| Model | D3161-A12 GS 3 |
| CPU Socket | LGA 1155 |
| Chipset | Intel Q75 |
| RAM Slots | 4 x DDR3 DIMM |
| Max RAM Capacity | 32 GB |
| Form Factor | mATX |
| Compatible Processors | Intel Core i3-3220, i5-3450, i7-3770, i5-4460, i7-4770, i5-5400, i7-5775C |
| USB Ports | USB 2.0, USB 3.0 (Total 8 USB ports) |
| Video Outputs | DisplayPort, DVI |
| Other Ports | COM, LAN (Ethernet) |
| Expansion Slots | PCIe x16 |
| Dimensions | 24 x 24 x 4 cm |
| Weight | 700 g |
Warranty Information
This BQTEC D3161-A12 GS 3 Motherboard is a refurbished product. Specific warranty terms and duration may vary depending on your region and the retailer from whom it was purchased. Please refer to your purchase documentation or contact your retailer for detailed warranty information. Keep your proof of purchase for any warranty claims.
Support
For technical assistance, driver downloads, or further support regarding your BQTEC D3161-A12 GS 3 Motherboard, please visit the official BQTEC website or contact their customer support. When contacting support, please have your motherboard model number (D3161-A12 GS 3) and any relevant system information ready.