1. Introduction
This manual provides essential instructions for the safe and efficient operation, maintenance, and troubleshooting of your XQZMZSCP Commercial Conveyor Toaster 2200W. Please read this manual thoroughly before initial use and retain it for future reference.
2. Safety Instructions
- Always ensure the toaster is placed on a stable, heat-resistant surface.
- Do not operate the toaster near flammable materials or in wet environments.
- Keep hands and utensils away from the conveyor belt and heating elements during operation.
- Unplug the toaster from the power outlet before cleaning or performing any maintenance.
- Allow the toaster to cool completely before cleaning.
- Do not immerse the toaster in water or any other liquid.
- This appliance is for commercial use only and should be operated by trained personnel.
- Ensure the power supply matches the voltage specified on the appliance label (220V/50Hz).
3. Product Overview
The XQZMZSCP Commercial Conveyor Toaster is designed for high-volume toasting of bread, bagels, and buns. It features a stainless steel construction, adjustable conveyor speed, and dual heating elements for consistent results.
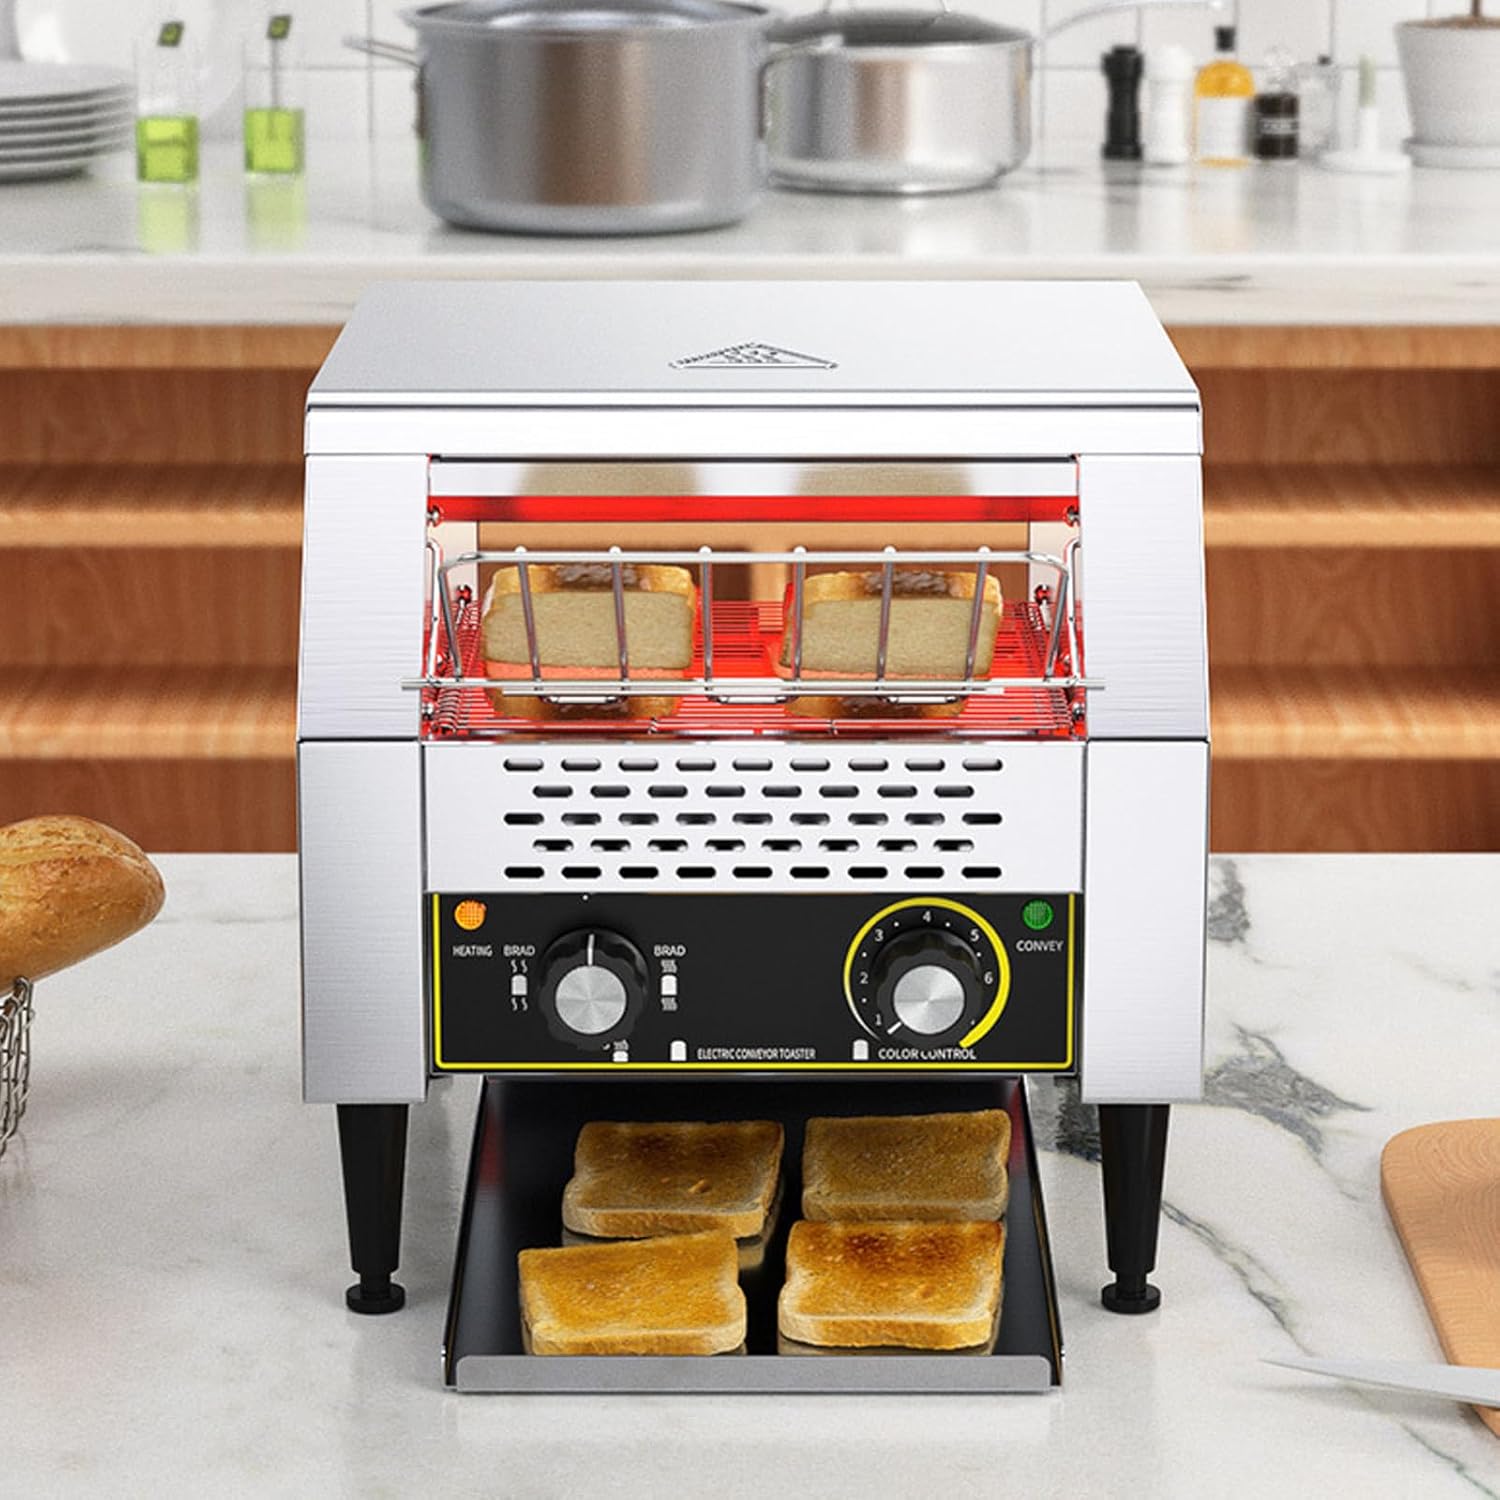
Figure 3.1: Front view of the toaster showing the loading area and control panel.

Figure 3.2: Detailed view of the control panel, chain conveyor belt, adjustable feet, and removable crumb tray.
Components:
- Stainless Steel Casing: Durable and easy to clean.
- Conveyor Belt: Transports items through the heating chamber.
- Heating Elements: Upper and lower three-ring heating tubes for even toasting.
- Control Knobs: For adjusting bread type and conveyor speed.
- Removable Crumb Tray: Collects crumbs for easy cleaning.
- Adjustable Feet: For leveling the appliance on uneven surfaces.
- Dispensing Trays: Front and rear outlets for toasted items.
4. Specifications
| Specification | Value |
|---|---|
| Model | 2200W |
| Material | Stainless Steel |
| Voltage Frequency | 220V/50 Hz |
| Power | 2200W |
| Slices per Hour (Approx.) | 600 (for 2200W model) |
| Dishwasher Compatible | No |

Figure 4.1: Dimensions and power ratings for various models. The 2200W model has dimensions of approximately 350mm width, 480mm depth, and 420mm height.
5. Setup
5.1 Unpacking
- Carefully remove the toaster from its packaging.
- Remove all packing materials, including any protective films or tapes.
- Inspect the toaster for any signs of damage. If damaged, do not operate and contact customer support.
5.2 Placement
- Place the toaster on a flat, stable, and heat-resistant surface.
- Ensure there is adequate ventilation around the appliance (at least 10-15 cm clearance on all sides) to prevent overheating.
- Keep the toaster away from walls, curtains, and other flammable materials.
5.3 Adjusting Feet
The toaster is equipped with retractable and adjustable feet to ensure stability on uneven surfaces.
Figure 5.1: Rotate the feet to adjust the height and level the toaster.
5.4 Power Connection
- Ensure the power switch is in the OFF position.
- Plug the power cord into a grounded electrical outlet that matches the toaster's voltage requirements (220V/50Hz).
6. Operating Instructions
6.1 Powering On
- Turn the main power switch to the ON position. The indicator light will illuminate.
- Allow the toaster to preheat for a few minutes before loading items.
6.2 Loading Items
- Place bread slices, bagels, or buns onto the conveyor belt at the front opening.
- Ensure items are placed flat and do not overlap to allow for even toasting.
6.3 Adjusting Toasting Settings
The toaster features two control knobs: one for bread type/heating mode and one for conveyor speed (color control).
Figure 6.1: Control panel with 'BREAD' and 'CONVEY' knobs.
- Bread Type / Heating Mode Control: This knob typically offers three modes for different items:
- Bread: Activates both upper and lower heating elements for standard bread slices.
- Buns: May activate only the upper heating element for toasting the cut side of buns or bagels.
- Standby/Warm: Maintains a low temperature to keep items warm.
- Conveyor Speed / Color Control: This knob adjusts the speed of the conveyor belt, which directly affects the toasting level (color). It has 7 adjustment levels.
- Lower numbers (1-3): Faster conveyor speed, lighter toast.
- Higher numbers (4-7): Slower conveyor speed, darker toast.
Experiment with settings to achieve desired toasting results for different types of bread products.

Figure 6.2: Internal view illustrating the upper and lower three-ring heating tubes for even heat distribution.
6.4 Dispensing Mode
The toaster offers both front and rear dispensing options for toasted items.

Figure 6.3: The toaster can dispense toasted items from either the front or the rear outlet, depending on the setup.
Select the appropriate dispensing mode based on your operational needs.
6.5 Suitable Items for Toasting
This commercial toaster is suitable for a variety of baked goods, including:

Figure 6.4: Examples of items that can be toasted, such as bread, sandwiches, croissants, and bagels.
- Standard bread slices
- Bagels (cut side down)
- Buns
- Croissants
- Other similar baked goods
7. Maintenance
Regular cleaning and maintenance will ensure the longevity and optimal performance of your toaster.
7.1 Cleaning the Crumb Tray
The toaster is equipped with a removable crumb tray for easy cleaning.
Figure 7.1: The drawer-style crumb tray can be easily extracted for cleaning.
- Ensure the toaster is unplugged and completely cool.
- Locate the crumb tray at the bottom of the toaster and pull it out.
- Empty the collected crumbs into a waste bin.
- Wipe the tray with a damp cloth and mild detergent if necessary. Dry thoroughly before reinserting.
- Push the crumb tray back into its position until it is securely closed.
7.2 General Cleaning
- Always unplug the toaster and allow it to cool before cleaning.
- Wipe the exterior stainless steel surfaces with a soft, damp cloth. For stubborn stains, use a mild stainless steel cleaner.
- Do not use abrasive cleaners, scouring pads, or harsh chemicals, as these can damage the finish.
- Never spray water directly onto the toaster or immerse it in water.
- The toaster is not dishwasher compatible.
8. Troubleshooting
| Problem | Possible Cause | Solution |
|---|---|---|
| Toaster does not turn on | No power supply; Power switch off | Check power cord connection; Ensure power switch is ON; Check circuit breaker. |
| Items not toasting evenly | Incorrect speed setting; Overlapping items; Uneven heating elements | Adjust conveyor speed; Ensure items are placed flat and separate; Contact support if heating elements appear faulty. |
| Conveyor belt not moving | Motor issue; Obstruction | Unplug and check for obstructions; Contact support if motor is faulty. |
| Excessive smoke | Food residue; Over-toasting | Unplug and clean crumb tray and interior; Adjust speed setting to prevent over-toasting. |
9. Support
If you encounter any issues not covered in this manual or require further assistance, please contact XQZMZSCP customer support. Provide your product model number (2200W) and a detailed description of the problem when contacting support.