1. Introduction
This manual provides essential information for the safe and effective use of your aqxreight 72V Electric Motorcycle Controller, model DK72240. This controller is designed to manage power delivery to QS hub motors or mid-drive motors up to 2000W, offering efficient and stable performance for electric motorcycles and mobility scooters. Please read this manual thoroughly before installation and operation.
Note: Professional installation is strongly recommended for this product to ensure correct wiring and optimal performance.
2. Safety Information
Adhering to safety guidelines is crucial to prevent injury and damage to the product or vehicle. Always follow these precautions:
- Disconnect Power: Always ensure the battery is disconnected before performing any installation, wiring, or maintenance on the controller or associated components.
- Professional Installation: Due to the complexity of electrical systems, professional installation is highly recommended. Incorrect wiring can lead to severe damage or safety hazards.
- Avoid Water and Moisture: The controller is not fully waterproof. Protect it from direct exposure to water, heavy rain, or high humidity to prevent electrical shorts and damage.
- Proper Ventilation: Ensure the controller is installed in a location with adequate airflow to prevent overheating during operation.
- Secure Mounting: Mount the controller securely to prevent vibrations or impacts that could damage internal components.
- Correct Voltage: Verify that your battery system voltage matches the controller's rated voltage (72V) to avoid over-voltage or under-voltage conditions.
- Wiring Integrity: Use appropriate gauge wires and ensure all connections are tight and insulated to prevent short circuits.
3. Product Overview
The aqxreight DK72240 Electric Motorcycle Controller is a high-performance sine wave controller designed for efficient motor management. It features a robust metal and ABS construction for durability and resistance to temperature and erosion.
Key Features:
- Efficient Motor Control: Effectively increases motor speed and power output.
- Battery Protection: Designed to protect the battery, extend its service life, and boost driving range.
- Stable Sine Wave Output: Ensures a stable and consistent power effect without fluctuations, providing a smoother ride.
- Durable Construction: Made of metal and ABS materials for resistance to temperature and erosion.
- Compatibility: Matches well with QS hub motors or mid-drive motors up to 2000W.
- FOC Control Mode: Utilizes Field-Oriented Control for precise and efficient motor management.
- Self-Learning Function: Brushless DC controller with a self-learning function for optimal motor pairing.

Figure 1: The aqxreight DK72240 controller, illustrating its role in enhancing electric motorcycle performance by increasing motor speed, power, and driving distance.
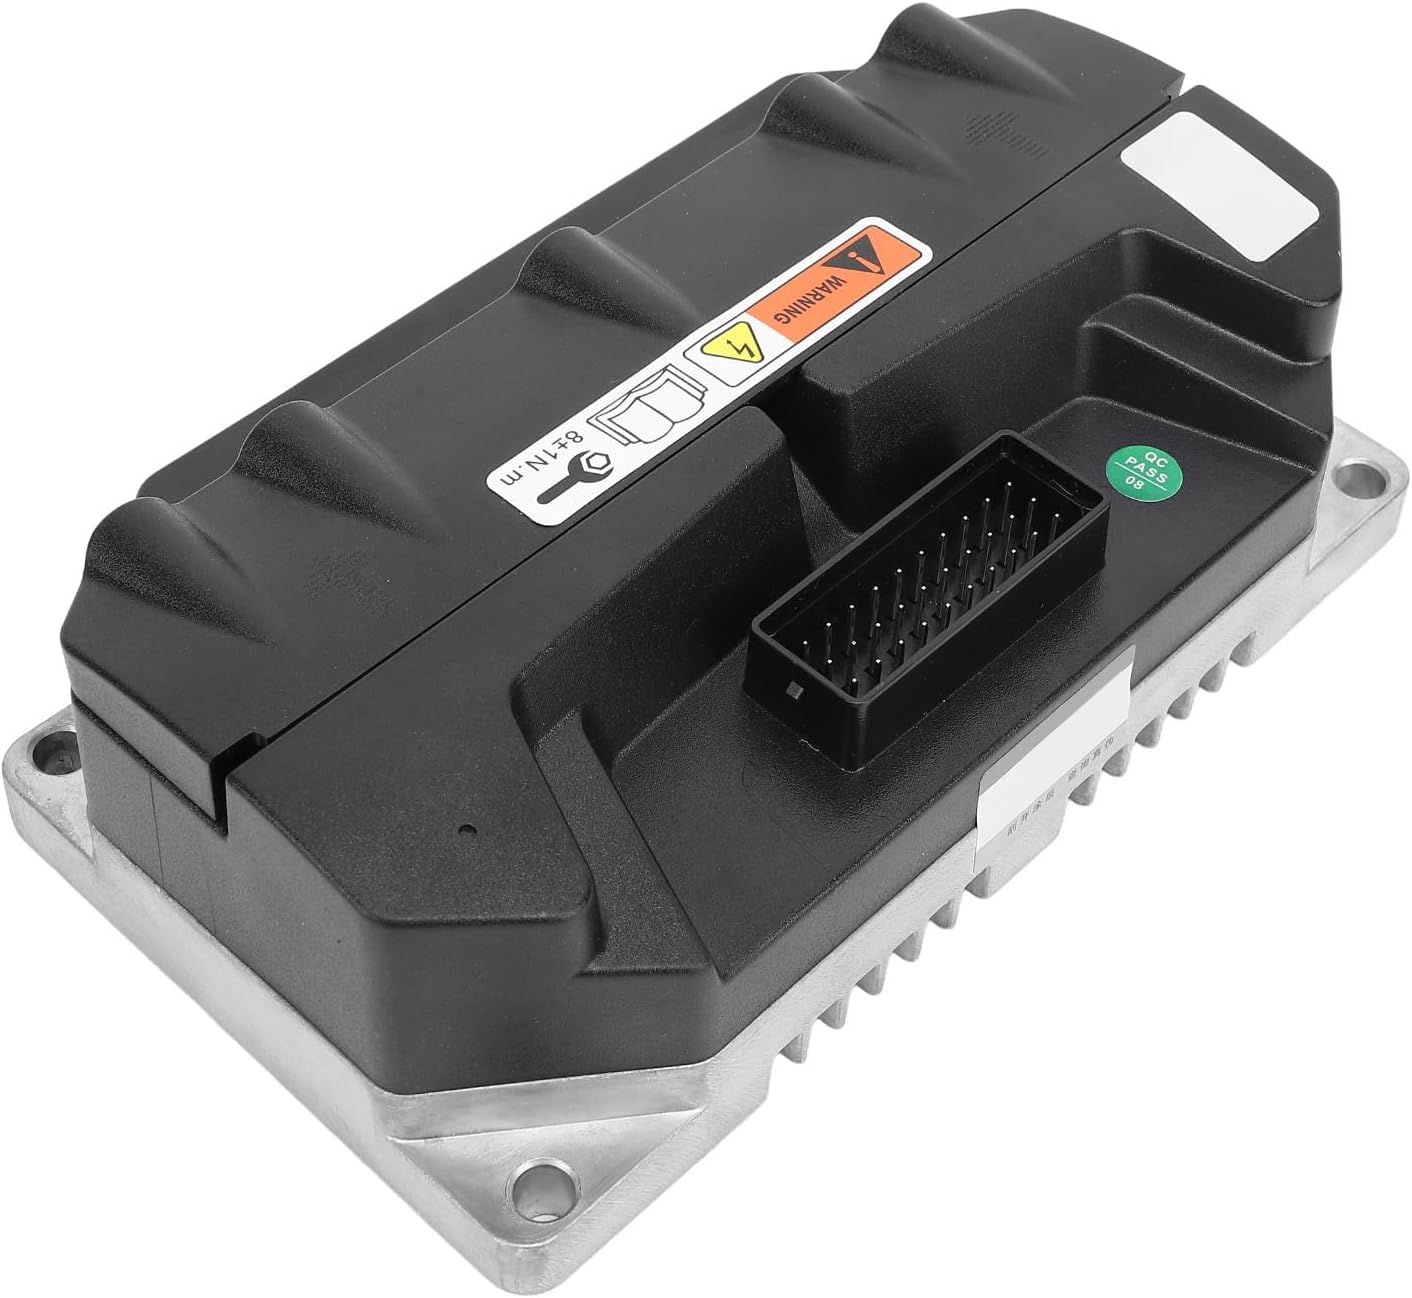
Figure 2: The DK72240 controller, highlighting its sine wave output for stable and consistent operation, and its brushless DC design with self-learning capabilities.
4. Setup and Installation
Proper installation is critical for the controller's functionality and safety. It is highly recommended that installation be performed by a qualified professional.
Installation Steps:
- Preparation: Ensure the vehicle's power is completely off and the battery is disconnected. Gather all necessary tools and components.
- Mounting: Select a secure and well-ventilated location for the controller. Use the provided screws to firmly mount the controller, ensuring it is protected from physical damage and excessive moisture.
- Wiring Connections: Refer to the wiring diagram (if provided with your specific kit) and the general guidelines below for connecting the controller.
Wiring Guidelines:
The controller comes with a wiring harness for various connections. Identify each wire bundle carefully before connecting.

Figure 3: The DK72240 controller shown with its complete wiring harness and mounting screws, illustrating the various connection points.
- Battery Connection: Connect the main power wires from the controller to the battery, ensuring correct polarity (positive to positive, negative to negative).
- Motor Connection: Connect the phase wires from the controller to the motor. For brushless DC motors, also connect the Hall sensor wires.
- Ignition/Key Switch: Connect the ignition wire to the vehicle's key switch or power lock.
- Throttle: Connect the throttle input wires.
- Brake Levers: Connect the brake signal wires. The controller supports both positive (12V) and negative compatible brake modes.
- Other Signals: Connect any additional wires for features such as speed display, reverse, cruise control, etc., as per your vehicle's requirements.
Self-Learning Function:
After initial wiring, the brushless DC controller may require a self-learning process to optimally match with your motor. Consult the electronic manual (if provided) or your professional installer for specific instructions on initiating this function.
5. Operation
Once properly installed and wired, the controller manages the power flow to your electric motor based on your throttle input and other vehicle signals.
- Power On: Turn the vehicle's key switch to the 'ON' position. The controller will initialize.
- Throttle Control: Gently apply the throttle to accelerate. The controller's FOC (Field-Oriented Control) mode ensures smooth and efficient power delivery.
- Braking: Engaging the brake levers will signal the controller to cut power to the motor, contributing to safe deceleration.
- Monitoring: Pay attention to any vehicle display indicators for battery level, speed, and error codes.
6. Maintenance
Regular, simple maintenance can help ensure the longevity and reliable performance of your controller.
- Keep Clean: Periodically clean the exterior of the controller with a dry, soft cloth. Avoid using liquids or harsh chemicals.
- Check Connections: Regularly inspect all wiring connections to ensure they are secure and free from corrosion or damage. Loose connections can lead to intermittent power or component failure.
- Environmental Protection: Ensure the controller remains protected from extreme temperatures, direct sunlight, and moisture.
- Physical Inspection: Check for any signs of physical damage to the controller casing or wires.
7. Troubleshooting
If you encounter issues with your controller, refer to the following common troubleshooting steps. For complex problems, consult a professional technician.
- Motor Not Responding:
- Check if the battery is charged and properly connected.
- Verify that the ignition switch is on.
- Inspect all motor and throttle connections for looseness or damage.
- Ensure brake levers are not engaged, as they cut motor power.
- Intermittent Power:
- Check battery terminals and main power connections for corrosion or looseness.
- Inspect wiring harness for any frayed or damaged wires.
- Overheating:
- Ensure the controller has adequate ventilation and is not covered.
- Reduce prolonged heavy loads if possible.
- Unusual Noises:
- Could indicate a motor issue or incorrect motor phasing. Re-run the self-learning function if applicable, or consult a professional.
If troubleshooting steps do not resolve the issue, contact customer support or a certified technician.
8. Technical Specifications
Below are the detailed specifications for the aqxreight DK72240 Electric Motorcycle Controller:
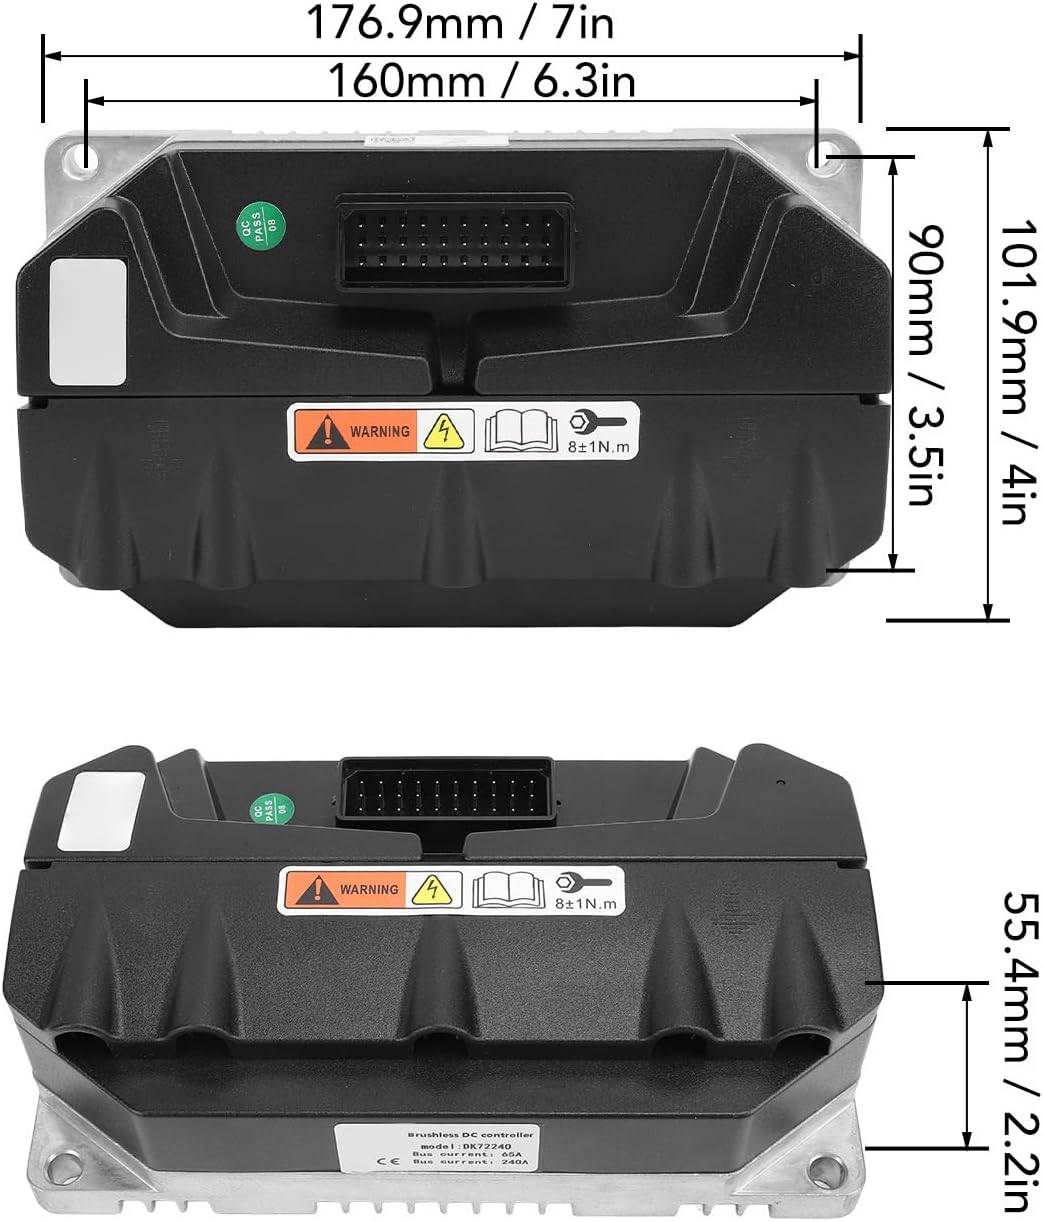
Figure 4: Dimensions of the aqxreight DK72240 controller, showing measurements in both millimeters and inches.
| Specification | Value |
|---|---|
| Model | DK72240 |
| Item Model Number | aqxreightp3n9v1hm0e |
| Rated Voltage | 72V (Operating range: 36-100V, default 72V) |
| Bus Current | 50-65A |
| Phase Current | 240A |
| Rated Power | 1440W |
| Peak Power | 3600W |
| Limited Current Value | 48-52A |
| Under Voltage Protection | 62-64V |
| Over Voltage Protection | 91-93V |
| Motor Control Mode | FOC (Field-Oriented Control) |
| Brake Mode | Positive (12V) / Negative Compatible |
| Operating Temperature | -20 to 60℃ |
| Approximate Speed (Max) | 85 km/h (dependent on vehicle weight and wind) |
| Material | Metal + ABS |
| Package Dimensions | 7.87 x 6.3 x 2.76 inches |
| Item Weight | 2.38 pounds |
9. Warranty and Support
For warranty information, please refer to the terms and conditions provided at the time of purchase or contact your retailer. Keep your proof of purchase for any warranty claims.
If you require technical assistance or have questions not covered in this manual, please contact aqxreight customer support through the retailer's platform or the official brand channels. An electronic manual may also be available for further details.