1. Introduction
This manual provides detailed instructions for the installation, operation, and maintenance of your new Jingelsye Car Radio Stereo. Please read this manual thoroughly before using the product to ensure proper function and safety. Keep this manual for future reference.

Image: Jingelsye Car Radio Stereo seamlessly integrated into a vehicle dashboard.
2. Safety Information
- Professional Installation Recommended: Due to the complexity of car electrical systems, professional installation is highly recommended.
- Power Disconnection: Always disconnect the vehicle's battery before performing any installation or maintenance.
- Wiring: Ensure all wiring connections are secure and properly insulated to prevent short circuits and damage.
- Driving Safety: Do not operate features that distract from driving. Always prioritize road safety.
- Temperature: Avoid exposing the unit to extreme temperatures or direct sunlight for prolonged periods.
3. Package Contents
Verify that all items listed below are included in your package:
- Car Radio x1
- Power Cable x1
- Canbus x1
- GPS Module x1
- RCA Cable x1
- USB Cable x2
- Crowbar x1
- Reversing Control Cable x1
- Backup Camera x1
- Microphone x1

Image: All components included in the product package.
4. Setup & Installation
4.1 Vehicle Compatibility Check
Before installation, confirm your vehicle's compatibility. This unit is designed for Jeep Grand Cherokee models from 2011, 2012, and 2013. Crucially, check the screw hole positions on your original air conditioning control panel.

Image: Compatibility check for the air conditioning control panel. Ensure screw holes are on the left and right sides for proper fit.
4.2 Wiring Connections
Follow these steps to connect the main components. Refer to the wiring guide video for visual assistance.
- Connect the 4G Antenna (if applicable for your model) and GPS Antenna to their respective ports on the head unit.
- Connect the Rear Camera Signal Wire and Camera Extension Cables.
- Connect the Power Cable and Canbus module.
- Connect the Radio Antenna.
- Connect the 4-pin and 6-pin USB Cables.
- Connect the RCA Cable for audio/video outputs.
Video: Detailed wiring guide for the car radio stereo, demonstrating connections for various cables and antennas.
5. Operating Instructions
5.1 Basic Functions
The unit features a 9-inch HD touchscreen with a 1280x800 resolution for clear visuals. Power on the unit using the designated power button. Adjust volume using the on-screen controls or steering wheel controls.

Image: The 9-inch HD touchscreen display.
5.2 Wireless CarPlay & Android Auto
Connect your iPhone or Android smartphone wirelessly for seamless access to navigation, music, messages, and calls. Use voice commands for hands-free operation.
- Enable Bluetooth on your smartphone.
- On the car stereo, navigate to the Bluetooth settings and search for available devices.
- Select the device starting with "SYU-Android" and enter the pairing password (usually 0000).
- Confirm the connection for CarPlay or Android Auto on your phone.

Image: Steps for connecting to Wireless CarPlay.

Image: Wireless CarPlay and Android Auto interfaces.

Image: Voice control for hands-free operation.
5.3 GPS Navigation
The unit supports various navigation applications like Apple Maps, Waze, and Google Maps. Ensure a stable internet connection for real-time traffic updates and map downloads.
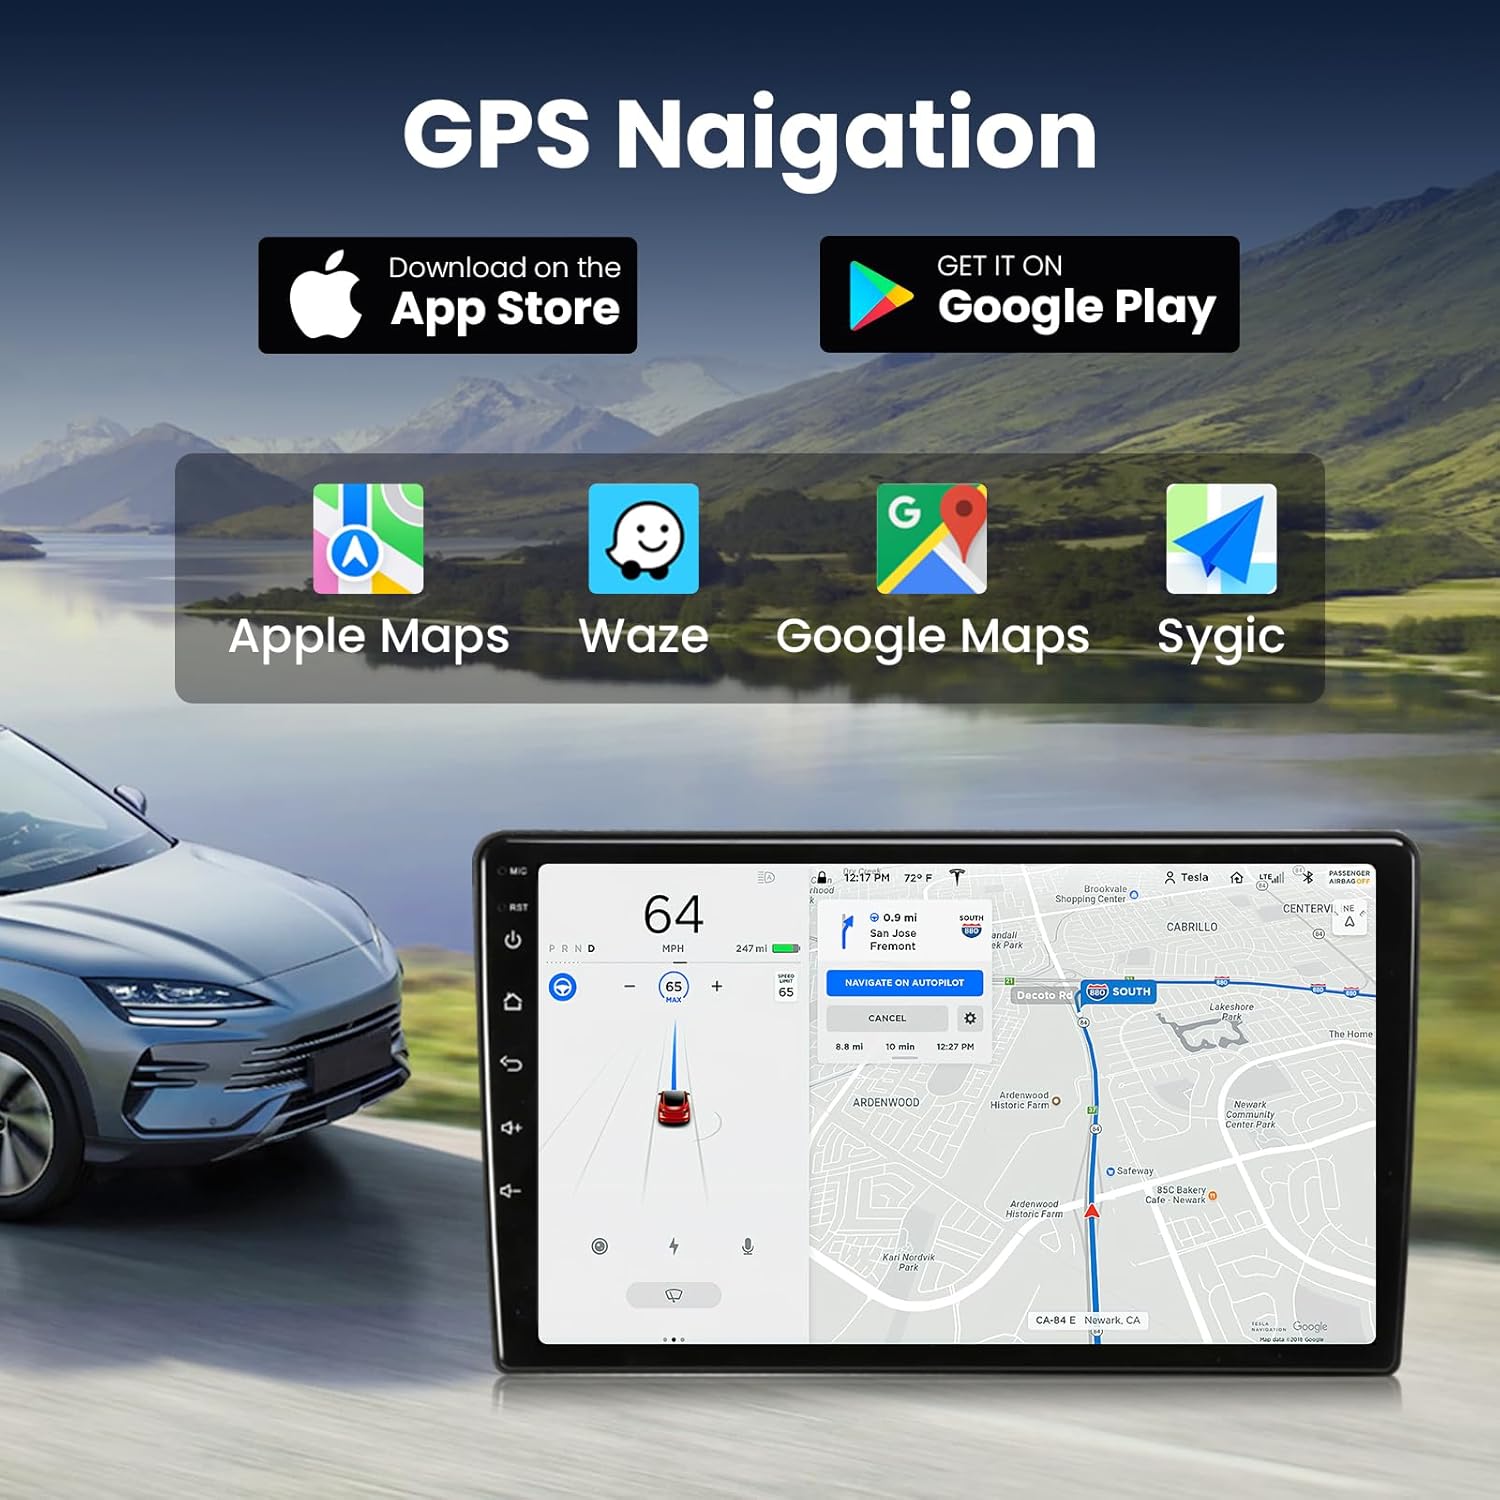
Image: GPS Navigation interface with supported apps.
5.4 Audio Settings (DSP Sound, EQ, FM Radio)
Utilize the built-in DSP (Digital Sound Processor) and 15-band equalizer to customize your audio experience. The FM radio with RDS provides station information.
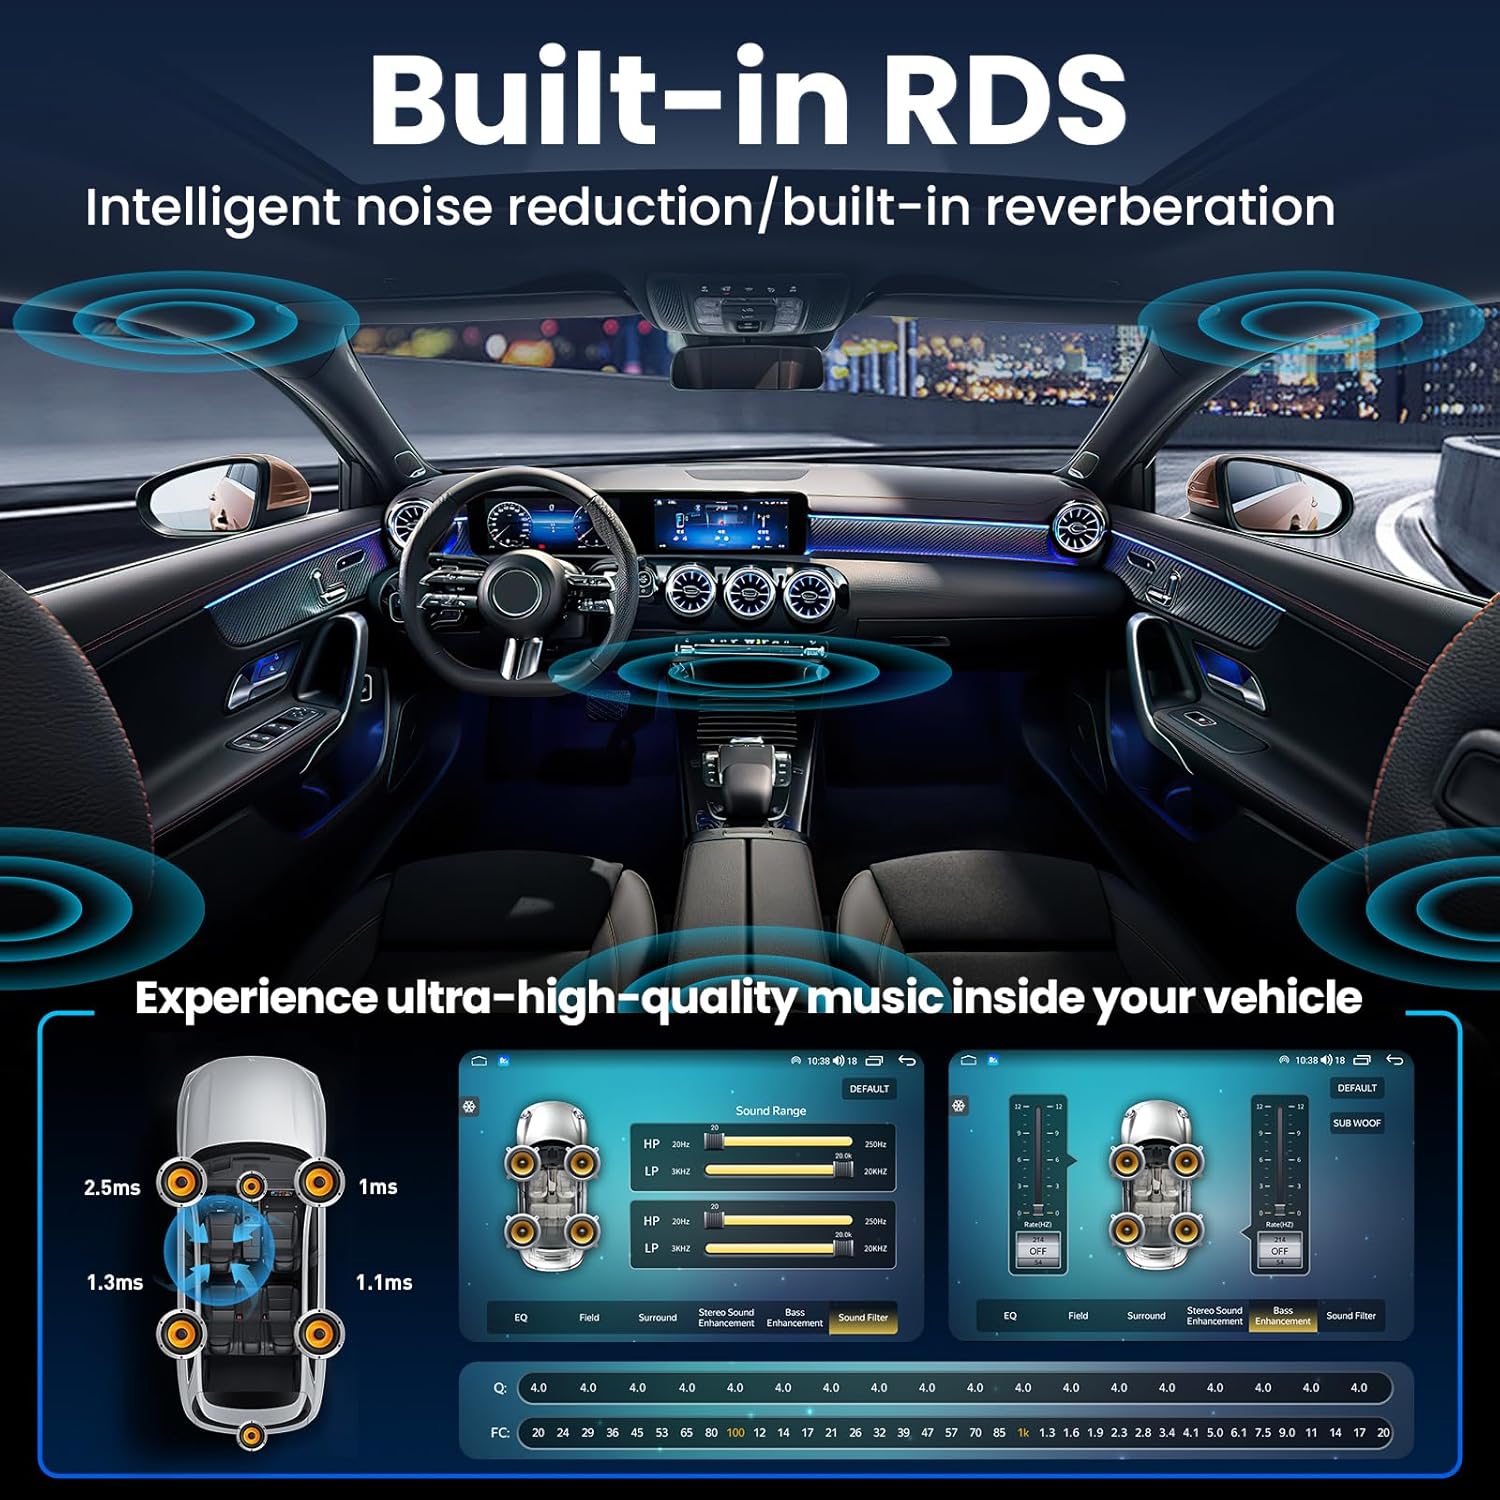
Image: DSP Sound settings and 15-band equalizer interface.

Image: FM RDS Radio interface.

Image: Various audio output modes.
5.5 Display Settings and UI Theme
Customize the user interface (UI) theme and adjust display brightness for optimal viewing in various lighting conditions. The unit supports OTA (Over-The-Air) updates to keep the firmware current.

Image: OTA (Over-The-Air) updates feature.

Image: Display clarity and specifications.
5.6 WiFi Connection
Connect to a 5G WiFi network for internet access, enabling online streaming, app downloads, and real-time updates.

Image: 5G WiFi connection and app usage.
5.7 Rear Camera Operation
The included 1080P backup camera automatically activates when the vehicle is in reverse, providing a clear view of the area behind your car. This enhances safety during parking and reversing maneuvers.

Image: Rearview camera display and steering wheel controls.

Image: Rear camera installation diagram.
5.8 Steering Wheel Control
The unit retains full functionality of your factory steering wheel controls, allowing convenient and safe operation of audio and other features without taking your hands off the wheel.
6. Maintenance
- Cleaning: Use a soft, dry cloth to clean the screen and unit. Avoid abrasive cleaners or solvents.
- Software Updates: Regularly check for and install OTA software updates to ensure optimal performance and access to new features.
- Cable Connections: Periodically check all cable connections to ensure they remain secure.
7. Troubleshooting
| Problem | Possible Cause | Solution |
|---|---|---|
| Unit does not power on | Loose power connection, blown fuse, incorrect wiring. | Check power cable connections. Inspect vehicle fuses. Verify wiring according to the installation guide. |
| No sound | Volume too low, mute activated, incorrect speaker wiring, DSP settings. | Increase volume. Check mute status. Verify speaker connections. Adjust DSP sound settings. |
| Wireless CarPlay/Android Auto not connecting | Bluetooth not enabled, incorrect pairing, software glitch. | Ensure Bluetooth is on and visible. Re-pair the device. Restart the car stereo and phone. |
| Screen freezes or is unresponsive | Software issue, excessive background apps. | Restart the unit. Close unnecessary applications. Check for and install software updates. |
| Backup camera not displaying | Incorrect camera wiring, faulty camera, signal wire issue. | Verify camera signal wire connection. Ensure camera is powered. Check for adapter needs if using factory camera. |
If issues persist after attempting these solutions, please contact customer support.
8. Specifications
| Feature | Detail |
|---|---|
| Model | 2G RAM 64G ROM |
| Operating System | Android 13 |
| Display Size | 9 Inches |
| Display Resolution | 1280x800 |
| Connectivity | Bluetooth 5.0, USB, 5G Wi-Fi |
| Special Features | Wireless CarPlay & Android Auto, 15-Band EQ, RDS, Hi-Fi Audio, GPS, Microphone, 1080P Backup Camera |
| Item Weight | 1.79 Kilograms (3.94 pounds) |
| Package Dimensions | 18 x 13.5 x 4.6 inches |
9. Warranty and Support
For warranty information and technical support, please refer to the documentation included with your purchase or visit the official Jingelsye website. Our dedicated technical support team is available to assist with any issues or questions you may have regarding your car radio stereo.