1. Introduction
This user manual provides comprehensive instructions for the installation, operation, and maintenance of your AX WABER AX11TB01 TV Ceiling Mount. Designed for flat-panel LED, LCD, OLED, and Plasma displays ranging from 26 to 65 inches, this adjustable bracket offers versatile viewing options and robust support. Please read this manual thoroughly before installation to ensure safe and correct usage.

Figure 1.1: AX WABER AX11TB01 TV Ceiling Mount installed with a television.
2. Safety Information
Please observe the following safety precautions to prevent personal injury or property damage:
- Always ensure the mounting surface (ceiling) can safely support the combined weight of the mount and the television.
- Do not mount on drywall alone. This mount requires installation into solid wood joists, concrete, or brick ceilings.
- Use appropriate tools and hardware for installation. If unsure, consult a qualified professional.
- Do not exceed the maximum load capacity of 110 lbs (50 kg).
- Ensure all screws and bolts are securely tightened before mounting the TV.
- Keep children and pets away during installation.
- Periodically check all connections and fasteners to ensure they remain secure.
3. Package Contents
Verify that all components are present before beginning installation:
- TV Ceiling Mount x 1
- Mounting Hardware Kit (various screws, washers, anchors)
- User Manual (this document)

Figure 3.1: The AX WABER AX11TB01 TV Ceiling Mount packaging.
4. Product Features
- Wide Compatibility: Fits 26" to 65" flat-panel LCD/LED TVs.
- High Load Capacity: Supports televisions up to 110 lbs (50 kg).
- VESA Compliance: Compatible with VESA mounting patterns including 400x400, 400x300, 400x200, 300x300, 200x200, 200x100, and 100x100mm.
- Height Adjustable Design: Offers 18 height settings with 6 levels of adjustment on the main tube and 3 levels on the bracket for optimal viewing.
- Full Motion Adjustability:
- 360° Swivel: Rotate your TV horizontally for perfect viewing from any angle in the room.
- Tilt Function: Adjust tilt from +5° to -20° to reduce glare and optimize viewing comfort.
- Easy Leveling: Fine-tune the TV level by ±3° after installation.
- Versatile Installation: Can be installed on concrete, wood joist, or brick ceilings. Also supports wall mounting.
- Cable Management: Integrated cable management system within the pole helps conceal wires for a clean, organized look.
- Durable Construction: Made from high-strength alloy steel with a rust-resistant layer and black powder coating for long-lasting durability.

Figure 4.1: Wide compatibility for 27-65 inch TVs and various VESA patterns.
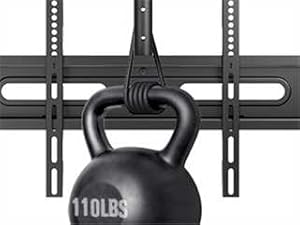
Figure 4.2: The mount supports up to 110 lbs (50 kg).

Figure 4.3: 360-degree swivel capability for optimal viewing.

Figure 4.4: Tilt adjustment and easy leveling features.

Figure 4.5: The mount offers 18 height settings for flexible positioning.

Figure 4.6: Integrated cable management for a tidy installation.
5. Specifications
| Attribute | Value |
|---|---|
| Brand | AX WABER |
| Model Number | AX11TB01 |
| Item Weight | 6.4 pounds (2.9 kg) |
| Package Dimensions | 17.36 x 5.98 x 3.46 inches |
| Country of Origin | China |
| Color | Black |
| Material | Alloy Steel |
| Mounting Type | Ceiling Mount (also supports Wall Mount) |
| Movement Type | Rotate, Tilt |
| Maximum Compatible TV Size | 65 Inches |
| Minimum Compatible TV Size | 26 Inches |
| Maximum Load Capacity | 110 lbs (50 kg) |
| VESA Compatibility | 100x100mm to 400x400mm |
| Tilt Angle | +5° to -20° |
| Swivel Angle | 360° |
| Level Adjustment | ±3° |
6. Setup and Installation
Follow these steps carefully for a secure installation. It is recommended to have at least two people for installation.
6.1. Pre-Installation Checks
- Identify your ceiling type (wood joist, concrete, or brick). Do not install on drywall alone.
- Locate the center of your desired mounting area. For wood joists, use a stud finder to locate the joists.
- Ensure there are no hidden electrical wires or plumbing in the drilling path.
- Gather all necessary tools (drill, level, measuring tape, pencil, socket wrench, etc.).

Figure 6.1: The mount can be installed on concrete, wood joist, or brick ceilings.

Figure 6.2: Suitable mounting surfaces include wood, concrete, and brick.
6.2. Installation Steps
- Assemble the Ceiling Plate and Pole: Attach the ceiling plate to the main pole using the provided screws and washers. Ensure it is securely fastened.

Figure 6.3: Assemble the ceiling plate to the pole.
- Mount the Ceiling Plate:
- Hold the assembled ceiling plate against the ceiling at your desired location.
- Mark the drilling points through the holes on the ceiling plate.
- Drill pilot holes according to the recommended drill bit size for your ceiling type.
- For concrete or brick ceilings, insert the appropriate anchors into the drilled holes.
- Secure the ceiling plate to the ceiling using the provided lag bolts or expansion screws. Tighten firmly.
Video 6.1: Official installation guide for the AX WABER TV Ceiling Mount, demonstrating the mounting process for various ceiling types.
- Attach TV Brackets to TV:
- Lay your TV face down on a soft, clean surface.
- Identify the correct VESA mounting holes on the back of your TV.
- Attach the vertical TV brackets to the back of your TV using the appropriate screws and spacers from the hardware kit. Ensure the brackets are centered and level.

Figure 6.4: Overview of the installation process, including attaching brackets to the TV.
- Hang TV onto Mount: Carefully lift the TV with the attached brackets and hook them onto the horizontal mounting plate on the ceiling pole. Ensure the TV is securely seated.
- Secure the TV: Use the strengthening screws or locking mechanisms to secure the TV brackets to the mounting plate, preventing accidental dislodgement.
- Cable Management: Route all necessary cables (power, HDMI, etc.) through the designated cable management holes in the pole for a neat appearance.
7. Operating Instructions
Adjusting your TV mount for optimal viewing:
- Height Adjustment: The pole features multiple height settings. To adjust, loosen the securing bolts on the pole, slide the inner pole to the desired height, and re-tighten the bolts. The TV bracket itself also has 3 levels of height adjustment post-installation.

Figure 7.1: The mount is suitable for various environments, including commercial spaces.
- Swivel Adjustment: The mount allows for 360° horizontal swivel. Gently rotate the TV to achieve your desired viewing angle.
Figure 7.2: Swivel the TV 360 degrees for flexible viewing.
- Tilt Adjustment: The TV can be tilted from +5° (upwards) to -20° (downwards). Loosen the tilt adjustment knobs/screws on the side of the mounting plate, adjust the angle, and then re-tighten to secure.
Figure 7.3: Adjust the tilt to reduce glare and improve viewing angle.
- Level Adjustment: If your TV appears slightly unlevel after installation, use the easy leveling feature (±3° adjustment) to fine-tune its horizontal position. Refer to the installation section for details on how to adjust the leveling screws.
8. Maintenance
To ensure the longevity and safe operation of your TV ceiling mount:
- Cleaning: Wipe the mount with a soft, dry cloth to remove dust. Do not use abrasive cleaners or solvents.
- Periodic Checks: Every 6-12 months, inspect all screws, bolts, and connections to ensure they are still tight and secure. Re-tighten if necessary.
- Damage Inspection: If you notice any signs of damage, wear, or corrosion, discontinue use and contact customer support immediately.
9. Troubleshooting
Common issues and their solutions:
| Problem | Possible Cause | Solution |
|---|---|---|
| TV is not level. | Mounting plate or TV brackets are slightly off-level. | Use the easy leveling adjustment (±3°) on the mount to correct the angle. Ensure all screws are tightened after adjustment. |
| Difficulty adjusting swivel or tilt. | Securing screws are too tight or mechanism needs lubrication. | Slightly loosen the relevant adjustment screws. If still stiff, apply a small amount of silicone-based lubricant to moving parts. Do not over-lubricate. |
| Mount feels unstable. | Mounting screws are loose or incorrect hardware/surface used. | Immediately remove the TV. Re-check all mounting screws and ensure they are securely fastened to a suitable ceiling structure. If necessary, consult a professional. |
| Cables are visible/messy. | Cable management not utilized. | Route cables through the central pole of the mount. Use cable ties if needed to keep them neat. |
10. Warranty and Support
For any questions, concerns, or assistance with your AX WABER TV Ceiling Mount, please contact our experienced and friendly US-based customer support team. They are available to assist you 7 days a week.
Please refer to your product packaging or the retailer's website for specific warranty details and contact information.