
1. Introduction
This manual provides comprehensive instructions for the safe and effective use of your JASTIND A9290 Automotive Digital Circuit Tester. This device is designed for checking electrical circuits in various vehicles, including cars, RVs, trucks, and motorcycles, within a 3-48V DC range. It features a digital LCD display for accurate voltage readings and bidirectional testing capabilities.
2. Safety Information
- Always wear appropriate personal protective equipment, such as safety glasses, when working with electrical systems.
- Ensure the vehicle's ignition is off before connecting or disconnecting the circuit tester, unless specific testing procedures require power.
- Avoid contact with moving engine parts or hot surfaces.
- Do not use the tester if it appears damaged or if the insulation on the wire is compromised.
- This tool is for DC voltage testing only. Do not use on AC circuits.
- Keep out of reach of children.
3. Package Contents
- 1 x JASTIND 3-48V Auto Digital Circuit Tester
4. Product Overview
The JASTIND A9290 Automotive Digital Circuit Tester is a robust tool featuring a clear LCD display and a durable design for automotive electrical diagnostics.

Figure 4.1: JASTIND A9290 Automotive Digital Circuit Tester with packaging and accessories.
Key Components:
- Stainless Steel Probe: Designed for durability and precise contact with electrical points.
- Digital LCD Display: Provides clear, accurate voltage readings with a backlight for visibility in various lighting conditions.
- Extended PU Spring Wire: A 140-inch long, flexible, heat-insulated, and oil-resistant wire for extended reach.
- Large Alligator Clip: Ensures a secure connection to battery terminals or ground points.

Figure 4.2: Detailed view of the tester's components, highlighting the probe, spring wire, and alligator clip.
5. Setup
Before operation, ensure the alligator clip is securely connected to a suitable power source or ground point, depending on the test required.
- Identify the circuit or component you intend to test.
- For testing positive voltage, attach the large alligator clip to a known good ground point (e.g., vehicle chassis, negative battery terminal).
- For testing ground/negative circuits, attach the large alligator clip to a known good positive power source (e.g., positive battery terminal).
6. Operating Instructions
6.1 Voltage Testing Range
The JASTIND A9290 tester operates within a 3-48V DC range. Voltages below 3V will display as 'BLANK', and voltages above 48V will display as 'OL' (Overload).
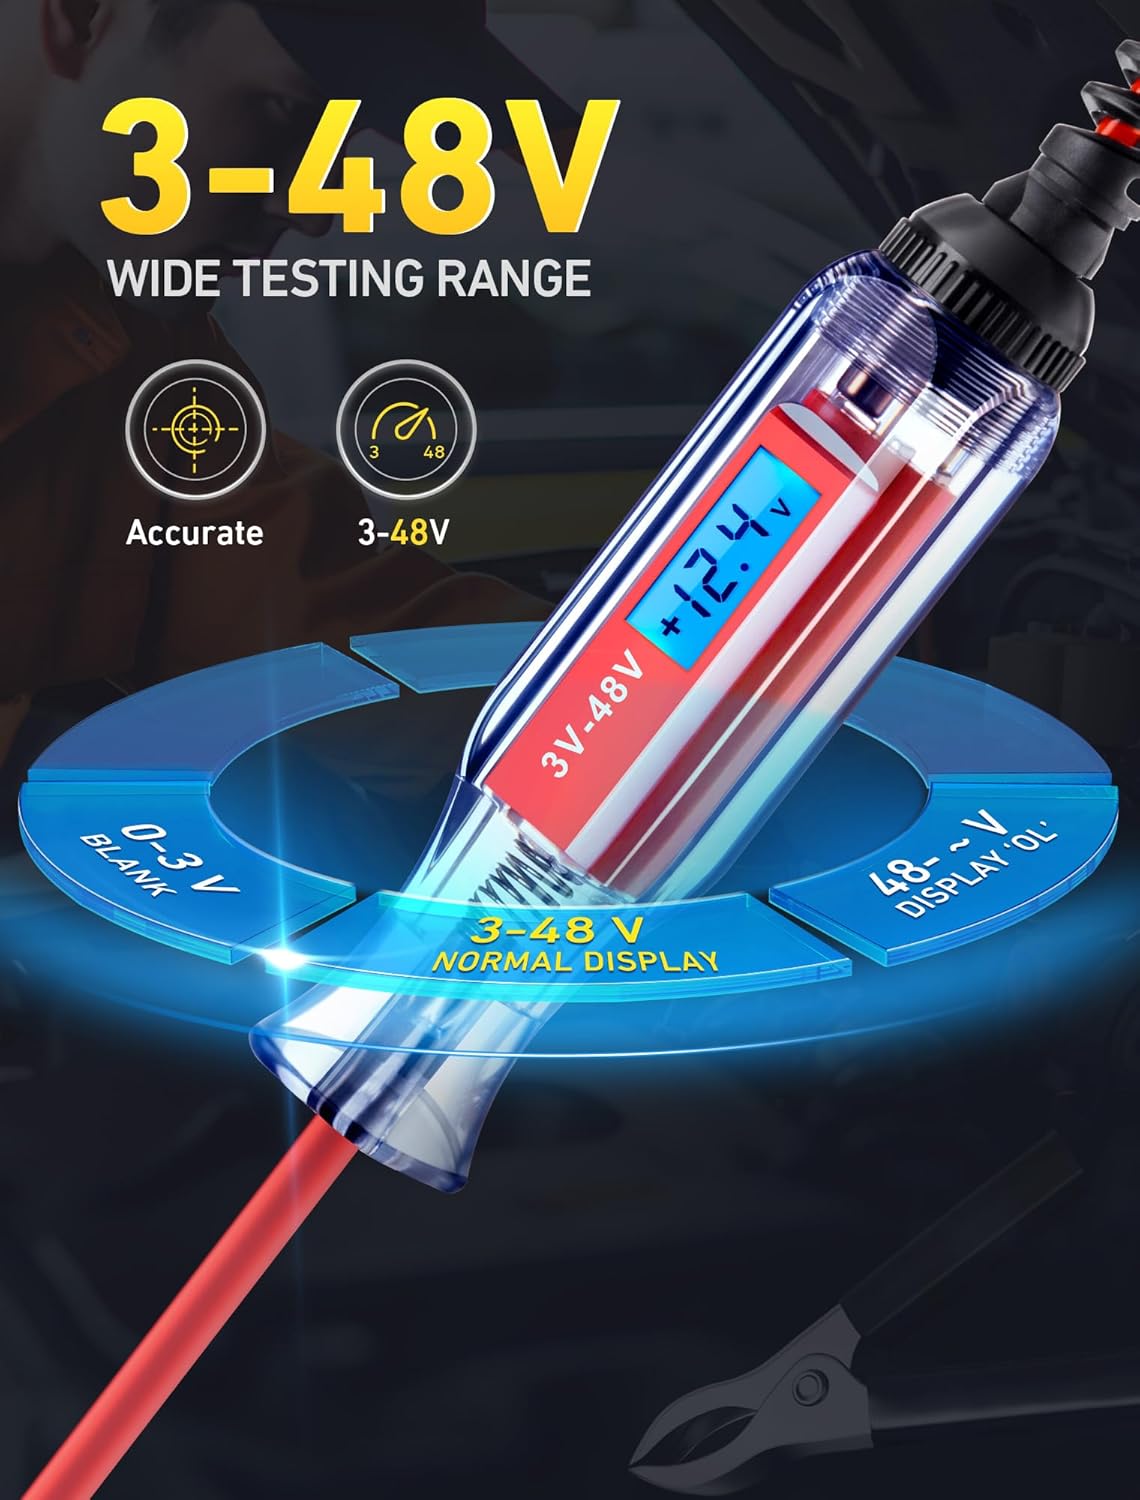
Figure 6.1: Illustration of the tester's operational voltage range.
6.2 Bidirectional Voltage Test Indication
This tester features bidirectional testing, indicating polarity with a '+' or '-' symbol on the LCD display. This allows for versatile testing by connecting the alligator clamp to either ground or a positive source.
- Positive Polarity: When the alligator clamp is attached to ground, and the probe touches a positive voltage source, the display will show a '+' symbol along with the voltage reading.
- Negative Polarity: When the alligator clamp is attached to a positive power source, and the probe touches a ground point, the display will show a '-' symbol along with the voltage reading.

Figure 6.2: Examples of positive and negative polarity indications.
6.3 Digital LCD Display
The backlit LCD screen provides clear and visible digital readouts for both day and night use. It displays the voltage reading with high accuracy (±0.2V) and indicates the detected polarity.

Figure 6.3: The LCD display showing basic information including polarity and voltage.
6.4 General Testing Procedure
- Connect the alligator clip to the appropriate reference point (ground for positive voltage tests, positive for ground tests).
- Carefully touch the stainless steel probe to the circuit point or component you wish to test.
- Observe the LCD display for the voltage reading and polarity indication.
- Interpret the reading to diagnose the circuit's status.

Figure 6.4: The digital circuit tester in use, checking a vehicle's fuse box.
7. Maintenance
- Cleaning: Wipe the tester with a clean, dry cloth after each use. Do not use abrasive cleaners or solvents.
- Storage: Store the tester in a dry, cool place, away from direct sunlight and extreme temperatures. Ensure the probe tip is protected to prevent damage.
- Wire Care: The PU spring wire is designed for durability, but avoid excessive stretching or sharp bends to prolong its lifespan.
8. Troubleshooting
- No Display: Check if the alligator clip has a secure connection to a power source or ground. Ensure the voltage being tested is within the 3-48V DC range.
- Inaccurate Reading: Verify that the probe is making good contact with the test point and that the alligator clip has a solid connection. Ensure the battery in the tester (if applicable) is not low.
- 'BLANK' Display: Indicates voltage below 3V DC.
- 'OL' Display: Indicates voltage above 48V DC.
9. Specifications
| Feature | Specification |
|---|---|
| Brand | JASTIND |
| Model Number | A9290 |
| Voltage Range | 3-48V DC |
| Display Type | Digital LCD with Backlight |
| Voltage Accuracy | ±0.2V |
| Probe Material | Stainless Steel |
| Wire Length | 140 inches (PU Spring Wire) |
| Item Weight | 0.25 Kilograms (approx. 8.78 ounces) |
| Power Source | Battery Powered |
10. Warranty and Support
JASTIND provides a 1-year quality assurance for this product. For any questions or support needs, please contact our customer service team. We offer 7*24 hours email service to assist you.
For further assistance, please visit the JASTIND Store on Amazon.