Moto Quip MQ8101
Moto Quip 4 Amp Intelligent Battery Charger User Manual
Model: MQ8101
Introduction
The Moto Quip Intelligent Battery Charger is a sophisticated high-frequency switch-mode battery charger and maintainer designed for various 12V/6V lead-acid batteries, including WET, GEL, and AGM types. This charger features an advanced 9-step charging program, ensuring efficient and safe battery recharging and maintenance. It is capable of recovering slightly sulfated batteries and maintaining charge over extended periods.

Figure 1: Moto Quip 4 Amp Intelligent Battery Charger. This image displays the charger's main unit, highlighting its compact design and digital display.
Setup and Connection
Before connecting the charger, ensure the battery terminals are clean and free from corrosion. Always connect the charger to the battery before plugging it into the AC power outlet.
- Identify Battery Voltage: Determine if the battery is 12V or 6V. The charger automatically detects the voltage, but manual selection may be required in some cases.
- Connect to Battery:
- For standard battery terminals, use the provided strong clamps. Connect the RED clamp to the positive (+) battery terminal and the BLACK clamp to the negative (-) battery terminal.
- For permanent connection, use the eyelet terminals. Ensure correct polarity.
- For maintaining battery through a 12V outlet in a car, use the cigarette lighter plug.
- Connect to AC Power: Plug the charger's AC power cord into a standard wall outlet (220-240V AC). The charger will power on and begin its diagnostic process.
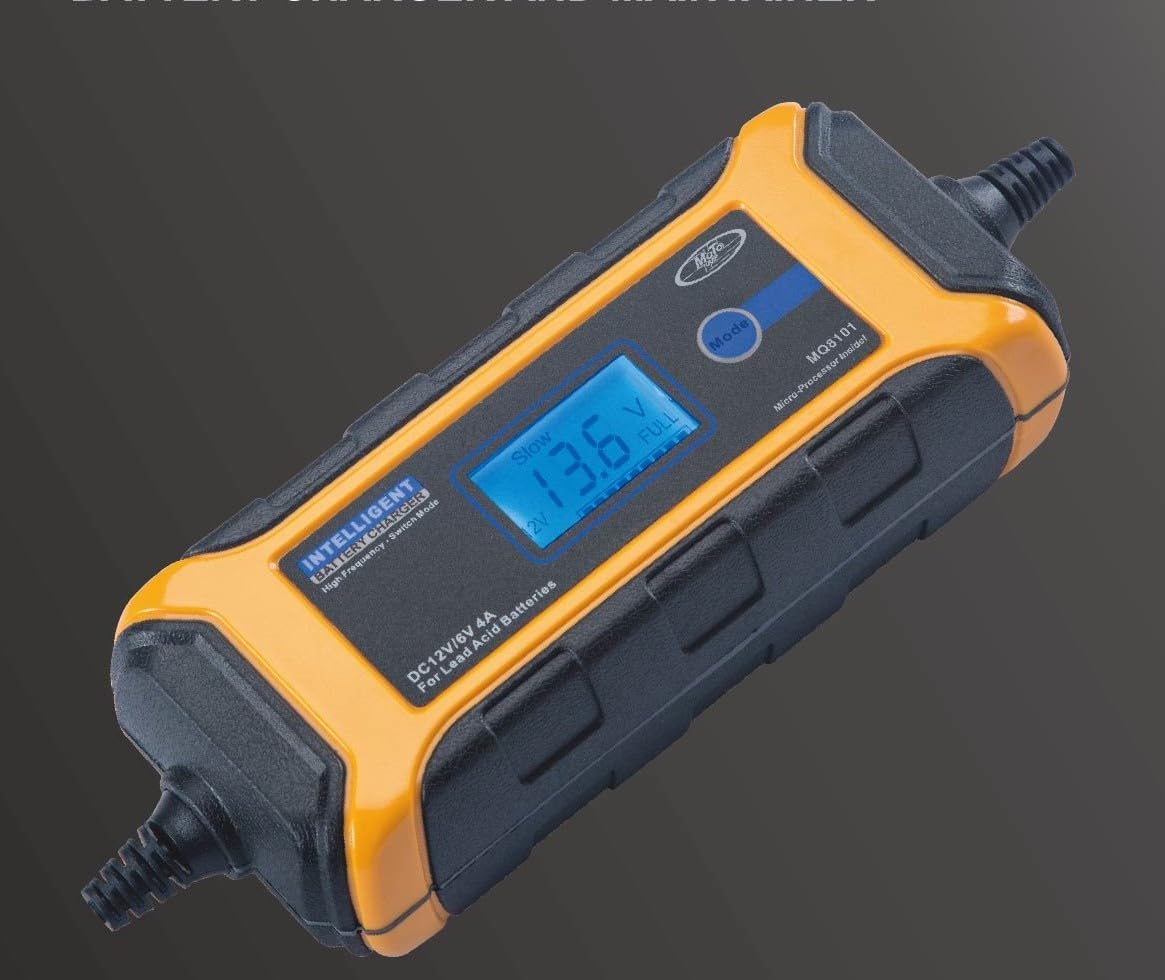
Figure 2: Charger with connection options. This image illustrates the various terminal heads, including clamps, eyelets, and the cigarette lighter plug, for versatile battery connection.
Operating Instructions
The Moto Quip Intelligent Battery Charger features an MCU (Microcontroller Unit) for fully automatic operation from charging to maintenance.
Charging Process
The charger utilizes a 9-stage charging program to optimize battery health and lifespan:
- Desulphation: Recovers slightly sulfated batteries.
- Soft Start: Gentle initial charge for deeply discharged batteries.
- Bulk Charge: Main charging stage, delivering maximum current.
- Absorption: Gradually reduces current as battery approaches full charge.
- Analysis: Checks battery condition.
- Recondition: Optional stage for deeply discharged or sulfated batteries.
- Float: Maintains full charge by providing a constant voltage.
- Pulse: Keeps battery optimized during long-term connection.
- Maintenance: Automatically switches to maintenance mode once fully charged.
Special Features
- Cold Conditions Charging: The charger is designed to operate effectively in cold environments.
- Drained Battery Rescue: Capable of rescuing drained batteries with voltage over 2.0V.
- Power Failure Memory: Returns to the last selected mode after a power failure.
- Automatic Voltage Detection: Automatically detects 12V or 6V battery systems.
Maintenance and Care
Proper maintenance ensures the longevity and optimal performance of your Moto Quip Battery Charger.
- Cleaning: Disconnect the charger from both AC power and the battery before cleaning. Use a soft, dry cloth to wipe the casing. Do not use abrasive cleaners or solvents.
- Storage: Store the charger in a cool, dry place when not in use. Keep it away from direct sunlight, moisture, and extreme temperatures.
- Cable Inspection: Regularly inspect the power cord and charging cables for any signs of damage, fraying, or exposed wires. Do not use the charger if any cables are damaged.
- Ventilation: Ensure the charger has adequate ventilation during operation. Do not cover the charger or place it in an enclosed space that restricts airflow.
Troubleshooting
If you encounter issues with your Moto Quip Battery Charger, refer to the following common problems and solutions:
| Problem | Possible Cause | Solution |
|---|---|---|
| Charger does not turn on. | No AC power; faulty connection; internal fault. | Check AC outlet and power cord connection. Ensure battery is connected correctly. If problem persists, contact support. |
| Battery not charging. | Incorrect battery connection; battery too deeply discharged (below 2.0V); faulty battery. | Verify correct polarity and secure connections. Check battery voltage; if below 2.0V, it may not be recoverable. Test battery condition. |
| Charger displays an error code. | Short circuit; reverse polarity; over-temperature. | Disconnect charger, check connections for short circuits or reverse polarity. Allow charger to cool down if it feels hot. Refer to display for specific error codes if available. |
| Charger switches to maintenance mode too quickly. | Battery is already fully charged or near full charge. | This is normal operation. The charger is designed to maintain the battery once it reaches full capacity. |
If troubleshooting steps do not resolve the issue, please contact Moto Quip customer support or your retailer for further assistance.
Specifications
| Feature | Detail |
|---|---|
| Brand | Moto Quip |
| Model Number | MQ8101 |
| Input Voltage | 12 Volts (AC input not specified, assuming standard household) |
| Current Rating | 4 Amps |
| Battery Compatibility | 12V/6V Lead-Acid (WET, GEL, AGM, VRLA, Calcium) |
| Charging Program | 9-Stage Automatic |
| Product Dimensions | 14.4D x 5.6W x 26.1H centimetres |
| Item Weight | 0.77 Kilograms |
| Colour | Black |
Warranty Information
The Moto Quip 4 Amp Intelligent Battery Charger comes with a Limited Warranty from the manufacturer. For specific terms, conditions, and duration of the warranty, please refer to the warranty card included with your product or contact Moto Quip (Pty) Ltd. directly. Keep your proof of purchase for warranty claims.
Customer Support
For technical assistance, product inquiries, or warranty claims, please contact:
- Moto Quip (Pty) Ltd. (Manufacturer)
- Your authorized retailer or point of purchase.
Please have your product model number (MQ8101) and proof of purchase ready when contacting support.