1. Introduction
This manual provides essential information for the safe and effective use of your Yoidesu 1.2G VTX 1.6W Video Transmitter Module. Please read it thoroughly before installation and operation to ensure optimal performance and longevity of the product.
2. Safety Information
- Voltage: Ensure the input voltage is within the specified range of DC 7-36V (2-8S battery input). Exceeding this voltage can cause permanent damage to the module.
- Heat Dissipation: The module can generate heat during operation, especially at higher power outputs. Ensure adequate airflow and consider additional cooling if operating in enclosed spaces or at maximum power for extended periods.
- Antenna Connection: Always connect the antenna before powering on the VTX. Operating without an antenna can damage the transmitter.
- Frequency Usage: Be aware of local regulations regarding 1.2GHz frequency band usage. A HAM radio license may be required in some regions for legal operation.
- Polarity: Double-check all wiring connections for correct polarity before applying power to prevent damage.
3. Package Contents
Verify that all items are present in your package:
- 1 x Yoidesu 1.2G VTX 1.6W Video Transmitter Module
- 1 x Antenna
- 1 x Connecting Cable

Image: Complete package contents of the Yoidesu 1.2G VTX module, including the video transmitter module, a compatible antenna, and the necessary connecting cable. This image confirms all items included in the product box.
4. Product Overview
4.1 Features
- Compact Design: Lightweight module allows for easy installation with adjustable power settings.
- Premium Quality: Constructed with top-tier materials and technology for stability in harsh environments.
- Low Latency: Optimized algorithms reduce video delay for a real-time viewing experience.
- Advanced Frequency: Utilizes the 1.2GHz band to avoid interference from crowded 2.4GHz and 5.8GHz bands.
- Powerful Output: 1.6W module ensures stable video transmission in complex environments or over long distances.
4.2 Components
The Yoidesu 1.2G VTX module features a compact circuit board with an SMA antenna connector, power input pads, and video/audio signal pads. Channel and power output selection are typically managed via a control interface or dip switches, as indicated by the 'ODCH 123456789' markings.
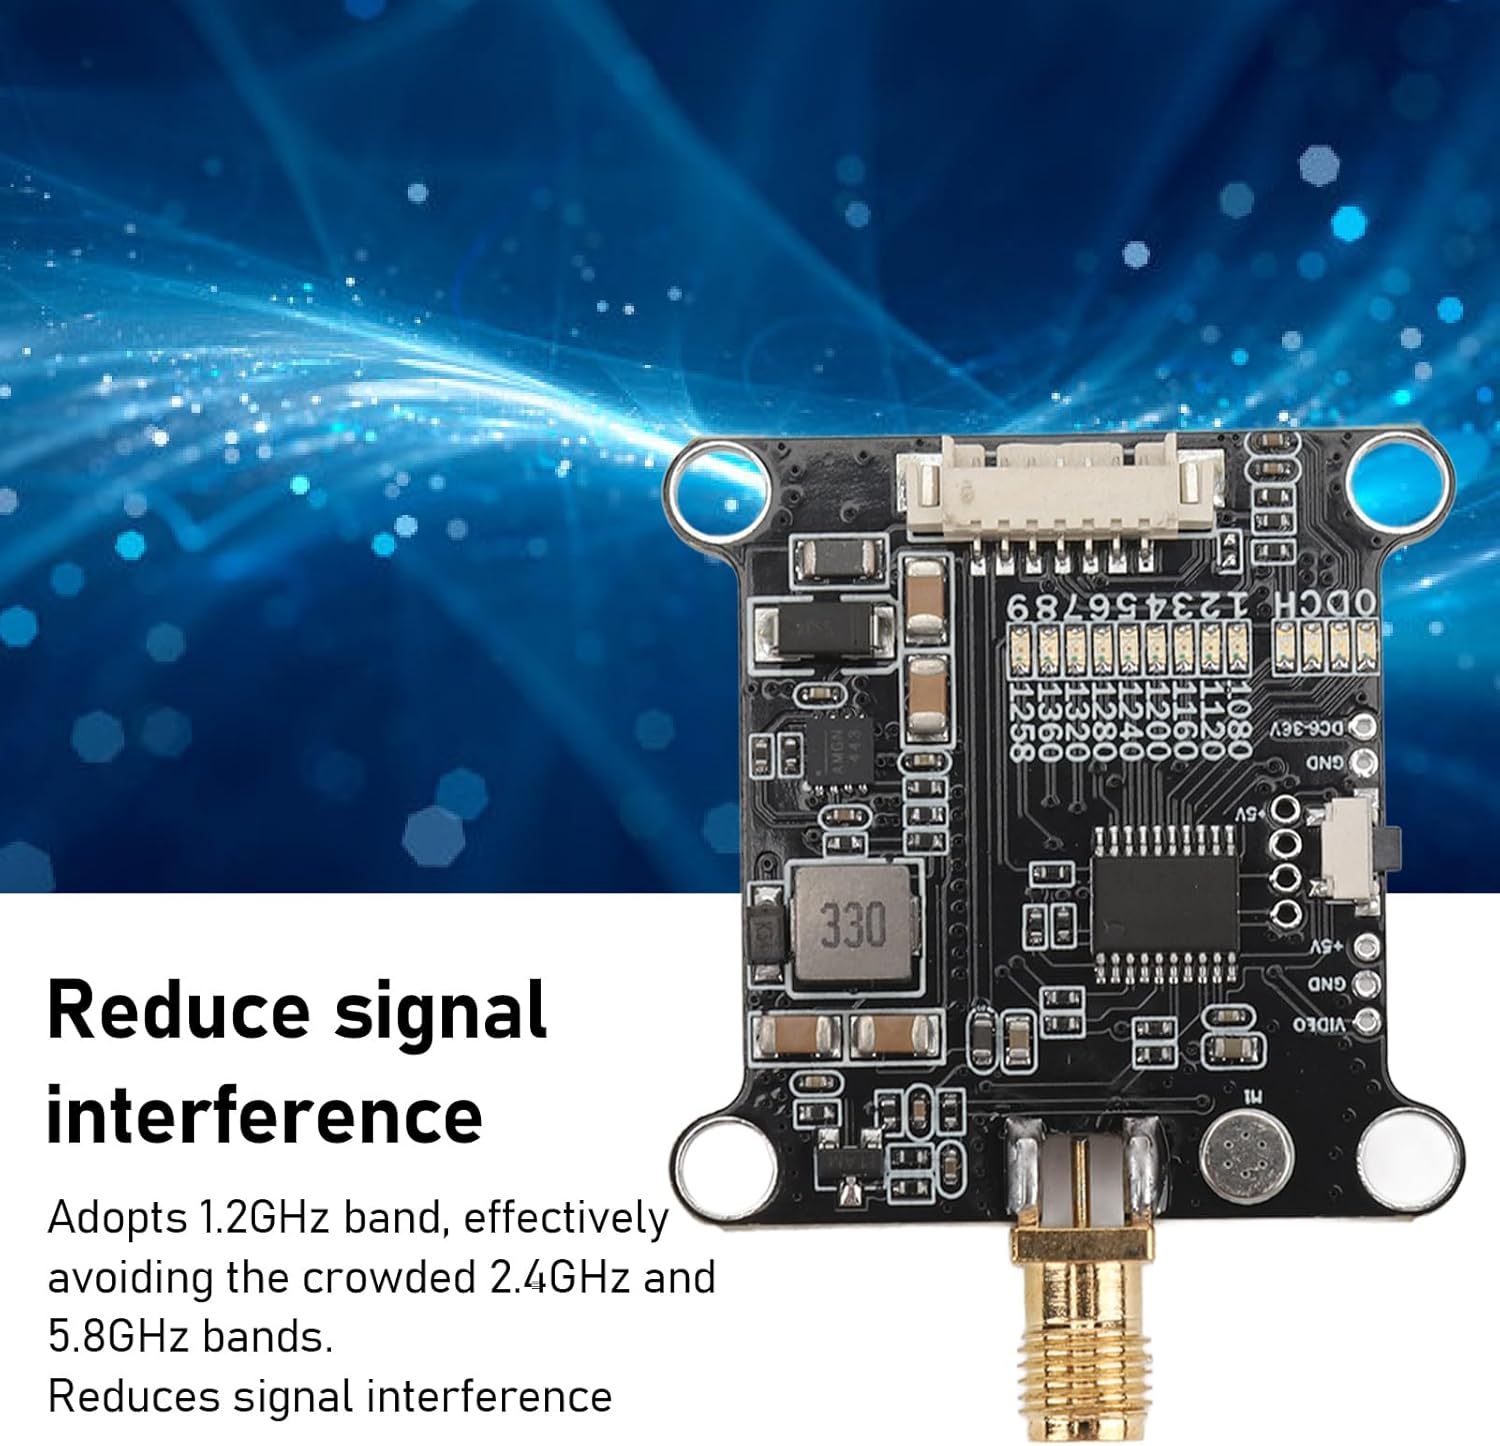
Image: Top view of the Yoidesu 1.2G VTX module, highlighting its compact design and channel selection indicators. This image illustrates the module's ability to reduce signal interference by operating on the 1.2GHz band, avoiding crowded 2.4GHz and 5.8GHz frequencies.

Image: Detailed top view of the Yoidesu 1.2G VTX module, emphasizing its 1.6W high-power transmission capability. This power output ensures stable signal transmission even in complex environments or over long distances.

Image: Angled view of the Yoidesu 1.2G VTX module, showcasing its integrated components. The optimized transmission algorithm significantly reduces video transmission delay, providing a near real-time viewing experience for FPV applications.

Image: The Yoidesu 1.2G VTX module shown alongside an FPV drone, demonstrating its intended application. This image illustrates how the compact and lightweight module integrates into an RC drone setup for video transmission.
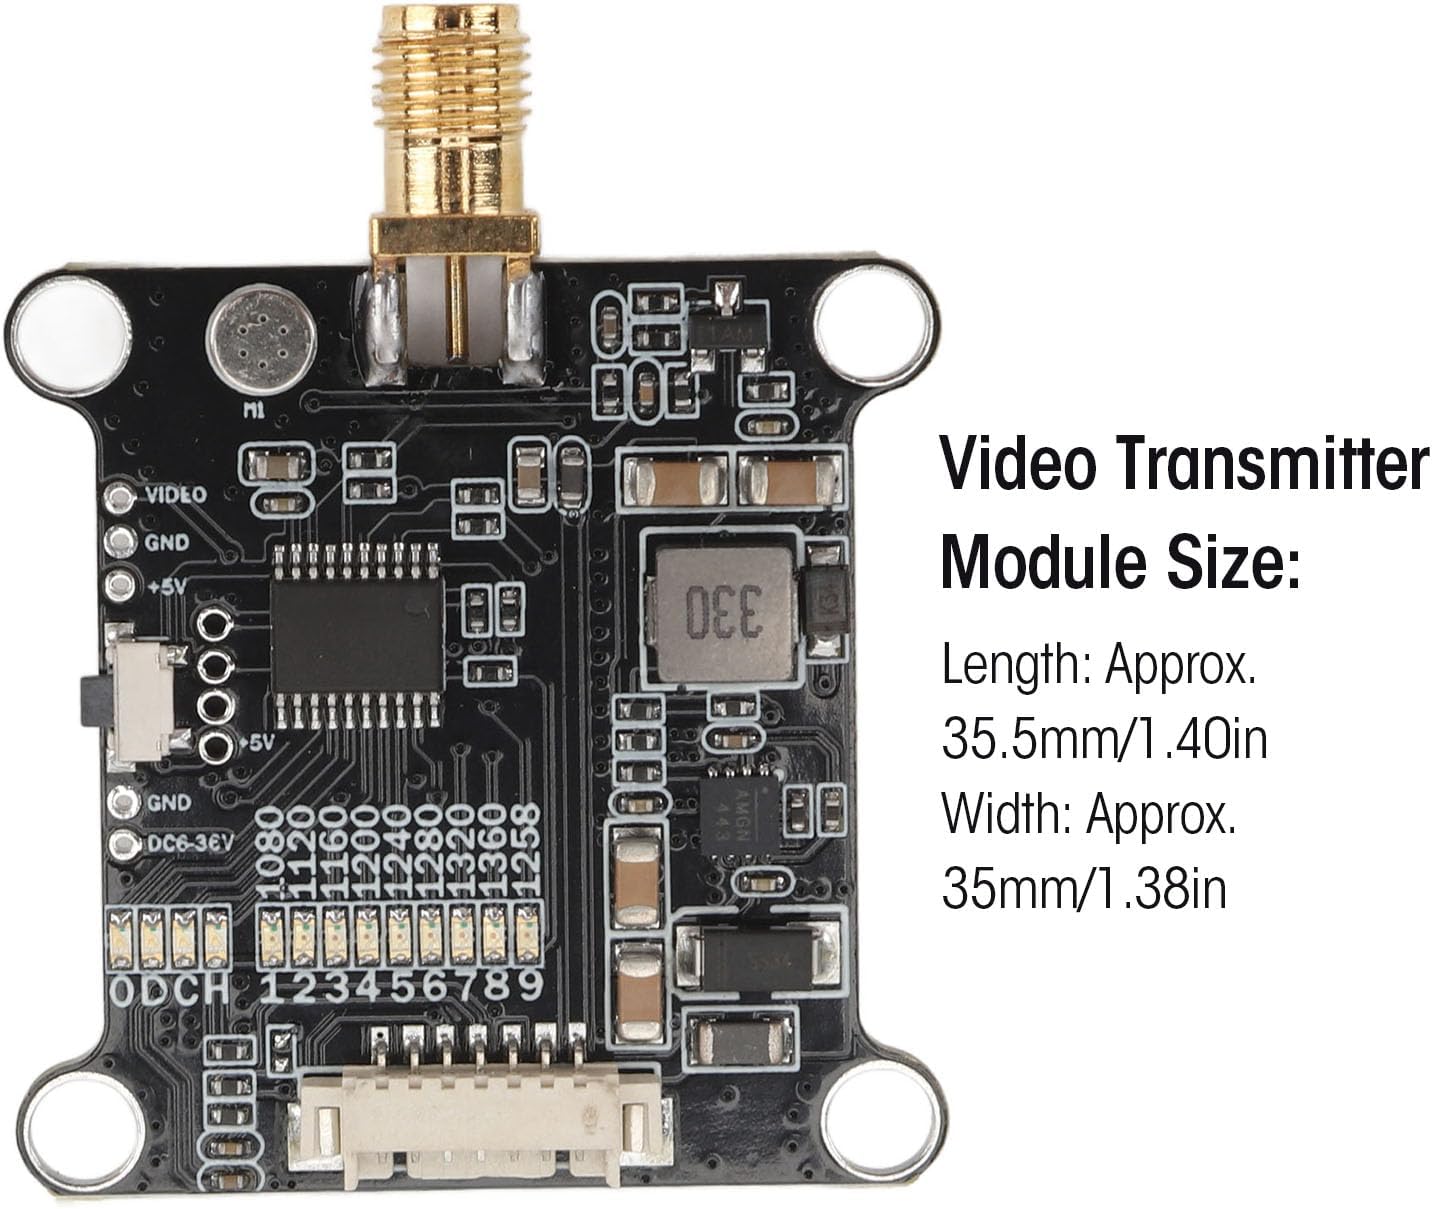
Image: Displaying the Yoidesu 1.2G VTX module with its approximate dimensions: Length 35.5mm (1.40in) and Width 35mm (1.38in). This provides crucial information for planning installation space.

Image: Bottom view of the Yoidesu 1.2G VTX module, showing the shielded section and connection pads for power, video, and audio. This perspective is useful for understanding the module's wiring and mounting options.
5. Setup
Follow these steps for proper installation and initial setup of your VTX module:
- Mounting: Securely mount the VTX module to your RC drone or application platform using appropriate hardware. Ensure it is protected from physical impact and has adequate ventilation. The mounting hole spacing is approximately 30.5x30.5mm (1.20x1.20in).
- Antenna Connection: Carefully screw the provided antenna onto the SMA connector of the VTX module. Ensure it is finger-tight but do not overtighten. Never power on the VTX without the antenna connected.
- Wiring: Connect the VTX to your flight controller or power distribution board. The connecting cable typically includes wires for power (DC 7-36V), ground (GND), video input (VIDEO), and potentially audio input (AUDIO). Refer to your flight controller's manual for specific wiring diagrams.
- Power Source: Connect the VTX to a power source within the specified voltage range (2-8S LiPo battery).
- Camera Connection: Connect your FPV camera's video output to the VTX's video input.
6. Operating Instructions
Once installed, operate your VTX module as follows:
- Power On: Apply power to your drone system. The VTX module will power on.
- Channel Selection: The module supports 9 channels (1060MHz-1380MHz). Channel selection is typically done via a button or dip switches on the module, or through a flight controller's OSD (On-Screen Display) using the IRC Tramp telecommunication protocol. Consult your flight controller's documentation for VTX control.
- Power Output Adjustment: The module offers adjustable power outputs: PIT, 25mW, 200mW, and 1600mW. Adjust the power output according to your needs and local regulations. Higher power outputs increase range but also generate more heat.
- Receiver Pairing: Ensure your FPV receiver is set to the same frequency and channel as your VTX module to receive the video signal.
Video: Official product video demonstrating the physical features and potential applications of the Yoidesu 1.2G VTX 1.6W Video Transmitter Module.
7. Maintenance
- Cleaning: Keep the module clean and free from dust, dirt, and moisture. Use a soft, dry cloth for cleaning. Avoid using liquid cleaners.
- Storage: Store the VTX module in a dry, cool environment away from direct sunlight and extreme temperatures.
- Physical Inspection: Periodically inspect the module for any signs of damage, loose connections, or corrosion.
- Antenna Care: Ensure the antenna is not bent or damaged, as this can affect signal quality and range.
8. Troubleshooting
- No Video Signal:
- Check power connections to the VTX.
- Verify antenna is securely connected.
- Ensure VTX and receiver are on the same channel and frequency.
- Inspect video input/output connections from camera to VTX.
- Poor Video Quality/Short Range:
- Check antenna condition and orientation.
- Increase VTX power output (if legally permissible and cooling allows).
- Ensure there are no obstructions between the VTX and receiver.
- Check for sources of interference (e.g., other electronic devices, nearby Wi-Fi).
- Overheating:
- Reduce power output if not needed.
- Improve airflow around the module.
- Ensure the module is not in an enclosed space without ventilation.
9. Specifications
| Item Type | FPV Transmitter Module |
| Material | Electronic Components |
| Module Size (L x W) | Approx. 35.5mm x 35mm (1.40in x 1.38in) |
| Mounting Hole Spacing | Approx. 30.5mm x 30.5mm (1.20in x 1.20in) |
| Input Voltage | DC 7-36V (Supports 2-8S Battery Input) |
| Channels | 9CH (1060MHz-1380MHz) |
| Power Output | PIT, 25mW, 200mW, 1600mW |
| Antenna Interface | SMA |
| Telecommunication Protocol | IRC Tramp |
| Item Weight | 0.882 ounces |
| Model Number | Yoidesurbncxzas36 |
10. Warranty and Support
Yoidesu products are designed for reliability and performance. For warranty information, technical support, or service inquiries, please refer to the official Yoidesu brand store or contact your retailer. Keep your proof of purchase for any warranty claims.
Visit the Yoidesu Store for more information and product updates.