
Introduction
Thank you for choosing the Airwit 106cm Ceiling Fan with Light. This manual provides essential information for the safe and efficient installation, operation, and maintenance of your new ceiling fan. Please read these instructions carefully before installation and keep them for future reference.
Important Safety Instructions
- Ensure the power supply is disconnected before installation, cleaning, or maintenance.
- Installation must be performed by a qualified electrician or a person with sufficient electrical knowledge.
- Mount the fan to a ceiling joist or support structure capable of holding the fan's weight (approximately 5.48 kg).
- Maintain a minimum clearance of 2.3 meters (7.5 feet) from the floor to the fan blades.
- Do not insert objects into the path of the rotating blades.
- Use only the remote control provided with the fan.
- This fan is designed for indoor use only. Do not expose to water or excessive humidity.
What's in the Box
Upon unpacking, please ensure all components are present and undamaged:
- Airwit 106cm Ceiling Fan Unit
- Remote Control (AAA batteries not included)
- Installation Hardware (screws, anchors, etc.)
- Installation Guide
If any parts are missing or damaged, please contact customer support immediately.
Setup and Installation
The Airwit 106cm Ceiling Fan is designed for straightforward installation, typically taking 1 to 2 hours for assembly and fixing. A comprehensive installation guide and a video tutorial (accessible via QR code in the printed manual) are provided to assist you.
Pre-Installation Checklist:
- Power Disconnection: Turn off power at the circuit breaker before starting.
- Tools Required: Basic tools such as a screwdriver, wire strippers, and a ladder.
- Location: Choose a suitable location with adequate ceiling support and clearance.
- Batteries: Ensure you have 2 AAA batteries for the remote control.
Installation Steps:
- Mounting Bracket: Secure the mounting bracket to the ceiling joist or a suitable support structure using the provided hardware.
- Wiring: Connect the fan's electrical wires to your household wiring according to local electrical codes. Ensure all connections are secure.
- Assemble Blades: Attach the fan blades to the motor housing. The blades are reversible, offering a matte black or wood grain finish. Choose your preferred side before assembly.
- Install Light Kit: Connect and secure the LED light kit to the fan's main body.
- Final Assembly: Lift the fan unit and attach it to the mounting bracket, ensuring all connections are firm and safe.
- Test: Restore power and test the fan and light functions using the remote control.
Note: While designed for DIY, some users find the installation challenging due to the weight of components and electrical connections. Professional installation may be preferred for those less experienced.
Operating Instructions
Your Airwit ceiling fan is controlled via the included remote control, offering various settings for optimal comfort and ambiance.
Remote Control Functions:
- Fan Speed: Adjust between 6 fan speeds for desired airflow.
- Light On/Off: Toggle the LED light.
- Color Temperature: Cycle through three color temperatures: 3000K (warm white), 4500K (natural white), and 6000K (cool white).
- Brightness Adjustment: Dim the light from 10% to 100% to set the perfect mood.
- Timer: Set the fan to automatically turn off after 1, 2, or 4 hours.
- Reversible Motor: Switch between summer and winter modes.
The remote control features a memory function that saves your last settings for fan speed and light, so you don't need to reconfigure them each time.
Summer and Winter Modes (Reversible DC Motor):
The energy-efficient DC motor allows for year-round comfort:
- Summer Mode: Blades rotate counter-clockwise, pushing air downwards to create a cooling breeze.
- Winter Mode: Blades rotate clockwise, drawing air upwards to circulate warm air trapped near the ceiling, helping to warm the room.
This feature helps optimize air circulation and can contribute to energy savings.

The reversible DC motor allows for efficient cooling in summer and warm air circulation in winter.

Easily adjust light color temperature and brightness with the remote control.

The dual-sided blades offer versatile style options (matte black or wood grain).
Maintenance
Regular maintenance ensures the longevity and optimal performance of your Airwit ceiling fan. Always disconnect power before performing any maintenance.
- Cleaning: Dust the fan blades and motor housing periodically with a soft, damp cloth. Avoid using abrasive cleaners or solvents that could damage the finish.
- Blade Inspection: Check the blades for any signs of warping or damage. The high-quality plywood blades are designed for durability and quiet operation.
- Tighten Screws: Periodically check and tighten all screws on the fan assembly to prevent wobbling and noise.
- Light Fixture: Clean the LED light cover gently with a soft cloth. The integrated LED light is designed for long-term use and does not require bulb replacement.
For any specific maintenance concerns or if you require spare parts, please contact Airwit customer support.
Troubleshooting
If you encounter any issues with your Airwit ceiling fan, refer to the following common troubleshooting steps:
| Problem | Possible Cause | Solution |
|---|---|---|
| Fan does not start | No power; Loose wiring; Remote control issues | Check circuit breaker; Ensure all wiring connections are secure; Replace remote control batteries (AAA); Re-pair remote if necessary. |
| Fan wobbles | Loose blades or mounting hardware; Unbalanced blades | Tighten all blade screws and mounting screws; Ensure blades are correctly installed; Use a balancing kit if wobbling persists. |
| No light or flickering light | Loose light kit wiring; LED driver issue | Check light kit wiring connections; If problem persists, contact customer support. |
| Remote control not working | Dead batteries; Remote not paired | Replace AAA batteries; Refer to the full installation guide for remote pairing instructions. |
| Excessive noise | Loose screws; Motor issue | Tighten all screws; Ensure blades are clean and free of obstructions. The DC motor is designed for ultra-quiet operation (20 dB). If noise persists, contact customer support. |
If these steps do not resolve the issue, please contact Airwit customer support for further assistance.
Specifications
| Feature | Detail |
|---|---|
| Brand | Airwit |
| Model Number | 60009 |
| Dimensions (L x W x H) | 106L x 106l x 25H centimeters (42 inches diameter) |
| Weight | 5.48 Kilograms |
| Material | Engineered Wood (Blades), Metal (Housing) |
| Color | Dark Wood (Plafond-bois Foncé) |
| Motor Type | Reversible DC Motor |
| Fan Speeds | 6 speeds |
| Control Method | Remote Control (Infrared) |
| Light Type | Integrated LED |
| LED Power | 18 Watts |
| Luminous Flux | 1600 Lumens (Max) |
| Color Temperatures | 3000K (Warm White), 4500K (Natural White), 6000K (Cool White) |
| Dimmable | Yes (10% to 100%) |
| Timer Function | 1, 2, or 4 hours |
| Noise Level | 20 dB (Ultra-silent) |
| Energy Efficiency Class | D |
| Installation Type | Semi-flush mount |
| Recommended Use | Indoor (Living Room, Bedroom, Kitchen, Garage, Walkway) |
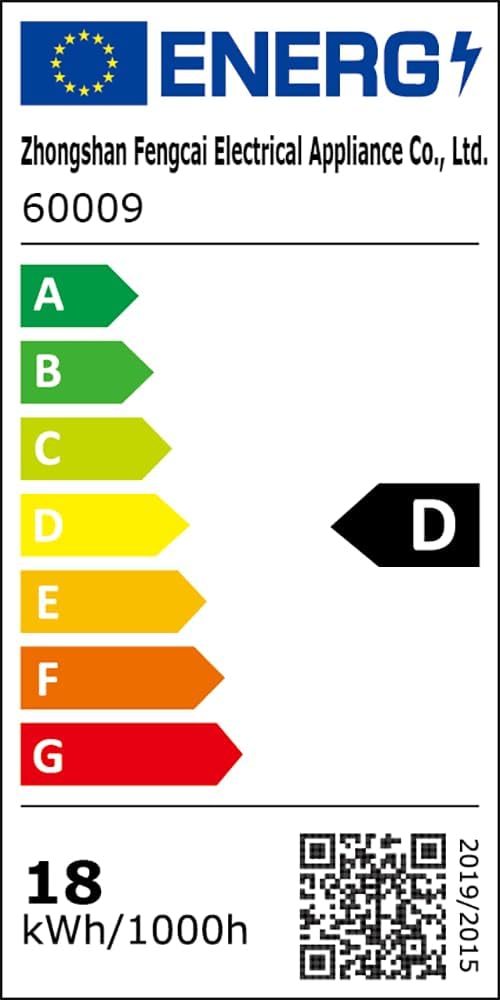
EU Energy Label for Model 60009. For more details, visit eprel.ec.europa.eu/qr/2266600
Warranty and Support
Airwit is committed to providing high-quality products and excellent customer service.
- Product Warranty: Your Airwit ceiling fan comes with a one-year warranty covering manufacturing defects.
- Motor Warranty: The DC motor is backed by a 10-year warranty, ensuring long-term, worry-free use.
- Lifetime Motor Maintenance: Enjoy lifetime maintenance support for the motor.
- Free Spare Parts: Free spare parts are available if needed during the warranty period.
- Customer Support: Our dedicated customer support team is available 24/7 to assist you with any questions, issues, or concerns. Your satisfaction is our priority.
For assistance, please refer to the contact information provided in your purchase documentation or visit the official Airwit website.

Our customer support team is ready to assist you 24/7.


