Introduction
This manual provides comprehensive instructions for the installation, operation, and maintenance of your Philips Hanno LED Ceiling Light with SceneSwitch technology. Please read this manual carefully before installation and use, and retain it for future reference. Ensure safe and optimal use by following these guidelines.
Product Features
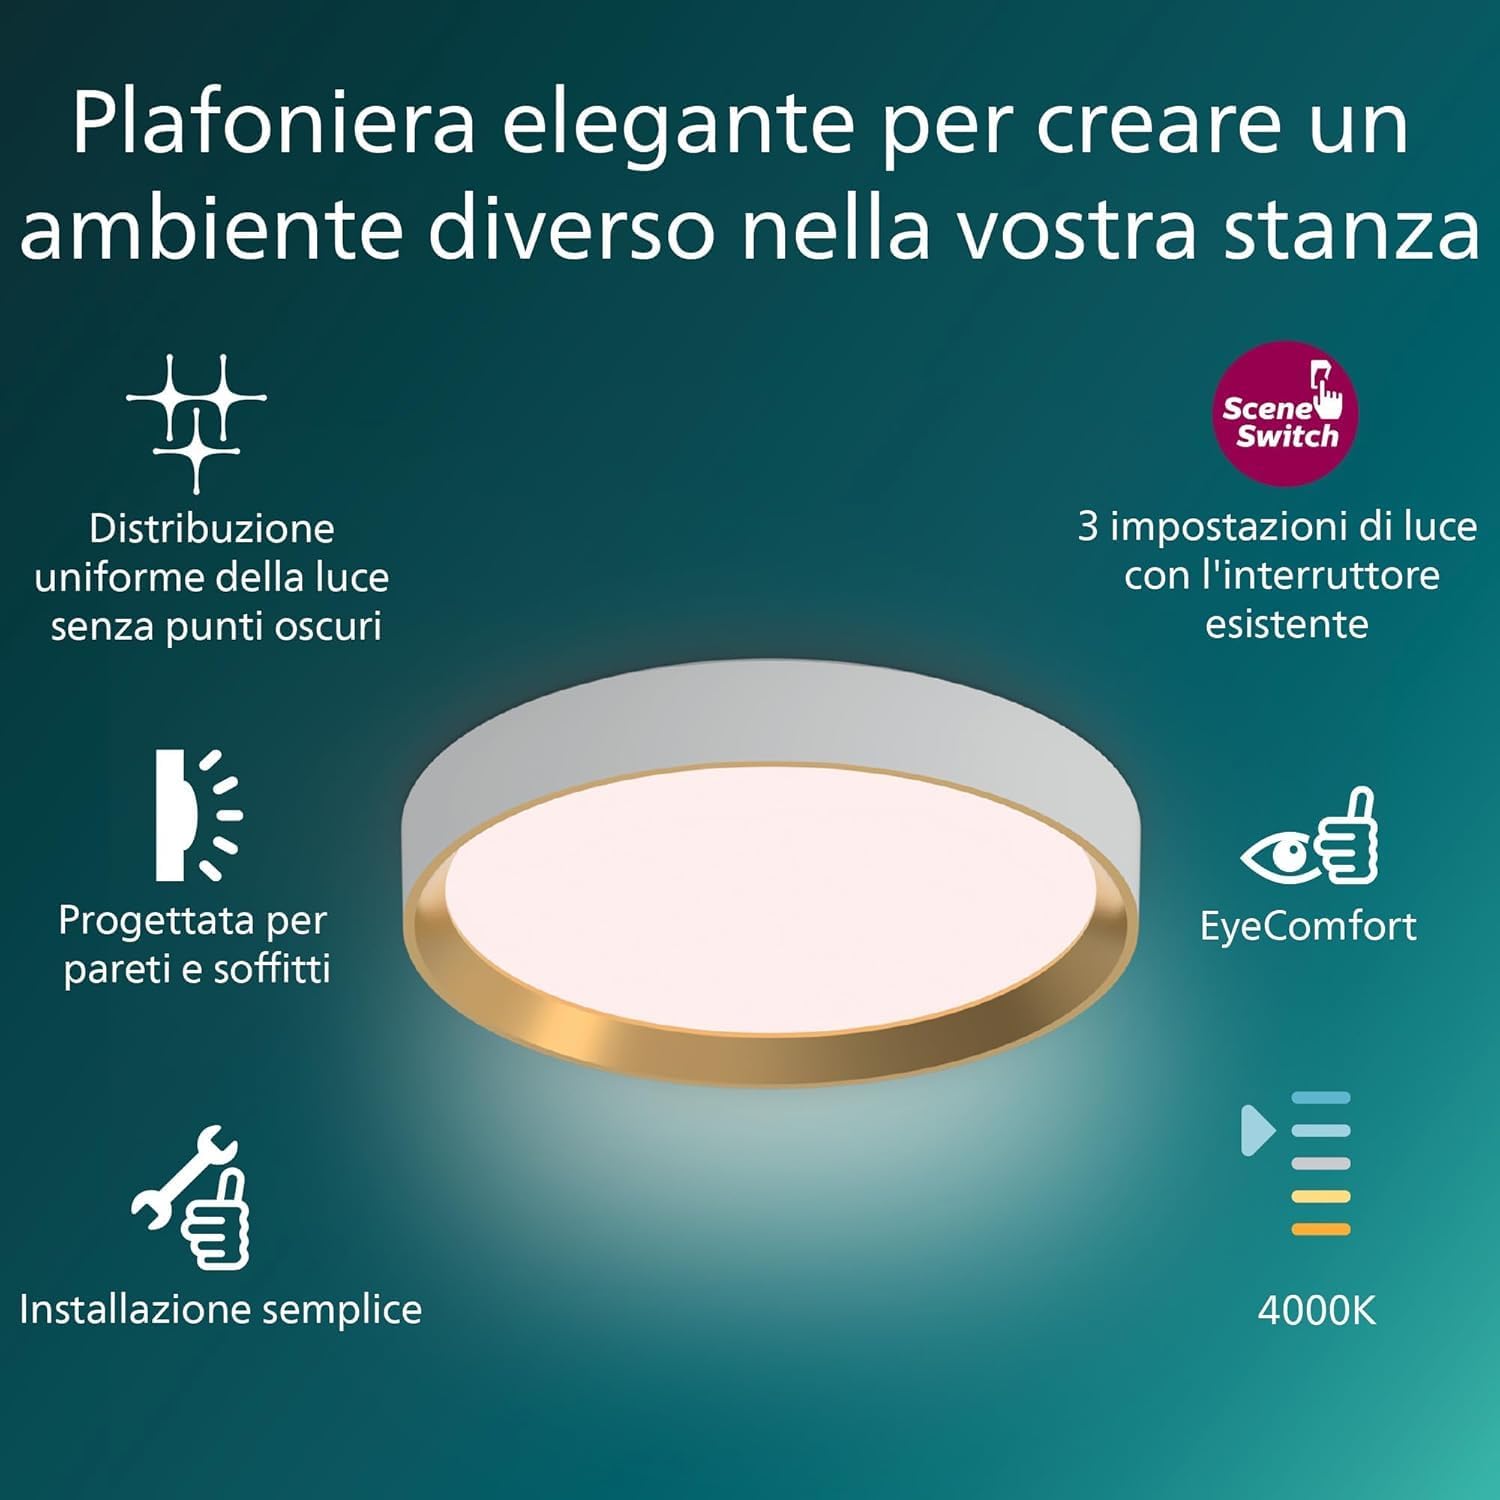
Image: Overview of the Philips Hanno LED Ceiling Light and its key features.
- SceneSwitch Technology: Easily switch between three light settings (100%, 40%, and 10% brightness) using your existing wall switch. The light remembers your last selected scene for convenience.
- EyeComfort Standard: Designed to provide comfortable light without flicker or glare, reducing eye strain.
- Elegant Design: A sleek and modern design suitable for various interior spaces.
- Uniform Light Distribution: Provides consistent illumination without dark spots.
- Easy Installation: Designed for straightforward ceiling mounting.
- Energy Efficient: LED technology for long-lasting and energy-saving illumination.
Safety Information
Always follow basic safety precautions when installing and using electrical products to reduce the risk of fire, electric shock, and personal injury.
- WARNING: Risk of electric shock. Disconnect power at the fuse box or circuit breaker before installation or servicing.
- This product must be installed in accordance with the applicable installation code by a person familiar with the construction and operation of the product and the hazards involved.
- Do not modify the product. Any modifications may void the warranty and create safety hazards.
- Ensure the mounting surface can support the weight of the fixture.
- Do not look directly into the LED light source.
- This product is rated IP20 and is intended for indoor use only. Do not expose to water or high humidity.
Package Contents
The package includes:
- 1x Philips Hanno LED Ceiling Light
- Installation hardware (screws, wall plugs)
- User Manual
Setup and Installation
- Prepare for Installation:
- Turn off the main power supply at the circuit breaker or fuse box to prevent electric shock.
- Ensure you have all necessary tools (screwdriver, drill, wire strippers, etc.).
- Mounting the Fixture:
- Carefully remove the mounting bracket from the ceiling light fixture.
- Position the mounting bracket on the ceiling at the desired location. Mark the drilling points.
- Drill holes at the marked points and insert appropriate wall plugs if necessary.
- Secure the mounting bracket to the ceiling using the provided screws.
- Wiring Connections:
- Connect the household electrical wires to the corresponding wires on the light fixture. Typically, live (L), neutral (N), and ground (E) wires. Ensure connections are secure.
- If you are unsure about wiring, consult a qualified electrician.
- Attach the Light Fixture:
- Carefully align the light fixture with the mounting bracket and secure it in place.
- Ensure the fixture is firmly attached to the ceiling.
- Restore Power:
- Once installation is complete, turn the main power supply back on.

Image: Simple installation process for the Philips Hanno LED Ceiling Light.
Operating Instructions
The Philips Hanno LED Ceiling Light features SceneSwitch technology, allowing you to change light settings using your standard wall switch.
- Turning On/Off: Use your existing wall switch to turn the light on or off.
- Changing Light Scenes:
- When the light is on, quickly toggle your wall switch OFF and then ON again.
- Each quick toggle will cycle through the available light settings: 100% brightness, 40% brightness, and 10% brightness.
- The light will remember the last selected scene if left off for more than 6 seconds.

Image: Demonstrating the three light settings achievable with the SceneSwitch feature.
Maintenance
- Cleaning: Ensure the power is off before cleaning. Use a soft, dry, or slightly damp cloth to wipe the surface of the light. Do not use abrasive cleaners or solvents.
- No User-Serviceable Parts: The LED light source is integrated and not replaceable. Do not attempt to open or repair the fixture.
Troubleshooting
| Problem | Possible Cause | Solution |
|---|---|---|
| Light does not turn on. | No power supply; loose wiring; faulty switch. | Check circuit breaker/fuse. Ensure all wiring connections are secure. Test the wall switch. |
| SceneSwitch not cycling through settings. | Switch toggled too slowly; internal malfunction. | Ensure quick toggling of the wall switch (OFF-ON). If problem persists, contact support. |
| Light flickers or dims unexpectedly. | Unstable power supply; loose connection. | Check power supply stability. Verify wiring connections. |
If troubleshooting steps do not resolve the issue, please contact Philips customer support.
Specifications
| Brand | Philips |
| Model Number | 8720169301399 |
| Power Consumption | 24 W |
| Luminous Flux | 2800 Lumen |
| Color Temperature | 2700 Kelvin (Natural White) |
| Voltage | 240 Volt |
| IP Rating | IP20 |
| Dimensions (LxWxH) | 6.6L x 38.4W x 38.4H cm |
| Material | Wood (Lampshade) |
| Control Method | Wall Switch (SceneSwitch) |
| Mounting Type | Ceiling Mount, Flush Mount |
| EyeComfort | Yes |
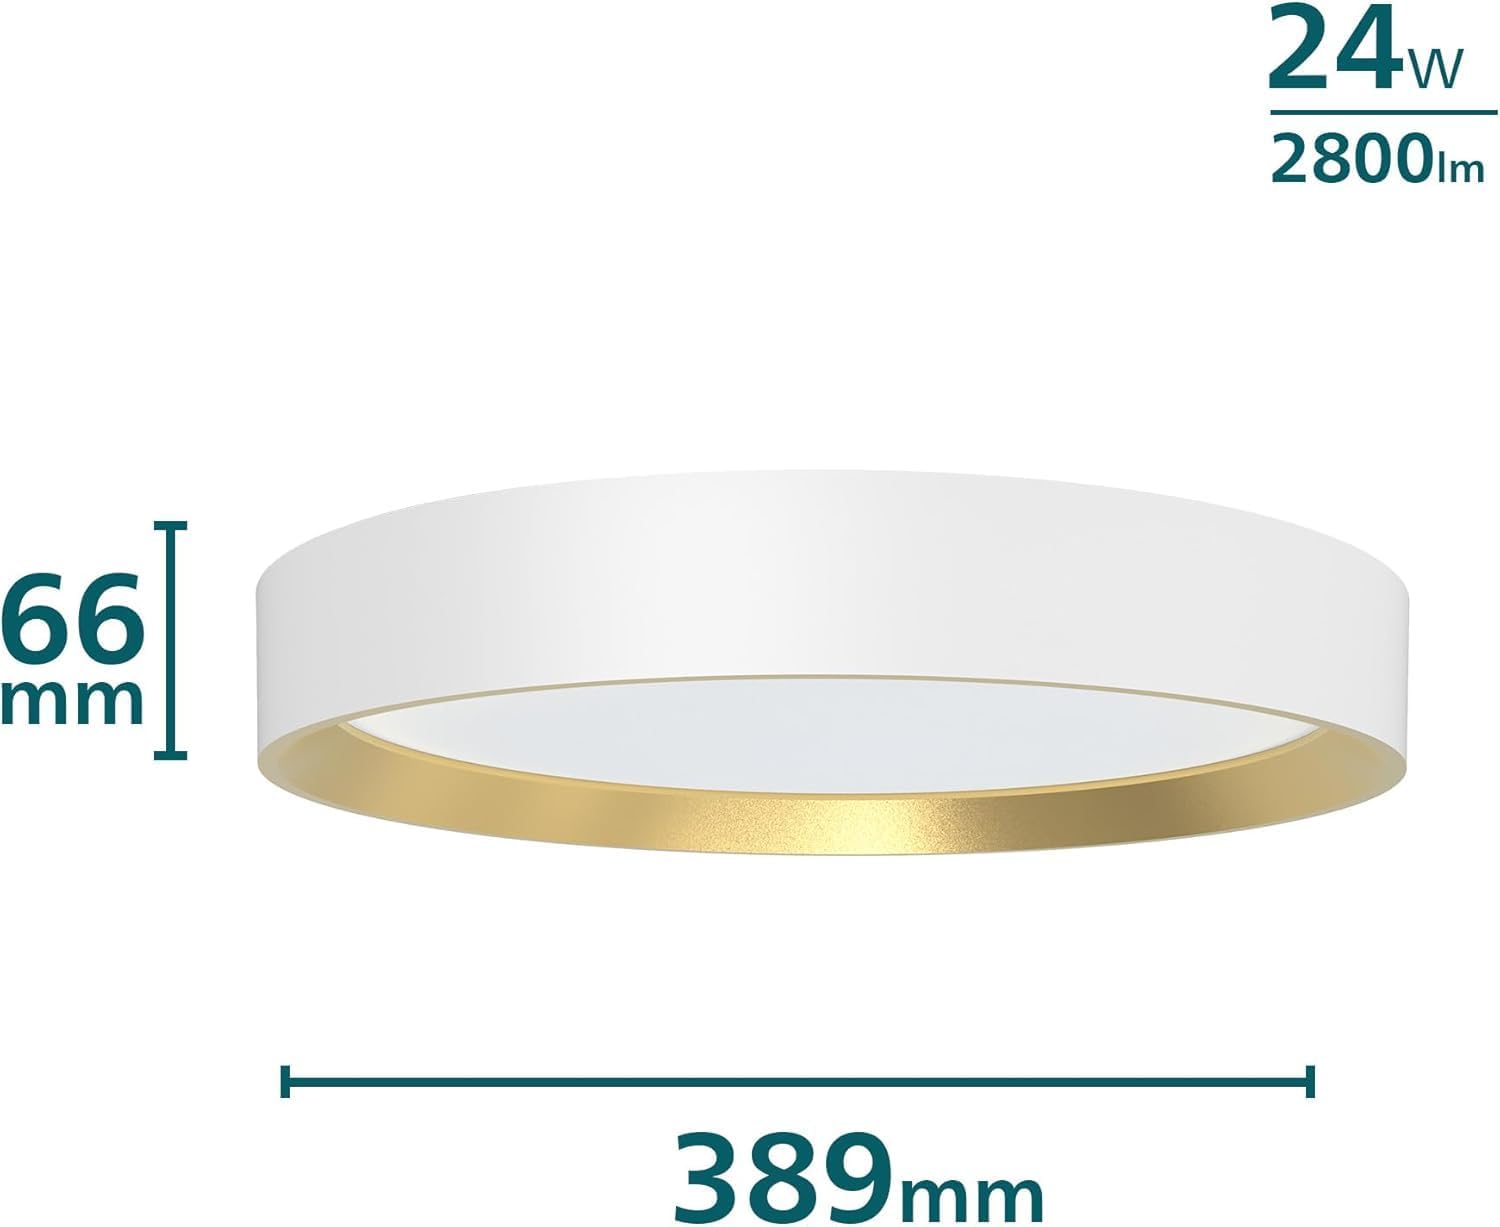
Image: Product dimensions and power specifications.
Warranty
This Philips Hanno LED Ceiling Light comes with a Limited Warranty. Please refer to the warranty card included in your package or visit the official Philips website for detailed terms and conditions regarding your product's warranty coverage.
Support
For further assistance, technical support, or to report any issues not covered in this manual, please contact Philips customer service. You can find contact information on the official Philips website or through the retailer where you purchased the product.
Online Resources: www.philips.com/support