Introduction
This manual provides detailed instructions for the setup, operation, and maintenance of your IVEOPPE Weather Station. Please read this manual thoroughly before using the device to ensure proper function and longevity. This weather station offers comprehensive environmental monitoring, including indoor and outdoor temperature and humidity, atmospheric pressure, weather forecasts, and timekeeping functions.
Package Contents
- 1 x IVEOPPE Weather Station Main Unit
- 1 x Wireless Outdoor Sensor
- 1 x USB Power Cable
- 1 x User Manual
Product Features
The IVEOPPE Weather Station is designed to provide accurate and comprehensive weather information with a user-friendly interface.
- Clear Color Display: Features a vibrant color LCD screen with large, easy-to-read numbers, displaying all essential weather data at a glance.
- Wireless Outdoor Sensor: Transmits outdoor temperature and humidity data wirelessly up to 60 meters in open areas. Supports connection for up to three outdoor sensors (one included).
- Dual Power Modes: Can be powered via the included USB cable for continuous operation with adjustable backlight brightness (4 levels: High, Medium, Low, Dim, Off). Alternatively, it can be powered by 2 x AAA batteries, activating a 15-second backlight upon touch. The outdoor sensor is battery-powered only.
- Multifunctional Device: Integrates an alarm clock with a 5-60 minute snooze function, indoor/outdoor comfort level indicators, detailed weather forecasts, air pressure trend display, sunrise/sunset times, and moon phase/tide level information.
- Time and Date Display: Shows date from January 1, 2000, to December 31, 2099, with selectable 12HR/24HR format. Weekday display available in 8 languages (English, French, Italian, Spanish, Dutch, Danish, Polish, German).
- Weather Forecast Icons: Provides 6 distinct weather forecast icons: Sunny, Slightly Cloudy, Cloudy, Light Rain, Heavy Rain, and Snowy.
- Humidity Monitoring: Measures indoor/outdoor humidity from 20%RH to 95%RH. Includes min/max humidity records, a 3-level indoor mold risk alert, 5 indoor/outdoor comfort levels, and high/low humidity alerts.
- Temperature Monitoring: Indoor temperature range: -9.9°C to 50°C (15°F to 122°F). Outdoor temperature range: -40°C to 70°C (-40°F to 158°F). Selectable °C/°F units. Features min/max temperature records, high/low temperature alerts, and a frost alarm. Temperature and humidity measurements update every 60 seconds.
- Atmospheric Pressure: Measurement range: 600 hPa/mb to 1100 hPa/mb (17.72 inHg to 32.50 inHg). Selectable hPa/mb or inHg units. Displays a bar graph of air pressure changes over the last 3, 6, 9, 12, 18, and 24 hours, along with a 3-level air pressure trend indicator.

Image: The main display of the IVEOPPE Weather Station showing various functions including indoor/outdoor temperature and humidity, weather forecast, barometric pressure trends, moon phase, and current time/date.
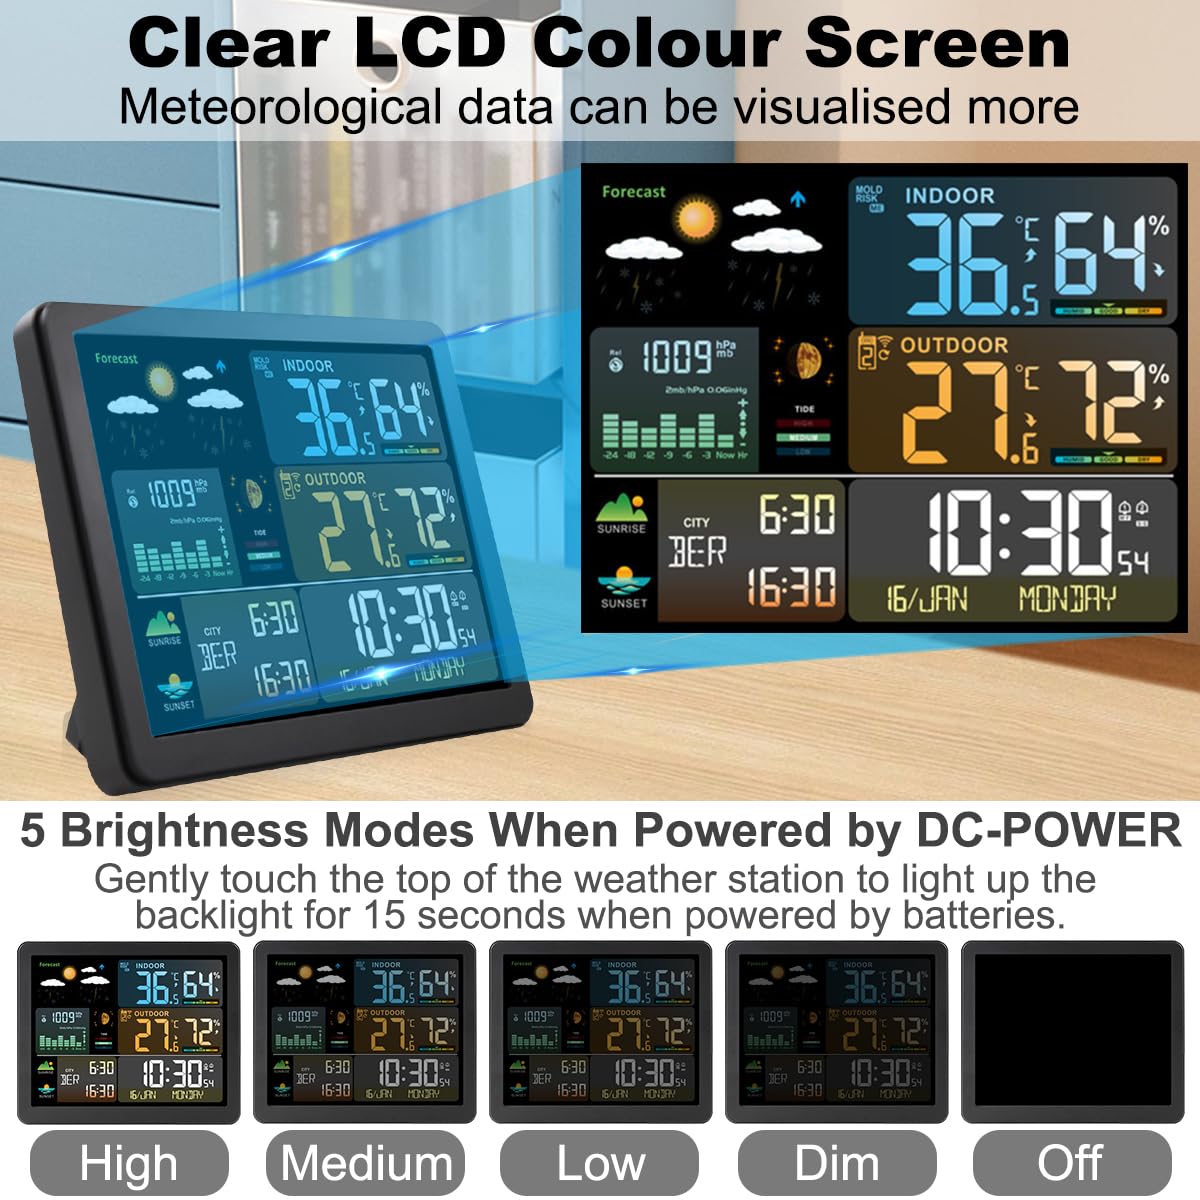
Image: A visual representation of the six weather forecast icons used by the weather station: Sunny, Slightly Cloudy, Cloudy, Heavy Rain, Rainy, and Snowy.
Setup
1. Powering the Main Unit
- USB Power (Recommended for continuous display): Connect the provided USB cable to the weather station's power input and plug the other end into a USB power adapter (not included) or a compatible USB port. The display will light up immediately.
- Battery Power (for portable use): Open the battery compartment on the back of the main unit and insert 2 x AAA batteries (not included), observing the correct polarity (+/-). The display will briefly light up, and the backlight will activate for 15 seconds when the top of the unit is touched.
2. Powering the Outdoor Sensor
Open the battery compartment on the back of the wireless outdoor sensor and insert 2 x AA batteries (not included), observing the correct polarity (+/-). The sensor will automatically begin transmitting data.
3. Sensor Placement
Place the outdoor sensor in a shaded, dry location away from direct sunlight and rain to ensure accurate readings. It can be wall-mounted or placed on a flat surface. Ensure it is within 60 meters (197 feet) of the main unit, with minimal obstructions for optimal signal transmission.

Image: Illustration demonstrating the capability of the weather station to connect with up to three wireless outdoor sensors, highlighting the 60-meter transmission range in an open area. Note: Only one sensor is included.

Image: The weather station main unit displayed indoors and the wireless outdoor sensor mounted outside, illustrating typical placement and indicating the indoor temperature range of -9.9°C to +50°C and outdoor range of -40°C to +70°C.
4. Initial Synchronization
After powering both units, the main unit will automatically search for the outdoor sensor signal. This may take a few minutes. Once connected, the outdoor temperature and humidity will appear on the display. If the connection is not established, refer to the Troubleshooting section.
5. Setting Time, Date, and Units
Refer to the detailed instructions in the Operating Instructions section for setting the current time, date, language, and preferred temperature/pressure units.
Operating Instructions
Basic Display Overview
The color display is organized to show various data points clearly:
- Top Section: Weather forecast icons, indoor temperature, and humidity.
- Middle Section: Outdoor temperature and humidity, atmospheric pressure with trend graph.
- Bottom Section: Time, date, weekday, sunrise/sunset, moon phase/tide.
Setting Time and Date
- Press and hold the SET button (or equivalent, refer to specific button labels on your device) for 3 seconds to enter time setting mode.
- Use the UP and DOWN buttons to adjust the flashing value.
- Press SET again to confirm and move to the next setting (e.g., 12/24HR format, hour, minute, year, month, day, weekday language).
- Press SET repeatedly until all settings are confirmed, or wait 15 seconds for the unit to exit setting mode automatically.
Setting Alarms and Snooze
- Press the ALARM button to view Alarm 1 time. Press again for Alarm 2.
- Press and hold the ALARM button for 3 seconds to enter alarm setting mode.
- Adjust hour and minute using UP/DOWN buttons, confirm with ALARM.
- Set the snooze duration (5-60 minutes) if prompted.
- To activate/deactivate an alarm, press the ALARM button repeatedly until the alarm icon appears/disappears.
- When an alarm sounds, press any button (except snooze) to stop it, or press the SNOOZE button (usually on top) to activate snooze.
Changing Temperature and Pressure Units
- To switch between °C and °F, press the °C/°F button (or a dedicated button, check your device).
- To switch between hPa/mb and inHg for atmospheric pressure, press the PRESSURE button (or a dedicated button).
Adjusting Backlight (USB Power)
When powered by USB, repeatedly press the LIGHT button (or a dedicated button, often on top) to cycle through the 4 brightness levels (High, Medium, Low, Dim) and Off.

Image: The weather station's display illustrating the five adjustable brightness modes (High, Medium, Low, Dim, Off) available when the unit is powered via USB.
Maintenance
Battery Replacement
- Replace batteries in the main unit (2 x AAA) and outdoor sensor (2 x AA) when the low battery indicator appears on the display.
- Always replace all batteries in a set with new ones. Do not mix old and new batteries or different battery types.
Cleaning
Wipe the weather station and sensor with a soft, damp cloth. Do not use abrasive cleaners or solvents, as these may damage the display or casing.
Environmental Considerations
Avoid placing the main unit in direct sunlight or near heat sources, as this can affect indoor temperature readings. Ensure the outdoor sensor is protected from extreme weather conditions and direct precipitation for optimal performance and longevity.
Troubleshooting
| Problem | Possible Cause | Solution |
|---|---|---|
| No display on main unit | No power or low batteries. | Ensure USB cable is properly connected or replace AAA batteries. |
| Outdoor temperature/humidity not displayed or incorrect | Outdoor sensor not connected, out of range, or low batteries. | Replace AA batteries in the sensor. Move sensor closer to the main unit. Re-synchronize by removing batteries from both units, then reinserting batteries into the sensor first, then the main unit. |
| Inaccurate indoor readings | Main unit placed near heat sources, direct sunlight, or drafts. | Relocate the main unit to a more stable environment. |
| Backlight not working (battery power) | Batteries are low or not inserted correctly. | Replace AAA batteries. Ensure correct polarity. Backlight only activates for 15 seconds on touch with battery power. |
| Weather forecast seems inaccurate | Weather forecasts are based on atmospheric pressure changes and are predictions, not guarantees. | Allow 7-14 days for the station to calibrate to local atmospheric pressure. Forecasts are for a 12-24 hour period within a 30-50 km radius. |
Specifications
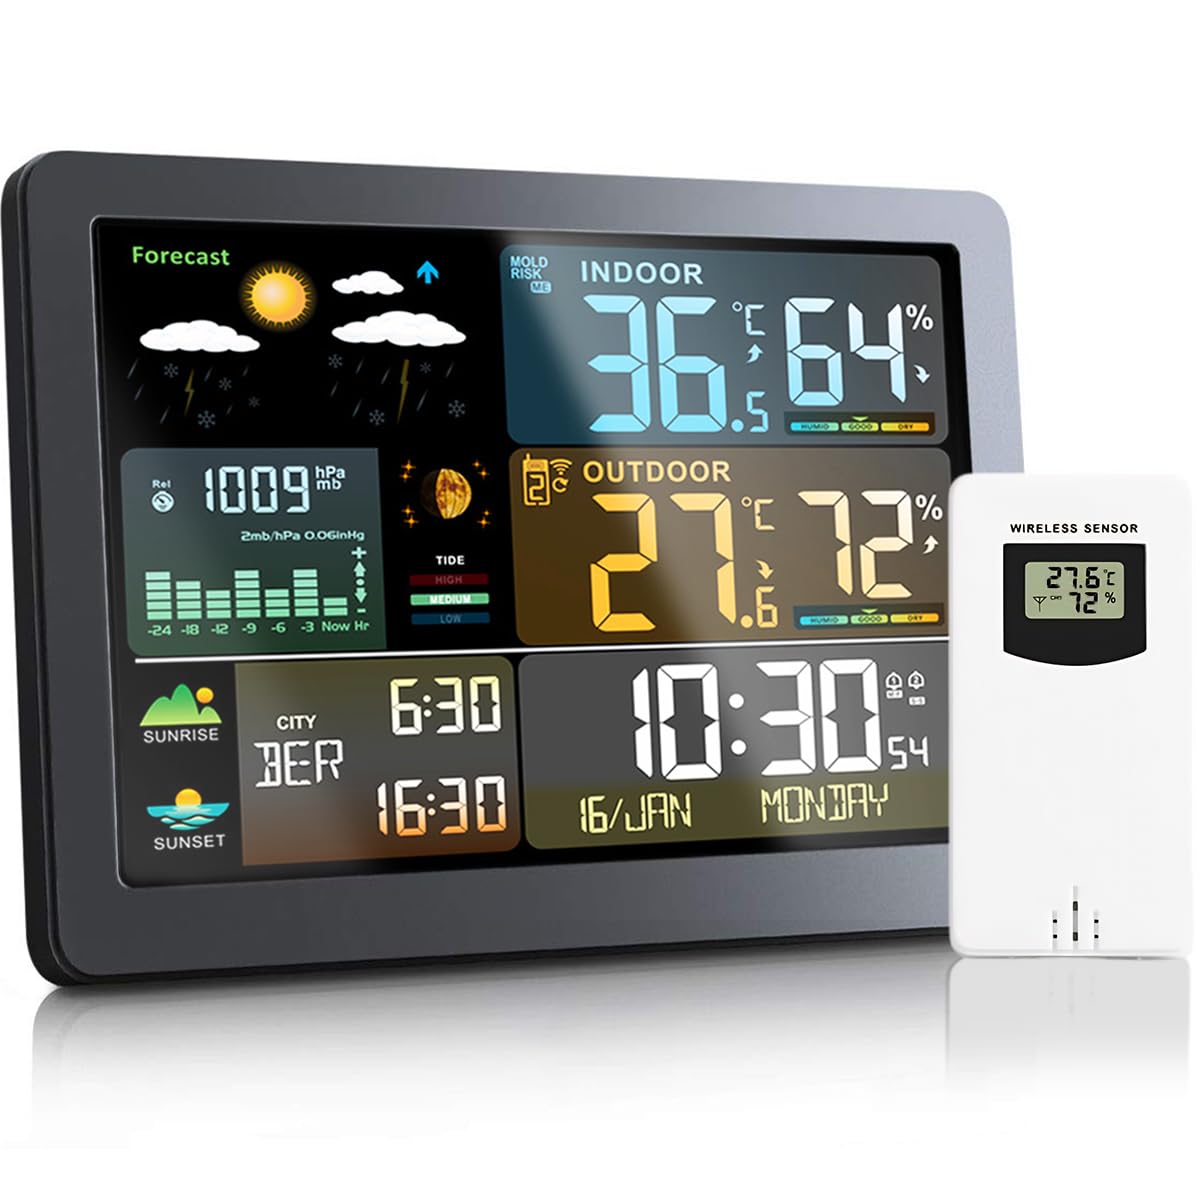
Image: The weather station and its outdoor sensor with their respective dimensions, showing the main unit is 17.3cm wide and 14cm high, and the sensor is 5cm wide and 9.6cm high. Also pictured are the table stand and wall-mount options.
- Model: PB-CPQXZ
- Color: Black
- Material: Plastic
- Main Unit Dimensions: 18.5 x 15.3 x 7.2 cm
- Item Weight: 540 g
- Display Style: Color LCD
- Indoor Temperature Range: -9.9°C to 50°C (15°F to 122°F)
- Outdoor Temperature Range: -40°C to 70°C (-40°F to 158°F)
- Humidity Range: 20%RH to 95%RH
- Atmospheric Pressure Range: 600 hPa/mb to 1100 hPa/mb (17.72 inHg to 32.50 inHg)
- Temperature/Humidity Measurement Cycle: 60 seconds
- Wireless Transmission Frequency: 433.92 MHz
- Wireless Transmission Range: Up to 60 meters (open area)
- Max. Outdoor Sensors Supported: 3 (1 included)
- Main Unit Power: USB cable (included) or 2 x AAA batteries (not included)
- Outdoor Sensor Power: 2 x AA batteries (not included)
Warranty and Support
This product comes with a standard manufacturer's warranty. For specific warranty details, please refer to the documentation provided at the time of purchase or contact your retailer.
If you encounter any issues or have questions regarding your IVEOPPE Weather Station, please contact customer support. Our team is available to assist you with troubleshooting, technical inquiries, and general product information.
For support, please visit the official IVEOPPE website or contact your point of purchase.