Introduction
This manual provides detailed instructions for the setup, operation, maintenance, and troubleshooting of your ASTGMI Kids Camera Instant Print. Please read this manual thoroughly before using the camera to ensure proper function and longevity of the device.
The ASTGMI Kids Camera is designed to capture and instantly print memories, offering both digital photography and inkless printing capabilities. It features a 12-megapixel dual lens, 1080P HD video recording, and various creative functions suitable for children aged 3-12 years.
Package Contents
- 1 x ASTGMI Kids Instant Camera (Blue)
- 3 x Print Paper Rolls
- 1 x 32GB Memory Card (pre-installed)
- 1 x USB Charging Cable
- 5 x Colored Pens
- 1 x Cute Cartoon Stickers (randomized)
- 1 x Neck Lanyard
- 1 x User Manual (this document)
Note: The camera received may not be fully charged. The memory card is already in the camera.
Setup Guide
1. Initial Charging
Before first use, fully charge the camera using the provided USB charging cable. Connect the cable to the camera's charging port and a compatible USB power source (e.g., computer USB port, wall adapter). The charging indicator will show the charging status.
2. Memory Card
The 32GB memory card is pre-installed in the camera. Ensure it is securely seated before operation. Do not insert or remove the card while the camera is in use (video/photo/music/playback mode) to prevent data corruption.
3. Installing Print Paper
Follow these steps to correctly install the thermal print paper:
- Open the paper compartment door.
- Insert a roll of print paper into the slot, ensuring the paper feeds in the correct direction as marked on the camera. The paper should feed from the bottom of the roll, over the top, and out towards the printing slot.
- Close the paper compartment door firmly until it clicks into place. Ensure the paper is flat to avoid jams.

Image: Visual guide demonstrating the three steps for installing the print paper into the camera's designated slot.
Operating Instructions
1. Power On/Off
Press and hold the power button to turn the camera on or off. The camera features a simple interface designed for ease of use by children.
2. Taking Photos
The camera is equipped with 12-megapixel front and rear dual lenses. Select the camera mode and press the shutter button to capture photos. You can take color photos and selfies.
3. Video Recording
Switch to video mode to record 1080P HD videos. Press the shutter button to start and stop recording.
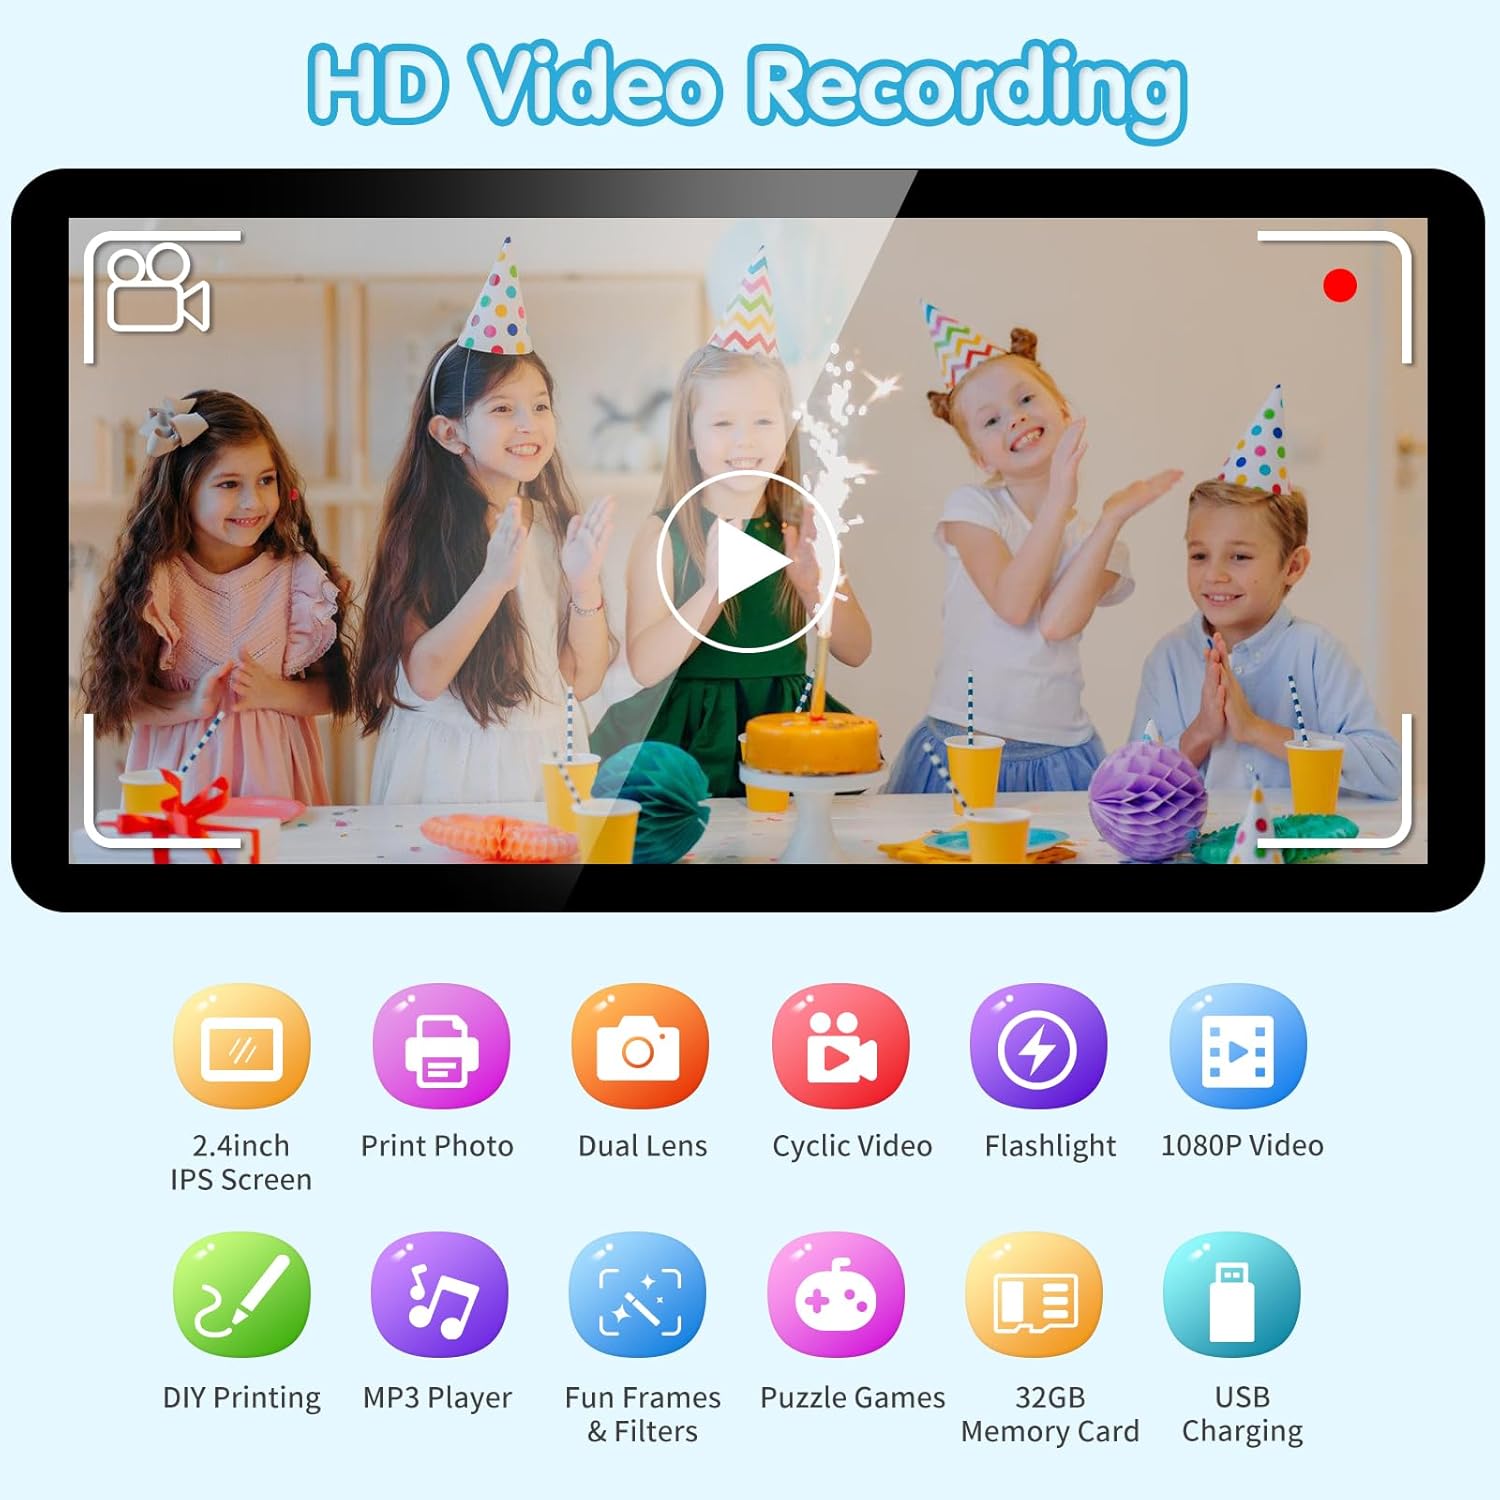
Image: The camera's screen displaying HD video recording mode, alongside icons representing features like 2.4-inch IPS screen, print photo, dual lens, cyclic video, flashlight, and 1080P video.
4. Instant Printing
The camera uses advanced inkless printing technology to print black and white photos instantly. You can choose between two print modes (grayscale and dot matrix) and adjust the printing density (0-4) to achieve different results.

Image: Illustration of the two photo modes: black and white instant print with adjustable densities and print modes, and color digital photo display on the camera screen.
5. Creative Features
- Filters and Photo Frames: The camera includes 8 filters and 10 photo frames to add fun and creativity to your pictures.
- Burst Shooting: Capture a series of photos quickly.
- Time Lapse: Set a delay for photos (2S, 5S, 10S).
- Playback: View captured photos and videos on the 2.4-inch IPS screen.
- Digital Zoom: The camera supports up to 16X digital zoom.

Image: Examples of funny frames and filters that can be applied to photos, the camera's music player interface, and a visual representation of the 16X digital zoom capability.
6. Games and Music
The camera includes 5 puzzle games for entertainment. It also functions as an MP3 player; you can upload music files to the memory card for playback.
7. DIY Coloring
Use the included colored pens and stickers to decorate your instant prints, fostering creativity and personalization.

Image: A child engaged in coloring an instant print photo with the provided colored pens, demonstrating the DIY coloring feature.
Maintenance
- Cleaning: Use a soft, dry cloth to clean the camera body. For the lens, use a specialized lens cleaning cloth. Avoid using liquid cleaners directly on the camera.
- Storage: Store the camera in a cool, dry place away from direct sunlight and extreme temperatures.
- Water Exposure: This camera is not water resistant. Do not use it in water or wet environments to prevent damage.
- Battery Life: A full charge provides approximately 3.5 hours of continuous usage.
Troubleshooting
| Problem | Possible Cause | Solution |
|---|---|---|
| Screen gets stuck/Camera unresponsive | Memory card full or system error. | Restart the camera by holding the restart button with a card pin for a few seconds. Check memory card storage and delete unnecessary files. |
| Paper jams during printing | Paper not placed flat or incorrect direction. | Ensure printing paper is placed flat and in the correct direction. Do not use force when replacing paper. |
| Camera does not power on | Low battery. | Charge the camera fully using the provided USB cable. |
| Poor print quality | Incorrect print density setting or low battery. | Adjust print density settings (0-4). Ensure camera is sufficiently charged. |
Specifications
| Feature | Detail |
|---|---|
| Model Name | D500 |
| Effective Still Resolution | 12 MP |
| Video Resolution | 1080P HD |
| Display | 2.4-inch IPS Screen |
| Storage | 32GB Memory Card (included) |
| Printing Technology | Inkless Thermal Printing |
| Battery Type | Lithium Polymer (included) |
| Continuous Usage Time | Approx. 3.5 hours (full charge) |
| Zoom Type | Optical Zoom (16x digital zoom) |
| Water Resistance Level | Not Water Resistant |
| Package Dimensions | 14.4 x 12.9 x 6.6 cm |
| Package Weight | 0.42 Kilograms |
Warranty and Support
For warranty information or technical support, please refer to the contact details provided with your purchase documentation or visit the official ASTGMI website. Specific warranty terms may vary by region and retailer.


