1. Introduction
Thank you for choosing the Generic HT123 Digital Multimeter. This automatic digital multimeter is designed for smart measurement, offering reliable and accurate readings for various electrical parameters. It features auto-ranging capabilities, non-contact voltage (NCV) detection, and a clear display, making it suitable for both professional and home use. Please read this manual thoroughly before operation to ensure safe and correct usage.

Figure 1: Generic HT123 Digital Multimeter and included test leads.
2. Safety Information
To prevent possible electrical shock, fire, or personal injury, please read all safety information before using the product.
- Always use the multimeter according to the instructions provided in this manual.
- Do not use the multimeter if it appears damaged or if the test leads are damaged.
- Do not apply more than the rated voltage, as marked on the multimeter, between the terminals or between any terminal and earth ground.
- Exercise extreme caution when working with voltages above 30V AC RMS, 42V peak, or 60V DC. These voltages pose a shock hazard.
- Keep fingers behind the finger guards on the test probes during use.
- Replace the batteries when the low battery indicator appears to ensure accurate readings.
- Do not operate the multimeter in explosive gas, vapor, or dust environments.
- Ensure the test leads are properly connected to the correct input jacks for the measurement being performed.
3. Package Contents
Verify that all items listed below are present and undamaged. If any item is missing or damaged, contact your retailer.
- 1 x Generic HT123 Digital Multimeter
- 1 x Pair of Test Leads (Red and Black)
- 2 x 1.5V AAA Batteries (included)
- 1 x User Manual (English)
4. Product Overview
The HT123 Digital Multimeter is designed for ease of use with its automatic identification and auto-ranging features.
4.1 Key Features
- Automatic Digital Multimeter with Smart Measurement
- Auto-Ranging Voltmeter
- Non-Contact Voltage (NCV) Tester
- Measures DC Voltage, AC Voltage, Resistance, and Continuity
- Data Hold function
- Backlit LCD Display for low-light conditions
- Low Battery Indication
- Automatic Power-off
4.2 Components

Figure 2: Front view of the HT123 Digital Multimeter, highlighting the display, function buttons, and input jacks.
The multimeter features a clear LCD display, function buttons for NCV, power, backlight, and mode selection, and input jacks for test leads.

Figure 3: Visual representation of the multimeter's core functions, including AC and DC voltages, continuity, resistance, data hold, non-contact voltage detection, and backlight.
5. Setup
5.1 Battery Installation
The HT123 Multimeter requires two 1.5V AAA batteries for operation. These are typically included in the package.
- Locate the battery compartment cover on the back of the multimeter.
- Use a screwdriver to open the battery compartment.
- Insert two 1.5V AAA batteries, observing the correct polarity (+ and -) as indicated inside the compartment.
- Replace the battery compartment cover and secure it with the screw.
5.2 Connecting Test Leads
The multimeter comes with a pair of red and black test leads.
- Insert the black test lead into the "COM" (Common) input jack.
- Insert the red test lead into the "INPUT" jack for voltage, resistance, and continuity measurements. This jack is typically marked with "MAX 600V CAT II".
6. Operating Instructions
The HT123 Multimeter features smart automatic identification, simplifying operation.
6.1 Power On/Off
- Press the Power button (red circle icon) to turn the multimeter on.
- Press and hold the Power button to turn the multimeter off.
- The multimeter will automatically power off after a period of inactivity to conserve battery life.
6.2 Automatic Measurement Mode
Upon powering on, the multimeter enters automatic measurement mode, indicated by "AUTO" on the display. In this mode, the multimeter intelligently identifies and measures AC voltage, DC voltage, resistance, and continuity without manual range selection.

Figure 4: The multimeter in automatic identification mode, ready for various measurements.
6.3 DC Voltage Measurement
The multimeter can measure DC voltage from 0.8V to 600V.
- Ensure the multimeter is in automatic mode.
- Connect the black test lead to the negative (-) terminal of the circuit and the red test lead to the positive (+) terminal.
- The DC voltage reading will appear on the display.
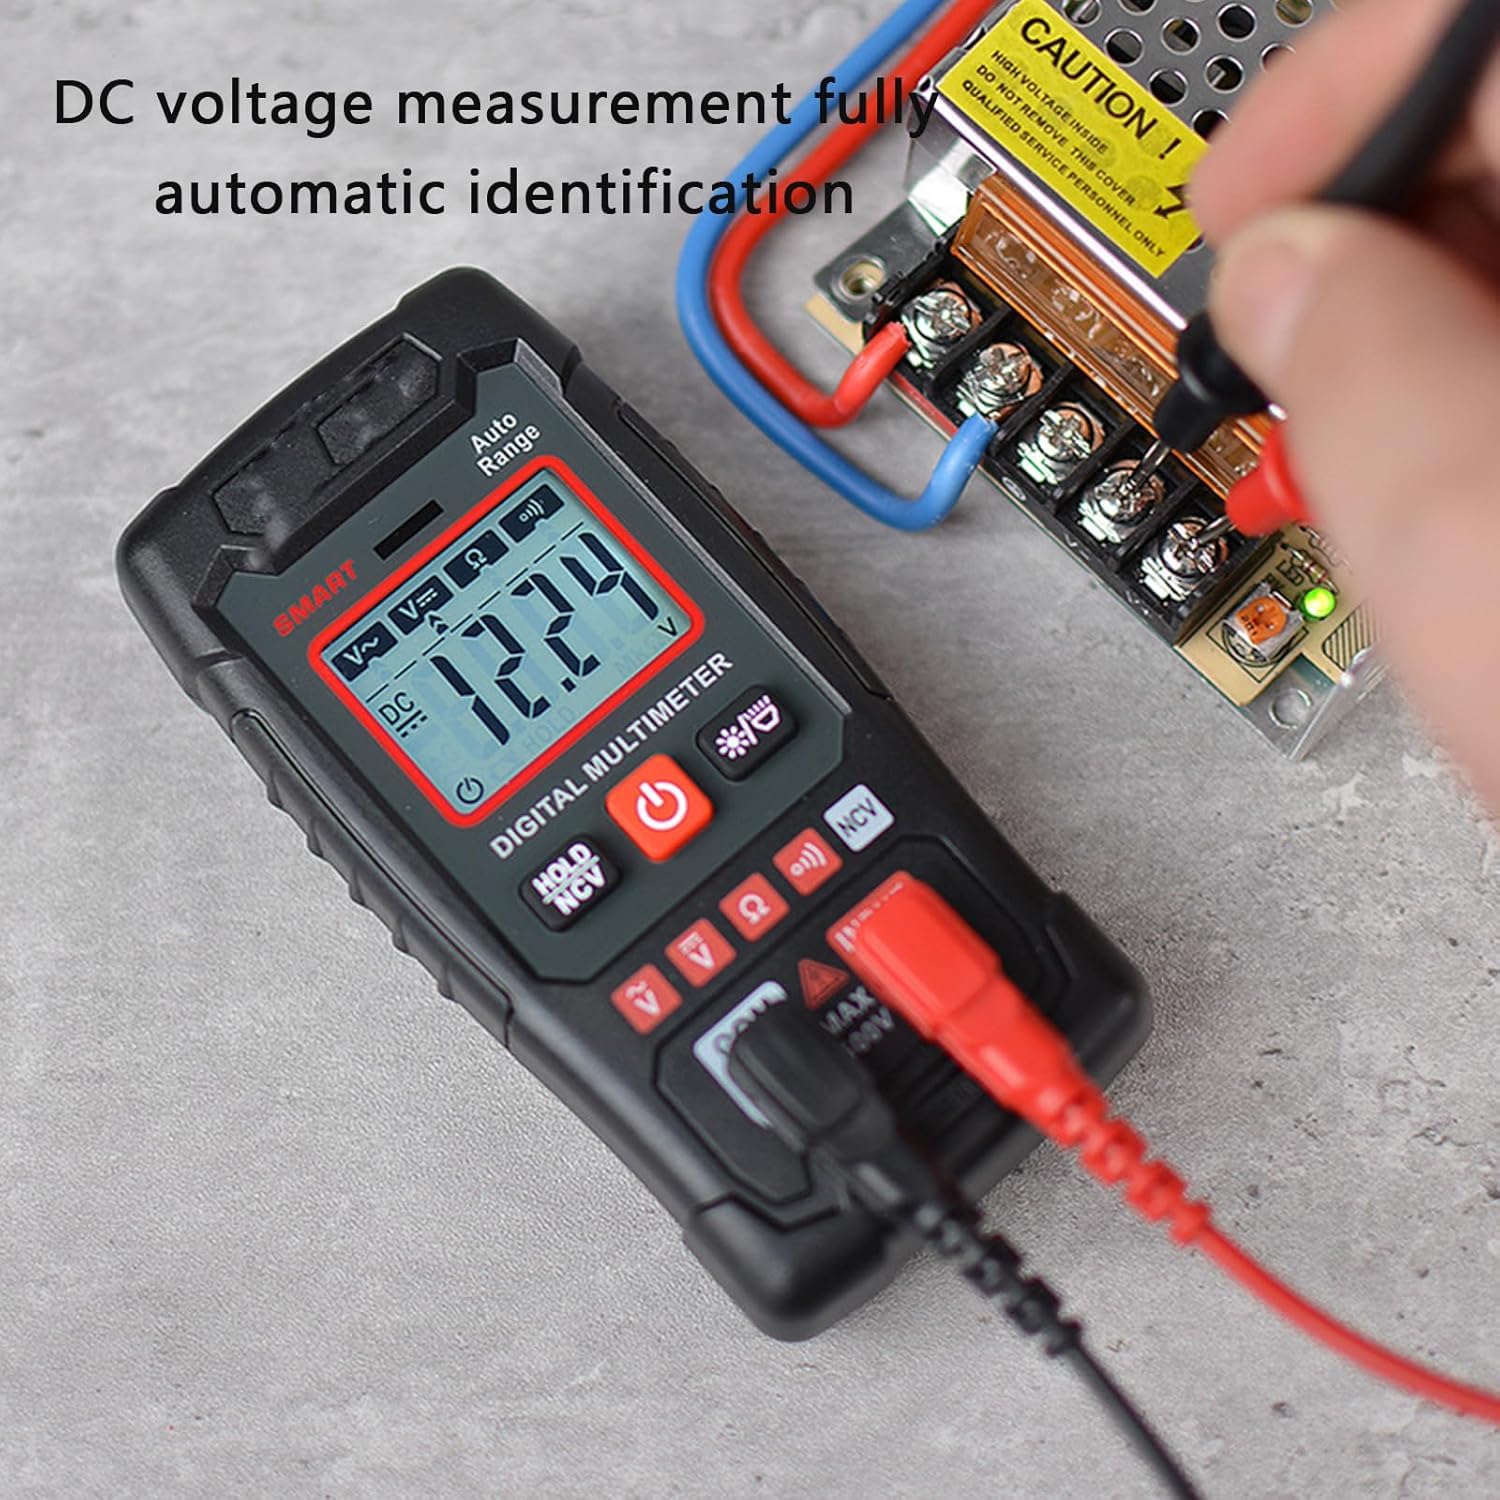
Figure 5: Measuring DC voltage on a circuit board. The display shows a DC voltage reading.
6.4 AC Voltage Measurement
The multimeter can measure AC voltage from 0.8V to 600V.
- Ensure the multimeter is in automatic mode.
- Connect the test leads across the AC voltage source.
- The AC voltage reading will appear on the display.

Figure 6: Measuring AC voltage from a wall outlet. The display shows an AC voltage reading.
6.5 Resistance Measurement
The multimeter can measure resistance up to 600kΩ.
- Ensure the multimeter is in automatic mode.
- Ensure the circuit or component under test is de-energized before measuring resistance.
- Connect the test leads across the component to be measured.
- The resistance reading will appear on the display.
6.6 Continuity Test
The continuity test checks for an open or closed circuit.
- Ensure the multimeter is in automatic mode.
- Ensure the circuit or component under test is de-energized.
- Connect the test leads across the circuit or component.
- If the circuit is continuous (low resistance), the multimeter will emit an audible beep.
6.7 Non-Contact Voltage (NCV) Detection
The NCV function allows for safe detection of AC voltage without direct contact.
- Press the NCV button (usually marked with "NCV" or a wave icon).
- Move the top of the multimeter near the AC power source (e.g., a live wire or outlet).
- If AC voltage is detected, the multimeter will sound an alarm and the display will indicate the presence of voltage.
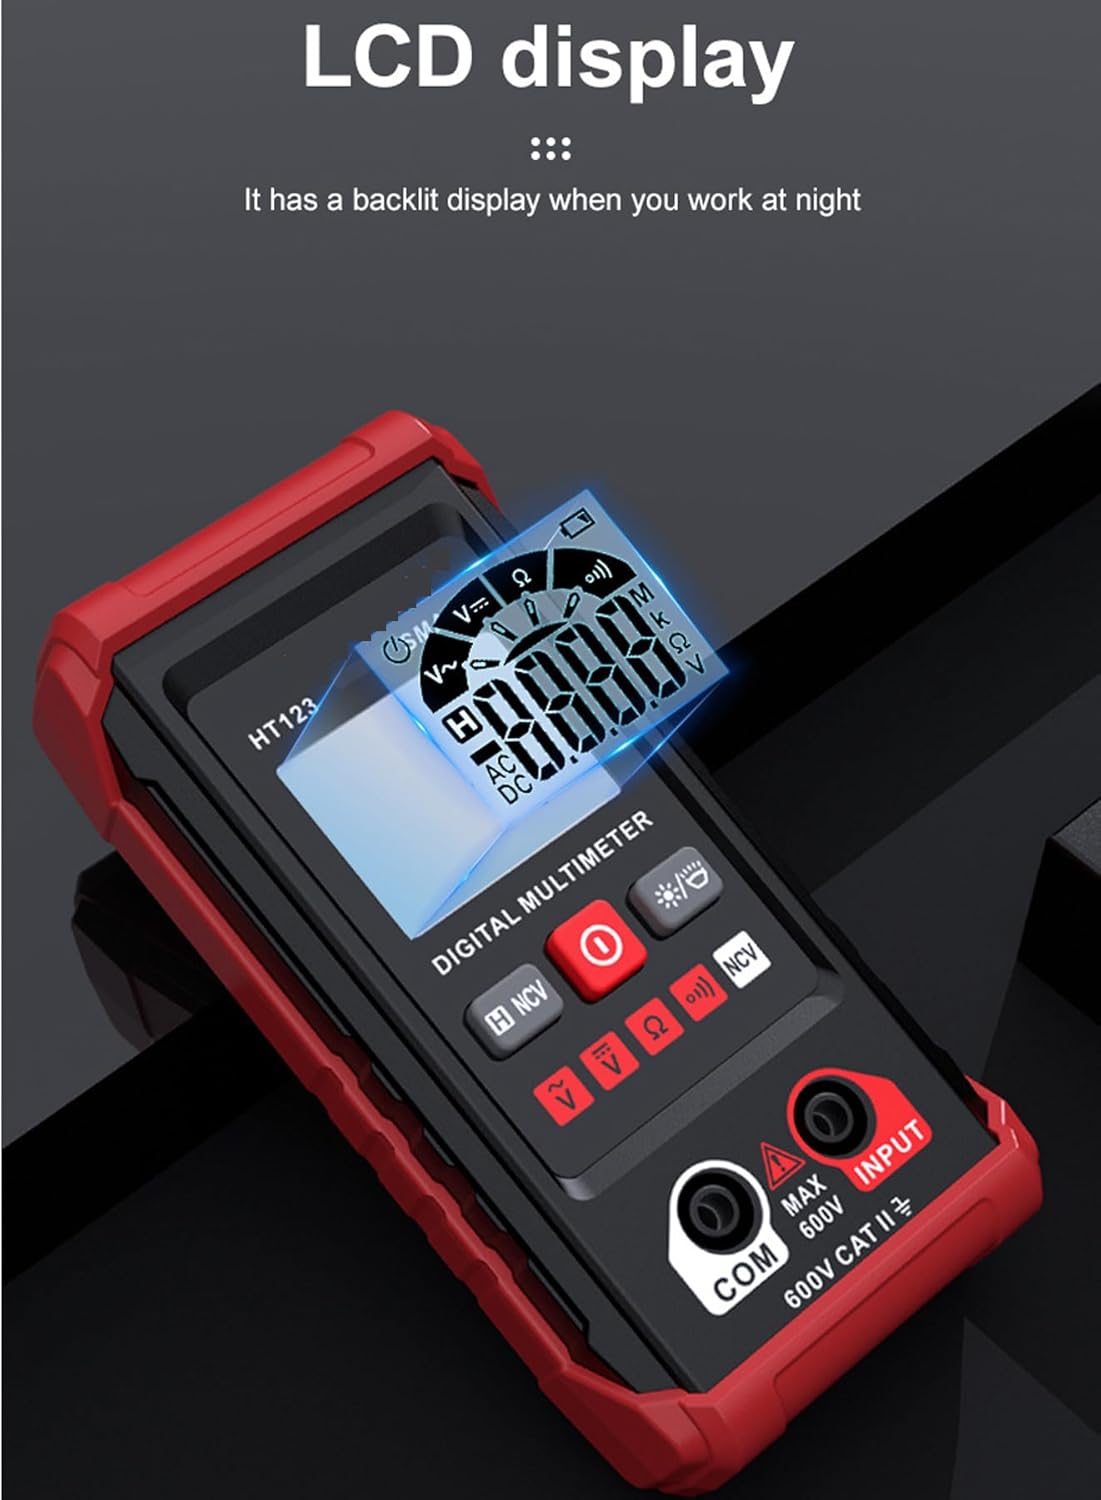
Figure 7: Using the NCV function to detect AC voltage near a wall outlet, indicated by an alarm and display notification.
6.8 Data Hold
Press the HOLD button (often combined with NCV or another function) to freeze the current reading on the display. Press it again to release the hold.
6.9 Backlight
Press the Backlight button (often marked with a light bulb icon) to turn on the display backlight for improved visibility in dark environments. Press it again to turn off the backlight.
Figure 8: The multimeter's LCD display with backlight activated, enhancing readability in low-light conditions.
7. Specifications
| Parameter | Value |
|---|---|
| DC Voltage Range | 0.8V - 600V (Max 610V) |
| AC Voltage Range | 0.8V - 600V (Max 610V) |
| Resistance Range | Up to 600kΩ |
| Counts | 2,000 counts |
| NCV | Yes |
| Display with Gear Display | Yes |
| Data Hold | Yes |
| Backlight | Yes |
| Low Battery Indication | Yes |
| Auto Power-off | Yes |
| Material | ABS |
| Power Supply | 2 x 1.5V AAA Batteries |
| Item Size | 122 x 61 x 29mm (4.81 x 2.40 x 1.14in) |
8. Maintenance
8.1 Cleaning
Wipe the case with a damp cloth and mild detergent. Do not use abrasives or solvents.
8.2 Battery Replacement
When the low battery indicator appears on the display, replace the batteries immediately to ensure accurate measurements. Refer to Section 5.1 for battery installation instructions.
9. Troubleshooting
| Problem | Possible Cause | Solution |
|---|---|---|
| Multimeter does not power on. | Dead or incorrectly installed batteries. | Check battery polarity or replace batteries. |
| Inaccurate readings. | Low battery, incorrect connection, or exceeding measurement range. | Replace batteries, ensure correct test lead connection, verify measurement is within specifications. |
| No continuity beep. | Open circuit or component. | Check the circuit for breaks or the component for damage. |
| NCV not detecting voltage. | Voltage too low or NCV function not activated. | Ensure NCV mode is active and the voltage source is strong enough. |
10. Warranty and Support
This product is covered by a standard manufacturer's warranty against defects in materials and workmanship. For specific warranty details, please refer to the documentation included with your purchase or contact your retailer.
For technical support or inquiries, please contact the customer service department of your retailer or the manufacturer.