
Zupapa 10X17FT Rectangle
Zupapa Rectangle Trampoline User Manual
Model: 10X17FT Rectangle
Brand: Zupapa
Product Overview
The Zupapa Rectangle Trampoline is designed for both kids and adults, offering a robust and safe platform for recreational and gymnastic activities. It features a high weight capacity and enhanced stability for a secure bouncing experience. This manual provides essential information for setup, operation, maintenance, and troubleshooting to ensure safe and enjoyable use of your trampoline.

Figure 1: Zupapa 10x17FT Rectangle Trampoline with safety enclosure and ladder.
Key Features
- Patented No-Gap Design: The safety net is seamlessly sewn with the jumping mat, eliminating dangerous gaps and protecting users from spring injuries. This design also simplifies assembly by removing the need for tedious net-securing ropes.
- High Weight Capacity: Constructed with top-tier Q195 steel, featuring a large 51mm diameter frame and a thick 2.5mm wall. This provides a static load capacity of 1500 LBS and a dynamic load capacity of 450 LBS.
- Enhanced Stability Design: An innovative four-leg side-by-side support system ensures superior middle support and stability across the entire jumping surface, preventing long sides from caving in.
- Longer Net Poles: Netting poles extend to the ground at each corner, augmenting net stability and enhancing overall safety.
- Net with Double Zippers: Features dual-zipper entry systems on both long and short sides for convenient access.
- Certified Safety: CPC certified in the USA, compliant with strict CPSIA guidelines, and designed to meet ASTM F381-16 standards.

Figure 2: Close-up of the patented No-Gap Design, showing the safety net sewn directly to the jumping mat.
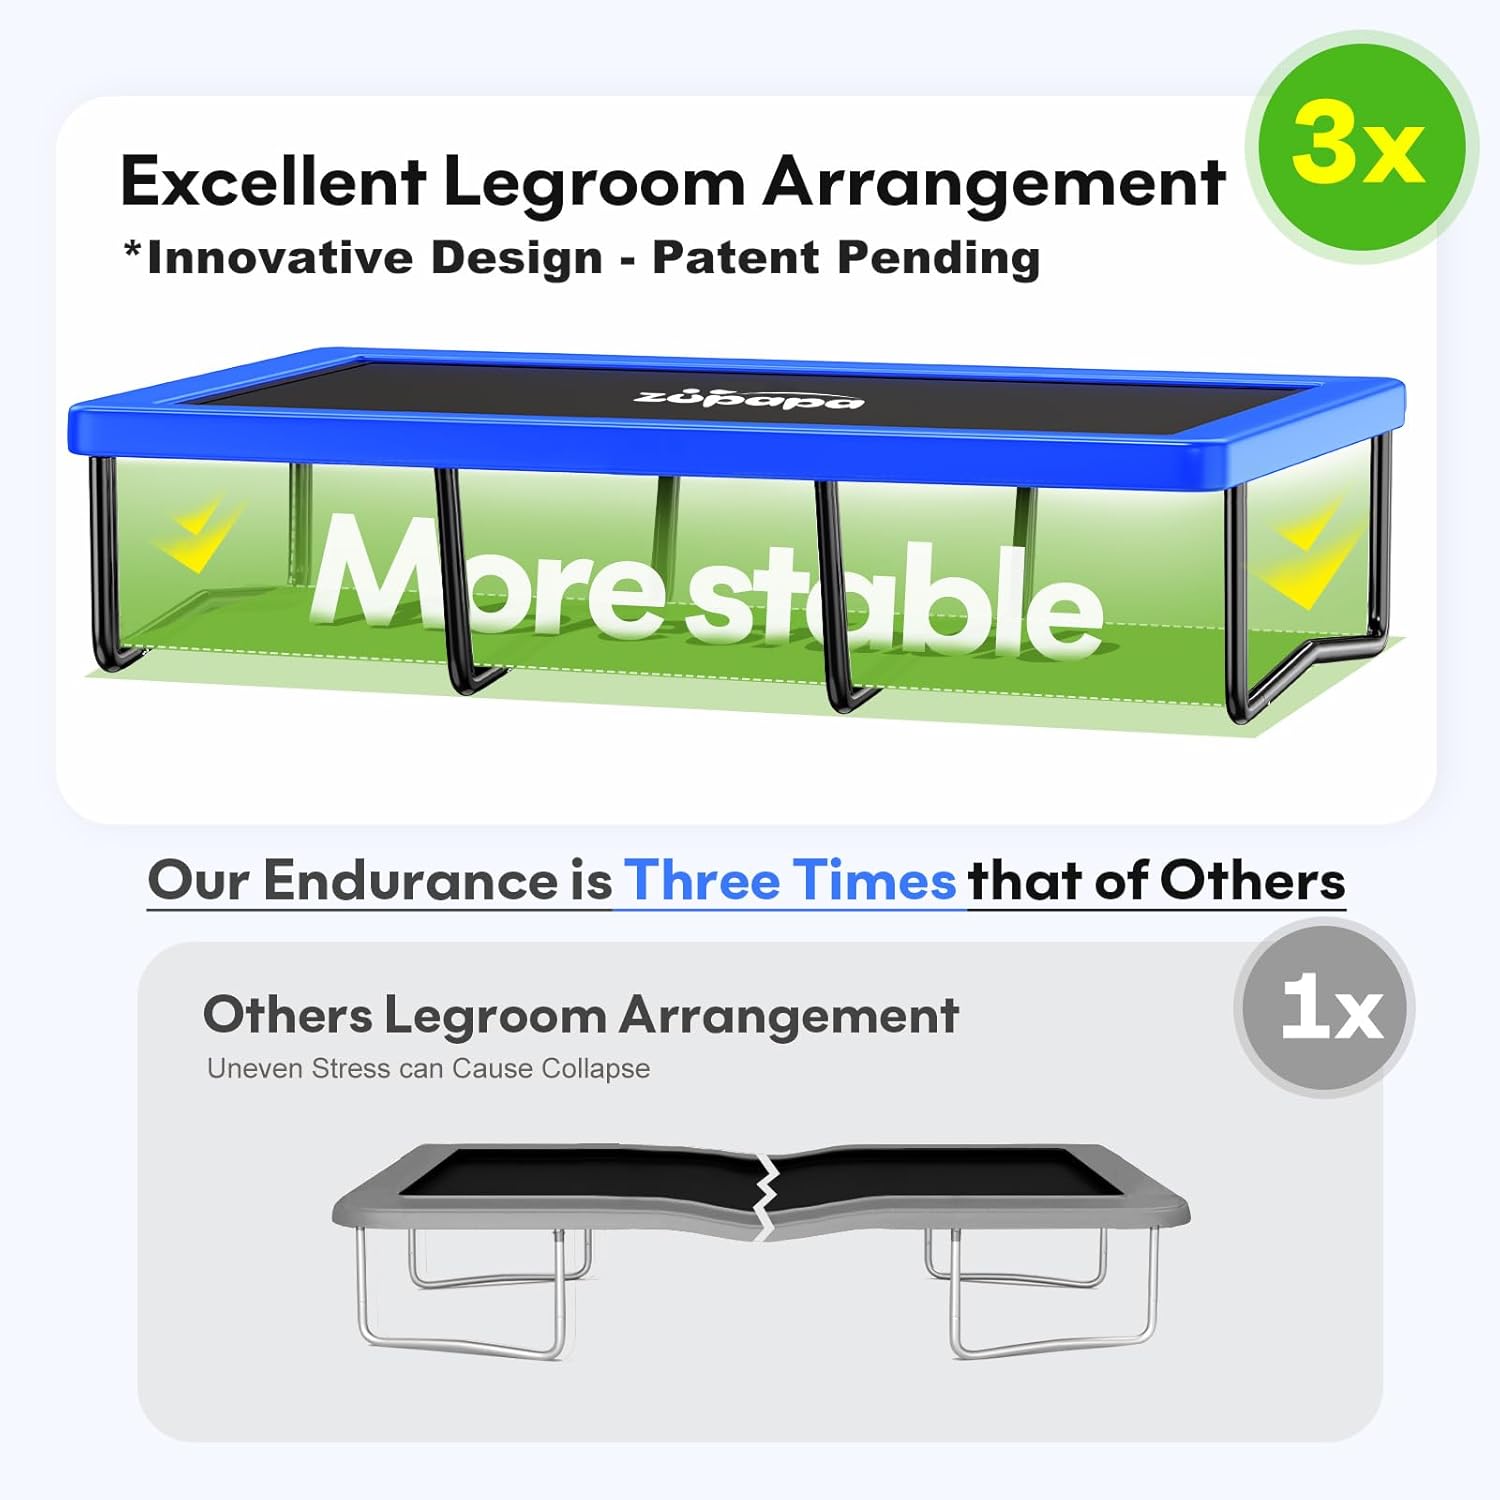
Figure 3: Illustration of the innovative four-leg side-by-side support system for enhanced stability.
Setup Instructions
Follow these steps carefully for the safe and correct assembly of your Zupapa Rectangle Trampoline. It is recommended to have at least two adults for assembly.
- Unboxing and Inventory: Carefully unbox all components. Verify all parts are present against the packing list provided.
- Frame Assembly: Connect the steel frame sections to form the rectangular base. Ensure all connections are secure.
- Spring Attachment: Attach the springs to the jumping mat and the frame. Use the provided spring tool for easier and safer attachment. Ensure springs are evenly distributed and securely hooked.
- Safety Pad Installation: Place the 15mm thick spring pad over the springs and frame, ensuring it fully covers all springs for complete protection. Secure it using the attached straps.
- Net and Mat Connection: Due to the patented No-Gap design, the safety net is already sewn to the jumping mat, simplifying this step.
- Net Pole Assembly: Assemble the longer net poles. These poles are designed to reach the ground for increased stability.
- Net Pole Attachment: Attach the assembled net poles to the trampoline frame using the provided hardware. Ensure they are securely fastened and upright.
- Ladder Attachment: Secure the ladder to the trampoline frame for safe entry and exit.
- Weather-Proof Mat Placement: If included, place the weather-proof mat at the base of the ladder for added protection and cleanliness.
Video 1: Official Zupapa Trampoline Assembly Guide. This video demonstrates the step-by-step process of setting up your trampoline, including frame assembly, spring attachment, and safety net installation.

Figure 4: Comparison showing the integrated net assembly of the Zupapa trampoline versus traditional methods requiring manual rope lacing.

Figure 5: Image illustrating the longer net poles that extend to the ground, providing enhanced stability for the safety enclosure.
Operating Instructions
To ensure a safe and enjoyable experience, please adhere to the following operating guidelines:
- Supervision: Always ensure adult supervision when children are using the trampoline.
- One Jumper at a Time: For optimal safety and to prevent collisions, allow only one person to jump on the trampoline at a time.
- Weight Limits: Do not exceed the dynamic load capacity of 450 LBS. The static load capacity is 1500 LBS.
- Clear Area: Ensure the area around the trampoline is clear of obstacles, sharp objects, or other hazards.
- Proper Entry/Exit: Always use the provided ladder for safe entry and exit. Do not jump on or off the trampoline.
- No Stunts Without Training: Avoid performing complex acrobatic stunts without proper training and supervision.
- Weather Conditions: Do not use the trampoline during strong winds, rain, or thunderstorms. Secure the trampoline during adverse weather.

Figure 6: Children seated on the trampoline, demonstrating its spacious jumping surface and high static load capacity.

Figure 7: A person actively jumping on the trampoline, highlighting the ample space for dynamic movement within the safety enclosure.
Maintenance
Regular maintenance will prolong the life of your Zupapa trampoline and ensure continued safety.
- Regular Inspection: Periodically inspect all components, including the frame, springs, jumping mat, safety pad, and enclosure net, for any signs of wear, damage, or loose connections.
- Cleaning: Clean the jumping mat and safety pad with mild soap and water. Avoid harsh chemicals that could damage the materials.
- Spring and Frame Check: Ensure all springs are securely attached and not stretched or broken. Check the frame for any rust or structural damage. The hot-dip galvanized steel frame is designed for enhanced rust resistance.
- Net Integrity: Inspect the enclosure net for tears or holes. The superfine mesh is tear-resistant, but regular checks are important.
- Winter Storage: In areas with harsh winters, it is recommended to disassemble and store the trampoline indoors to protect it from extreme weather conditions.

Figure 8: Close-up of the 15mm thick spring pad, designed to fully cover the springs for user protection.

Figure 9: Detail of the superfine mesh enclosure net, highlighting its tear-resistant quality for safety.
Troubleshooting
If you encounter any issues with your Zupapa trampoline, please refer to the following common troubleshooting tips:
- Reduced Bounce: Ensure all springs are properly attached and not stretched. Check the jumping mat for any damage or excessive slack.
- Frame Instability: Verify that all frame connections are securely tightened. Ensure the trampoline is placed on a flat, level surface.
- Net Sagging/Damage: Check the net poles for proper assembly and attachment. Inspect the net for any tears or holes that may require repair or replacement.
- Noise During Use: Lubricate spring connections if squeaking occurs. Ensure all bolts and connections are tight.
For issues not covered here, please contact Zupapa customer support.
Specifications
| Feature | Detail |
|---|---|
| Model Name | zupapa trampoline (10X17FT Rectangle) |
| Brand | Zupapa |
| Product Dimensions | 204"L x 120"W x 108"H (17FT L x 10FT W x 9FT H) |
| Shape | Rectangular |
| Frame Material | Hot-dip Galvanized Steel (Q195 Alloy Steel) |
| Frame Size | 51mm diameter, 2.5mm wall thickness |
| Pad Type | PVC+PE+Foam (15mm thick) |
| Maximum Static Weight Recommendation | 1500 Pounds |
| Maximum Dynamic Weight Recommendation | 450 Pounds |
| Color | Blue |
| Certifications | CPC, CPSIA, ASTM F381-16 |

Figure 10: Diagram illustrating the dimensions of the 8x14FT, 9x15FT, and 10x17FT Zupapa Rectangle Trampoline models.
Warranty and Support
Zupapa offers a comprehensive guarantee program for your peace of mind:
- Frame: 10-year guarantee.
- Jumping Mat, Safety Pad, Enclosure Net, and Springs: 2-year guarantee.
- Other Parts: Complimentary replacements for any other parts.
For any inquiries, technical assistance, or warranty claims, please contact Zupapa customer support. You can typically find contact information on the seller's page or through your purchase platform. The seller for this product is Brandline.

Figure 11: Visual representation of Zupapa's warranty coverage for various trampoline components.

Figure 12: Image indicating the availability of 24/7 customer service from Brandline for Zupapa products.
Related documents10X17FT Rectangle


Ask a question about this manual
Ask about setup, troubleshooting, compatibility, parts, safety, or missing instructions. Manuals+ will review the question and use this page’s manual context to help answer it.