1. Product Overview
This manual provides instructions for the ToiCottage ZCY1810RX 7-pin control box and its accompanying 2.4GHz Bluetooth remote control. This system is designed as a replacement part for 6V and 12V kids' ride-on toys, functioning as the receiver and motor controller.

Image 1.1: The ZCY1810RX control box, showing the model number and the 7-pin white socket connector.
2. What's in the Box
The package typically includes the following components:
- ZCY1810RX Control Box (Receiver/Motor Controller)
- 2.4GHz Bluetooth Remote Control
3. Compatibility
This control box is specifically designed for ride-on toys that utilize a 7-pin white socket for their control system. It is crucial to verify that your existing control box also uses a 7-pin white socket. If your current socket is 5-pin, this product is not compatible.
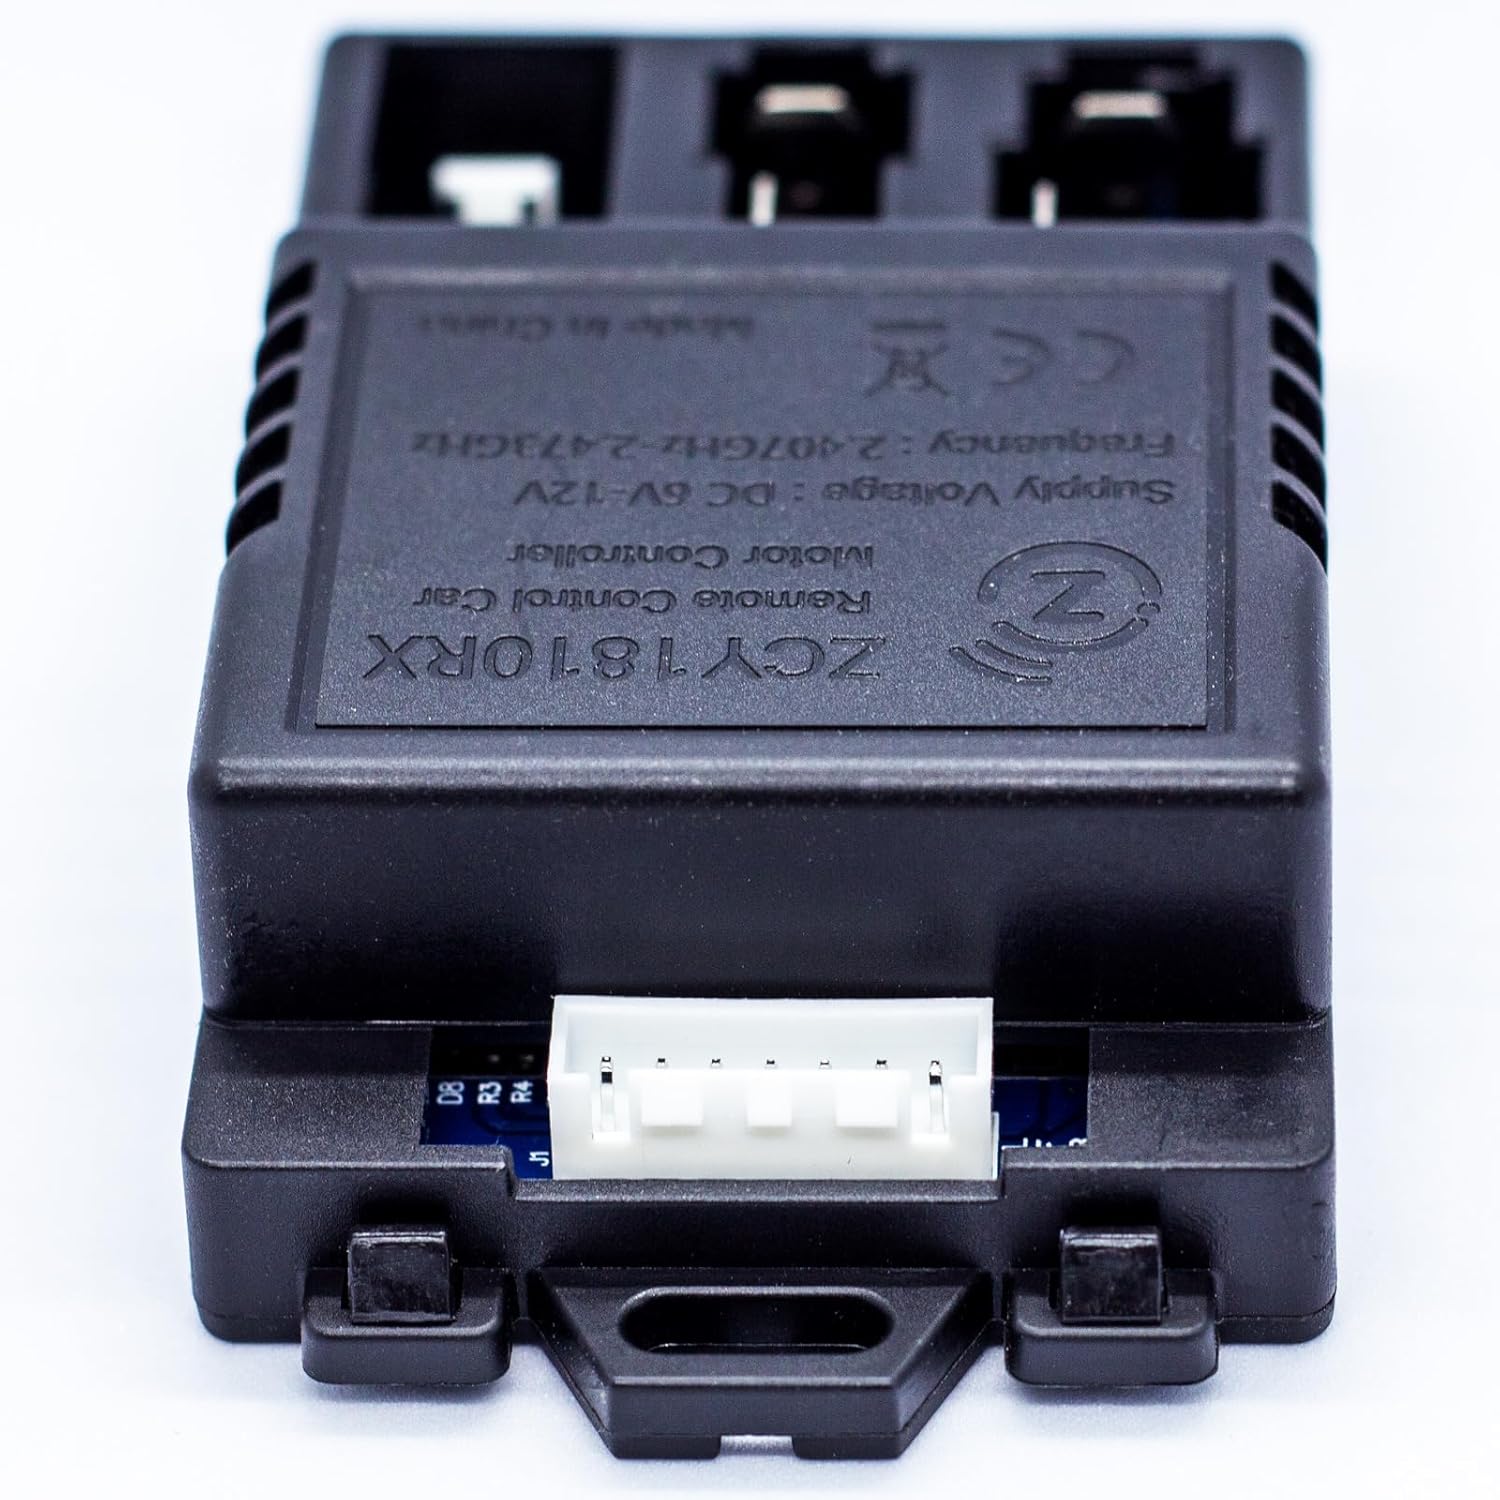
Image 3.1: Detailed view of the 7-pin white socket on the ZCY1810RX control box.
For the remote control, it is recommended to choose a replacement remote with the same appearance as your original to ensure proper functionality. Remote controls with different appearances may not be compatible.

Image 3.2: Example of a compatible remote control, emphasizing the importance of matching appearance.
4. Setup
4.1 Control Box Installation
- Ensure the ride-on toy's power is turned off and disconnected from any power source.
- Locate the existing control box in your ride-on toy.
- Carefully disconnect all wires from the old control box. Note the orientation and connection points if possible.
- Connect the wires from the ride-on toy to the new ZCY1810RX control box, ensuring the 7-pin white socket is correctly inserted.
- Secure the new control box in place within the toy.
4.2 Remote Control Battery Installation
The remote controller requires two AAA (1.5V) batteries.
- Locate the battery compartment on the back of the remote control.
- Open the battery compartment cover.
- Insert two AAA (1.5V) batteries, ensuring correct polarity (+ and -).
- Close the battery compartment cover securely.

Image 4.1: Packaging detail showing battery installation instructions for the remote control.
5. Operating Instructions
5.1 Pairing the Remote Control
After replacing the control box and installing batteries in the remote, you must pair the remote control with the ride-on toy.
- Load two AAA batteries into the remote controller.
- Turn off the power switch on the ride-on vehicle.
- Hold down the "▲" (Forward) and "▼" (Backward) keys on the remote control simultaneously for 3 seconds to initiate the pairing process. The red indicator light on the remote will start flashing.
- While the remote's indicator light is flashing, turn on the vehicle's power switch.
- If pairing is successful, the red indicator light on the remote will stop flashing and remain solid.
5.2 Remote Control Functions

Image 5.1: The 2.4GHz Bluetooth remote control.
The remote control features several buttons for operating the ride-on toy:
- "S" button: Sets the speed. 1 LED lit indicates low speed, 2 LEDs lit indicates medium speed, 3 LEDs lit indicates high speed.
- "▲" button: Moves the vehicle forward.
- "▼" button: Moves the vehicle backward.
- Left arrow button: Turns the vehicle left.
- Right arrow button: Turns the vehicle right.
- "P" button: Holds the brake. All indicator LEDs will flicker when pressed.
6. Troubleshooting
- Vehicle not responding to remote: Ensure the remote control batteries are fresh and correctly inserted. Re-attempt the pairing process (Section 5.1). Check all connections to the control box.
- Intermittent operation: Check for loose connections to the control box. Ensure the remote control is within range and has a clear line of sight to the vehicle. Replace remote batteries if they are low.
- Vehicle not powering on: Verify the vehicle's main power switch is on. Check the vehicle's battery charge. Ensure the control box is correctly installed and all wires are securely connected.
7. Specifications
| Feature | Detail |
|---|---|
| Model | ZCY1810RX |
| Socket Type | 7-pin White Socket |
| Frequency | 2.4GHz Bluetooth |
| Supply Voltage | DC 6V-12V |
| Product Dimensions | 0.5 x 1.5 x 2 inches (Control Box) |
| Item Weight | 0.48 ounces |
| Manufacturer Recommended Age | 20 months - 5 years |
8. Safety Information
- WARNING! Not for children under 3 years. Contains small parts which pose a choking hazard.
- Always supervise children when they are operating ride-on toys.
- Load two AAA (1.5V) batteries into the remote control according to the diagram, ensuring correct polarity.
- Non-rechargeable batteries are not to be recharged.
- Do not mix different types of batteries or new and used batteries.
- Batteries are to be inserted with the correct polarity.
- Exhausted batteries are to be removed from the toy.
- The supply terminals are not to be short-circuited.
- The packaging must be retained as it contains important information.
9. Warranty and Support
For warranty information or technical support, please refer to the purchase documentation or contact the seller directly through the platform where the product was purchased. Keep your proof of purchase for any warranty claims.