Introduction
This manual provides instructions for the PZL Replacement Remote Control, designed for use with EVPAD 5, 5P, 5S, 6P, 6S, and DZ8032-008 set-top boxes. This remote control is engineered for immediate use without complex programming or pairing, offering a straightforward solution for your entertainment system.
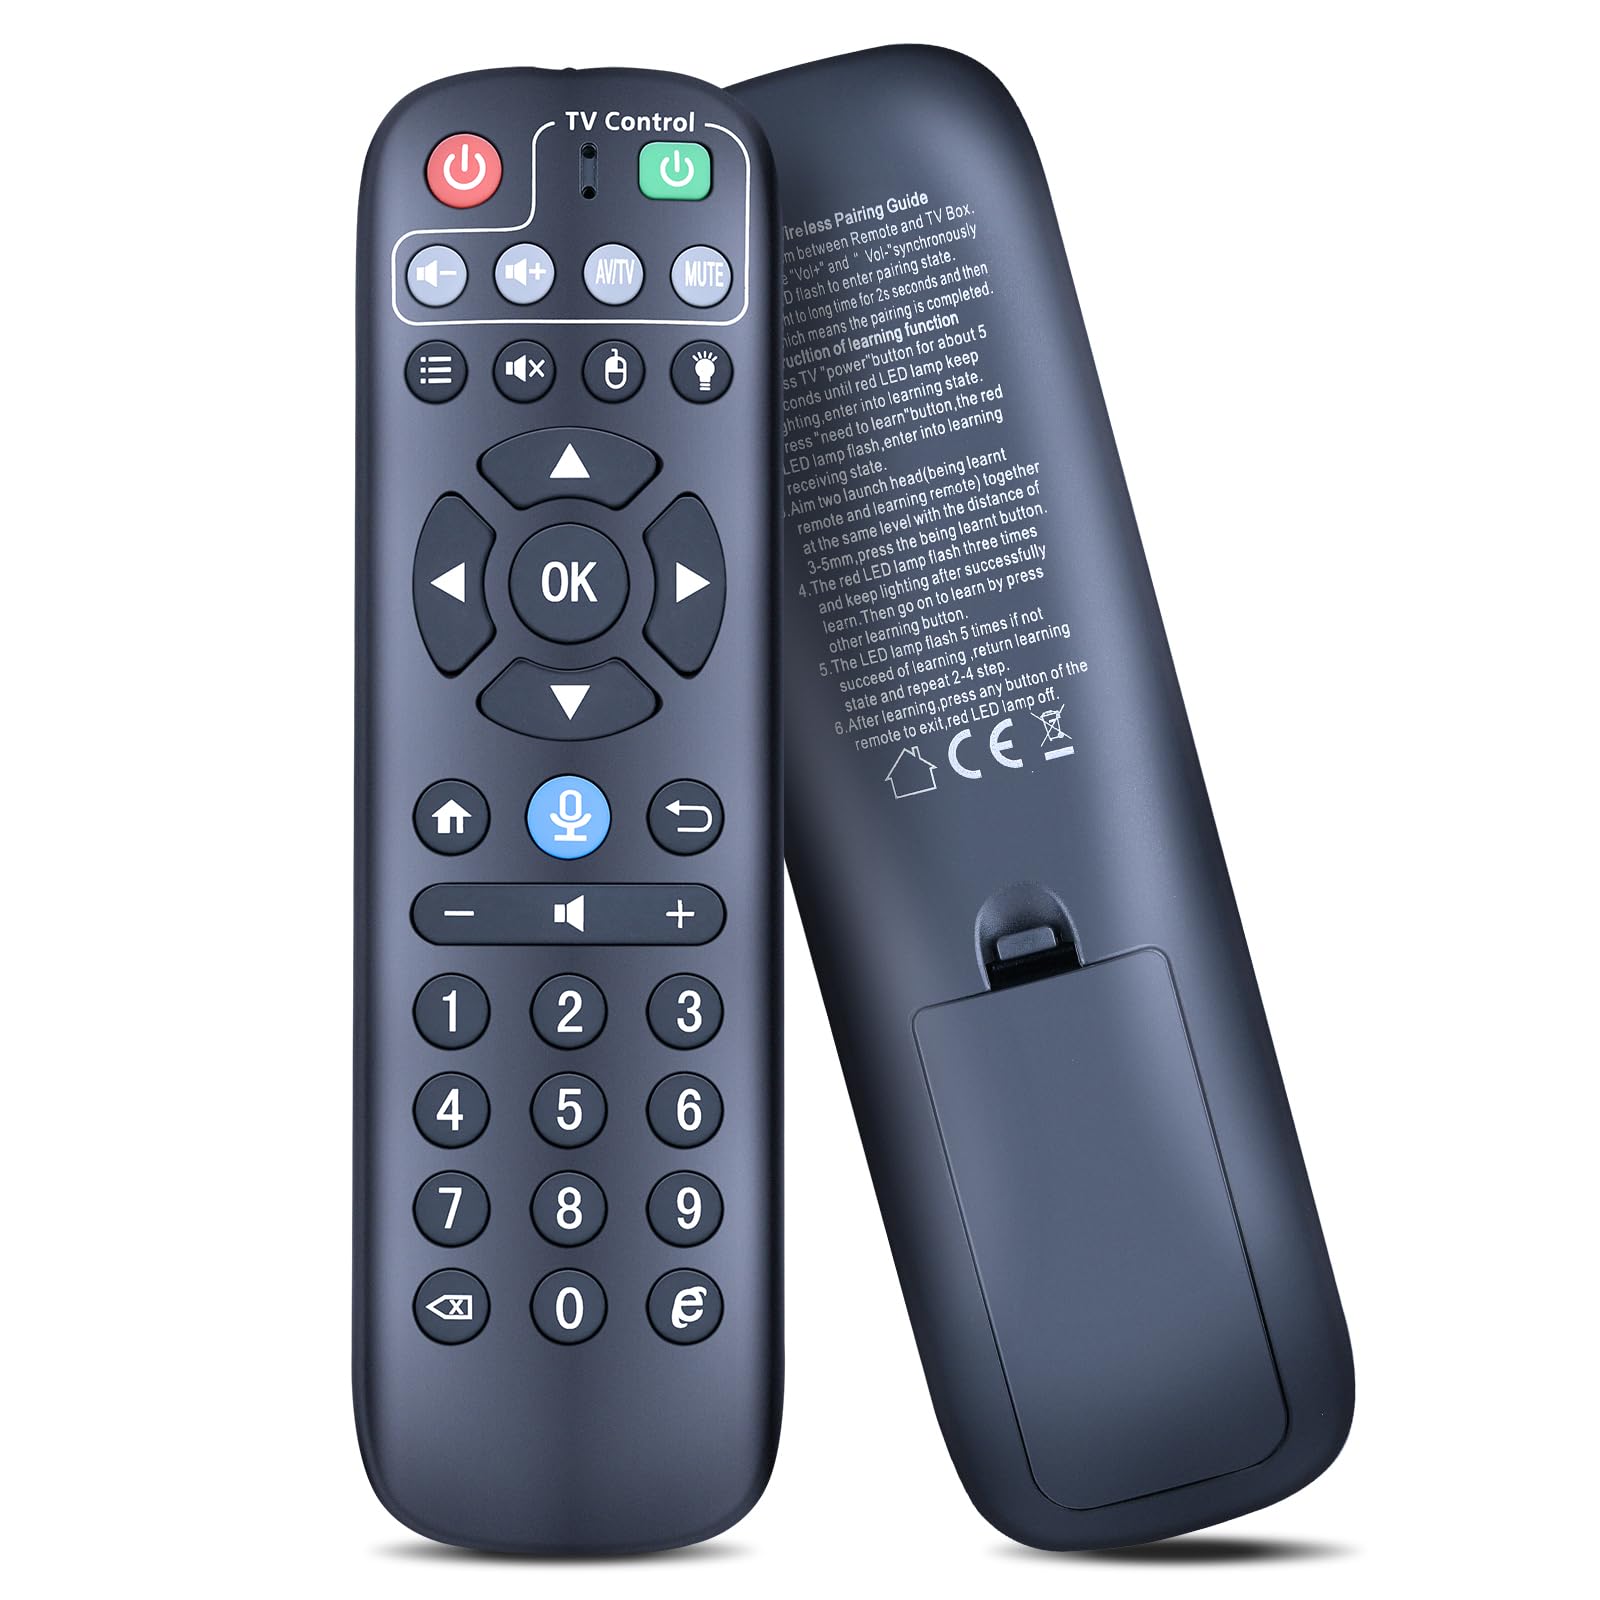
Image: The PZL Replacement Remote Control, showcasing its ergonomic design and button layout.
Setup
Battery Installation
The remote control requires two (2) AAA 1.5V batteries (not included). Follow these steps to install them:
- Locate the battery compartment on the back of the remote control.
- Slide open the battery compartment cover.
- Insert two AAA batteries, ensuring the positive (+) and negative (-) terminals align correctly with the markings inside the compartment.
- Close the battery compartment cover securely.

Image: Illustration showing the battery compartment and correct insertion of two AAA batteries.
Initial Use
This replacement remote control is designed to work immediately out of the box with compatible EVPAD set-top boxes. No programming or pairing is typically required. Simply insert the batteries, and the remote should function.

Image: The remote control next to a television, indicating that no programming or pairing is needed.
2.4G Wireless Pairing Guide (If Applicable)
While primarily an IR remote, some advanced functions may utilize 2.4G wireless technology. If specific features require 2.4G pairing, follow these steps:
- Ensure the remote control is within 20cm (approximately 8 inches) of your TV Box.
- Press the "Vol+" and "Vol-" buttons simultaneously for 3 seconds.
- The LED indicator light will illuminate for 2 seconds and then turn off, signifying successful pairing. If pairing fails, repeat steps 1-3.
IR Learning Guide (For Custom Functions)
This remote supports IR learning, allowing you to program specific functions from another remote control:
- Press the 'TV' 'power' button for approximately 5 seconds until the red LED lamp remains lit, indicating entry into learning mode.
- Press the button on the PZL remote that you wish to program. The red LED lamp will flash, entering learning receiving state.
- Align the infrared emitters of both the original remote and the PZL remote, keeping them 1-3cm apart. Press the corresponding button on the original remote that you want to learn.
- The red LED lamp will flash three times and then remain lit if learning is successful. You can then proceed to learn other buttons.
- If learning is unsuccessful, the LED lamp will flash 5 times. Return to learning state and repeat steps 2-4.
- After completing all learning, press any button on the PZL remote to exit learning mode; the red LED lamp will turn off.
Operating Instructions
The remote control features an ergonomic design and responsive buttons for comfortable and efficient operation. It provides precise control over distances of up to 12 meters (40 feet).

Image: The remote control with callouts indicating 'NO Need to Set Up', 'Soft Plastic Button', and 'ABS Material'.
Button Functions
Familiarize yourself with the primary functions of the remote control buttons:
- Power Button (Red): Turns the set-top box on or off.
- TV Control Power Button (Green): Controls the power of your television (if programmed via IR learning).
- Volume Up/Down (+/-): Adjusts the audio volume.
- Mute: Mutes or unmutes the audio.
- AV/TV: Switches between AV and TV input modes.
- Navigation Pad (Up, Down, Left, Right, OK): Navigates menus and confirms selections.
- Home Button: Returns to the main menu or home screen.
- Microphone Button: Activates voice control features (if supported by your set-top box).
- Back/Return Button: Goes back to the previous screen or menu.
- Number Pad (0-9): Direct channel input or numerical selections.
- Menu/List Button: Accesses the main menu or channel list.
- Mouse/Cursor Button: Activates or deactivates mouse pointer mode (if supported).
- Light Bulb Button: May control backlight or other specific functions.

Image: A hand holding the remote control, illustrating its effective range and precise control.
Maintenance
Cleaning
To maintain the remote control's appearance and functionality, wipe it regularly with a soft, dry cloth. Avoid using abrasive cleaners, solvents, or chemical sprays, as these can damage the surface or internal components.
Battery Replacement
Replace batteries when the remote control's responsiveness decreases or it stops functioning. Refer to the "Battery Installation" section under Setup for instructions.
Troubleshooting
If you encounter issues with your remote control, consider the following:
- Remote Not Responding:
- Check if the batteries are inserted correctly and have sufficient charge. Replace them if necessary.
- Ensure there are no obstructions between the remote control and the set-top box's IR receiver.
- Confirm you are within the operational range (up to 12 meters / 40 feet).
- Specific Functions Not Working:
- If a function was programmed via IR learning, re-attempt the learning process.
- For 2.4G wireless functions, ensure the remote is properly paired as per the "2.4G Wireless Pairing Guide."
- Compatibility Issues:
- Verify that your EVPAD set-top box model is listed as compatible (5, 5P, 5S, 6P, 6S, DZ8032-008).
Specifications
| Brand | PZL |
| Model Number | B0D81RF7PZ |
| Compatible Devices | EVPAD Set-top Box (Models: 5, 5P, 5S, 6P, 6S, DZ8032-008) |
| Connectivity Technology | Infrared (IR), 2.4G Wireless (for specific functions) |
| Controller Type | Button Control |
| Maximum Range | 12 meters (40 feet) |
| Power Source | 2 x AAA 1.5V Batteries (not included) |
| Material | ABS |
| Color | Black |

Image: Side and back view of the remote control, showing its dimensions and the battery compartment.
Support
PZL is committed to providing quality products and professional after-sales service. If you have any questions regarding your order, product compatibility, or require assistance with your remote control, please do not hesitate to contact us. We aim to respond to inquiries within 12 hours on weekdays.
If your specific EVPAD model is not explicitly listed as compatible, please contact us before ordering so we can verify compatibility for you.