1. Introduction
This manual provides comprehensive instructions for the installation, operation, and maintenance of your SMARTSTANDARD Bifold Barn Door. This bi-fold door system is designed to offer a space-saving solution for various living areas, including bedrooms, laundry rooms, closets, pantries, studies, living rooms, and kitchens.
The door panels are constructed from primed MDF, ensuring a flat, smooth, and sturdy surface. They are also equipped with waterproof and scratch-resistant features for enhanced durability. The accompanying hardware kit is made from heavy-duty black steel, providing robustness, wear resistance, and corrosion resistance.
2. Safety Information
- Always wear appropriate safety gear, including gloves and eye protection, during installation.
- Ensure the installation surface (wall) is structurally sound and capable of supporting the door's weight.
- Keep children and pets away from the installation area.
- Handle door panels and hardware carefully to prevent injury or damage.
- Do not modify the product or use non-approved parts, as this may void the warranty and compromise safety.
- If you are unsure about any step, consult a professional or contact customer support.
3. Package Contents
Verify that all components listed below are present and undamaged before beginning installation.
- Finished MDF Bifold Barn Doors (30''x84'')
- 2.83FT Track Kit
- Handle
- Fixed Roller
- Fixed Roller Lock Bracket (x2)
- Bottom Pivot Plate & Sleeve
- Butt Hinges (x5)
- Anti-collision strip
- All necessary hardware for assembly
- Installation Instructions Manual
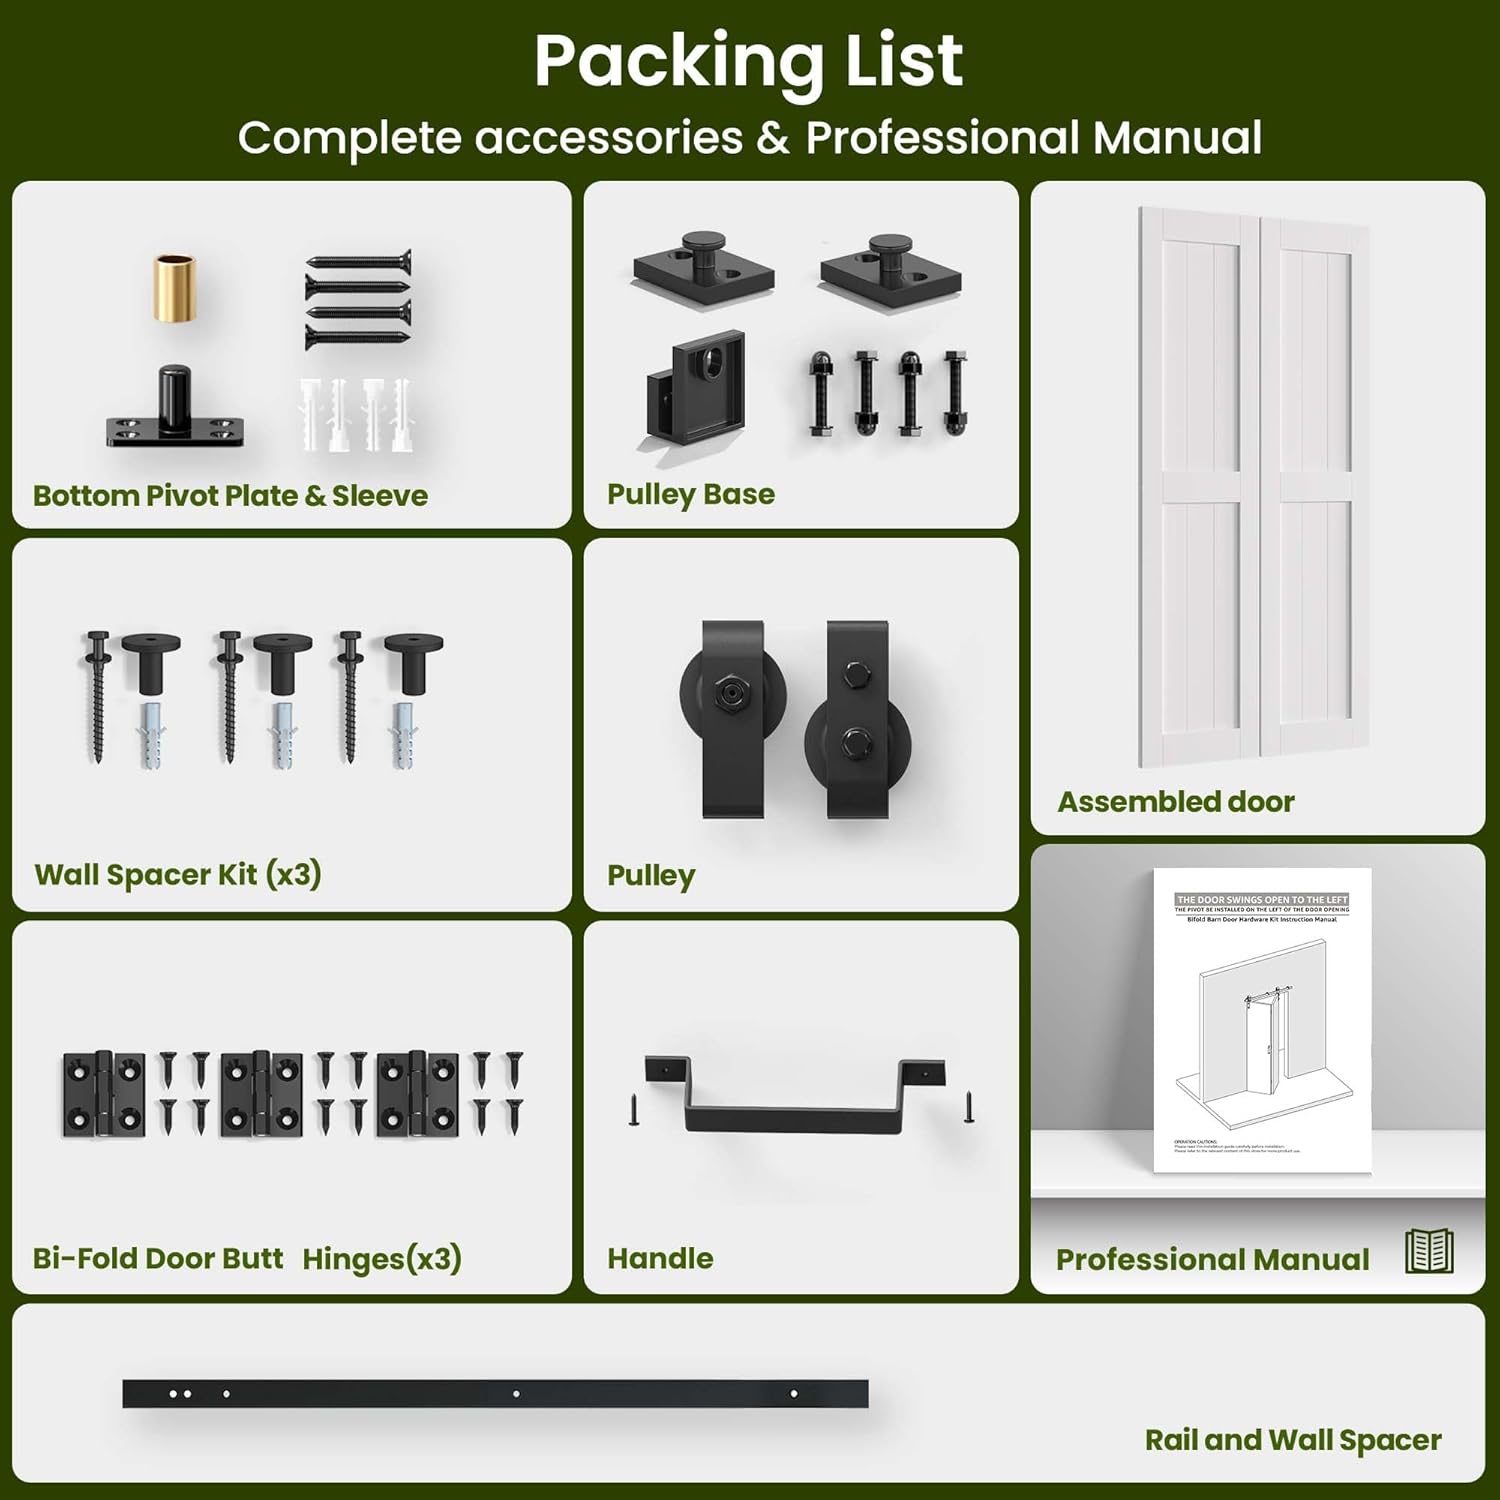
Figure 3.1: Complete list of accessories and hardware included in the package.
4. Specifications
| Feature | Detail |
|---|---|
| Brand | SMARTSTANDARD |
| Model Number | M-BDM-HB2-TKJ-WH |
| Door Panel Size | 30"W x 84"H (each panel 15"W x 84"H) |
| Door Thickness | 1 3/8" |
| Track Length | 34" |
| Material | Primed MDF, Polyvinyl Chloride (PVC) coating, Heavy-duty Black Steel hardware |
| Color | White |
| Item Weight | 83 pounds |
| Product Dimensions | 5 x 30 x 84 inches (packaged) |
| Assembly Required | Yes |
Door Opening Size Recommendation: The door width should be the door opening size (Max 28") + 2". Ensure at least 6" clearance is reserved from the top of the door to the ceiling for track installation.

Figure 4.1: Door dimensions and size choice chart for various models.

Figure 4.2: Common size selections for bifold barn doors.
5. Setup and Installation
The SMARTSTANDARD Bifold Barn Door is designed for easy assembly with pre-finished and pre-drilled holes. A detailed manual with sequential instructions is included in your package. For visual guidance, refer to the diagrams below.
5.1. General Installation Steps
- Assemble the bifold butt hinges onto the door panels.
- Install the hex bolts for the track system.
- Hang the fixed roller and the adjustable roller onto the track.
- Install the Bottom Pivot Plate on the floor.
- Install the handle onto the door.

Figure 5.1: Simplified installation process overview.

Figure 5.2: Detailed easy installation steps.
5.2. Key Components and Features

Figure 5.3: Detailed view of key hardware components.

Figure 5.4: Connecting plate for combining multiple door sets.
6. Operating Instructions
The bifold barn door features butt hinges that allow for easy expansion and folding. To open the door, gently push the panels inward, causing them to fold neatly against each other and slide along the track. To close, pull the panels outward until they extend fully across the opening.
This design allows the door to fold completely when opened, effectively saving up to 52% of space compared to traditional doors.

Figure 6.1: Door in closed and open positions, illustrating space saving.
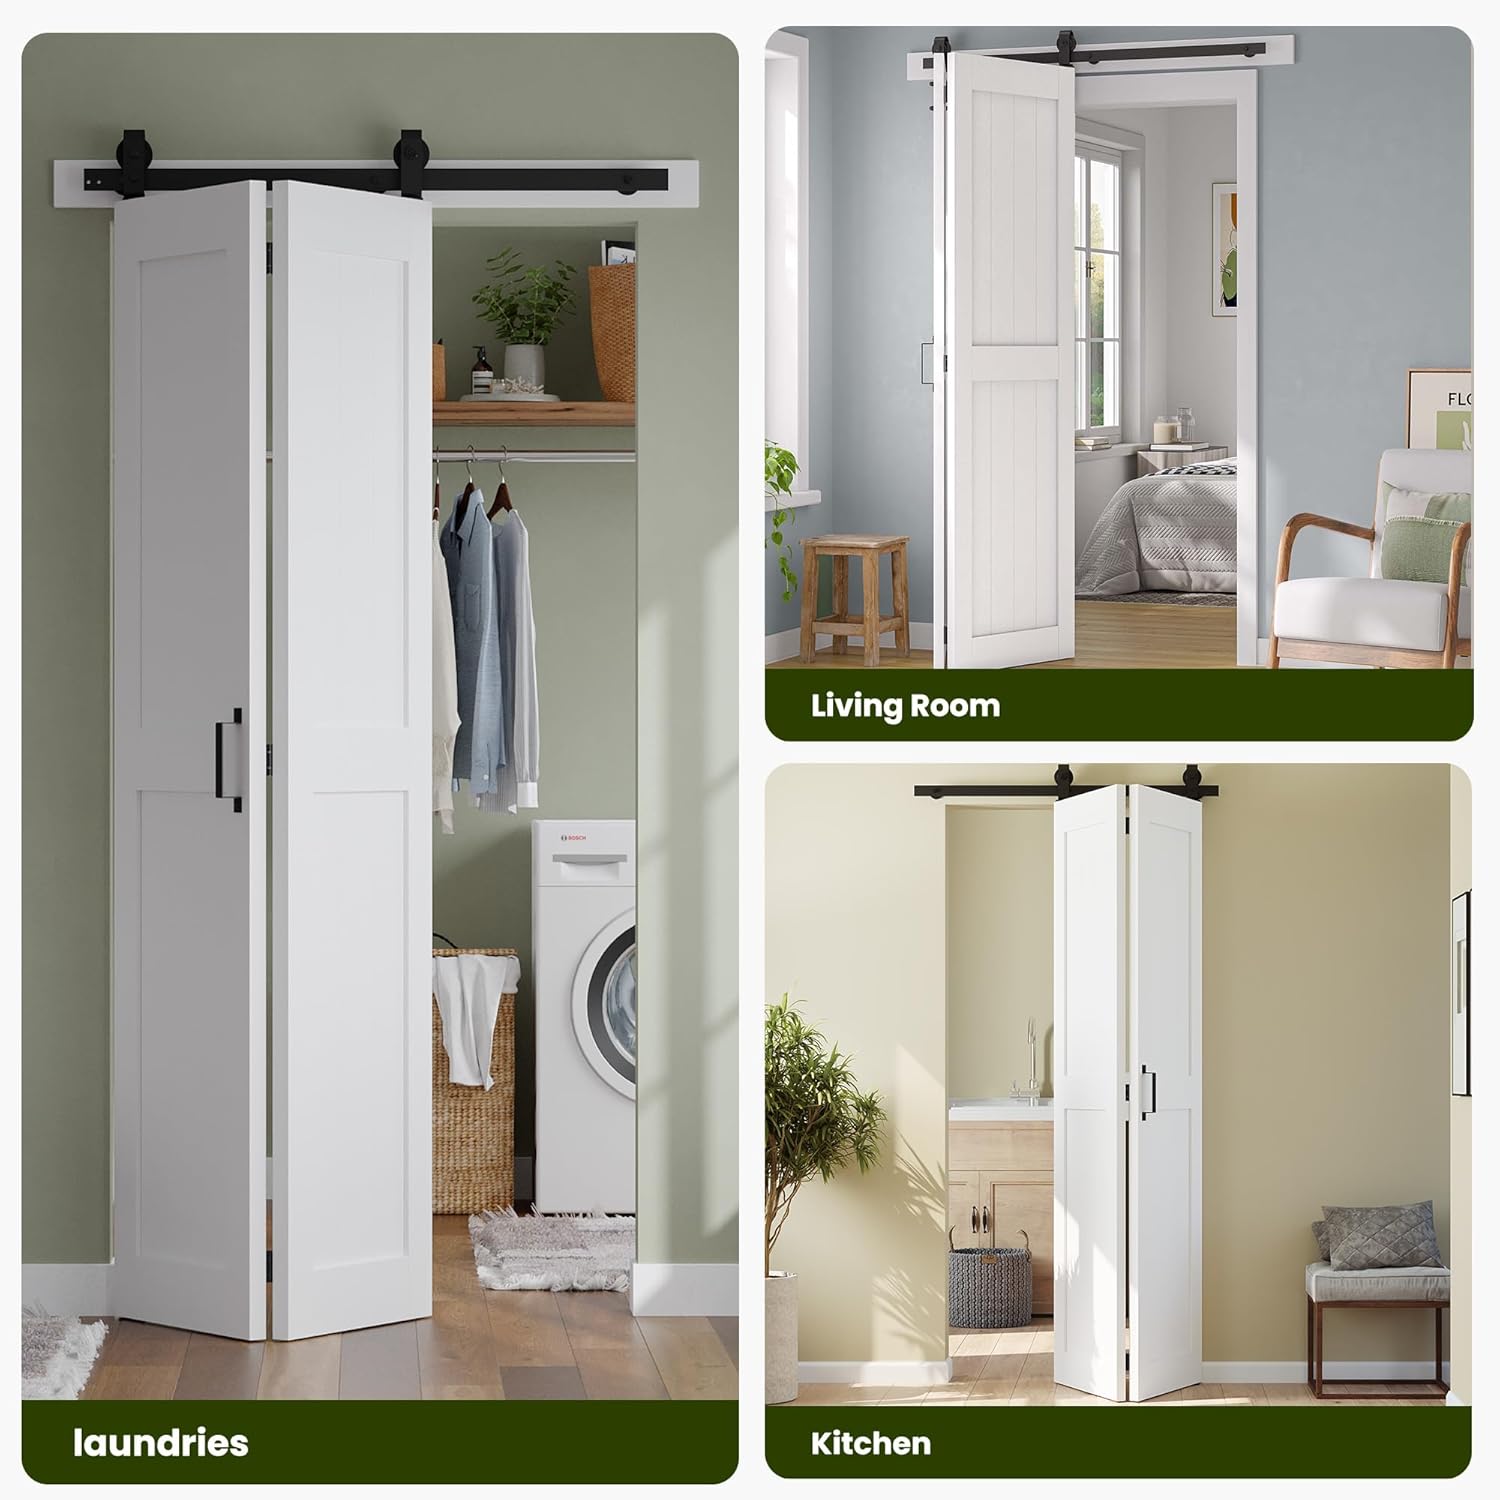
Figure 6.2: Examples of door usage in different rooms.
7. Maintenance
To ensure the longevity and smooth operation of your SMARTSTANDARD Bifold Barn Door, follow these maintenance guidelines:
- Cleaning: Wipe door panels with a soft, damp cloth. Avoid abrasive cleaners or harsh chemicals, as these can damage the PVC coating. The waterproof and scratch-resistant features simplify cleaning.
- Hardware: Periodically check all screws and bolts for tightness. Tighten any loose fasteners to ensure stability and prevent wear.
- Track and Rollers: Keep the track free of dust and debris. The wheels and tracks are designed to reduce noise, but occasional cleaning can help maintain smooth and quiet operation.
- Bumper Strips: The doors are equipped with bumper strips to prolong their service life. Inspect these periodically for wear and tear.

Figure 7.1: Material properties: waterproof and scratch-resistant.

Figure 7.2: Bumper strip and silent design features.
8. Troubleshooting
If you encounter any issues during or after installation, refer to the following common problems and solutions:
- Door drags on the floor/carpet:
Solution: This often indicates insufficient ground clearance. Ensure the Bottom Pivot Plate is installed correctly and that the door height is appropriate for your opening, especially in carpeted areas. Adjust the pivot plate if possible, or consider adding a header board above the trim if necessary to raise the track. - Door does not slide smoothly or is noisy:
Solution: Check the track for any obstructions (dust, debris). Clean the track and rollers. Ensure all rollers are properly seated and lubricated if necessary. Verify that the track is level and securely mounted. - Door panels do not align or close flush:
Solution: Recheck the installation of the hinges and the Bottom Pivot Plate. Precise measurements are crucial for proper alignment. Ensure all fasteners are tightened. Adjust the adjustable roller if available. - Difficulty with installation steps:
Solution: Refer to the detailed installation manual provided. If specific steps remain unclear, consider watching online video tutorials for bifold barn door installations or contact customer support for assistance. Pilot drilling holes may be necessary for some screws.
9. Warranty and Support
While specific warranty details are not provided in this document, SMARTSTANDARD is committed to customer satisfaction. For any product-related inquiries, technical support, or warranty claims, please contact SMARTSTANDARD customer service.
You can typically find contact information on the product packaging, the SMARTSTANDARD official website, or through the retailer where you purchased the product.