1. Introduction
Thank you for choosing the Lemorele HDMI KVM Switch. This device allows you to control two computers using a single set of keyboard, mouse, and monitor. It is designed to streamline your workspace, enhance efficiency, and provide a seamless switching experience between different systems. This manual will guide you through the setup, operation, and troubleshooting of your KVM switch.

Image: The Lemorele HDMI KVM Switch, a compact black device with multiple ports.
2. Product Features
- 2 PC 1 Monitor Control: Seamlessly switch between two computers using one keyboard, mouse, and monitor setup.
- 4K@30Hz Resolution: Supports high-definition video output up to 4K at 30Hz, ensuring clear and vibrant visuals. For optimal performance, ensure your computer and monitor support 4K resolution and HDMI 2.0.
- 4 USB 3.0 Ports: Equipped with four USB 3.0 interfaces, functioning as a USB hub for sharing peripherals like keyboards, mice, printers, gamepads, hard drives, and U disks. Offers data transfer speeds up to 5Gbps and is backward compatible with USB 2.0 and USB 1.1 devices.
- Wide Compatibility: Compatible with most HDMI-enabled devices and signal sources, including PS5, PS4, PS3, Xbox One, TV boxes, PCs, laptops, and Nintendo Switch. Supports various operating systems such as Windows, Vista, XP, Mac OS, Linux, and Unix.
- One-Click Switching: Easily switch between connected computers with a simple press of a button on the KVM switch.
- Space-Saving Design: Consolidates your peripherals, reducing cable clutter and saving valuable desk space.

Image: A monitor displaying high-resolution 4K content, connected to the KVM switch, highlighting its 4K@30Hz capability.
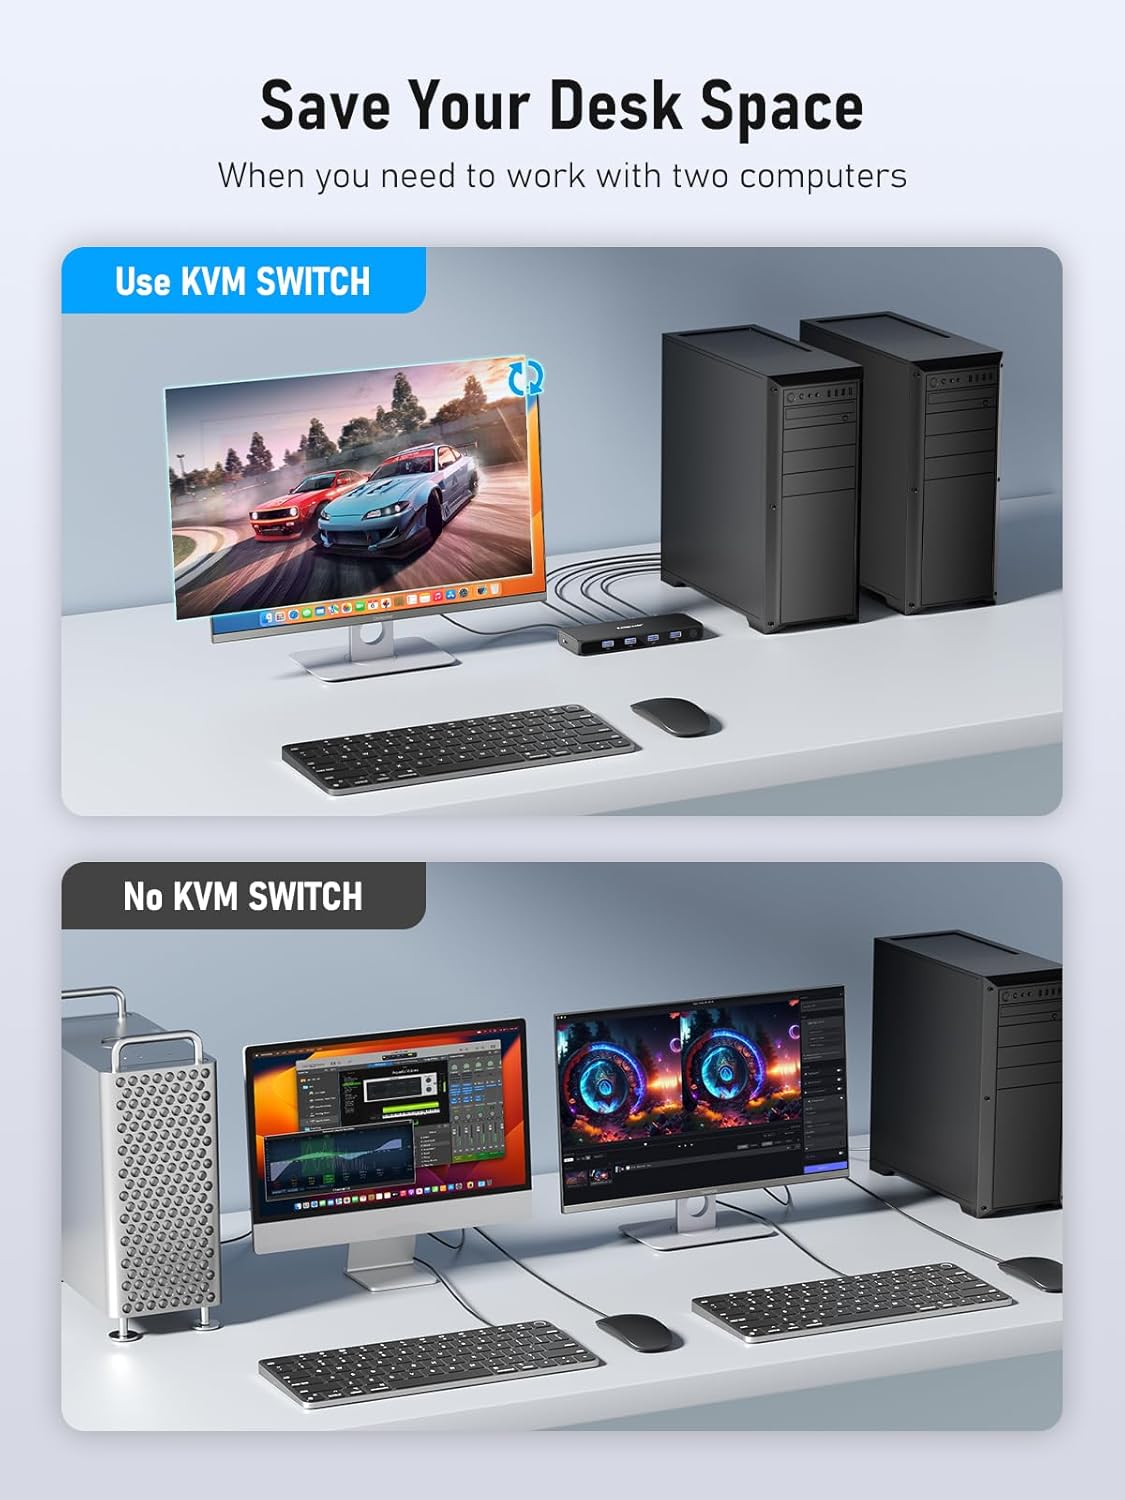
Image: A visual comparison showing a cluttered desk with two separate computer setups versus a clean desk with a single setup using the KVM switch, illustrating space saving.

Image: Two laptops connected to the KVM switch, with text indicating "Ultra-fast file transfer 5Gbps", demonstrating its high-speed data capabilities.
3. Package Contents
Please check the package contents upon opening. If any items are missing or damaged, please contact customer support.
- 1 x Lemorele 2-in-1 out HDMI KVM Switch
- 2 x 1m USB A to USB A Cables
- 1 x USB C Cable (for optional power supply)
- 1 x User Manual

Image: A clear layout of the package contents, including the KVM switch, two USB A to USB A cables, one USB C cable, and the user manual.
4. Setup Instructions
Follow these steps to set up your Lemorele HDMI KVM Switch:
- Connect Monitor: Connect your monitor to the HDMI OUT port on the KVM switch using an HDMI cable (not included).
- Connect Computers (HDMI): Connect the HDMI output of PC1 to HDMI IN (1) on the KVM switch. Connect the HDMI output of PC2 to HDMI IN (2) on the KVM switch.
- Connect Computers (USB): Connect one end of a supplied USB A to USB A cable to a USB 3.0 port on PC1, and the other end to the corresponding USB input port for PC1 on the KVM switch. Repeat this step for PC2, connecting it to the USB input port for PC2 on the KVM switch. Note: Both USB outputs from the KVM switch must be connected to your laptops or computers near the HDMI outputs for the USB HUB function to work correctly.
- Connect Peripherals: Connect your keyboard, mouse, and any other USB peripherals (e.g., printer, external hard drive) to the USB 3.0 ports on the front of the KVM switch.
- Power Supply (Optional): In most cases, the KVM switch can be powered via the HDMI connection. However, if the HDMI power is insufficient (e.g., for high-power USB devices or certain Mac systems), connect the supplied USB C cable to the KVM switch's power input and to a 5V/1A USB power adapter (not included).

Image: A detailed diagram illustrating how to connect two PCs, a monitor, and various USB peripherals (keyboard, mouse, printer, SSD) to the KVM switch, highlighting its function as both an HDMI KVM switch and a USB hub.
Image: The KVM switch on a desk with connected cables, emphasizing its "Plug and Play" simplicity.
Image: A close-up view of the KVM switch's power input port, with text indicating "Power Supply" and explaining when external power might be needed.
5. Operating Instructions
Once all connections are made, you can begin using your KVM switch:
- Switching Computers: Press the button on the top of the KVM switch to toggle between PC1 and PC2. The LED indicator on the switch will illuminate to show which computer is currently active.
- LED Indicators: The LED light color on the KVM switch indicates the currently active computer.

Image: A user at a desk with two computers and one monitor, demonstrating the one-click switching functionality of the KVM switch.
6. Maintenance
To ensure the longevity and optimal performance of your KVM switch, follow these maintenance guidelines:
- Keep the device in a cool, dry place, away from direct sunlight and extreme temperatures.
- Avoid exposing the device to water or excessive humidity.
- Clean the device with a soft, dry cloth. Do not use liquid cleaners or aerosols.
- Ensure cables are not bent sharply or under strain to prevent damage to ports and cables.
7. Troubleshooting
If you encounter issues with your KVM switch, refer to the following common problems and solutions:
- No Display on Monitor:
- Ensure all HDMI cables are securely connected to both the KVM switch and your computers/monitor.
- Verify that the correct input is selected on your monitor.
- Try connecting an external 5V/1A power supply to the KVM switch, especially if using a Mac or high-resolution display.
- Test the HDMI cables directly between the computer and monitor to rule out cable issues.
- Keyboard/Mouse Not Working:
- Ensure both USB A to USB A cables are securely connected from the KVM switch to both computers. The USB HUB function requires both connections.
- Try connecting the keyboard/mouse to different USB ports on the KVM switch.
- If using a wireless keyboard/mouse, ensure the receiver is plugged into the KVM switch and has a clear line of sight.
- Connect an external 5V/1A power supply to the KVM switch if USB devices are not receiving sufficient power.
- Monitor Does Not Wake Up from Sleep:
- If your monitor does not display after a computer wakes from sleep, try pressing the switch button on the KVM a few times to re-establish the connection.
- Disconnecting and reconnecting the HDMI or USB cables from the computer's side may also resolve this.
- HDMI-CEC Functionality Issues:
- The KVM switch may interfere with HDMI-CEC (Consumer Electronics Control) features on some devices. This is a common characteristic of KVM switches and may require using the original remote for affected devices.
8. Specifications
| Attribute | Value |
|---|---|
| Product Dimensions | 6.34 x 2.24 x 0.79 inches |
| Item Weight | 7.83 ounces |
| Model Number | G98 |
| Manufacturer | Lemorele |
| ASIN | B0CFVWT7Z7 |
| Country of Origin | China |
| Connector Type | Plug In |
| UPC | 749691096618 |
9. Warranty and Support
Lemorele is committed to providing high-quality products and excellent customer service. Your KVM switch comes with a standard warranty. For any inquiries, technical support, or warranty claims, please contact our customer service team. Our team is available 24 hours a day and aims to answer your inquiries within 24 hours.
For support, please visit the official Lemorele website or contact us via the platform where you purchased the product.