Introduction
The Clean Living With Michelle Plant Milker is an innovative 8-in-1 multi-functional appliance designed to simplify the creation of homemade plant-based milks and smoothies. With its self-cleaning function and versatile programs, it offers a convenient and healthy alternative to store-bought options. This manual provides essential information for safe and effective use, maintenance, and troubleshooting.
Safety Information
Please read all safety instructions carefully before operating the Plant Milker. Failure to follow these instructions may result in injury or damage to the appliance.
- Electrical Safety: Ensure the appliance is connected to a grounded outlet with the correct voltage (110 Volts). Do not immerse the main unit in water.
- Overheating Protection: The Plant Milker is equipped with an automatic shut-off feature to prevent overheating. If the unit overheats, it will cool down before resuming operation.
- Safe Lock Design (E2 Error): The built-in safety mechanism prevents operation if the lid is not securely closed. Ensure the lid is properly locked to avoid an E2 error and ensure safe use.
- Hot Surfaces: The interior and heating elements become hot during operation. Exercise caution when handling the unit after use.
- Blade Safety: The stainless steel blades are sharp. Handle with care during cleaning and assembly.
- Supervision: Keep out of reach of children. Adult supervision is recommended when the appliance is in use.
- Ventilation: Ensure adequate ventilation around the appliance during operation.
Product Components
The Clean Living With Michelle Plant Milker comes with the following components:
- Main Plant Milker Unit (with stainless steel interior and blades)
- Lid
- Power Cord (35 inches)
- Stainless Steel Strainer
- Cleaning Brush
- User Manual with Recipes
- Quick Use Guide Insert
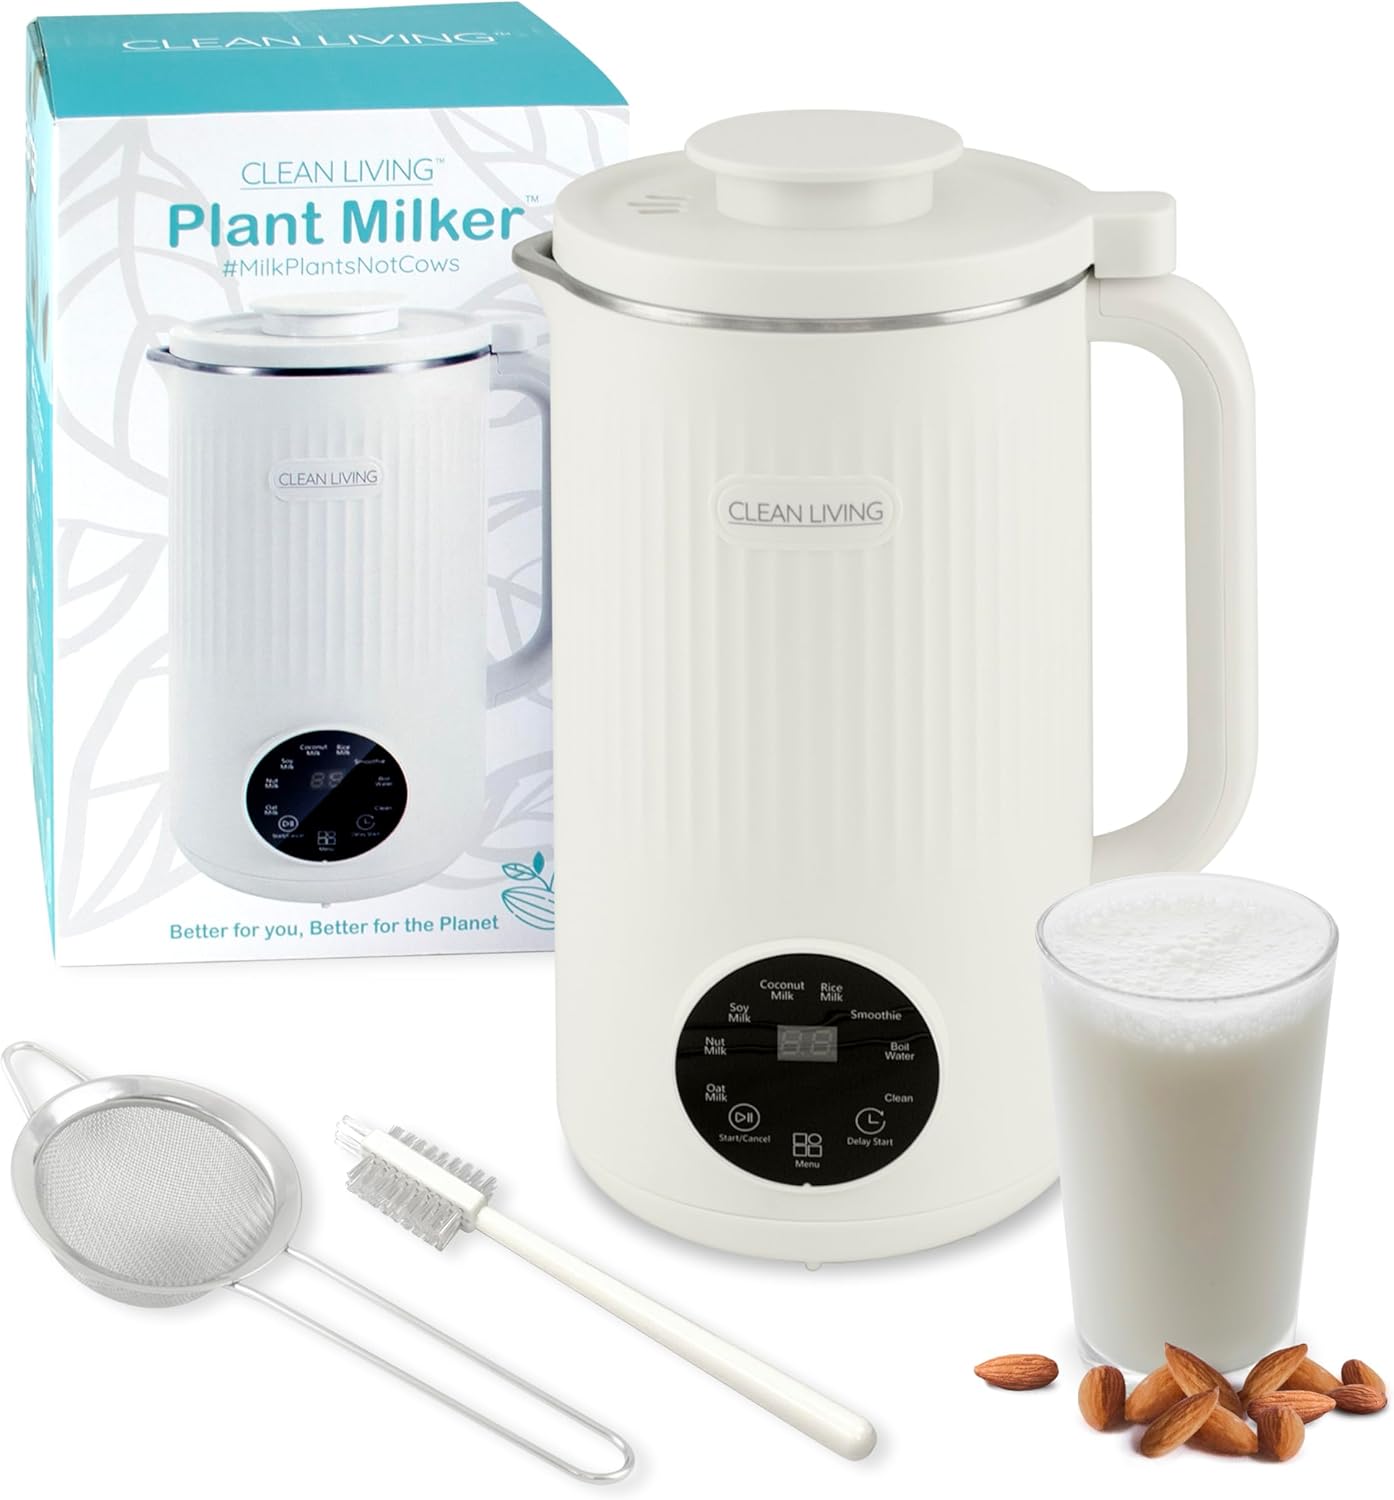
The Clean Living Plant Milker, shown with its included stainless steel strainer and cleaning brush, alongside a glass of freshly made plant milk.

The Plant Milker package includes the main unit, a detailed instruction manual, a stainless steel strainer for smooth milk, and a cleaning brush for easy maintenance.
Setup
Before first use, ensure all packaging materials are removed. Wash the interior of the Plant Milker, the lid, strainer, and cleaning brush with warm, soapy water. Rinse thoroughly and dry. Place the Plant Milker on a stable, flat, and dry surface near a power outlet.
Operating Instructions
The Plant Milker features 8 functions for various plant milks, smoothies, and boiling water, along with a self-cleaning option. Follow these general steps for operation:
- Step 1: Add Ingredients. Place your desired ingredients into the stainless steel interior of the Plant Milker. Ensure ingredients and water do not exceed the maximum fill line.
- Step 2: Secure Lid and Choose Option. Place the lid securely on the unit. Plug in the power cord. Use the 'Menu' button to cycle through the functions (Oat Milk, Nut Milk, Soy Milk, Coconut Milk, Rice Milk, Smoothie, Boil Water, Clean). The selected function will be displayed on the digital screen.
- Step 3: Start Cycle. Press the 'Start/Cancel' button to begin the selected program. The display will show the remaining time.
- Step 4: Remove Lid and Pour. Once the cycle is complete, carefully remove the lid. For smoother milk, use the included stainless steel strainer when pouring into a container.

This graphic outlines the simple three-step process for making plant milk: adding ingredients, selecting the desired function, and pouring the finished milk, with an optional straining step.
Recipe Guide
Refer to the table below for recommended ingredients and measurements for various milk types and smoothies. Adjust to taste.
| Milk Type | Function | Ingredients | Measurement | Water/Milk | Strain after cooking |
|---|---|---|---|---|---|
| Oat Milk | Oat Milk | rolled oats | 7 tbsp | 4 cups | yes |
| Almond Milk | Nut Milk | unsalted almonds | 1/4 cup | 4 cups | yes |
| Cashew Milk | Nut Milk | raw, unsalted cashews | 1 cup | 4 cups | no |
| Macadamia Milk | Nut Milk | raw, unsalted macadamia nuts | 3/4 cup | 4 cups | no |
| Hazelnut Milk | Nut Milk | 1/2 cup | 3 1/2 cups | yes | |
| Soy Milk | Soy Milk | 1 cup | 4 cups | yes | |
| Coconut Milk | Coconut Milk | 2 cups | 4 cups | yes | |
| Rice Milk | Rice Milk | 3 cups | 4 cups | yes | |
| Smoothie | Smoothie | 1 cup | 2 cups Milk | no |
To add a touch of sweetness or a light salt flavor, add one of these to your milk before starting the cycle:
- 1/8 tsp salt
- 1/8 tsp vanilla extract, agave, or maple syrup
- 1 tbsp of minced dates

A comprehensive cooking guide table providing specific recipes, ingredients, and measurements for various plant-based milks and smoothies that can be made with the Plant Milker.

The Plant Milker positioned on a kitchen counter, surrounded by ingredients like almonds and chocolate sprinkles, illustrating its readiness for use in a home setting.

Demonstration of pouring plant milk through the provided strainer to achieve a smoother consistency, showcasing the practical use of the accessory.
Official Product Video
This video demonstrates the process of making plant-based milk and smoothies using the Clean Living With Michelle Plant Milker, highlighting its ease of use and versatility.
Maintenance and Cleaning
Regular cleaning ensures the longevity and hygiene of your Plant Milker.
- Automatic Cleaning: The Plant Milker features a 'Clean' function for easy internal cleaning. Add water to the unit and select the 'Clean' program.
- High-Temperature Cleaning: The self-cleaning function utilizes high-temperature cycles to keep the machine fresh and sanitary.
- Manual Cleaning: After each use, unplug the unit and allow it to cool. Use the provided cleaning brush to remove any residue from the stainless steel interior and blades. Wash the lid and strainer with warm, soapy water. Wipe the exterior of the main unit with a damp cloth. Do not immerse the main unit in water.
- Storage: Store the Plant Milker in a dry, cool place when not in use.
Troubleshooting
If you encounter issues with your Plant Milker, refer to the following common problems and solutions:
| Problem | Possible Cause | Solution |
|---|---|---|
| Unit does not power on | Not plugged in; power outlet issue | Ensure the power cord is securely plugged into a working outlet. |
| E2 Error displayed | Lid not securely closed | Ensure the lid is properly aligned and locked into place. |
| Unit stops mid-cycle or displays E3 error | Overheating protection activated | Unplug the unit and allow it to cool down for at least 15-20 minutes before attempting to use it again. Ensure proper ventilation. |
| Milk overflows during operation | Overfilling; too many ingredients; ingredients causing excessive foam | Do not exceed the maximum fill line. Reduce the amount of ingredients, especially those prone to foaming (e.g., oats, certain nuts). Ensure ingredients are properly soaked if required by the recipe. |
| Milk is not smooth enough | Insufficient blending; ingredients not pre-soaked (if required) | Ensure ingredients are properly prepared (e.g., soaked nuts/beans). Use the included strainer after the cycle for a smoother consistency. |
Specifications
- Brand: THE SNEAKY CHEF
- Model Number: DCL01
- Color: White
- Special Feature: Automatic Cleaning
- Capacity: 2.1 Pounds (approx. 1 quart / 33.8oz)
- Product Dimensions: 6"D x 7.75"W x 11.25"H
- Included Components: Strainer, Brush
- Style: Countertop Blenders
- Recommended Uses: Residential
- Power Source: Corded Electric
- Voltage: 110 Volts
- Rated Heating Power: 800W
- Controls Type: Touch
- Material Type Free: BPA Free
- Item Weight: 3.25 pounds
- Country of Origin: China
- UPC: 850039903298

This image illustrates the key benefits of using the Plant Milker, emphasizing its health, environmental, and convenience aspects.

A visual comparison demonstrating how homemade plant milk made with the Plant Milker avoids common additives found in many store-bought alternatives.
Warranty and Support
The Clean Living With Michelle Plant Milker comes with a 2 Year Limited Warranty. For warranty claims, technical support, or any questions regarding your product, please contact THE SNEAKY CHEF customer service. Refer to the contact information provided with your purchase or visit the official brand website for support details.