1. Introduction
Thank you for choosing the Hohuqeri Slatwall Panel Garage Wall Organizer. This system is designed to help you maximize storage space and organize your tools and accessories efficiently. Made from durable PVC, these panels are suitable for various environments, offering a versatile and customizable storage solution.
2. Important Safety Information
- Always wear appropriate safety gear, including eye protection, during installation.
- Ensure the mounting surface (wall) is structurally sound and capable of supporting the weight of the panels and any items stored on them.
- Use the correct type and number of fasteners for your specific wall material (wood studs, drywall, masonry).
- Do not overload the slatwall panels or accessories. Refer to accessory manufacturer guidelines for weight capacities.
- Keep children and pets away from the installation area.
- If you are unsure about any step of the installation process, consult a qualified professional.
3. Package Contents
Verify that all components are present before beginning installation:
- 8 x PVC Slatwall Panels (48'' x 12'' each)
- 10 x Slatwall Hooks
- 1 x Drill Bit
- 60 x Expansion Screws
- 5 x Seal Edges (for finishing the panel edges)

The image above displays the complete set of items included in your package, ensuring you have everything needed for assembly and immediate use.
4. Product Specifications
| Feature | Specification |
|---|---|
| Material | Polyvinyl Chloride (PVC) |
| Color | Grey |
| Product Dimensions (Assembled) | 0.25"D x 95"W x 48"H (8'H x 4'W) |
| Individual Panel Dimensions | 48"W x 12"H |
| Mounting Type | Wall Mount |
| Special Features | Durable, Impact Resistant, Stain Proof, Chemical & Oil Resistant, Flame Retardant, Rust-Proof, UV Protected, Climate Resilient |
| Assembly Required | Yes |
| Included Components | Slatwall Panels, Hooks, Drill Bit, Expansion Screws, Seal Edges |

The diagram illustrates the overall dimensions of the assembled slatwall, providing a clear understanding of the space it will occupy.
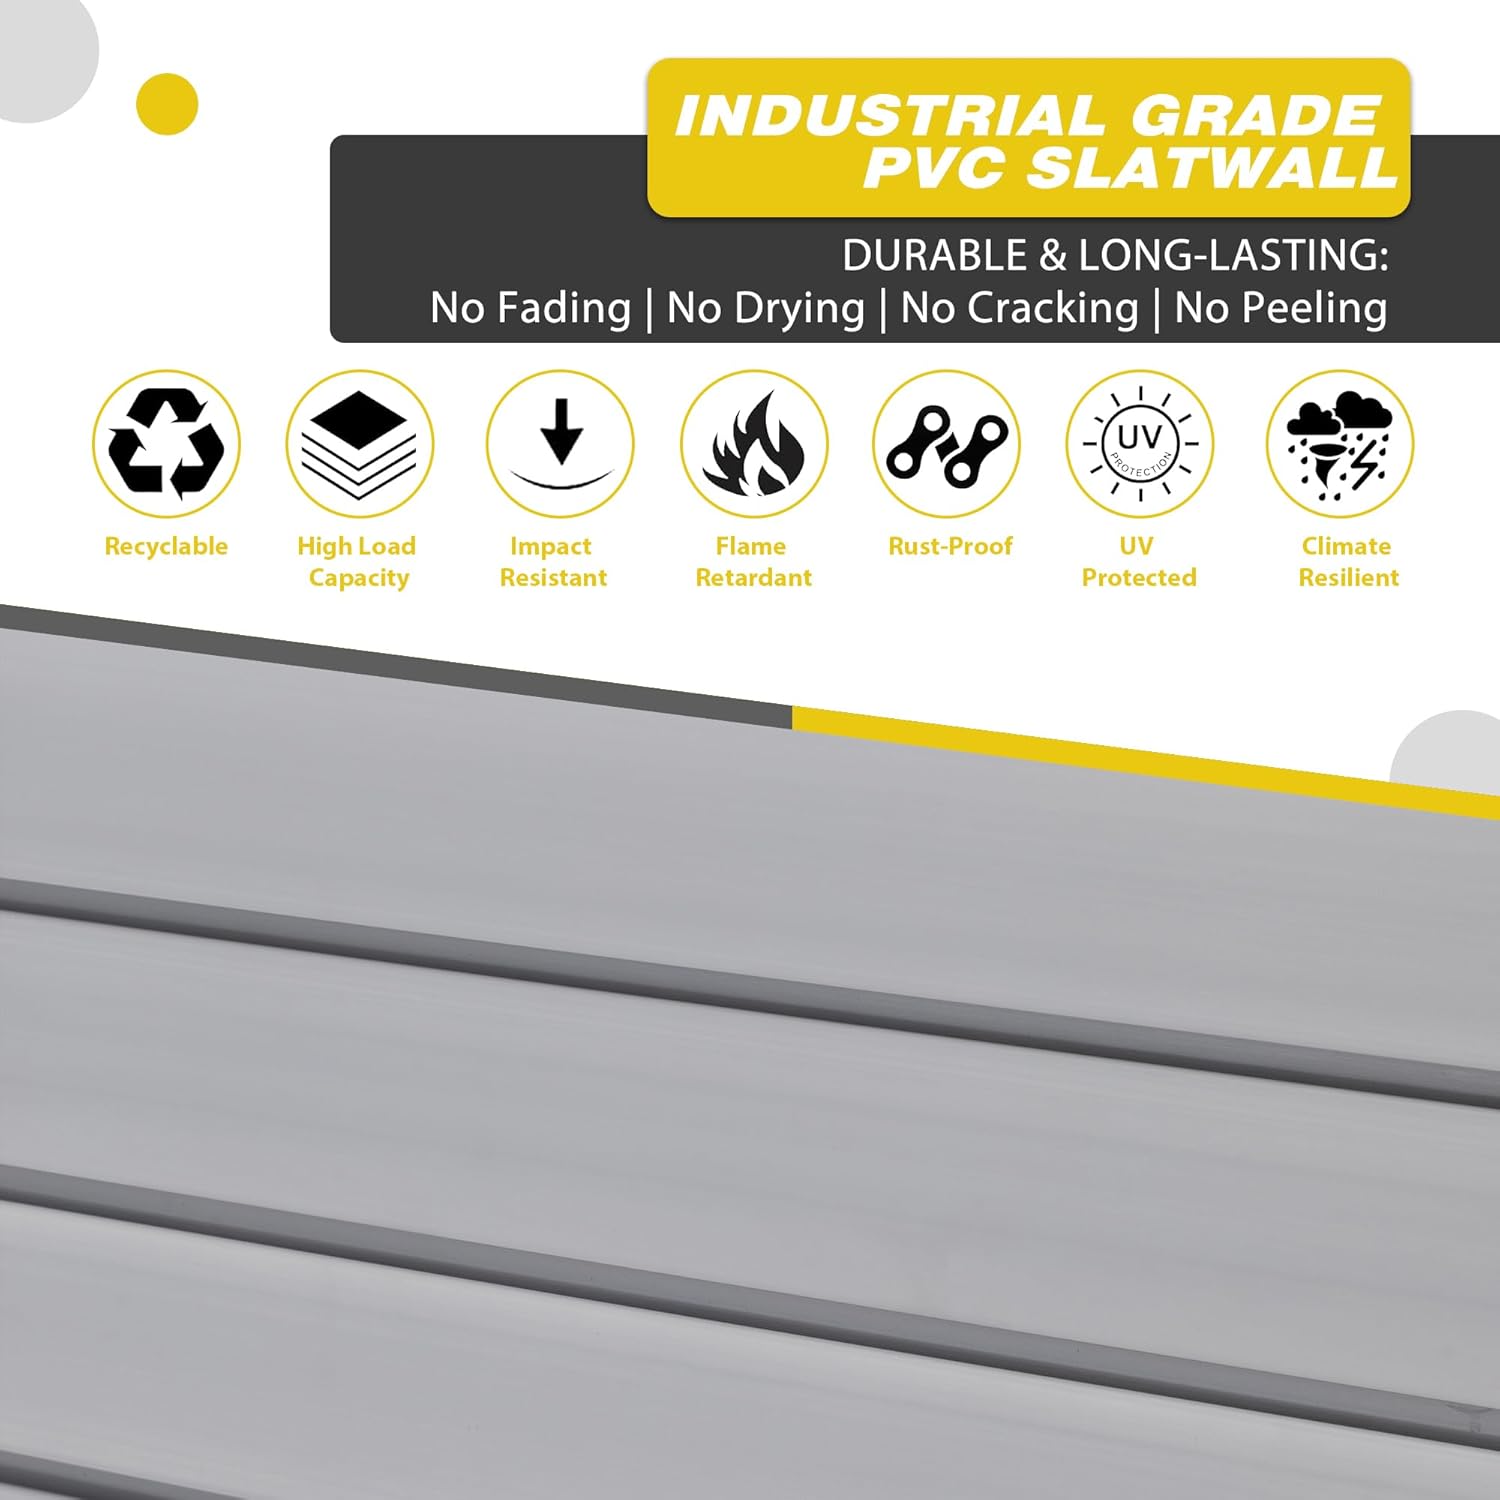
This image highlights the robust characteristics of the PVC material, ensuring durability and longevity in various conditions.
5. Setup and Installation
Follow these steps for a secure and efficient installation of your slatwall system:
- Mark Wall Location: Determine the desired location for your slatwall. Use a measuring tape and pencil to mark the precise positions where the panels will be installed. Ensure the area is clear of electrical wires or plumbing.
- Position Groove Upward: Begin with the bottom row of panels. Position the first panel with its top groove facing upward. This orientation is crucial for interlocking subsequent panels.
- Drill Holes: Using the provided drill bit, drill pilot holes through the designated mounting points on the slatwall panels and into the wall. Insert the expansion screws into these holes. For wood studs, screws can be fastened directly. For drywall or masonry, use the provided anchors.
- Secure Panels: Fasten the panels securely to the wall using the expansion screws. Ensure each panel is level before tightening completely. Continue this process for all panels, interlocking them as you move upwards.
- Attach Edge Protection Bands: Once all panels are mounted, attach the seal edges to the exposed sides of the assembled slatwall for a finished appearance.
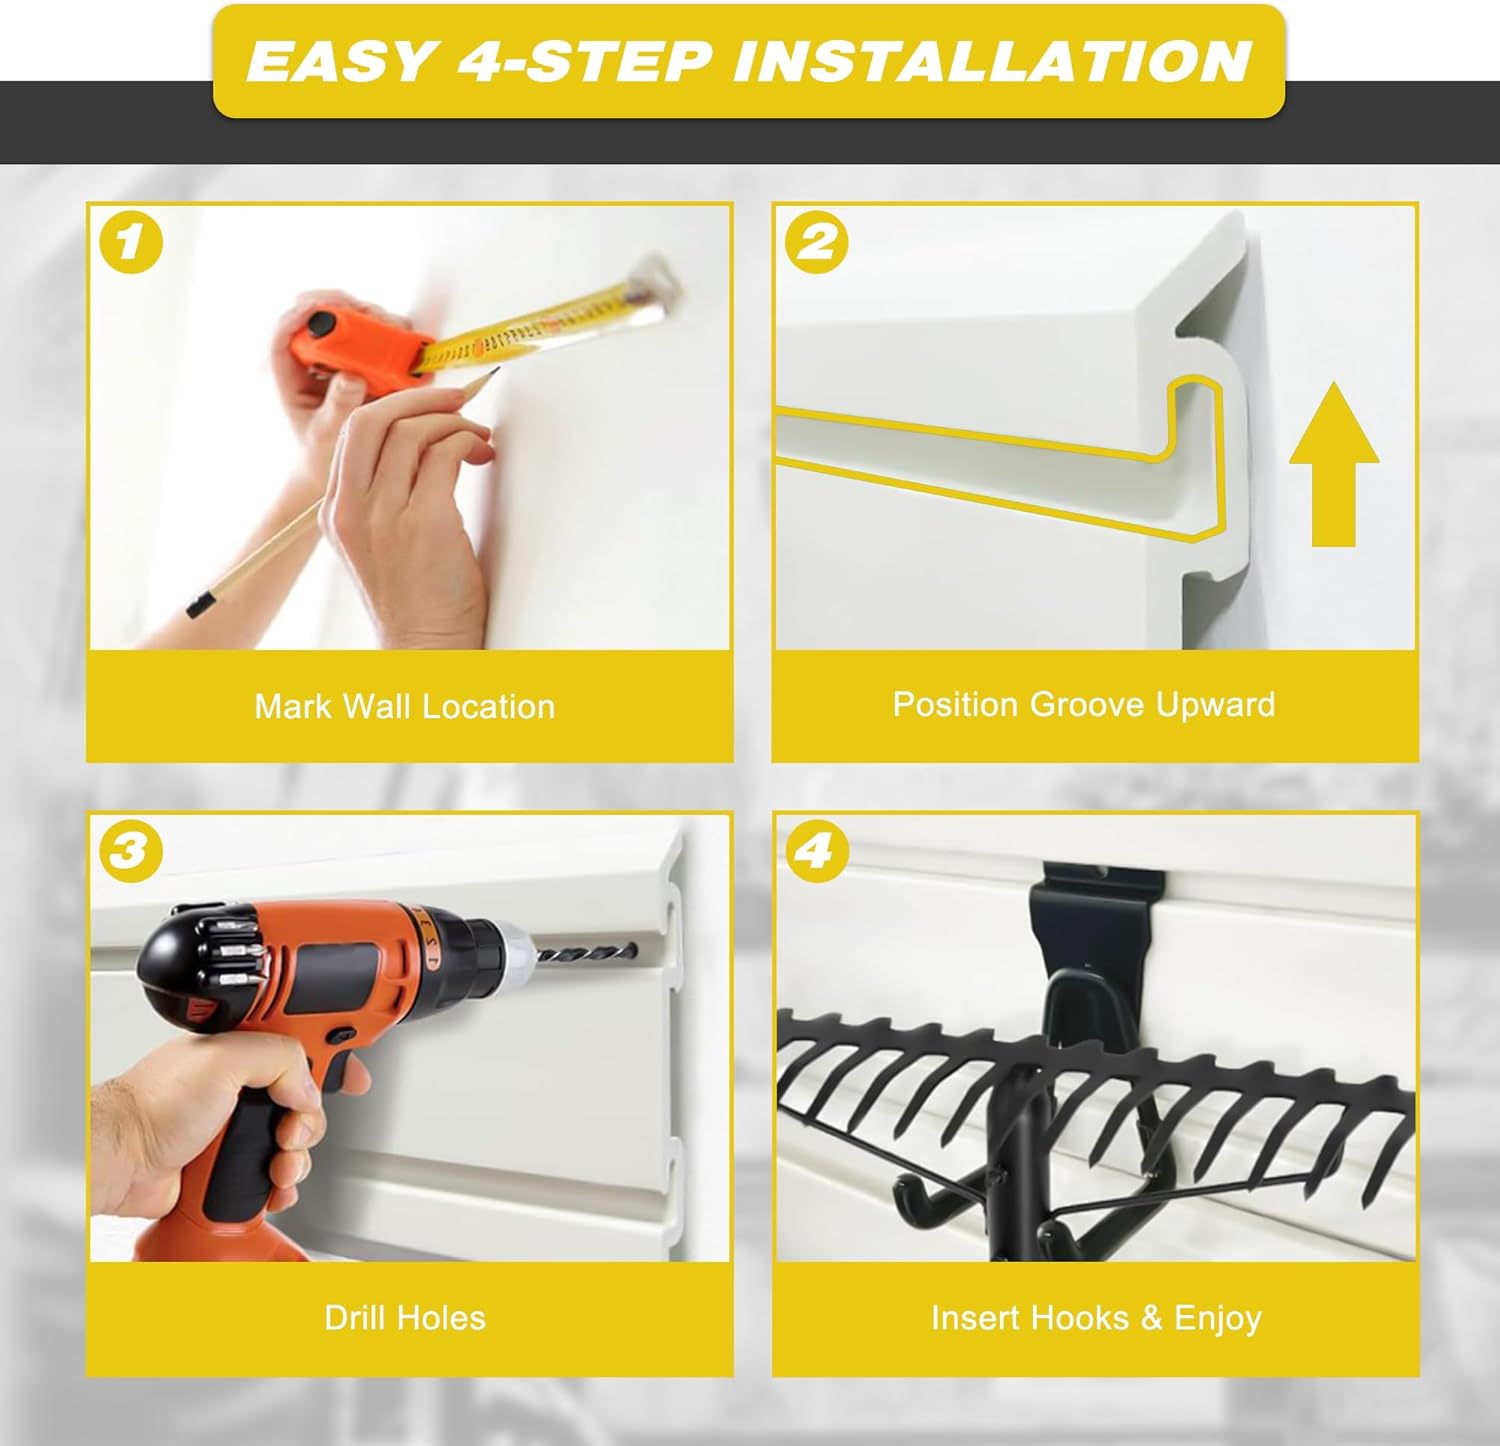
This visual guide simplifies the installation, showing the key actions for mounting the panels and preparing them for use.

The edge protection bands provide a neat and finished look to the installed slatwall system.
6. Operating Instructions
The Hohuqeri Slatwall system features a T-channel design for universal compatibility with most slatwall accessories. To use:
- Select Accessories: Choose any standard slatwall hooks, shelves, bins, baskets, or other accessories that fit into a T-channel system.
- Insert and Position: Align the accessory's mounting mechanism with the T-channel groove on the slatwall panel. Slide the accessory into the groove and adjust its position as needed.
- Secure (if applicable): Some accessories may have locking mechanisms or set screws to secure them in place. Follow the accessory manufacturer's instructions for proper attachment.

This diagram demonstrates how the T-channel allows for easy insertion and secure placement of various slatwall accessories.

The image showcases the wide range of standard slatwall accessories that can be used with this system, offering flexible organization options.
7. Maintenance
The PVC slatwall panels are designed for low maintenance. To keep your system in optimal condition:
- Cleaning: Wipe down the panels regularly with a soft, damp cloth. For more stubborn dirt or stains, a mild soap solution can be used. Avoid abrasive cleaners or harsh chemicals, as these may damage the PVC surface.
- Inspection: Periodically check all mounted panels and accessories to ensure they remain securely fastened. Tighten any loose screws as needed.
- Environmental Conditions: While the panels are climate resilient, prolonged exposure to extreme conditions (e.g., direct, intense sunlight for years) may affect their appearance over time.

The image illustrates the simple process of cleaning the slatwall panels, highlighting their easy-to-maintain surface.
8. Troubleshooting
- Panels appear loose after installation: Ensure all screws are fully tightened. If mounting into drywall, verify that the expansion anchors are properly engaged. Consider adding more mounting points if the load is heavy.
- Accessories do not fit or are unstable: Confirm that you are using standard T-channel compatible slatwall accessories. Ensure the accessory is fully inserted and, if applicable, its locking mechanism is engaged.
- Panel damage during installation: PVC can chip if excessive force is applied or if tools are used improperly. Exercise care during drilling and fastening. Minor chips may be covered by accessories once installed.
- Panels are not level: Use a level during installation to ensure each panel is perfectly horizontal before tightening screws. Adjust as necessary before securing subsequent panels.
9. Warranty and Support
Hohuqeri products are manufactured to high-quality standards. For any questions regarding your Slatwall Panel Garage Wall Organizer, including installation assistance, missing parts, or product performance, please contact Hohuqeri customer support. Information regarding specific warranty terms and return policies can typically be found on the product's purchase page or by contacting the seller directly.
Typical return policies allow for returns within 30 days of purchase for a refund or replacement, subject to the seller's terms and conditions.