1. Important Safety Information
Please read this manual carefully before operating your safe box. Keep this manual for future reference.
- Do not store emergency keys inside the safe. Keep them in a secure, separate location.
- Ensure the safe is placed on a stable, level surface or securely mounted.
- Keep the safe away from excessive moisture or direct sunlight.
- Replace batteries promptly when the low battery indicator appears to avoid being locked out.
2. Package Contents
Verify that all components are present in the package:
- 1 x Biometric Safe Box
- 2 x Emergency Keys
- 1 x External Battery Box
- 4 x Expansion Bolts
- 1 x User Manual

Image: Included components of the safe box package.
3. Product Overview
The Mitlvge 3.0 Cuft Biometric Safe Box is designed for securing valuables with advanced locking mechanisms and robust construction.
Key Features:
- Large Capacity: 3.0 cubic feet interior space for documents, jewelry, firearms, and other valuables.
- Advanced Biometric Lock: Semiconductor fingerprint reader for quick and secure access, storing up to 29 fingerprints.
- Electronic Keypad: Programmable digital passcode entry.
- Emergency Key Access: Two physical keys for manual override.
- Robust Construction: 78mm ultra-thick alloy steel door, 7*28mm solid core lock bolts, and pry-resistant concealed hinges.
- Dual Alarm System: Activates after 6 incorrect entries or upon vibration/tampering.
- Silent Mode: Option to disable alarm sounds for discreet operation.
- Removable Shelves: Two adjustable shelves for customizable storage.
- Mounting Capability: Pre-drilled anchor holes for wall or floor installation.
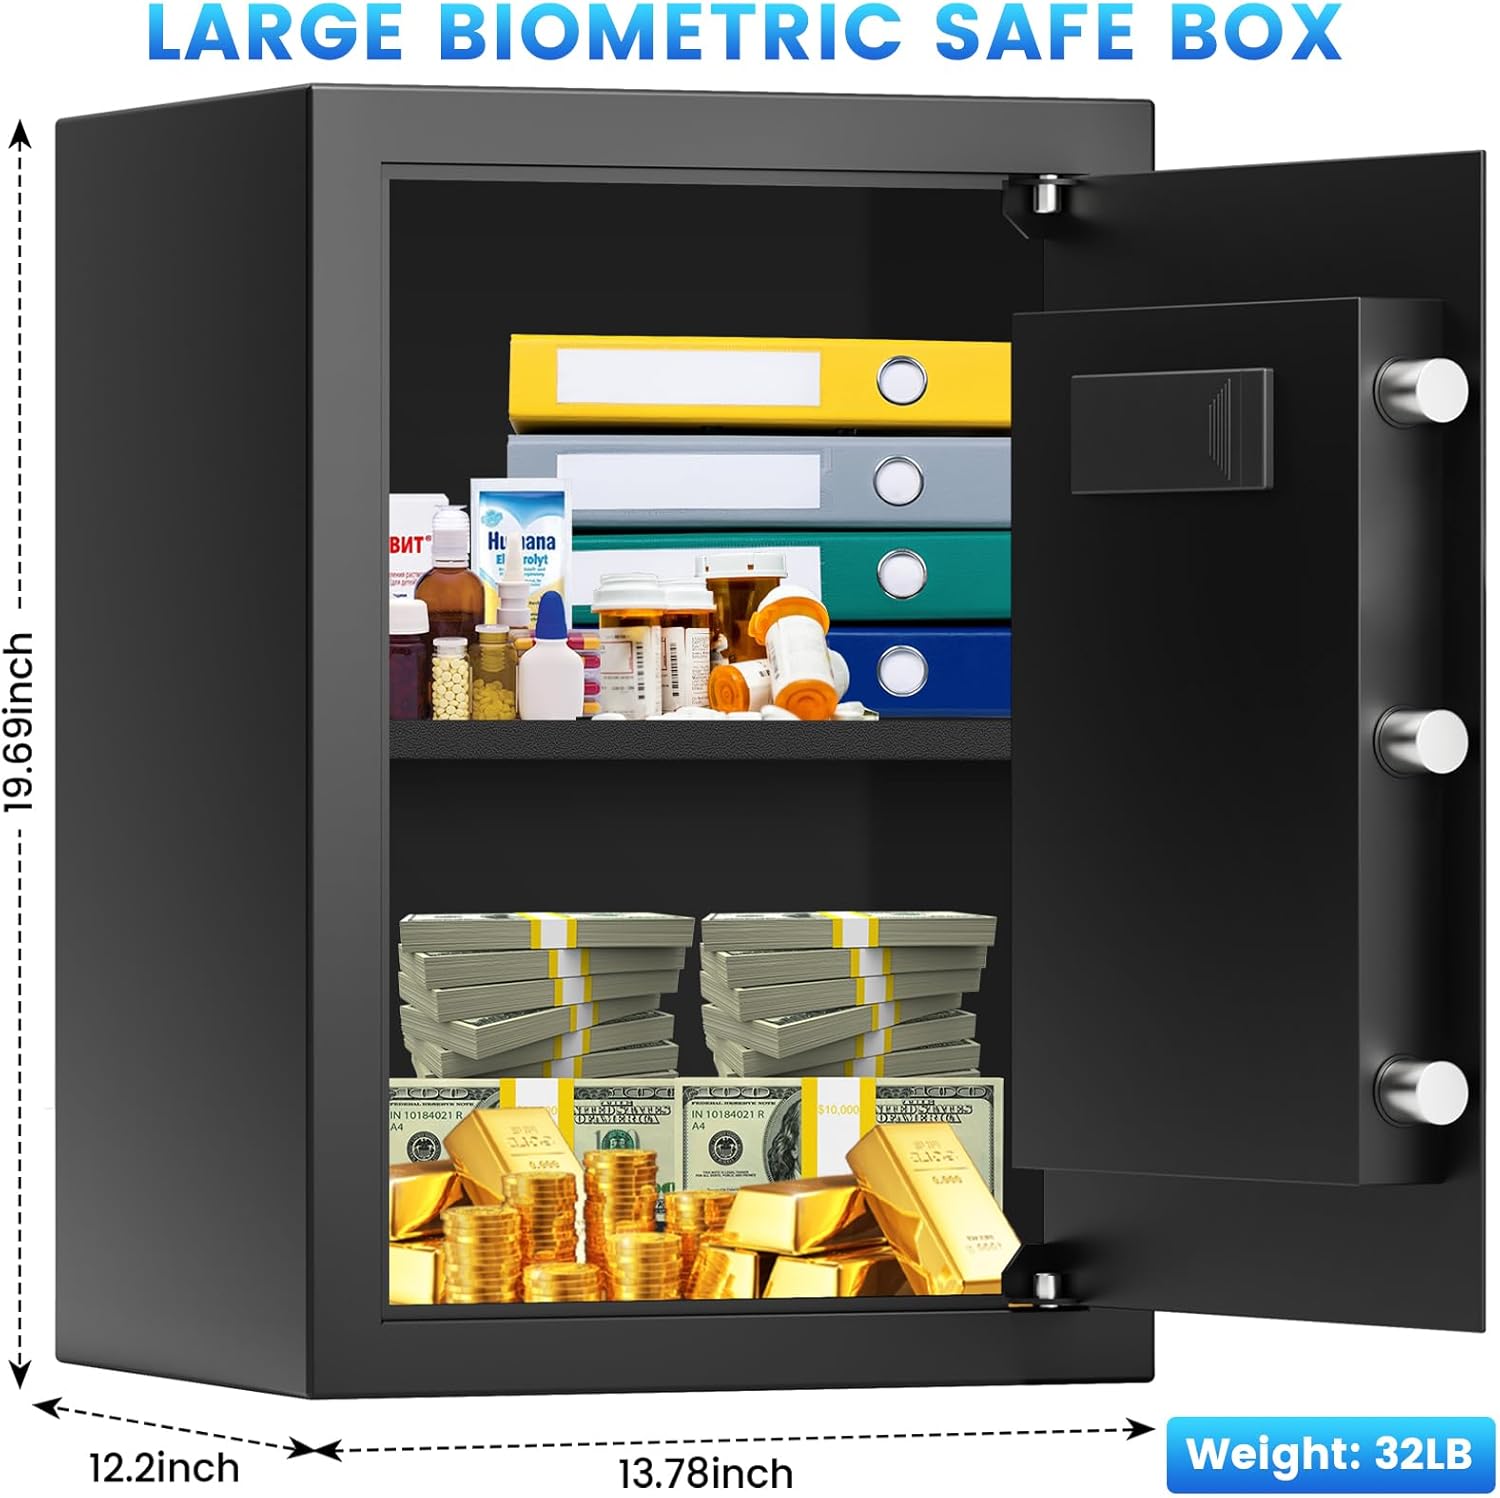
Image: Safe box dimensions (11.81"D x 14.57"W x 12.2"H).
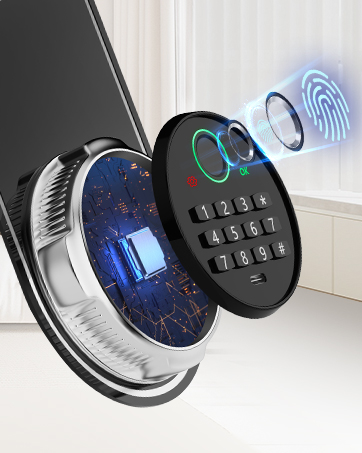
Image: Interior storage capacity with removable shelves.
4. Setup
4.1 Initial Opening
- Locate the emergency keyhole, usually concealed behind a cover on the keypad panel.
- Insert one of the emergency keys and turn it clockwise while simultaneously turning the handle to open the safe door.
4.2 Battery Installation
The safe requires 4 AA batteries (not included).
- Open the safe door using the emergency key.
- Locate the battery compartment on the inside of the safe door.
- Insert 4 AA batteries, ensuring correct polarity (+/-).
- Close the battery compartment cover. The safe will emit a beep, indicating successful power-up.
4.3 Mounting the Safe (Optional)
For enhanced security, the safe can be mounted to a wall or floor using the provided expansion bolts.
- Choose a suitable location for mounting.
- Mark the positions for the pre-drilled anchor holes on the wall or floor.
- Drill pilot holes at the marked positions.
- Align the safe with the drilled holes and secure it using the expansion bolts.

Image: Wall mounting diagram for secure installation.
5. Operating Instructions
5.1 Setting/Registering Fingerprints
The safe can store up to 29 unique fingerprints.
- With the safe door open, press the internal 'SET' button (usually a small red button). The indicator light will flash.
- Place your finger on the fingerprint scanner. Lift and repeat 3-5 times until the indicator light turns green and a successful beep is heard.
- Test the registered fingerprint before closing the safe.
5.2 Setting/Changing Passcode
The default passcode is typically '1234' or '0000'.
- With the safe door open, press the internal 'SET' button. The indicator light will flash.
- Enter your desired 4-8 digit passcode on the keypad.
- Press '#' to confirm. The indicator light will turn green and a successful beep will be heard.
- Test the new passcode before closing the safe.
5.3 Opening the Safe
Using Fingerprint: Place a registered finger on the scanner. If recognized, the light will turn green. Turn the handle to open.
Using Passcode: Enter your 4-8 digit passcode followed by '#'. If correct, the light will turn green. Turn the handle to open.
Using Emergency Key: Follow instructions in Section 4.1.

Image: Biometric fingerprint and digital keypad for access.

Image: Detailed view of the biometric lock for secure access.
5.4 Silent Mode
To activate or deactivate silent mode (mute keypad sounds and alarms):
- Press '3' and then '#'. The system will confirm the change with a visual indicator or a single beep (if not already in silent mode).
5.5 Emergency Power Supply
If the batteries are depleted and you cannot open the safe with the emergency key, an external battery box (included) or a USB-C power bank can be used.
- Connect the external battery box (with 4 AA batteries) or a USB-C power bank to the USB-C port located on the keypad panel.
- Once powered, you can use your fingerprint or passcode to open the safe.
6. Alarm System
The safe is equipped with a dual alarm system for enhanced security.
- Password/Fingerprint Error Alarm: If an incorrect passcode or unregistered fingerprint is entered 6 consecutive times, the safe will emit a 70-decibel alarm.
- Vibration Alarm: If the safe detects significant vibration or tampering while locked, the alarm will sound.
To silence an active alarm, open the safe using a valid fingerprint, passcode, or emergency key.

Image: Anti-theft alarm system with visual and audible alerts.
7. Maintenance
7.1 Battery Replacement
Replace batteries when the low battery indicator illuminates or when the keypad becomes unresponsive. Always use 4 new AA alkaline batteries.
7.2 Cleaning
Wipe the safe's exterior with a soft, damp cloth. Avoid abrasive cleaners or solvents that could damage the finish or electronic components.
7.3 Shelf Adjustment
The safe includes two removable shelves that can be adjusted or removed to accommodate items of various sizes.
- To remove a shelf, lift it slightly and pull it out.
- To adjust, place the shelf on the desired support brackets inside the safe.

Image: Removable steel shelf for flexible storage.
8. Troubleshooting
- Safe does not open with fingerprint/passcode:
a. Ensure batteries are not depleted. Replace if necessary.
b. Re-register fingerprints or reset passcode if unsure.
c. Use the emergency key for access. - Alarm sounds unexpectedly:
a. Check for tampering or excessive vibration.
b. Ensure no incorrect entries were made.
c. If persistent, contact customer support. - Keypad is unresponsive:
a. Check battery level. Replace batteries.
b. Use the external battery box or USB-C power bank for temporary power.
c. Use the emergency key for access. - Fingerprint not recognized:
a. Ensure your finger is clean and dry.
b. Try different angles or re-register your fingerprint.
c. Ensure the fingerprint scanner is clean.
9. Specifications
| Brand | Mitlvge |
| Model Number | ZQ |
| Capacity | 3.0 Cubic Feet |
| Product Dimensions | 11.81"D x 14.57"W x 12.2"H |
| Item Weight | 36.2 pounds (16.44 Kilograms) |
| Material | Alloy Steel |
| Lock Type | Biometric, Electronic Combination Lock, Key |
| Color | Black |
| Special Features | Alarm System, Anti-Theft, Combination Lock, Removable Shelf, Sensor Light |
| Mounting Type | Wall or Floor Mount |
| Water Resistance Level | Not Water Resistant |
| Batteries Required | Yes (4 x AA, not included) |
10. Warranty and Support
Mitlvge offers a 5-year return or exchange warranty and lifetime technical support for this product. All parts can be replaced free of charge within the warranty period.
If you encounter any issues or have questions regarding your safe box, please contact Mitlvge customer service. Our team is committed to resolving your concerns within 24 hours.
For support, please visit the official Mitlvge store on Amazon or refer to the contact information provided in your purchase documentation.
Mitlvge Store Link: Visit the Mitlvge Store