
1. Product Overview
The DNJ EK4221 Engine Rebuild Kit provides a comprehensive set of components for rebuilding compatible Ford 4.6L V8 SOHC engines. This kit is designed to meet original equipment (OE) quality standards for fit and performance, ensuring reliable engine restoration.
1.1. Compatibility
This kit is compatible with the following vehicles and engine specifications:
- Years: 2009-2014
- Make: Ford
- Models: E-150, E-250, F-150
- Engine: 4.6L V8 16V SOHC 281cid
- Fitment Notes: Iron Block
- VIN: W
1.2. Kit Contents
The DNJ EK4221 Engine Rebuild Kit includes the following components, all provided in standard sizing unless otherwise specified:
- Freeze Plug Set (Brass)
- Head Gasket Set
- Lower Gasket Set
- Main Bearings Set
- Piston Set
- Piston Ring Set
- Rod Bearings Set
- Thrust Washers

Image 1.1: Overview of the complete DNJ EK4221 Engine Rebuild Kit components.
Video 1.1: An overview of DNJ Engine Kits, showcasing various components and packaging. This video provides a general look at the quality and range of parts offered by DNJ.
2. Component Details
2.1. Piston Set
The kit includes a complete set of pistons designed for the specified engine. These pistons are manufactured to ensure proper compression and combustion efficiency.

Image 2.1: A set of pistons, complete with piston pins and retainers, ready for installation.
2.2. Piston Ring Set
A full set of piston rings is provided to seal the combustion chamber, control oil consumption, and transfer heat from the piston to the cylinder wall.

Image 2.2: Piston rings, individually packaged in colored wraps, indicating different ring types or sizes.
2.3. Main Bearings Set
The main bearings support the crankshaft within the engine block, allowing it to rotate smoothly with minimal friction.

Image 2.3: A complete set of main bearings, crucial for crankshaft support and rotation.
2.4. Rod Bearings Set
Rod bearings connect the connecting rods to the crankshaft, facilitating the transfer of power from the pistons to the crankshaft.

Image 2.4: A set of rod bearings, designed for connecting rod and crankshaft interface.
2.5. Thrust Washers
Thrust washers are included to control the axial movement of the crankshaft, preventing excessive end play.

Image 2.5: Thrust washers, essential for managing crankshaft end play.
2.6. Gasket Sets (Head and Lower)
The kit provides both head gasket and lower gasket sets to ensure a complete seal for the engine's critical components, preventing leaks and maintaining proper pressure.

Image 2.6: Various components of the head gasket set, including multiple gaskets and seals.

Image 2.7: Components of the lower gasket set, including larger seals and smaller O-rings.
2.7. Freeze Plug Set (Brass)
Brass freeze plugs are included to protect the engine block from damage in freezing conditions and to seal core passages.
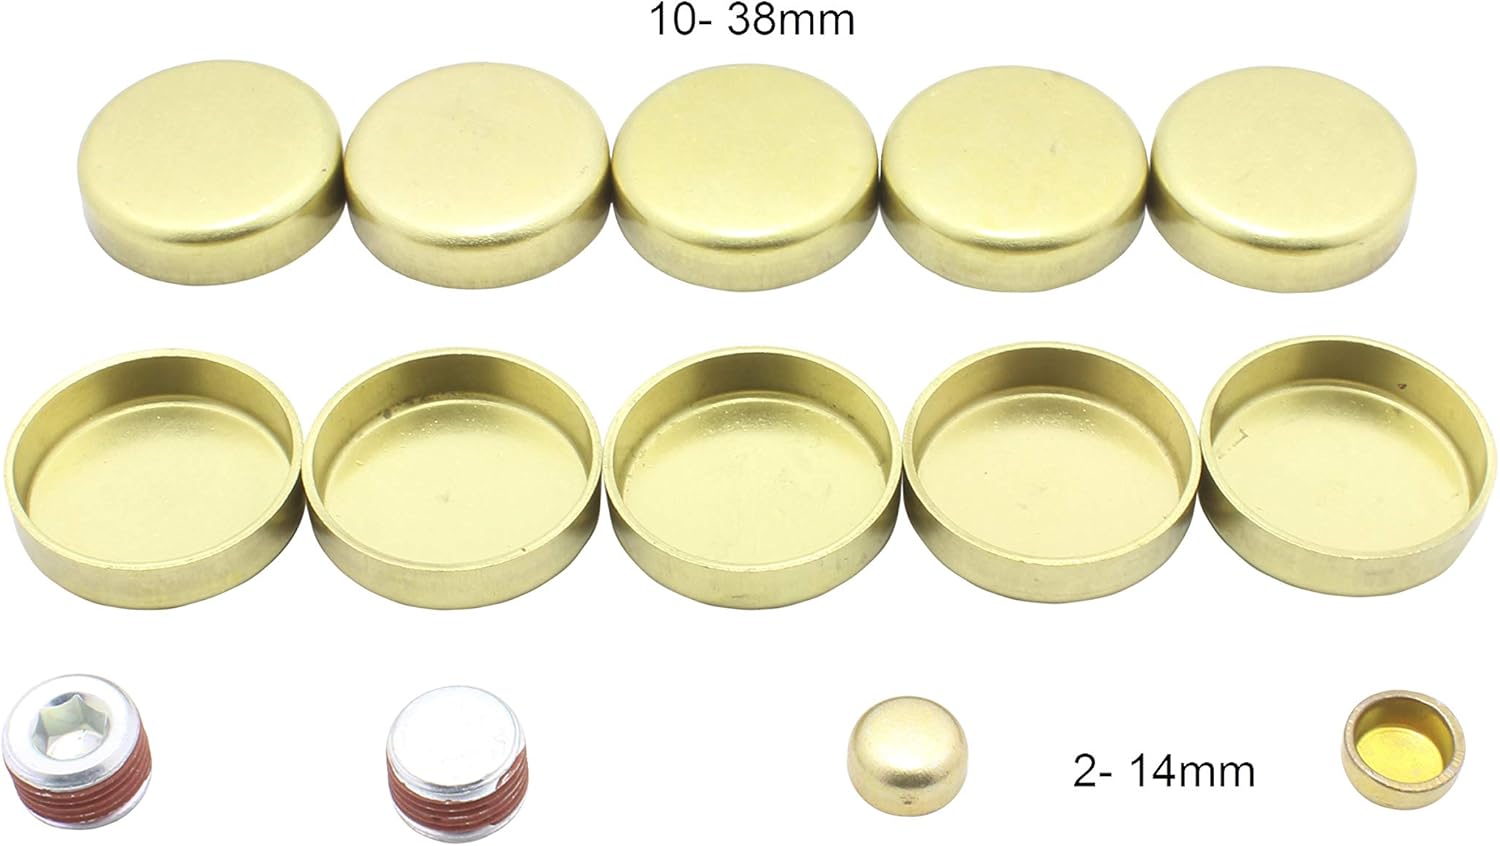
Image 2.8: A set of brass freeze plugs, varying in size, for engine block protection.
3. Installation Guidelines
Installation of an engine rebuild kit requires specialized knowledge, tools, and experience. It is highly recommended that installation be performed by a certified automotive technician or a professional engine builder.
3.1. Pre-Installation Checks
- Verify Components: Before beginning, carefully inspect all components in the kit against the packing list and your vehicle's specific requirements.
- Engine Block Preparation: Ensure the engine block, cylinder heads, and all mating surfaces are thoroughly cleaned, inspected for cracks or damage, and machined to specifications if necessary.
- Component Sizing: All components in this kit are standard size. If oversized pistons, piston rings, rod bearings, or main bearings are required for your engine, please ensure you have obtained the correct sizes before proceeding.
- Service Manual: Always refer to the specific factory service manual for your vehicle's make and model for detailed torque specifications, assembly procedures, and critical clearances.
3.2. General Installation Steps (Consult Service Manual for Details)
- Install main bearings and crankshaft, ensuring proper lubrication and torque.
- Assemble pistons with piston rings and connecting rods.
- Install rod bearings and piston/rod assemblies into the engine block, observing correct orientation and torque.
- Install freeze plugs into the engine block.
- Install the lower gasket set, including oil pan gasket and other seals.
- Install cylinder head gaskets and cylinder heads, following the manufacturer's torque sequence and specifications.
- Install the head gasket set components, including valve cover gaskets and intake/exhaust manifold gaskets.
- Complete remaining engine assembly according to the vehicle's service manual.
4. Post-Installation Operation (Engine Break-in)
After a complete engine rebuild, a proper break-in procedure is critical for the longevity and performance of the engine. Consult your vehicle's service manual or a professional engine builder for specific break-in recommendations.
4.1. Initial Start-up
- Ensure all fluids (oil, coolant) are at correct levels.
- Prime the oil system to ensure lubrication before initial cranking.
- Start the engine and immediately check for oil pressure.
- Allow the engine to run at a slightly elevated idle (e.g., 1500-2000 RPM) for 20-30 minutes to properly seat the camshaft and other components, if applicable. Monitor for leaks and unusual noises.
4.2. Driving Break-in
- Avoid heavy loads, high RPMs, and sustained speeds for the first 500-1000 miles.
- Vary engine RPMs frequently during driving to help seat piston rings.
- Avoid aggressive acceleration or deceleration.
- Perform an initial oil and filter change after the first 500-1000 miles to remove any break-in contaminants.
5. Maintenance
Regular maintenance is essential for the continued performance and longevity of your rebuilt engine.
- Oil Changes: Adhere to the manufacturer's recommended oil change intervals using the specified oil type and viscosity.
- Fluid Levels: Regularly check engine oil, coolant, and other fluid levels.
- Cooling System: Ensure the cooling system is functioning correctly to prevent overheating, which can damage engine components.
- Inspections: Periodically inspect for any signs of leaks, unusual noises, or performance issues.
6. Troubleshooting
If you encounter issues after an engine rebuild, consider the following general troubleshooting steps. For complex problems, consult a professional technician.
6.1. Common Issues and Potential Causes
- Low Oil Pressure: Incorrect oil level, faulty oil pump (if replaced), blocked oil passages, incorrect bearing clearances.
- Engine Overheating: Insufficient coolant, air in the cooling system, faulty thermostat, improper ignition timing, restricted radiator.
- Excessive Smoke:
- Blue Smoke: Oil burning, often due to improperly seated piston rings or valve stem seals.
- White Smoke: Coolant burning, indicating a head gasket leak or cracked component.
- Black Smoke: Rich fuel mixture, often related to fuel system or sensor issues.
- Unusual Noises:
- Knocking/Tapping: Bearing issues, piston slap, valve train problems.
- Hissing: Vacuum leak or exhaust leak.
- Fluid Leaks: Improperly installed gaskets or seals, damaged components, loose fasteners.
6.2. General Troubleshooting Steps
- Check Fluid Levels: Verify all fluid levels are correct.
- Visual Inspection: Look for obvious leaks, loose connections, or damaged components.
- Diagnostic Codes: If the check engine light is on, retrieve diagnostic trouble codes (DTCs) using an OBD-II scanner.
- Consult Service Manual: Refer to your vehicle's service manual for specific diagnostic procedures.
7. Specifications
| Specification | Detail |
|---|---|
| Manufacturer | DNJ ENGINE COMPONENTS |
| Brand | DNJ |
| Manufacturer Part Number | EK4221 |
| Item Weight | 17.65 pounds |
| Product Dimensions | 24 x 12 x 6 inches |
8. Warranty Information
All DNJ® Parts carry a limited 12-month or 12,000-mile warranty, whichever occurs first. This warranty is limited to the replacement of a defective product only. For full warranty terms and conditions, please refer to the official DNJ warranty documentation or contact customer support.
9. Customer Support
For technical assistance, questions regarding component sizing, or warranty claims, please contact DNJ customer support. You can also visit the official DNJ store for more product information and resources.
DNJ Store: Visit the DNJ Store on Amazon