1. Introduction
This manual provides comprehensive instructions for the safe and efficient operation, installation, and maintenance of your EQBVZZRD Portable EV Charger 7KW 32A Type2. Please read this manual thoroughly before using the product and retain it for future reference.
2. Important Safety Information
WARNING: Failure to follow these safety instructions could result in fire, electric shock, serious injury, or death.
- Ensure the charging cable and plug are free from damage before each use.
- Do not use the charger if any part is damaged or shows signs of wear.
- Do not attempt to open, disassemble, or modify the charger.
- Keep the charger away from water, moisture, and flammable materials.
- Ensure proper grounding of the power outlet.
- Always connect the charger to the vehicle first, then to the power source. Disconnect in reverse order.
- This charger is equipped with multiple safety protections including Leakage protection (TypeB AC30mA + DC6mA), Over-voltage and under-voltage protection, Lightning Protection, Over-current Protection, Overheat Protection, Ground Protection, and Overload protection.
- Operating temperature range: Consult specifications.
3. Product Overview and Components
The EQBVZZRD Portable EV Charger is a 7KW, 32A, Type 2 electric vehicle charging cable designed for convenient and adjustable charging. It features a control box with an LCD display for real-time data.

Figure 3.1: Main components of the portable EV charger, showing the control box, Type 2 charging gun, and CEE plug.
3.1 Key Features:
- Adjustable Current: Supports 7 levels of current adjustment (8A, 10A, 13A, 16A, 20A, 24A, 32A).
- Scheduled Charging: Set delayed charging to avoid peak hours.
- Charging Duration Setting: Set charging duration from 1-15 hours.
- Real-Time Data Display: Large LCD screen shows voltage, current, temperature, power consumption, and charging status.
- Robust Protection: IP67 (Water resistant), Fire resistant, Over Current, Over Voltage, Under Voltage, Missing Diode, Ground Fault, Over Temperature Protections.
- High-Strength Materials: PC+ASA material with 3.5mm thickness for enhanced durability.

Figure 3.2: Control box interface detailing current adjustment, time settings, and various protection mechanisms.
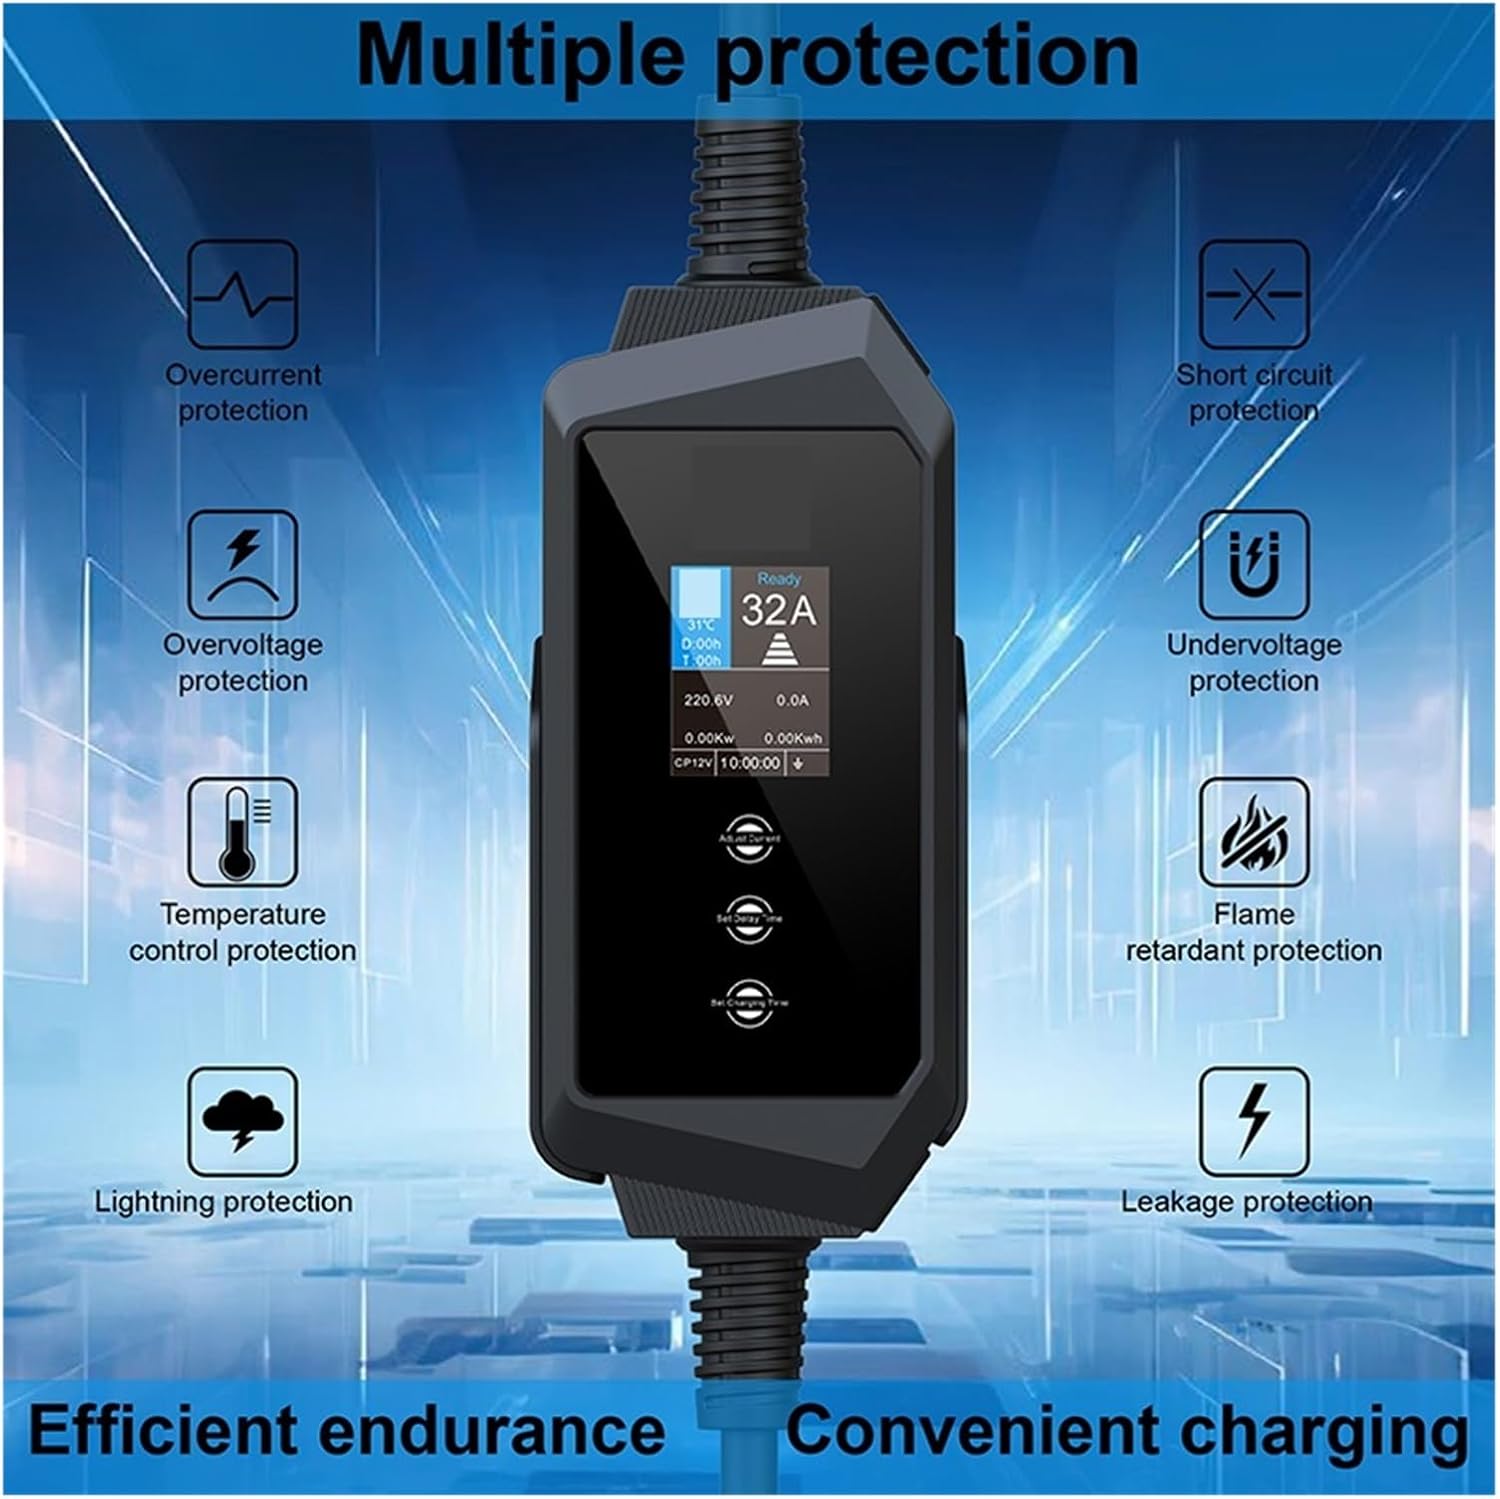
Figure 3.3: Visual representation of the charger's comprehensive safety features.
4. Setup and Installation
The EQBVZZRD Portable EV Charger is designed for ease of use. It comes with a charging box bracket and charging plug holder for convenient storage and mounting.
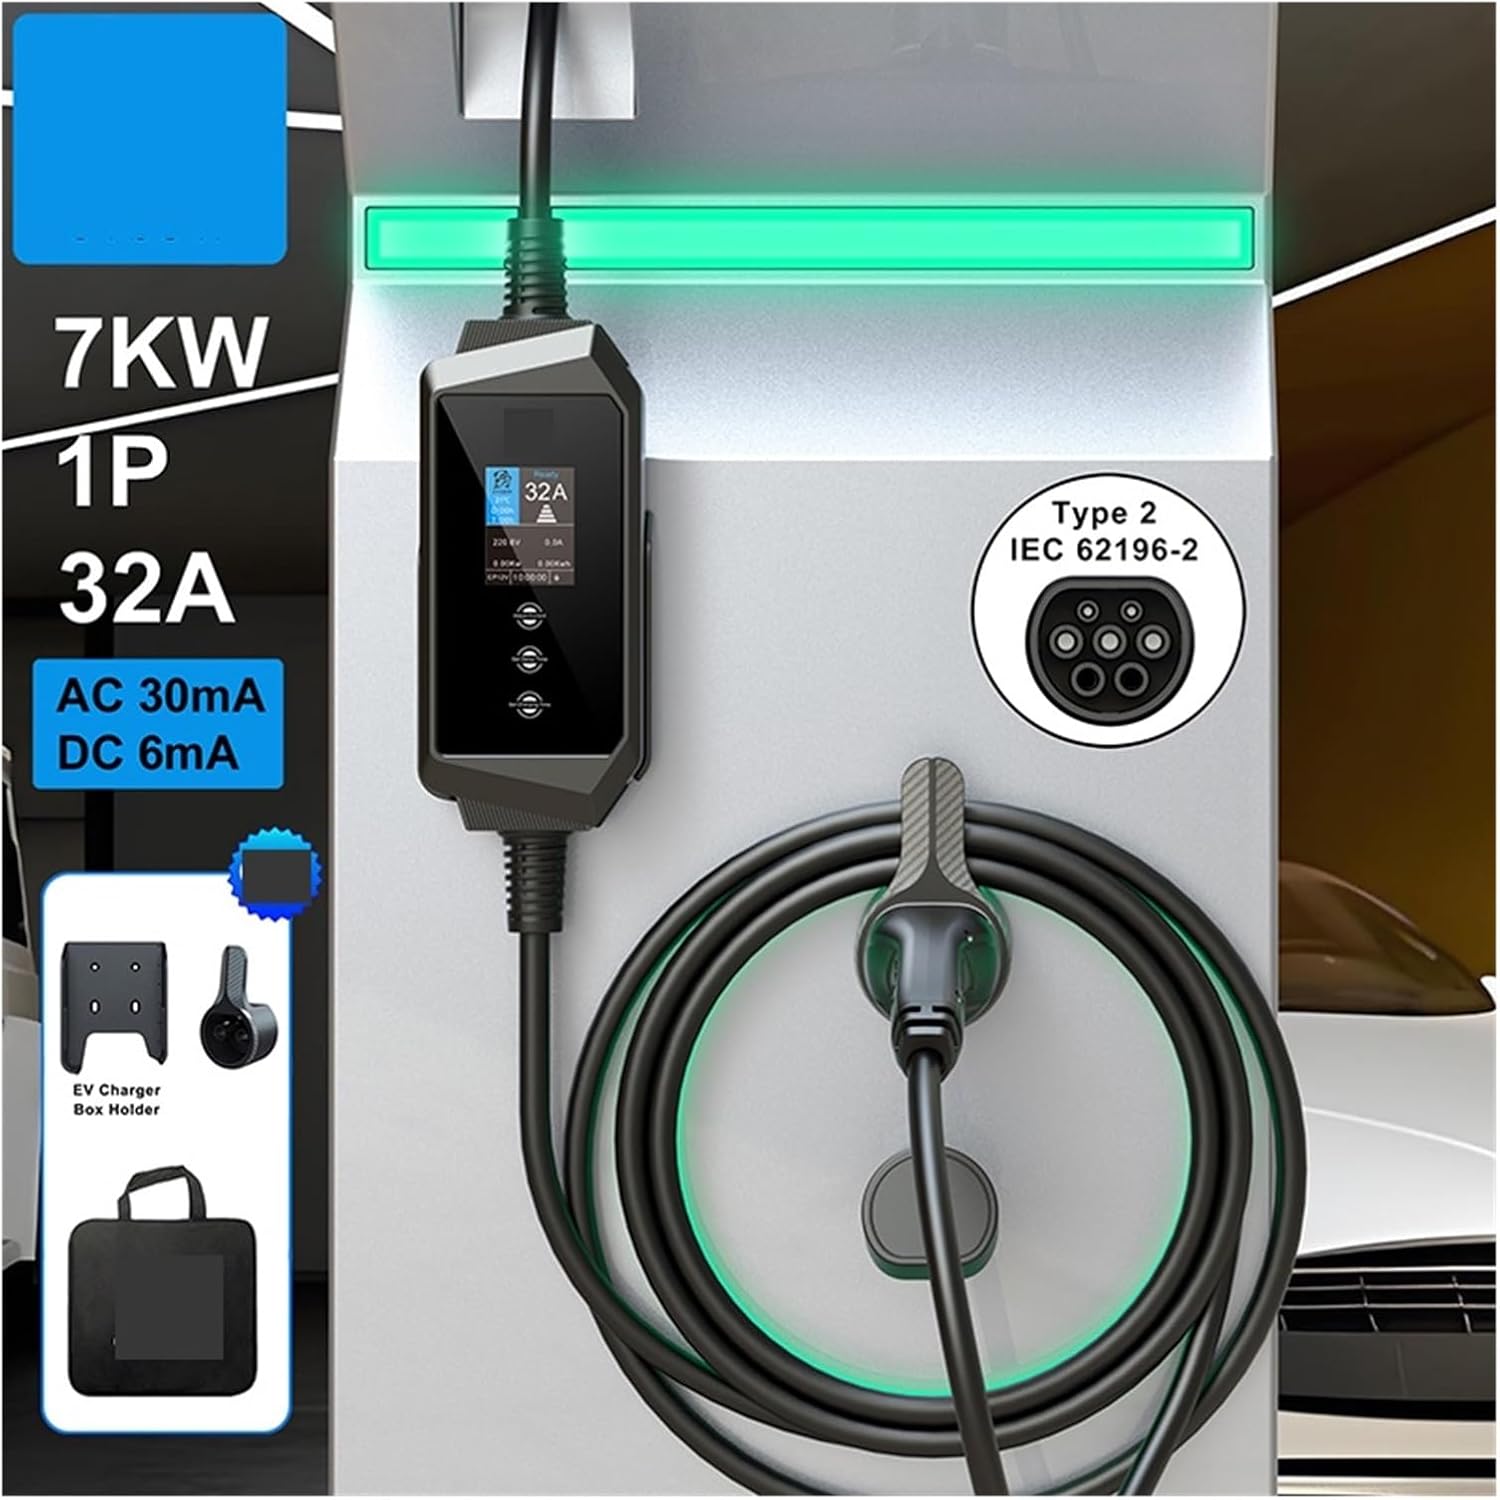
Figure 4.1: Example setup of the portable EV charger, demonstrating its use with a Type 2 compatible electric vehicle.
4.1 Mounting the Charger (Optional):
If desired, use the provided charging box bracket and plug holder to mount the control box and store the charging gun securely. Ensure the mounting location is dry, protected from direct sunlight, and within reach of your vehicle and power outlet.
4.2 Power Connection:
Connect the charger's power plug (typically a CEE 32A 3-pin blue plug for 7KW 1-phase) to a compatible and properly grounded 220V-240V AC power outlet. Ensure the outlet can safely provide 32A. The charger is designed for 1-phase operation. If the plug provided with your charger does not match the 32A rating (e.g., a 16A plug as sometimes shown in product images), do not use it and contact customer support immediately, as this poses a significant safety risk.
5. Operating Instructions
5.1 Starting a Charge:
- Ensure the charger is connected to a power source. The LCD screen will illuminate.
- Connect the Type 2 charging gun to your electric vehicle's charging port. Ensure it is securely latched.
- The charger will perform a self-check. Once ready, it will display "Ready".
- The charging process will typically begin automatically with the last set current.
5.2 Adjusting Charging Current:
Press the "Adjust Current" button on the control box to cycle through available current settings (8A, 10A, 13A, 16A, 20A, 24A, 32A). Select the appropriate current based on your vehicle's requirements and power source capacity.
5.3 Setting Delayed Charging:
Press the "Set Delayed Charging" button. Use the adjustment buttons to set the desired delay time (e.g., 1-15 hours). The charger will begin charging after the set delay period, allowing you to utilize off-peak electricity rates.
5.4 Setting Charging Duration:
Press the "Set Charging Time" button. Use the adjustment buttons to set the desired charging duration (e.g., 1-15 hours). The charger will automatically stop after the set time has elapsed.
5.5 Understanding the LCD Display:
The LCD screen provides real-time information during charging:

Figure 5.1: Detailed view of the LCD display showing various charging parameters for a 1-phase 7KW setup.
- Charging State: Indicates "Ready", "Charging", or error codes.
- Set Current: Displays the currently selected charging amperage.
- Real-time Temperature: Shows the internal temperature of the control box.
- Set Delay Time (D:00h): Displays the set delay before charging starts.
- Set Charging Time (T:00h): Displays the set duration for charging.
- Charging Voltage (V): Current voltage from the power source.
- Charging Current (A): Actual current being drawn by the vehicle.
- Real-time Power (KW): Instantaneous power consumption.
- Power Consumption (KWh): Total energy delivered during the current session.
5.6 Stopping a Charge:
- If charging is active, press the stop button on the control box (if available) or simply disconnect the charger from the power source.
- Disconnect the Type 2 charging gun from your vehicle.
- Disconnect the power plug from the wall outlet.
6. Maintenance and Care
- Cleaning: Wipe the charger and cables with a dry, soft cloth. Do not use abrasive cleaners or solvents.
- Storage: Store the charger in a dry, cool place, away from direct sunlight and extreme temperatures. Use the provided plug holder to prevent damage to the charging gun.
- Inspection: Regularly inspect the cable, plugs, and control box for any signs of damage, wear, or corrosion. If any damage is found, discontinue use immediately and contact customer support.
- Water Resistance: The control box is IP66 rated, the charging gun is IP65, and the power plug is IP44. While resistant to splashes, avoid submerging any part of the charger in water.

Figure 6.1: IP (Ingress Protection) ratings for the charger's components, indicating their resistance to dust and water.
7. Troubleshooting
If you encounter issues, refer to the following common problems and solutions:
| Problem | Possible Cause | Solution |
|---|---|---|
| Charger not powering on. | No power from outlet, damaged cable/plug. | Check power outlet with another device. Inspect cable and plug for damage. |
| Charging not starting. | Vehicle not connected properly, delayed charging set, error code displayed. | Ensure charging gun is fully inserted. Check if delayed charging is active. Refer to LCD for error codes and consult manual. |
| Slow charging speed. | Current setting too low, vehicle limitation, power supply issue. | Adjust current to a higher setting (up to 32A). Check vehicle's charging capacity. Ensure power outlet can deliver sufficient current. |
| Overheat protection activated. | High ambient temperature, poor ventilation, prolonged high current charging. | Move charger to a cooler, well-ventilated area. Reduce charging current. Allow charger to cool down before resuming. |
| Leakage protection activated. | Ground fault, internal fault. | Disconnect immediately. Do not attempt to reset without checking the power source and charger for faults. Contact qualified electrician or customer support. |
For error codes not listed or persistent issues, please contact customer support.
8. Product Specifications
| Feature | Detail |
|---|---|
| Model | B0D7Q3664J |
| Brand | EQBVZZRD |
| Charging Power | 7KW (1-Phase) |
| Charging Current | Adjustable: 8A, 10A, 13A, 16A, 20A, 24A, 32A |
| Connector Type (Vehicle) | Type 2 (IEC 62196-2) |
| Power Plug Type | CEE 32A 3-pin (blue, compatible with 220-240V outlets) |
| Input Voltage | 220V-240V AC |
| Frequency | 50/60 Hz |
| Protection Features | Leakage (TypeB AC30mA + DC6mA), Over/Under Voltage, Lightning, Over-current, Overheat, Ground, Overload |
| IP Rating (Control Box) | IP66 |
| IP Rating (Charging Gun) | IP65 |
| IP Rating (Power Plug) | IP44 |
| Material | PC+ASA (3.5mm thickness) |
| Item Weight | 2.2 pounds |
| Package Dimensions | 1.18 x 0.79 x 0.39 inches |
9. Warranty and Customer Support
For warranty information, technical support, or service inquiries, please contact your retailer or the manufacturer directly. Keep your purchase receipt as proof of purchase.
Manufacturer: EQBVZZRD
Model Number: B0D7Q3664J
Date First Available: June 21, 2024