1. Introduction
This manual provides essential information for the safe and efficient operation of your EQBVZZRD Portable EV Charger. Please read this manual thoroughly before using the product and retain it for future reference. This portable EV charger is designed for convenient electric vehicle charging, offering adjustable current settings and robust safety features.

Image 1.1: Overview of the EQBVZZRD Portable EV Charger, highlighting its adjustable current (8A/10A/13A/16A), 5-meter cable, IEC 62196-2 compatibility, IP65 rating, and 3.5KW power output.
2. Safety Information
Observe all safety precautions to prevent injury or damage. This device incorporates multiple safety features:
- IP65 Rating: Provides protection against dust and low-pressure water jets.
- Over-Current Protection: Prevents damage from excessive current.
- Over-Voltage Protection: Safeguards against high voltage spikes.
- Under-Voltage Protection: Protects against low voltage conditions.
- Leakage Protection: Detects and prevents electrical leakage.
- Overheating Protection: Automatically reduces current or stops charging if temperatures exceed safe limits.
- Ground Fault Protection: Ensures proper grounding to prevent electric shock.
- Short Circuit Protection: Prevents damage from short circuits.
Always ensure the charger is connected to a properly grounded outlet. Do not use the charger if the cable or connector is damaged. Keep the charging area clear of flammable materials.

Image 2.1: Illustration of the seven types of protection integrated into the EV charger, including short circuit, leakage current, over/under frequency, over current, over temperature, ground, and lightning protection.
3. Package Contents
Verify that all items are present in the package:
- EV Charger Control Box with 5m Cable (GBT Connector)
- Schuko Plug
- Portable Control Box
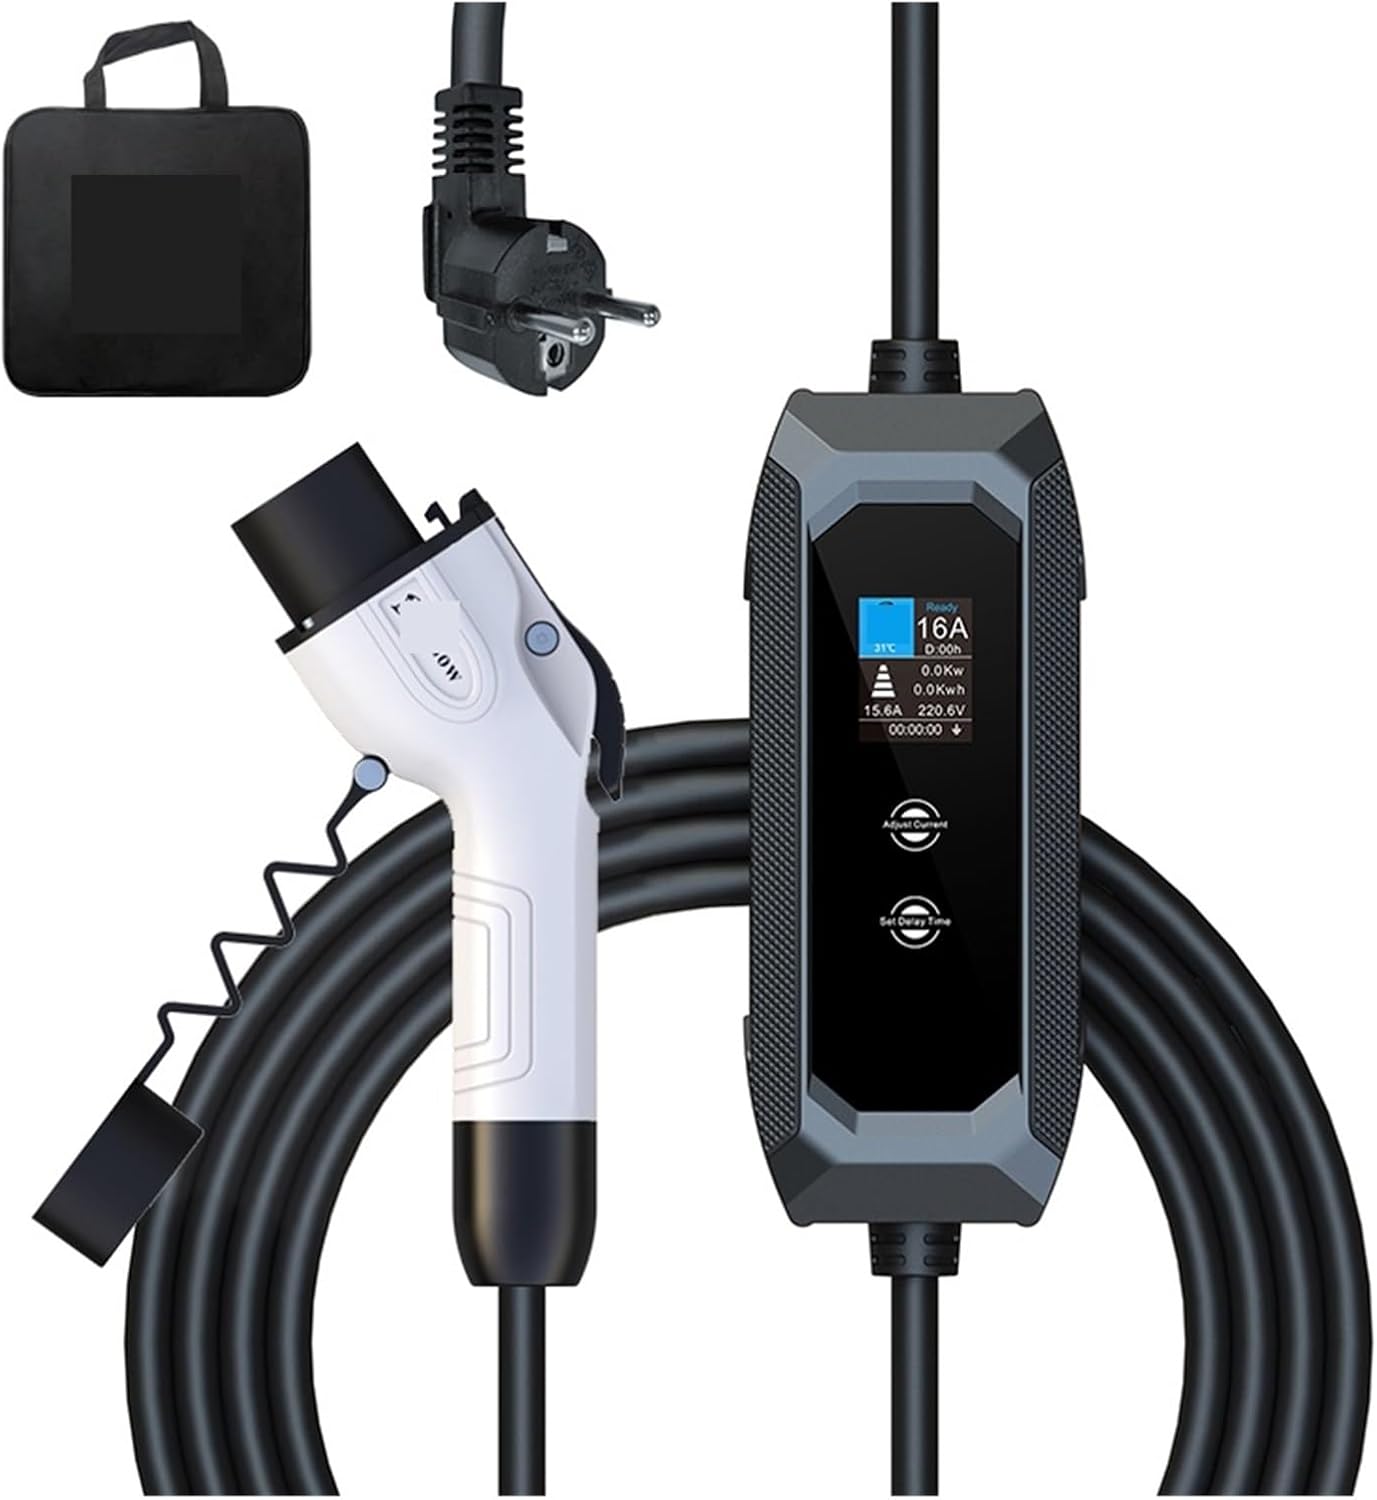
Image 3.1: The EQBVZZRD Portable EV Charger, including the GBT connector, control box, power plug, and a carrying bag.
4. Product Overview and Features
The EQBVZZRD Portable EV Charger is designed for ease of use and reliability. Key features include:
- 1.8-inch LCD Display: Shows real-time charging status, including time, voltage, current, power, and temperature.
- Adjustable Current: Allows selection of 8A, 10A, 13A, or 16A to suit different power sources and charging needs.
- Intelligent Time Setting: Enables delayed charging start times from 1 to 15 hours to optimize charging costs.
- High Compatibility: This specific model is compatible with GBT standard electric vehicles. Other variants support IEC-62169 Type 2 and SAE J1772 Type 1.
- Durable Construction: Made with PC+ASA material in 3.5mm thickness, designed to withstand impacts, such as being rolled over by a 2-ton vehicle, and drops from 1 meter.
- Portable Design: Weighing only 1.8kg with a 5-meter cable, it is easy to transport for charging on the go.

Image 4.1: The charger's control box alongside illustrations of Type2 (IEC 62196-2), Type1 (SAE J1772), and GB/T (GB/T20234) connectors, indicating broad compatibility across different models.

Image 4.2: The charger's cable and control box positioned under a car tire, illustrating its robust construction designed to withstand significant pressure and accidental collisions.
5. Setup
- Inspect the Charger: Before each use, visually inspect the charging cable, control box, and connectors for any signs of damage, wear, or foreign objects. Do not use if damaged.
- Select a Power Outlet: Connect the Schuko plug to a standard, properly grounded electrical outlet. Ensure the outlet can support the charger's maximum current (16A).
- Prepare the Vehicle: Ensure your electric vehicle is turned off and the charging port is accessible and clean.
6. Operating Instructions
Follow these steps to charge your electric vehicle:
- Adjust Current (if needed): Before plugging the GBT connector into your vehicle, use the control box buttons to select the desired charging current (8A, 10A, 13A, or 16A). The device cannot adjust the current during charging.
- Set Delay Time (optional): If you wish to delay the start of charging, press the "Set Time" button on the control box and adjust the delay from 1 to 15 hours. This can help manage charging costs during off-peak hours.
- Connect to Vehicle: Firmly insert the GBT connector into your vehicle's charging port. Ensure it clicks into place.
- Monitor Charging: The 1.8-inch LCD display on the control box will show the real-time charging status, including current, voltage, power, temperature, and charging time.
- Charging Completion: Once charging is complete, or if you need to stop charging, first disconnect the GBT connector from your vehicle, then unplug the Schuko plug from the wall outlet.

Image 6.1: A detailed view of the charger's LCD display, showing real-time temperature, charging state, set current, set delay time, real-time power, power consumption, charging current, charging voltage, and charging time. It also highlights the adjustable current and delayed time settings.
7. Maintenance
- Cleaning: Wipe the charger's exterior with a soft, dry cloth. Do not use harsh chemicals or abrasive cleaners. Ensure the connectors are free of dust and moisture.
- Storage: When not in use, store the charger in a dry, cool place, away from direct sunlight and extreme temperatures. Coil the cable neatly to prevent kinks or damage.
- Regular Inspection: Periodically check the cable and connectors for any signs of damage or wear.
8. Troubleshooting
If you encounter issues, refer to the following:
- Charger Not Activating: Ensure the power plug is fully inserted into the wall outlet and the GBT connector is securely connected to the vehicle. Check for power at the outlet.
- Error Indicators: The indicator lights on the control box will help identify potential errors. Refer to the display for specific error codes or messages. Common issues include over-temperature, voltage fluctuations, or ground faults.
- Charging Interrupted: This could be due to an internal safety mechanism (e.g., overheating, over-current) or an issue with the vehicle's charging system. Disconnect, wait a few minutes, and try again. If the problem persists, consult a qualified technician.
- Current Adjustment Not Working: Remember that current can only be adjusted before the GBT connector is plugged into the vehicle.
9. Specifications
| Parameter | Value |
|---|---|
| Rated Power | Maximum 3.5KW |
| Adjustable Current | 8A-10A-13A-16A |
| Rated Voltage | 85V-264V |
| Protection Grade | IP65 |
| Mechanical Life | Plugging and unplugging times > 10000 |
| Number of Phases | Single-phase |
| Total Cable Length | 5M |
| Operating Temperature | -30 °C ~ +65 °C |
| Item Weight | 2.2 pounds (approx. 1.0 kg) |
10. Warranty and Support
For warranty information and customer support, please refer to the documentation provided with your purchase or contact the retailer. Keep your proof of purchase for warranty claims.