1. Introduction
This manual provides essential instructions for the safe operation, maintenance, and troubleshooting of your COWSAR Beverage Station Bundle, which includes a 14-Cup Programmable Coffee Maker and an Ice Maker. Please read this manual thoroughly before initial use and retain it for future reference.
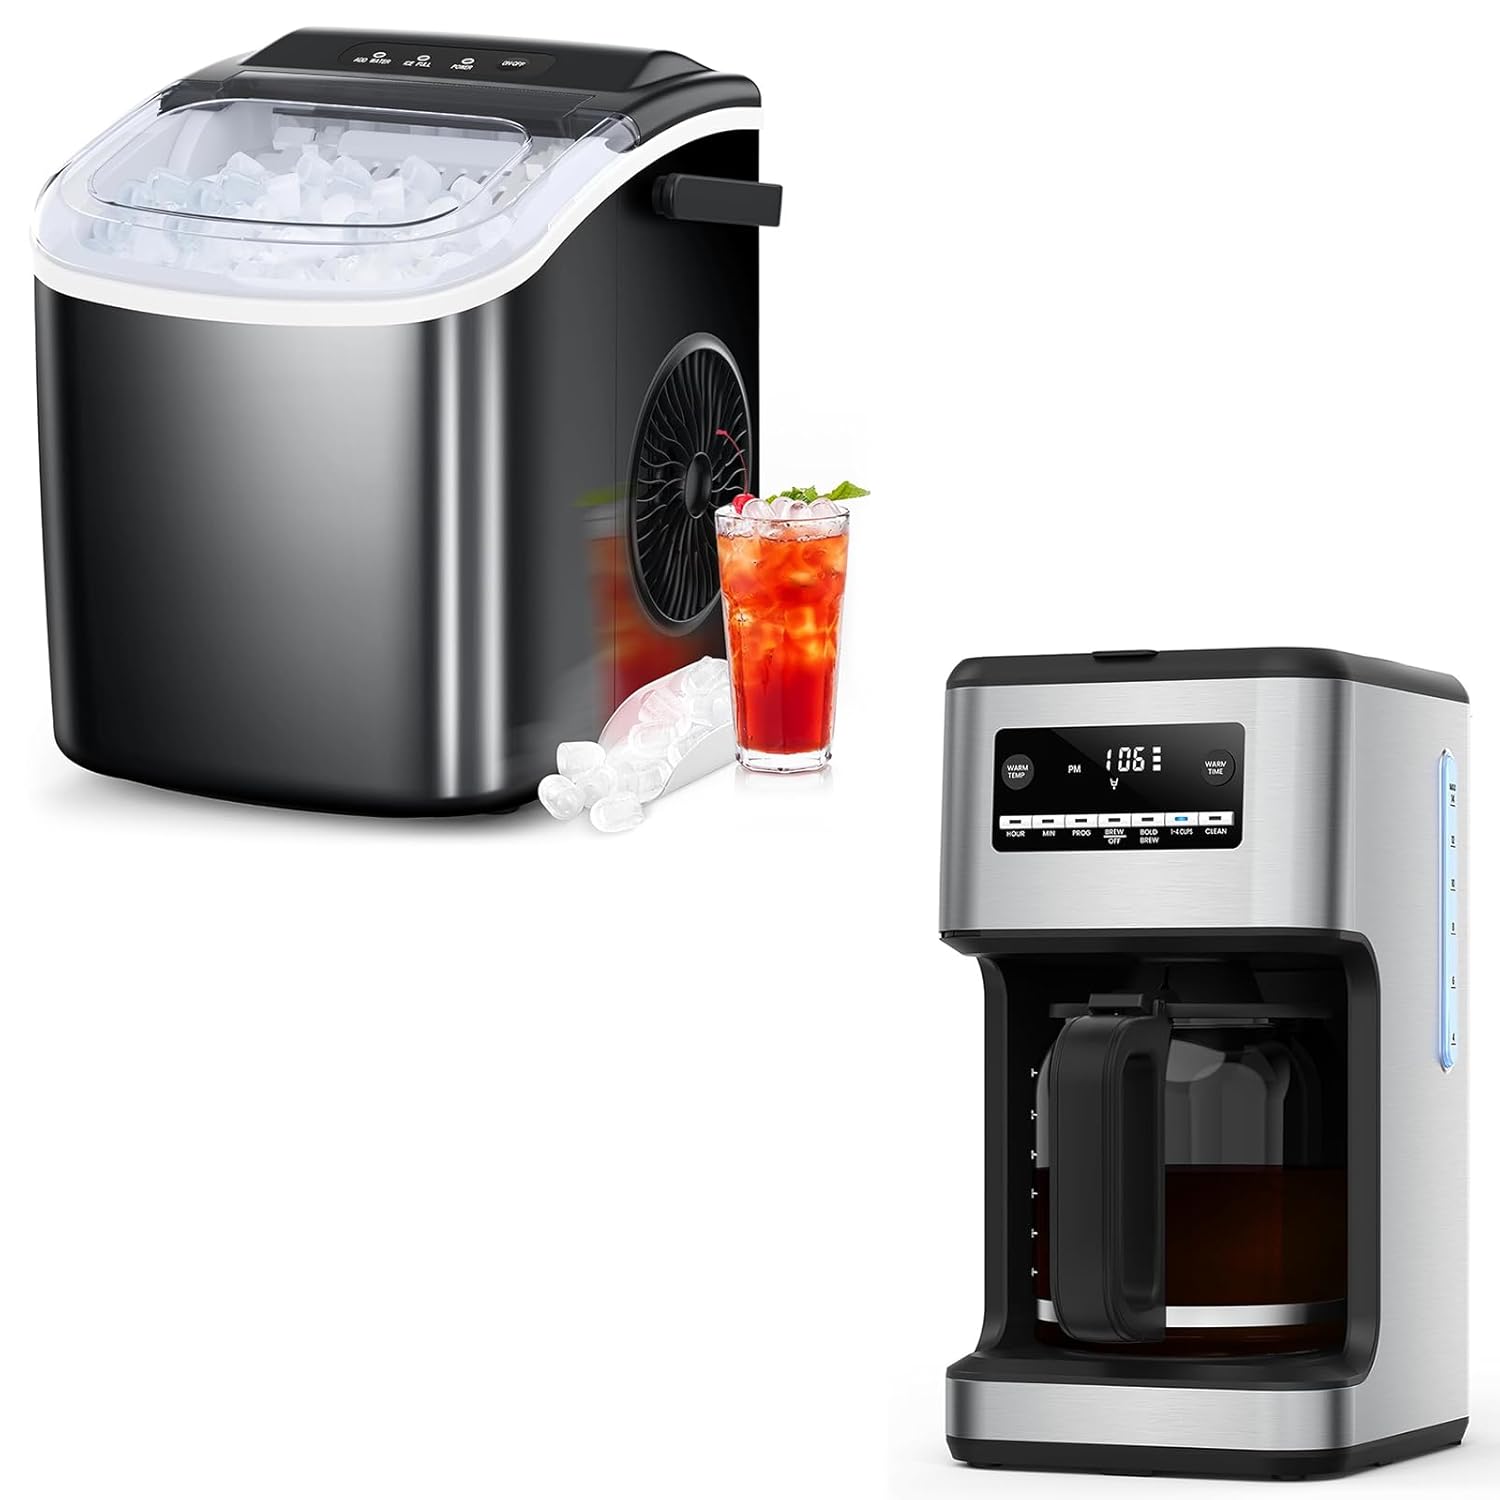
Image 1.1: The COWSAR Beverage Station Bundle, featuring both the coffee maker and the ice maker.
2. Important Safety Instructions
- Read all instructions before using the appliance.
- Do not touch hot surfaces. Use handles or knobs.
- To protect against fire, electric shock, and injury to persons, do not immerse cord, plugs, or appliance in water or other liquid.
- Close supervision is necessary when any appliance is used by or near children.
- Unplug from outlet when not in use and before cleaning. Allow to cool before putting on or taking off parts, and before cleaning the appliance.
- Do not operate any appliance with a damaged cord or plug or after the appliance malfunctions or has been damaged in any manner.
- The use of accessory attachments not recommended by the appliance manufacturer may result in fire, electric shock, or injury to persons.
- Do not use outdoors.
- Do not let cord hang over edge of table or counter, or touch hot surfaces.
- Do not place on or near a hot gas or electric burner, or in a heated oven.
- Always attach plug to appliance first, then plug cord into the wall outlet. To disconnect, turn any control to 'off', then remove plug from wall outlet.
- Do not use appliance for other than intended use.
3. Package Contents
Verify that all items listed below are present in your package:
- COWSAR 14-Cup Programmable Coffee Maker
- COWSAR Ice Maker
- Glass Carafe (for Coffee Maker)
- Reusable Gold-tone Filter (for Coffee Maker)
- Ice Basket (for Ice Maker)
- Ice Scoop (for Ice Maker)
- User Manual
4. Product Overview
4.1. COWSAR 14-Cup Programmable Coffee Maker
The COWSAR 14-Cup Programmable Coffee Maker is designed for convenience and customizable brewing. Key features include a programmable timer, adjustable warming temperature, and a bold brew mode.
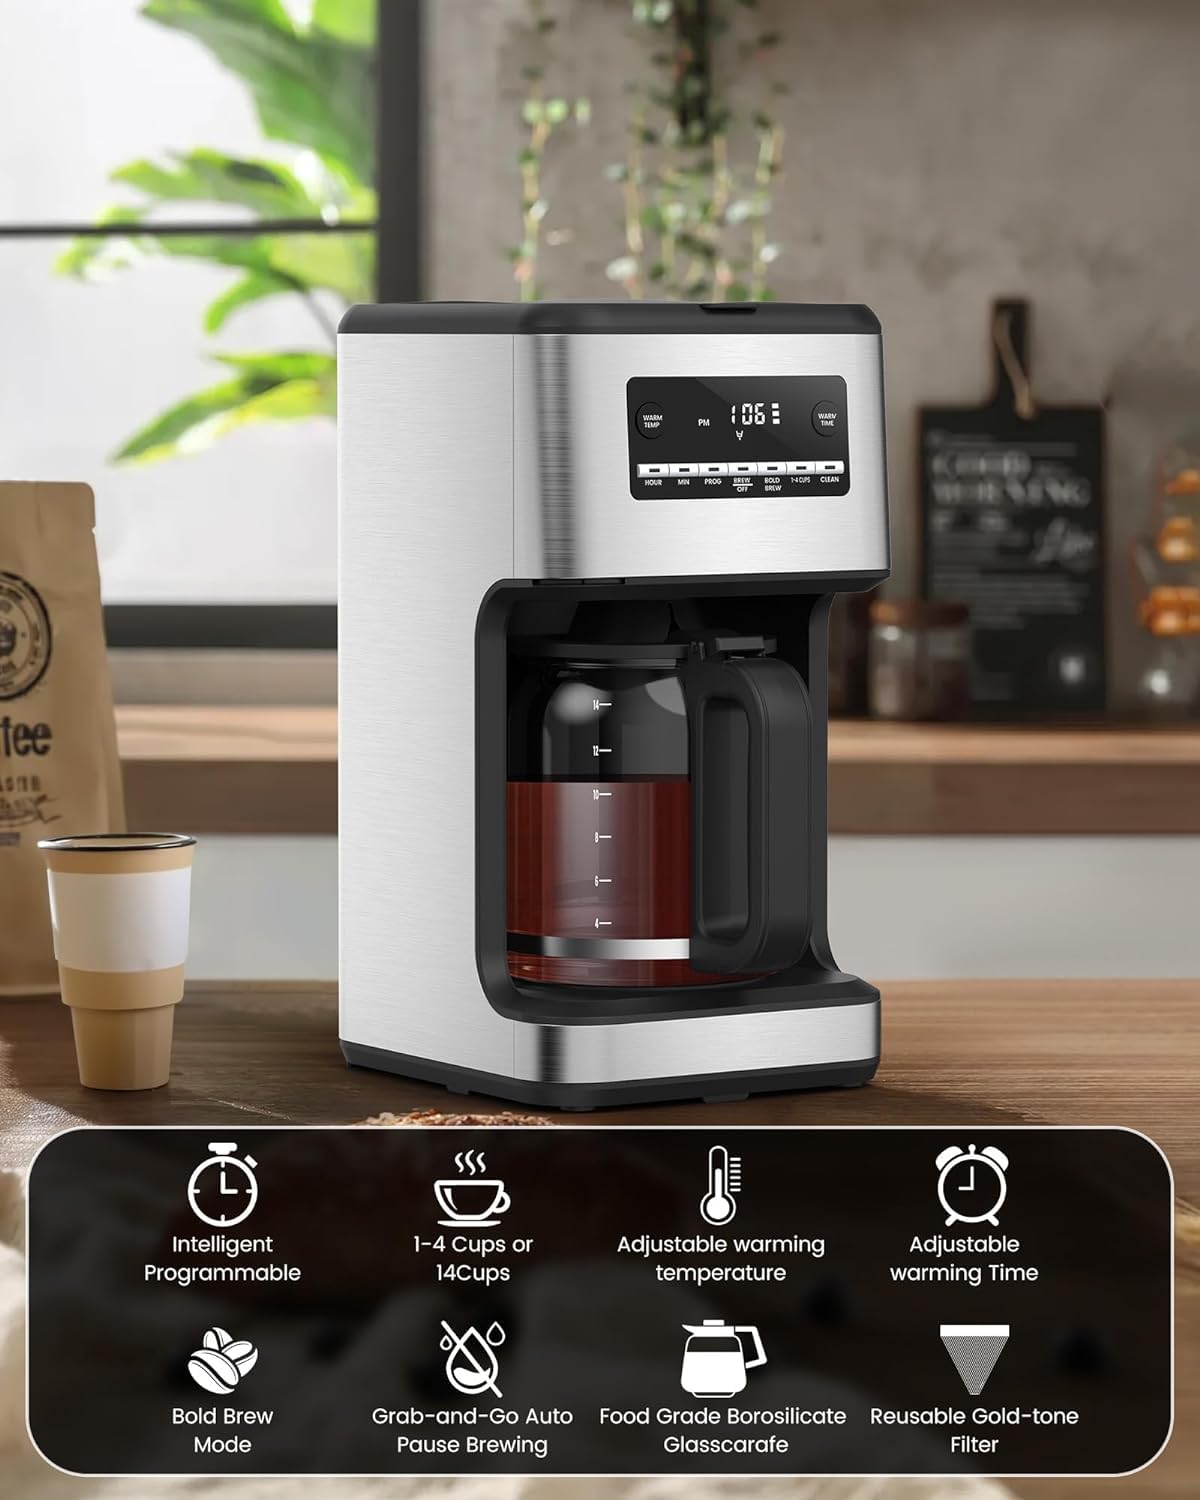
Image 4.1: The coffee maker highlighting its intelligent programmable features, 1-4 cups or 14 cups brewing, adjustable warming temperature, adjustable warming time, bold brew mode, grab-and-go auto pause brewing, food grade borosilicate glass carafe, and reusable gold-tone filter.
4.2. COWSAR Ice Maker
The COWSAR Ice Maker produces bullet-shaped ice cubes efficiently, with a capacity of up to 26.5 pounds per 24 hours. It features a quick ice-making cycle, producing ice in approximately 6 minutes.

Image 4.2: The ice maker showcasing its effective ice making capabilities, including being ready in 6 minutes, producing 26.5 lbs/24h, and featuring a powerful compressor.
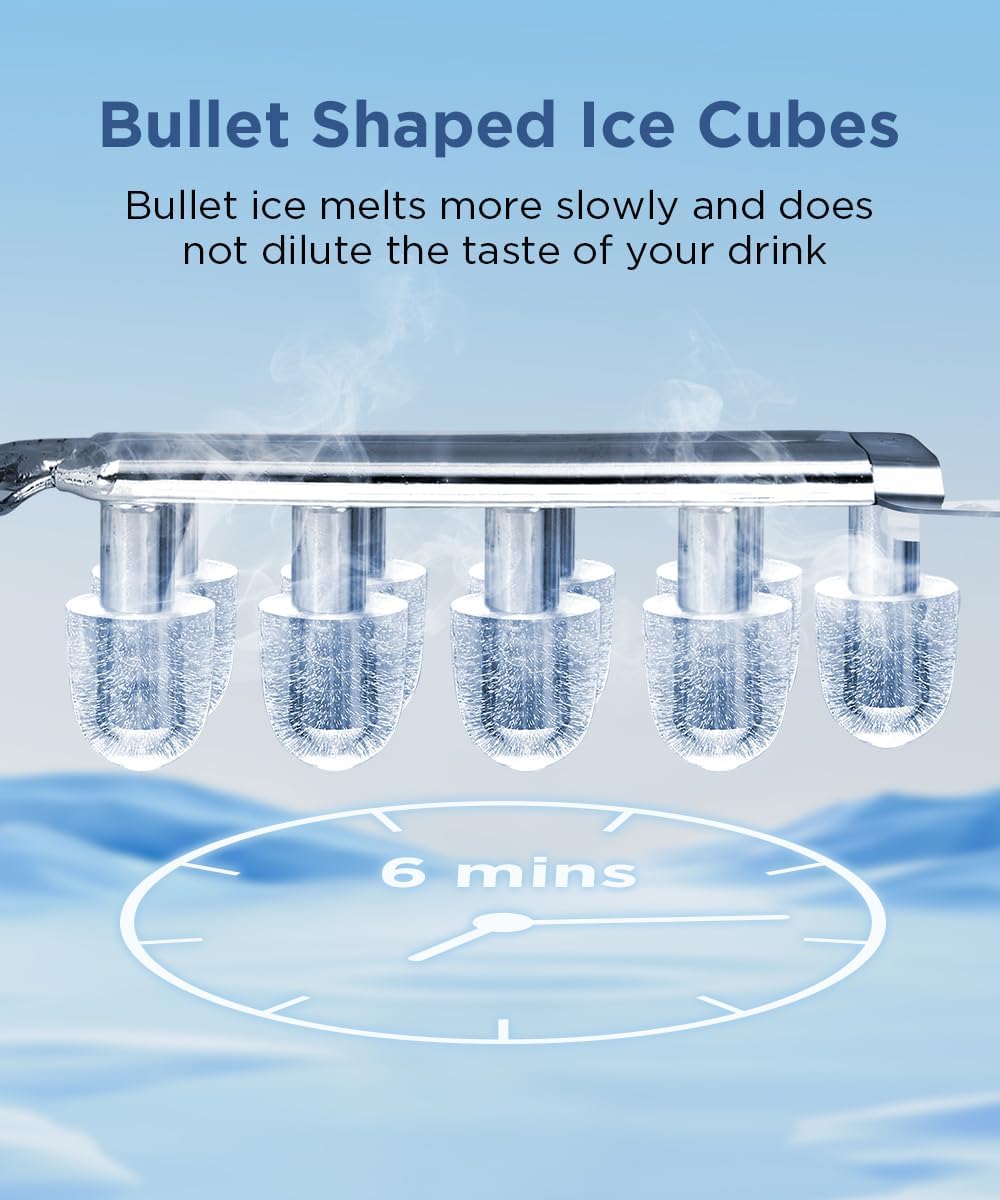
Image 4.3: A visual representation of the bullet-shaped ice cubes produced by the ice maker, emphasizing their slower melting rate.
5. Setup
5.1. Coffee Maker Setup
- Unpack: Remove all packaging materials and labels from the coffee maker.
- Initial Cleaning: Wash the glass carafe, lid, and reusable filter in warm, soapy water. Rinse thoroughly and dry.
- First Use Cycle: Fill the water reservoir with clean water to the 14-cup mark. Place the empty carafe on the warming plate. Run a full brew cycle without coffee grounds to clean the internal components. Discard the water.
- Placement: Place the coffee maker on a flat, stable surface away from heat sources.
5.2. Ice Maker Setup
- Unpack: Remove all packaging materials and labels from the ice maker.
- Placement: Place the ice maker on a flat, stable surface, ensuring adequate ventilation around the unit. Allow at least 4 inches of space from walls or other objects.
- Initial Cleaning: Clean the interior of the ice maker, including the water reservoir and ice basket, with a soft cloth and mild detergent. Rinse thoroughly.
- Power Connection: Plug the ice maker into a grounded electrical outlet.
- First Use: It is recommended to run 2-3 ice-making cycles and discard the first batches of ice to ensure cleanliness.
6. Operating Instructions
6.1. Coffee Maker Operation
- Fill Water Reservoir: Open the lid and fill the water reservoir with fresh, cold water to your desired level (up to 14 cups).
- Add Coffee Grounds: Place the reusable filter into the filter basket. Add your preferred amount of ground coffee. For a stronger brew, use the 'Bold Brew' setting.
- Place Carafe: Ensure the glass carafe with its lid is correctly positioned on the warming plate.
- Brew Coffee:
- Immediate Brew: Press the 'ON/OFF' button to start brewing.
- Programmable Brew: Press the 'PROG' button, then use 'HOUR' and 'MIN' buttons to set the desired start time. Press 'PROG' again to confirm. The coffee maker will start brewing automatically at the set time.
- Adjust Warming Temperature/Time: Use the 'WARM TEMP' and 'WARM TIME' buttons to customize how long and at what temperature your coffee stays warm after brewing.

Image 6.1: Illustration of setting a wake-up coffee with the programmable feature: adding coffee powder in advance, setting the extraction time, and automatic warming.

Image 6.2: The coffee maker's interface showing options to customize coffee strength between regular or stronger brews.
6.2. Ice Maker Operation
- Fill Water Reservoir: Open the lid and fill the water reservoir with clean, potable water up to the 'MAX' fill line. Do not overfill.
- Power On: Press the 'POWER' button to turn on the ice maker. The 'ICE' indicator light will illuminate.
- Ice Production: The ice maker will automatically begin the ice-making cycle. The first batch of ice will be ready in approximately 6-10 minutes.
- Ice Full Indicator: When the ice basket is full, the 'ICE FULL' indicator light will illuminate, and the ice maker will pause operation. Remove ice to resume.
- Add Water Indicator: If the water level is too low, the 'ADD WATER' indicator light will illuminate. Add more water to the reservoir to continue ice production.
- Self-Cleaning Function: To activate the self-cleaning mode, refer to Section 7.2.
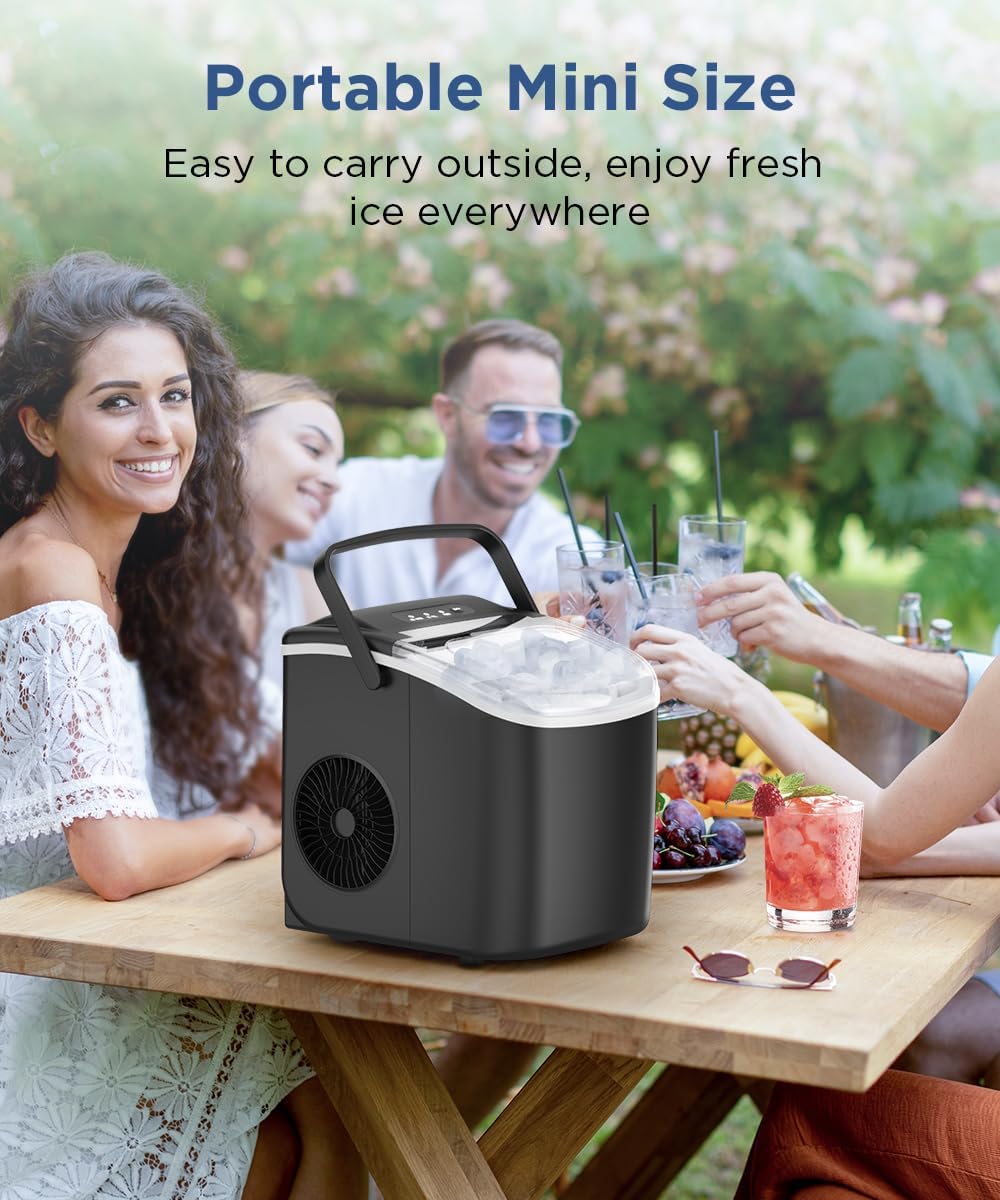
Image 6.3: The portable ice maker being used in an outdoor social setting, demonstrating its convenience for various environments.
7. Maintenance and Cleaning
7.1. Coffee Maker Maintenance
- Daily Cleaning: After each use, wash the glass carafe, lid, and reusable filter in warm, soapy water. The filter basket can also be removed and washed.
- Exterior Cleaning: Wipe the exterior of the coffee maker with a soft, damp cloth. Do not use abrasive cleaners or scouring pads.
- Descaling: Over time, mineral deposits can build up. Descale the coffee maker every 2-3 months, or more frequently if you have hard water. Fill the water reservoir with a mixture of white vinegar and water (1:2 ratio). Run a full brew cycle. After the cycle, run 2-3 cycles with clean water to rinse thoroughly.
7.2. Ice Maker Maintenance
- Self-Cleaning Mode: The ice maker features a self-cleaning mode. To activate, ensure the water reservoir is filled, then press and hold the 'CLEAN' button (or refer to specific button on your model if different) for a few seconds. The unit will run a cleaning cycle. After the cycle, drain the water and rinse the interior.
- Regular Cleaning: Regularly clean the water reservoir, ice basket, and ice scoop with a mild detergent and warm water. Rinse thoroughly.
- Draining Water: When not in use for an extended period, drain all water from the reservoir using the drain plug located at the bottom or side of the unit.
- Exterior Cleaning: Wipe the exterior with a soft, damp cloth.
8. Troubleshooting
8.1. Coffee Maker Troubleshooting
| Problem | Possible Cause | Solution |
|---|---|---|
| Coffee not brewing | No power; water reservoir empty; brew cycle not initiated. | Check power connection; fill water reservoir; press 'ON/OFF' or set program. |
| Coffee tastes weak | Insufficient coffee grounds; coarse grind; descaling needed. | Add more coffee; use finer grind; descale the unit. |
| Overflowing filter basket | Too much coffee grounds; filter clogged; carafe not placed correctly. | Reduce coffee grounds; clean filter; ensure carafe is centered. |
8.2. Ice Maker Troubleshooting
| Problem | Possible Cause | Solution |
|---|---|---|
| Ice maker not producing ice | No power; water reservoir empty; ambient temperature too high. | Check power; fill water reservoir; operate in a cooler environment. |
| 'ADD WATER' indicator on | Water level is low. | Add water to the reservoir up to the 'MAX' line. |
| 'ICE FULL' indicator on | Ice basket is full. | Remove ice from the basket. |
| Ice cubes are small or cloudy | Water quality; mineral buildup. | Use filtered water; run self-cleaning cycle. |
9. Specifications
| Feature | Specification |
|---|---|
| Brand | COWSAR |
| Coffee Maker Capacity | 14 Cups |
| Ice Maker Production Capacity | 26.5 lbs / 24 Hours |
| Ice Cube Shape | Bullet |
| Ice Making Time | Approx. 6 minutes per batch |
| Refrigerant (Ice Maker) | R600a |
10. Warranty and Support
For warranty information or technical support, please refer to the documentation included with your purchase or contact COWSAR customer service. Keep your proof of purchase for warranty claims.


