1. Introduction
The MLEEDA Displayport KVM Switch (Model 201DPA) allows two computers to share a single DisplayPort monitor, a set of USB keyboard and mouse, and up to four additional USB 3.0 peripheral devices. This device supports high resolutions up to 8K@30Hz and 4K@144Hz, providing a seamless and efficient workspace for users needing to manage multiple systems with minimal hardware.
This manual provides detailed instructions for setting up, operating, and maintaining your KVM switch, along with troubleshooting tips and product specifications.

Figure 1: MLEEDA Displayport KVM Switch (Model 201DPA)
2. Package Contents
Please verify that all items are present and in good condition upon opening the package:
- 1x MLEEDA Displayport KVM Switch
- 2x USB 3.0 Cables (1.5m)
- 1x USB Power Cable
- 1x Wired Remote Control
- 1x User Manual

Figure 2: Package contents including the KVM switch, cables, and remote.
3. Product Diagram
Familiarize yourself with the ports and indicators on your KVM switch:

Figure 3: Detailed connection diagram of the KVM switch. This diagram illustrates the various ports on the MLEEDA Displayport KVM Switch, including DisplayPort inputs for two PCs, a DisplayPort output for the monitor, USB 3.0 ports for peripherals, and USB-B ports for connecting to computers.
- Monitor Output: DisplayPort port for connecting to your monitor.
- PC Inputs (PC1, PC2): DisplayPort ports for video input from each computer.
- USB-B Ports (PC1, PC2): USB 3.0 ports for connecting to each computer to enable keyboard, mouse, and USB peripheral sharing.
- USB 3.0 Ports: Four USB 3.0 ports for connecting keyboard, mouse, printer, USB drives, and other peripherals.
- Select Button: Button on the front panel to switch between PC1 and PC2.
- Wired Remote Port: Port for connecting the included wired remote control.
- USB Power Input: USB-C port for connecting the USB power cable if additional power is needed.
- LED Indicators: Lights indicating which computer is currently active.
4. Setup Instructions
Follow these steps to set up your MLEEDA Displayport KVM Switch:
- Power Off Devices: Ensure both computers and your monitor are powered off before beginning the connection process.
- Connect Monitor: Connect your DisplayPort monitor to the 'MONITOR' DisplayPort output port on the KVM switch.
- Connect Computers (Video): Connect a DisplayPort cable from the DisplayPort output of PC1 to the 'PC1' DisplayPort input on the KVM switch. Repeat this step for PC2, connecting its DisplayPort output to the 'PC2' DisplayPort input.
- Connect Computers (USB): Connect one end of a USB 3.0 cable (USB-A to USB-B) to the USB-B port labeled 'PC1' on the KVM switch, and the other end (USB-A) to an available USB 3.0 port on PC1. Repeat this step for PC2, connecting its USB-B port to a USB 3.0 port on PC2.
- Connect Peripherals: Connect your USB keyboard, mouse, and any other USB 3.0 peripherals (e.g., printer, USB drive) to the four USB 3.0 ports on the front of the KVM switch.
- Connect Wired Remote (Optional): If desired, connect the wired remote control to the dedicated port on the KVM switch.
- Connect Power: If your setup requires additional power (e.g., for high-power USB devices or long cable runs), connect the included USB power cable to the USB-C power input on the KVM switch and to a 5V USB power source (e.g., a USB wall adapter, not included).
- Power On: Power on your monitor first, then power on PC1 and PC2. The KVM switch will automatically detect the active computer.
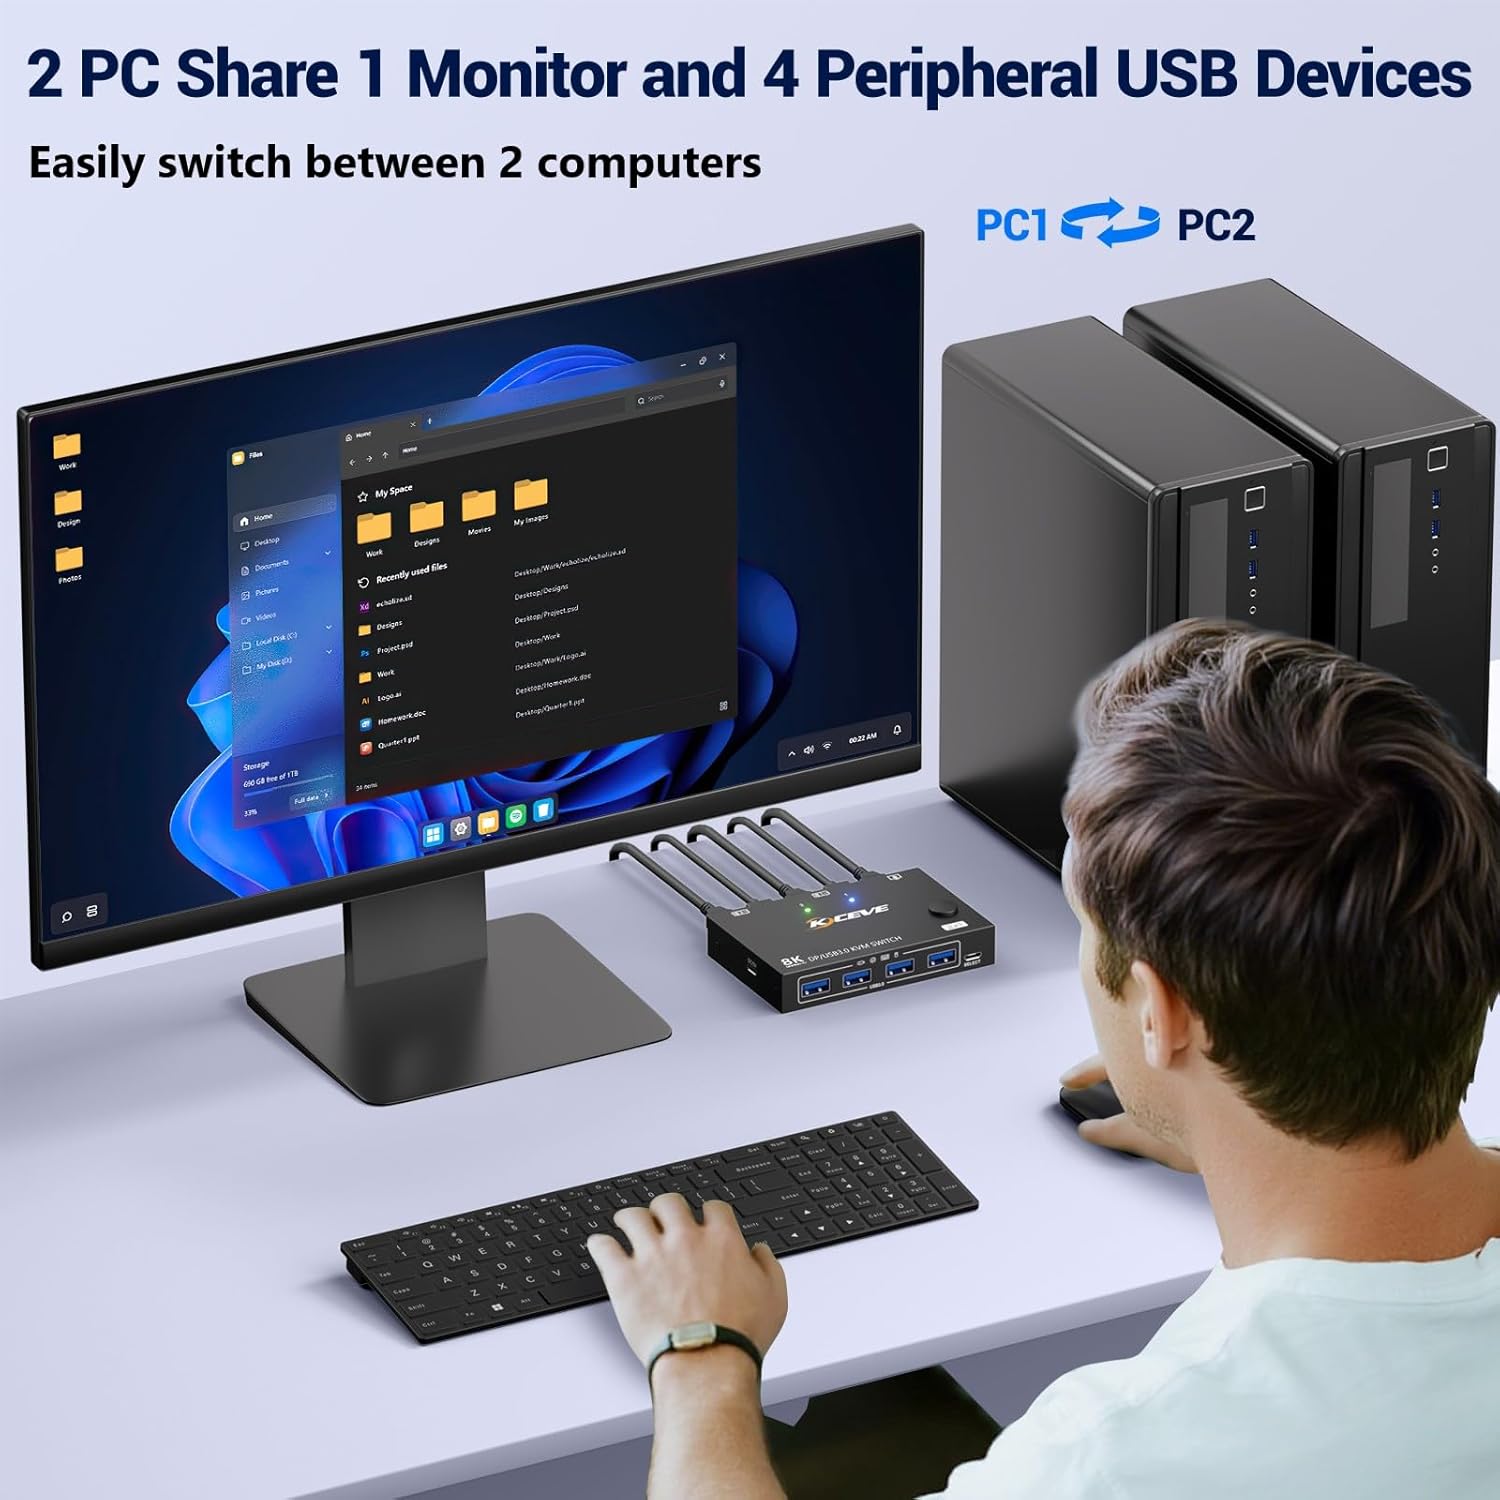
Figure 4: Example setup showing two computers sharing a single monitor and peripherals via the KVM switch. This image demonstrates a typical setup, showing two desktop computers connected to the KVM switch, which then connects to a single monitor, keyboard, and mouse, enabling shared access.
5. Operating Instructions
5.1 Switching Between Computers
You can switch between the two connected computers using one of two methods:
- Front Panel Button: Press the 'SELECT' button on the front of the KVM switch to toggle between PC1 and PC2. The LED indicators will show which computer is currently active.
- Wired Remote Control: Press the button on the wired remote control to switch between PC1 and PC2. This provides convenient switching if the KVM switch is not easily accessible.

Figure 5: Switching methods using the front panel button or wired remote. The KVM switch offers two methods for switching between connected computers: a physical button on the device and a wired remote control for convenient access.
5.2 USB 3.0 Functionality
The KVM switch features four USB 3.0 ports, enabling high-speed data transfer for your peripherals. When you switch between computers, the connected USB devices will also switch to the active computer.

Figure 6: USB 3.0 ports supporting up to 5Gbps data transfer. The KVM switch features USB 3.0 ports, supporting data transfer speeds up to 5Gbps for connected peripherals like USB drives, printers, and other devices.
5.3 Resolution Support
The KVM switch supports a range of high resolutions, ensuring a clear and detailed visual experience:
- Up to 8K@30Hz
- Up to 4K@144Hz
- Backward compatible with 4K@60Hz, 2560*1440@120Hz, and other lower resolutions.

Figure 7: High-resolution support for 8K@30Hz and 4K@144Hz. This image illustrates the high-resolution capabilities of the KVM switch, supporting up to 8K at 30Hz and 4K at 144Hz for a clear visual experience.
5.4 System Compatibility
The KVM switch is designed for plug-and-play operation and is driver-free for various operating systems:
- Windows
- Mac OS
- Linux
- Chrome OS

Figure 8: Broad compatibility with operating systems and USB devices.
6. Specifications
| Feature | Specification |
|---|---|
| Product Dimensions | 3.94 x 2.56 x 0.71 inches |
| Item Weight | 5.29 ounces |
| Model Number | Displayport kvm switch 201DPA |
| Manufacturer | MLEEDA |
| Operation Mode | ON-ON |
| Current Rating | 2 Amps |
| Operating Voltage | 5 Volts |
| Connector Type | Plug In |
| Material | Metal |
| International Protection Rating | IP54 |
7. Troubleshooting
If you encounter issues with your KVM switch, please refer to the following common problems and solutions:
- No Display on Monitor:
- Ensure all DisplayPort cables are securely connected between the computers, KVM switch, and monitor.
- Verify that the KVM switch is receiving power, especially if using high-resolution settings or multiple USB devices.
- Check your monitor's input source to ensure it is set to the correct DisplayPort input.
- Try restarting the computers and power cycling the KVM switch.
- Ensure your DisplayPort cables support the desired resolution and refresh rate.
- USB Devices (Keyboard/Mouse/Printer) Not Working:
- Ensure the USB 3.0 cables (USB-A to USB-B) are securely connected from each computer to the corresponding USB-B input on the KVM switch.
- Verify that your USB peripherals are correctly plugged into the USB 3.0 ports on the KVM switch.
- If using wireless peripherals, ensure the receiver dongle is plugged into a USB 3.0 port on the KVM switch.
- Try connecting the USB power cable to the KVM switch if not already connected.
- Test the USB devices by connecting them directly to the computer to rule out device issues.
- Switching is Slow or Inconsistent:
- Ensure all cables are of good quality and securely connected. Loose connections can cause instability.
- Power cycle the KVM switch and restart the connected computers.
- Some operating systems may take a few seconds to re-detect the display and USB devices after a switch.
- Resolution or Refresh Rate Issues:
- Ensure your DisplayPort cables are rated for the desired resolution and refresh rate (e.g., DP 1.4 for 8K@30Hz or 4K@144Hz).
- Check your computer's display settings to ensure the correct resolution and refresh rate are selected.
- Update your graphics card drivers on both computers.
8. Maintenance
To ensure the longevity and optimal performance of your MLEEDA Displayport KVM Switch, follow these maintenance guidelines:
- Cleaning: Use a soft, dry cloth to clean the exterior of the KVM switch. Avoid using liquid cleaners or abrasive materials.
- Ventilation: Ensure the KVM switch is placed in a well-ventilated area to prevent overheating. Do not block any ventilation openings.
- Cable Management: Keep cables organized and avoid excessive bending or tension, which can damage the cables or ports.
- Storage: When not in use for extended periods, store the KVM switch in a cool, dry place away from direct sunlight and extreme temperatures.
9. Warranty and Support
MLEEDA provides a 1-year warranty for this Displayport KVM Switch. Additionally, lifetime technical support is available to assist you with any questions or issues you may encounter.
For technical assistance or warranty claims, please contact MLEEDA customer support through the retailer where you purchased the product or refer to the contact information provided on the official MLEEDA website. Professional after-sales service will typically reply within 12 hours.