1. Product Overview
The TIMEONIA C12 Foldable Drone is a high-performance quadcopter designed for both beginners and experienced users. It features a 1080p HD dual camera system, advanced obstacle avoidance, and intelligent flight modes for an enhanced flying experience. Its foldable design ensures portability and convenience.

Image: The TIMEONIA C12 Foldable Drone with its remote control, spare propellers, batteries, charging cable, screwdriver, and carrying case.
Key Features:
- High-Definition Camera: 1080p HD resolution with a 120° wide-angle lens and 50x zoom for clear video and photo capture.
- Smart Flight Features: Equipped with gesture control, headless mode, altitude hold, and 360° flips.
- 4-Way Obstacle Avoidance: Enhances flight safety by detecting and avoiding obstacles from multiple directions.
- User-Friendly Operation: Easy setup and control, suitable for beginners.
- Durable Design: Constructed with high-quality materials for longevity.
- Extended Battery Life: Up to 15 minutes of flight time per battery.
- Portable Design: Foldable fuselage with included carrying case for easy transport.
- App Control & Real-Time Transmission: Seamless flying experience with Wi-Fi real-time video feed and draw flight path capabilities.
2. Package Contents
Please verify that all items listed below are included in your package:
- TIMEONIA C12 Foldable Drone
- Remote Control
- Drone Battery (quantity may vary based on package)
- USB Charging Cable
- Propeller Holder
- Spare Propellers
- Screwdriver
- Carrying Case
- User Manual (this document)
Image: A complete view of the drone, remote, and all included accessories, confirming package contents.
3. Safety Guidelines
To ensure safe operation and prevent damage, please read and adhere to the following safety guidelines:
- Flight Environment: Fly in open areas, away from people, animals, buildings, and trees. Avoid flying near airports or restricted airspace.
- Weather Conditions: Do not fly in strong winds, rain, snow, or fog. Optimal conditions are calm and clear.
- Battery Safety: Use only the provided charging cable and batteries. Do not overcharge or puncture batteries. Discontinue use if batteries are damaged or swollen. Store batteries in a cool, dry place.
- Propeller Safety: Keep fingers, hair, and loose clothing away from rotating propellers. Always turn off the drone before handling propellers.
- Line of Sight: Always maintain visual line of sight with the drone during flight.
- Age Recommendation: This drone is designed for users aged 14 and above. Adult supervision is recommended for younger users.
- Pre-Flight Check: Before each flight, ensure the drone and remote control batteries are fully charged, propellers are securely attached, and the drone is free from damage.
4. Setup
4.1 Unfolding the Drone
Gently unfold the drone arms until they lock into place. Ensure all four arms are fully extended before flight.
4.2 Battery Installation
- Insert the fully charged drone battery into the battery compartment on the back of the drone until it clicks securely.
- For the remote control, open the battery cover and insert 3 AA batteries (included) according to the polarity markings. Close the cover.
4.3 Propeller Installation (if needed)
If propellers are not pre-installed, attach them to the motor shafts, ensuring the correct propeller (A or B) matches the corresponding motor. Use the provided screwdriver to secure them with the propeller holder.
4.4 App Download and Connection
Download the official TIMEONIA drone app from your smartphone's app store. Turn on the drone and your phone's Wi-Fi. Connect to the drone's Wi-Fi network (usually named 'C12-XXXX'). Open the app to establish a connection and view the real-time camera feed.

Image: The drone's remote control with a smartphone mounted, showing the live video feed from the drone's camera, illustrating the app control and real-time transmission feature.
5. Operating Instructions
5.1 Powering On/Off
- Drone: Press and hold the power button on the drone until the indicator lights turn on. To power off, press and hold again.
- Remote Control: Press the power button on the remote control. The indicator light will flash.
5.2 Pairing
After powering on both the drone and remote, push the left joystick up then down. The remote will beep, and the drone's lights will become solid, indicating successful pairing.
5.3 Calibration
Place the drone on a flat, level surface. Push both joysticks to the bottom-right corner simultaneously. The drone's lights will flash rapidly and then become solid, indicating successful gyroscope calibration.
5.4 Takeoff and Landing
- One-Key Takeoff: Press the one-key takeoff/landing button (usually indicated by an arrow pointing up). The drone will automatically ascend and hover at a certain altitude.
- Manual Takeoff: Slowly push the left joystick up to increase throttle and lift off.
- One-Key Landing: Press the one-key takeoff/landing button again. The drone will automatically descend and land.
- Manual Landing: Slowly pull the left joystick down to decrease throttle and land.
5.5 Flight Controls
| Control | Action |
|---|---|
| Left Joystick Up/Down | Ascend/Descend (Throttle) |
| Left Joystick Left/Right | Rotate Left/Right (Yaw) |
| Right Joystick Up/Down | Forward/Backward (Pitch) |
| Right Joystick Left/Right | Fly Left/Right (Roll) |
5.6 Special Flight Features
- Altitude Hold: The drone will automatically maintain its current altitude, allowing for stable hovering.
- Headless Mode: In this mode, the drone's orientation is relative to the pilot, making it easier to control for beginners regardless of the drone's front direction.
- 360° Flip: Press the 360° flip button and then push the right joystick in any direction to perform an aerial flip. Ensure sufficient altitude.
- 4-Way Obstacle Avoidance: The drone is equipped with sensors to detect obstacles from four directions, automatically adjusting its flight path to prevent collisions.
- Gesture Control: Perform specific hand gestures in front of the camera to trigger photo or video recording. Refer to the app for specific gesture commands.
- Trajectory Designation Flight: In the app, draw a desired flight path on your screen, and the drone will automatically follow the designated route.
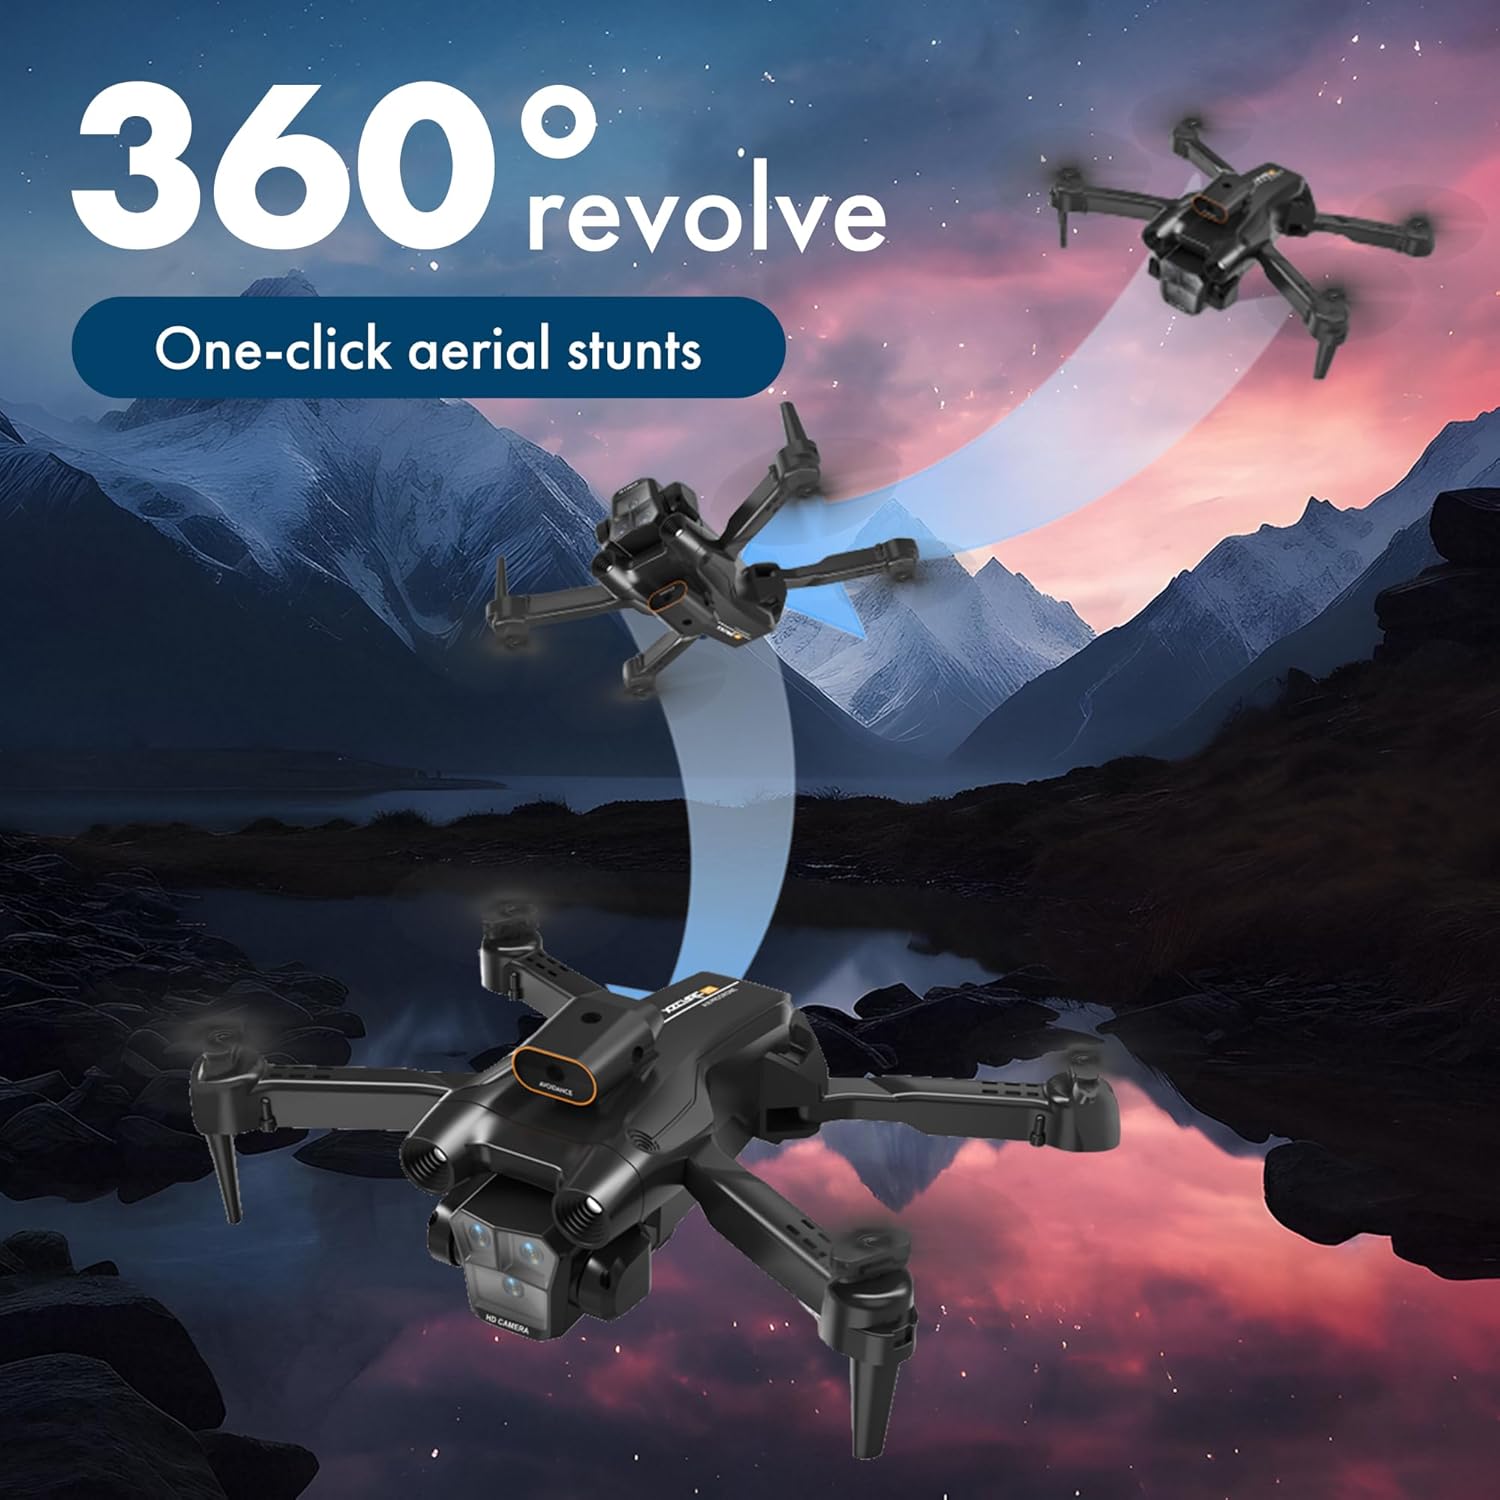
Image: The C12 drone executing a 360-degree aerial flip, demonstrating its one-click stunt capability.

Image: The drone in flight, surrounded by red radar-like waves, illustrating its 360-degree omni-directional obstacle avoidance system.
5.7 Camera Operation
The C12 drone features a versatile three-camera system for diverse shooting perspectives.
- Photo Capture: Tap the photo icon in the app to take a still image.
- Video Recording: Tap the video icon to start recording; tap again to stop. Videos and photos are saved to your connected smartphone.
- Camera Adjustment: The camera angle can be adjusted remotely for optimal viewing.

Image: Visual representation of the drone's three camera system, demonstrating its capability for landscape, vertical screen, and overhead shooting, offering flexible and diverse composition.
6. Maintenance
- Cleaning: Use a soft, dry cloth to clean the drone body and camera lens. Do not use liquid cleaners.
- Propeller Check: Regularly inspect propellers for damage (cracks, bends). Replace any damaged propellers immediately using the provided spare parts and screwdriver.
- Battery Care: Charge batteries fully before storage if not used for an extended period. Store batteries in a cool, dry place, away from direct sunlight and extreme temperatures. Do not leave batteries fully discharged for long periods.
- Storage: When not in use, fold the drone and store it in its carrying case to protect it from dust and physical damage.
7. Troubleshooting
If you encounter issues with your TIMEONIA C12 drone, please refer to the following common problems and solutions:
| Problem | Possible Cause | Solution |
|---|---|---|
| Drone does not power on | Low battery; Battery not installed correctly | Charge drone battery fully; Reinstall battery securely |
| Remote control does not respond | Low remote battery; Not paired correctly | Replace AA batteries; Re-pair drone and remote |
| Drone flies erratically/unstable | Not calibrated; Damaged propellers | Perform gyroscope calibration on a flat surface; Check and replace damaged propellers |
| No real-time video feed in app | Not connected to drone's Wi-Fi; App not open | Ensure phone is connected to drone's Wi-Fi network; Restart app and drone |
| Obstacle avoidance not working | Sensors are dirty or blocked; Flying too fast | Clean sensors gently; Reduce flight speed in complex environments |
If the problem persists after trying these solutions, please contact customer support for further assistance.
8. Specifications
| Feature | Detail |
|---|---|
| Brand | TIMEONIA |
| Model Name | C12 |
| Color | Black |
| Video Capture Resolution | 1080p |
| Connectivity Technology | Bluetooth, Wi-Fi |
| Skill Level | Beginner |
| Item Weight | 0.15 Kilograms (5.3 ounces) |
| Battery Capacity | 1800 Milliamp Hours |
| Battery Type | Lithium Ion |
| Remote Control Batteries | 3 AA batteries (included) |
| Product Dimensions | 12.4"L x 10.23"W x 1.96"H |
| Special Features | 360 Degree Flip, Gyroscopic Stabilization, Long Battery Life, Obstacle Avoidance, Rechargeable |
9. Warranty and Support
For warranty information, technical support, or any inquiries regarding your TIMEONIA C12 drone, please contact the manufacturer or seller directly. Refer to your purchase documentation for specific contact details.
Manufacturer: NEW BRAVERY
Please retain your proof of purchase for any warranty claims.