1. Introduction
This manual provides detailed instructions for the installation, operation, and maintenance of your YUNTX Android 14 Car Radio. Please read this manual thoroughly before using the product to ensure proper function and safety. This unit is specifically designed for the Audi TT MK2 8J model years 2006-2012.
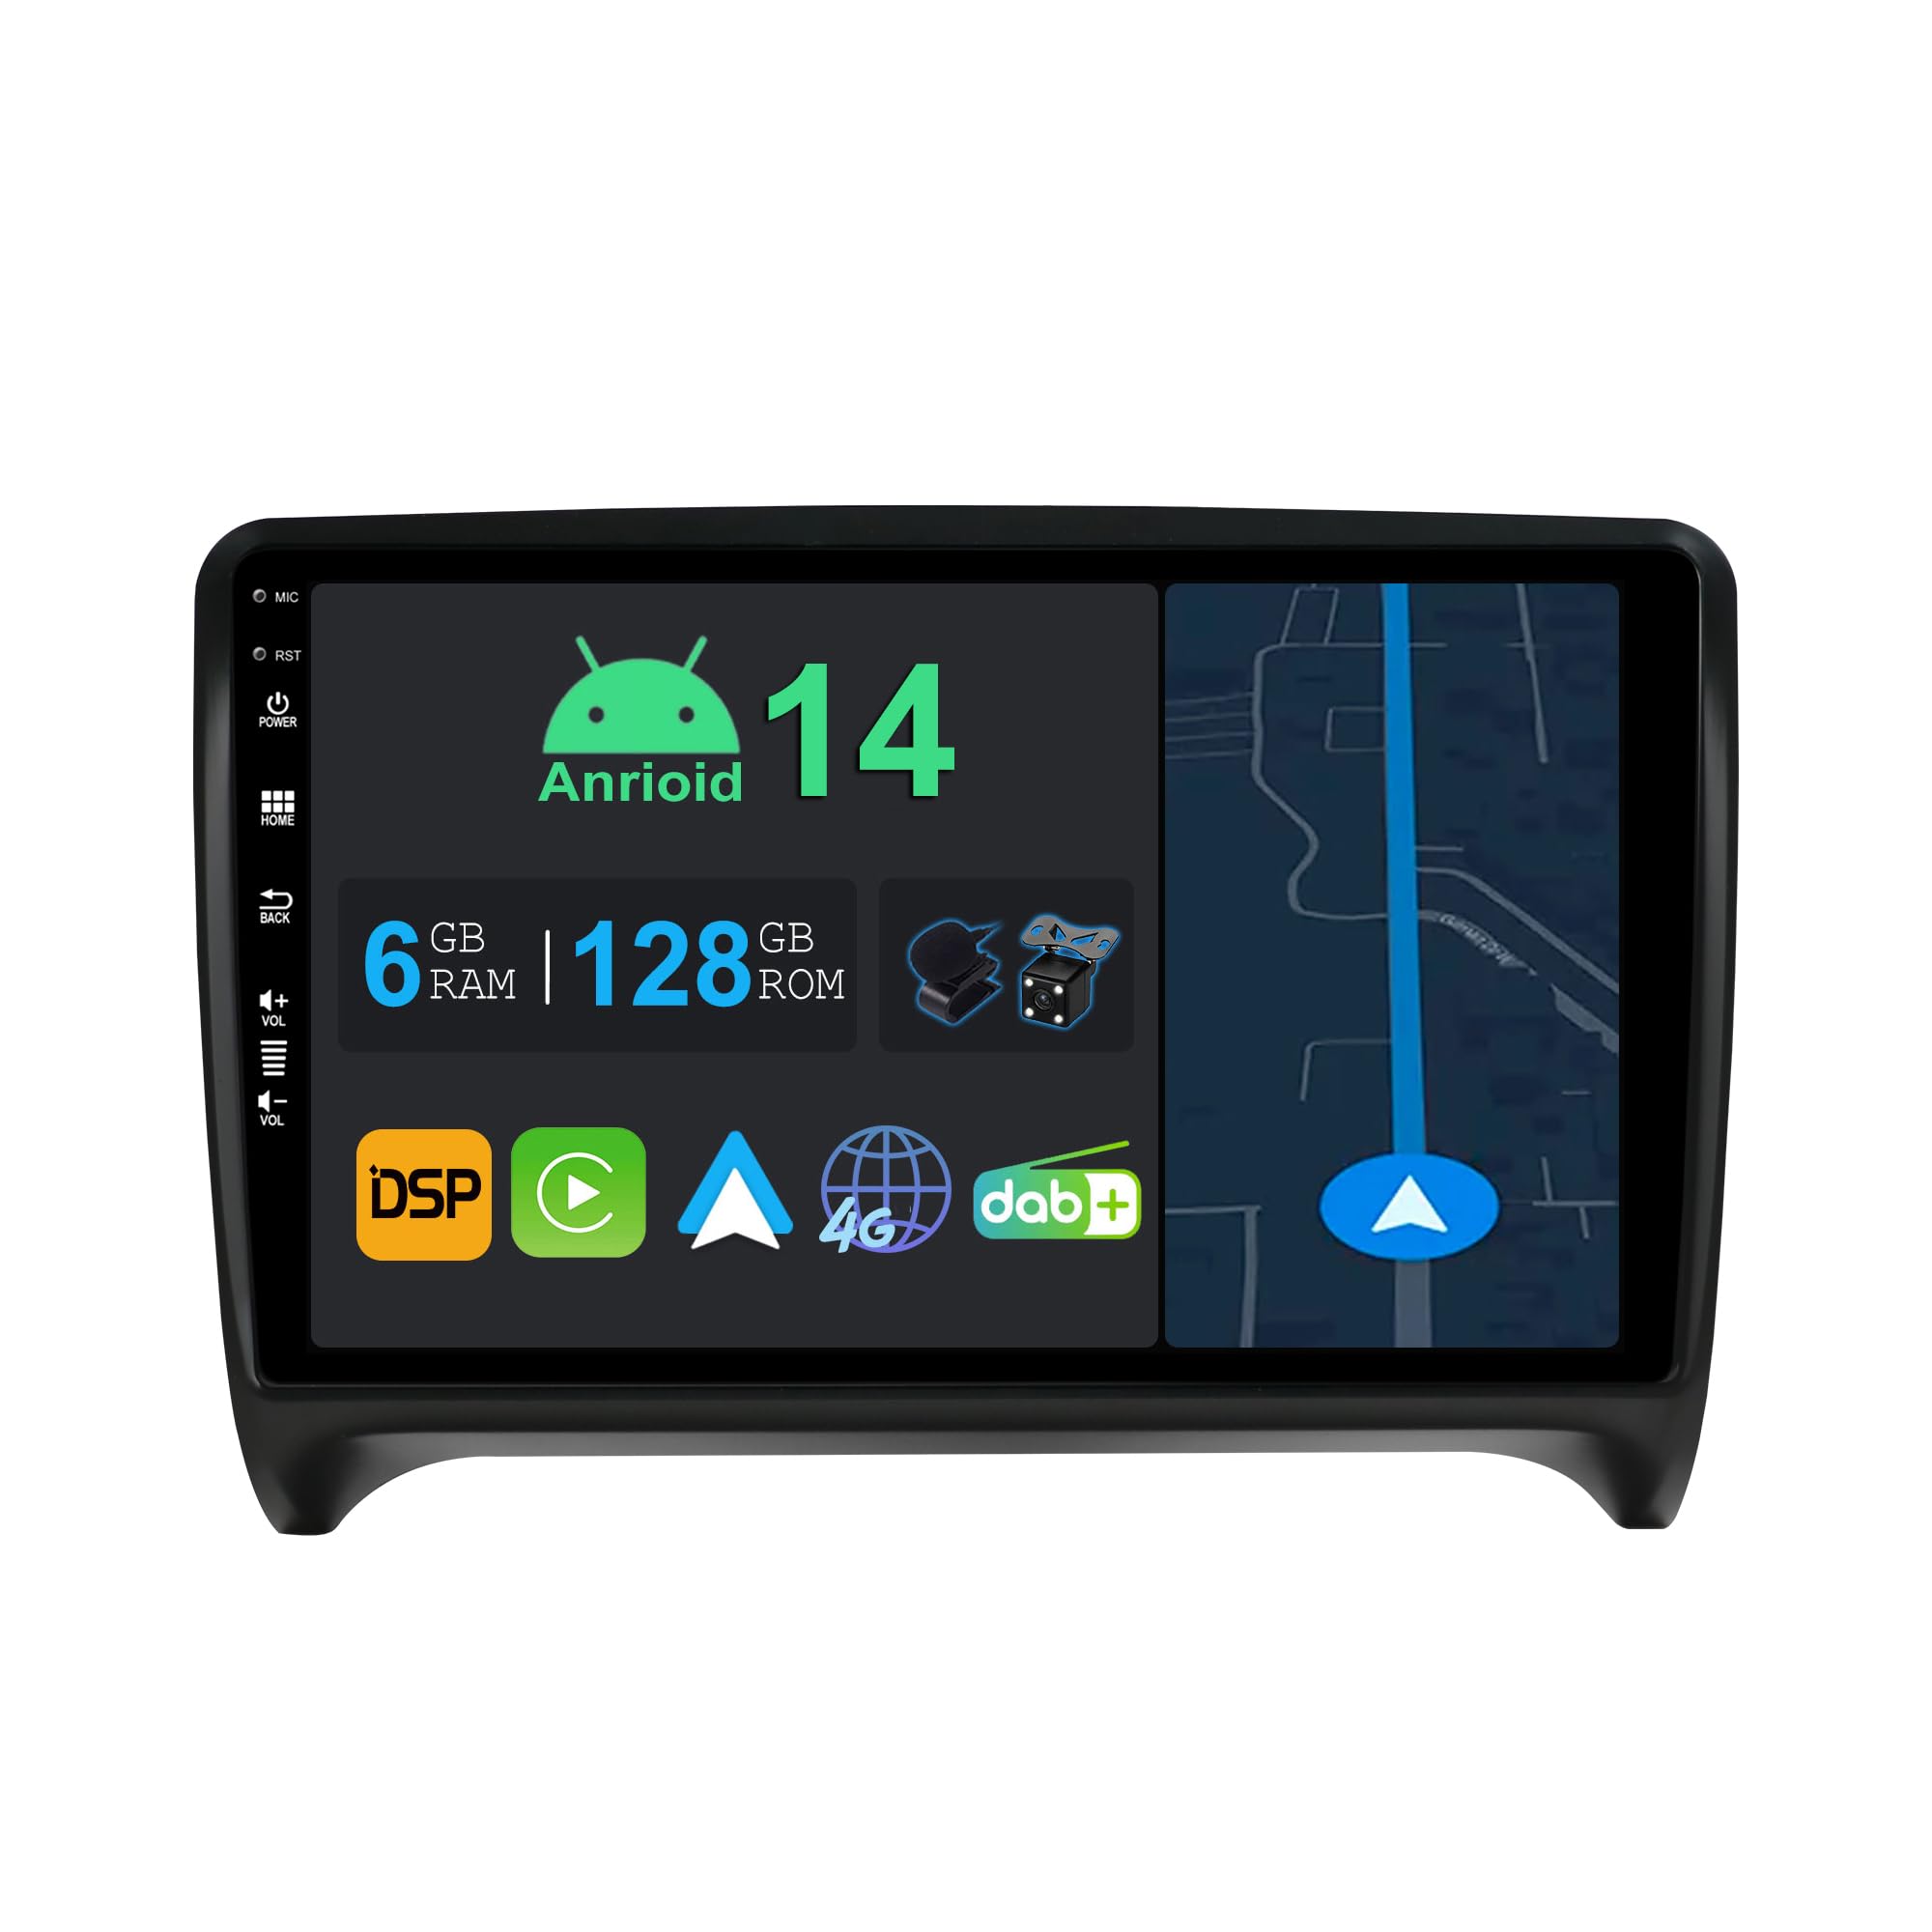
Image 1.1: YUNTX Android 14 Car Radio unit.
2. Product Overview
2.1 Key Features
- Operating System: Android 14
- Processor: Octa-Core
- Memory & Storage: 6GB RAM, 128GB ROM
- Display: 9-inch QLED HD Touchscreen (1280x720 resolution)
- Connectivity: Integrated Global 4G LTE, Dual Band Wi-Fi (2.4GHz & 5GHz), Bluetooth 5.0
- Smartphone Integration: Wireless CarPlay & Android Auto, MirrorLink
- Audio: Built-in DSP (Digital Sound Processor), DAB+ (Digital Audio Broadcasting)
- Navigation: GPS Navigation with pre-installed offline maps
- Camera Support: Rear Camera input (camera included), optional 360° camera support
- Control: Steering Wheel Control compatibility
- Cooling: Built-in Cooling Fan, 100% Aluminum Heat Sink
- Additional Ports: 2 USB ports, HDMI output
2.2 Specifications
| Specification | Detail |
|---|---|
| Brand | YUNTX |
| Model Compatibility | Audi TT MK2 8J (2006-2012) |
| Operating System | Android 14 |
| RAM | 6GB |
| ROM | 128GB |
| Screen Size | 9 inches |
| Screen Type | QLED HD (1280x720) |
| USB Ports | 2 |
| Bluetooth Version | 5.0 |
| Software Updates | Information not available |
| Spare Parts Availability | Information not available |

Image 2.1: Overview of key hardware and software features including 4G, DAB, CarPlay, Android Auto, GPS, QLED, DSP, and more.
3. Setup and Installation
Professional installation is highly recommended for this product. Incorrect installation can lead to damage to the unit or your vehicle's electrical system. Always disconnect the vehicle's battery before beginning installation.
3.1 Package Contents
Before installation, verify that all components are present:
- 1 x Car Radio Unit
- 1 x Power Cable
- 4 x RCA Output Cables (A, B, C, D)
- 1 x GPS Antenna
- 1 x USB Cable
- 1 x External Microphone
- 1 x Radio Antenna
- 1 x Rear Camera
- 1 x User Manual (this document)
- 1 x 4G Antenna
- 1 x DAB Antenna
- Installation Brackets (if applicable)

Image 3.1: Included components in the package.
3.2 Pre-Installation Check
Before proceeding, ensure the car radio is compatible with your vehicle's central console. Compare the shape and size of your vehicle's console with the provided frame and unit dimensions.
Image 3.2: Before and after installation comparison.
3.3 Wiring Diagram
Refer to the diagram below for correct wiring connections. Ensure all connections are secure to prevent malfunctions.
Image 3.3: Wiring diagram for the car radio.
- Power Socket: Connect ACC (Accessory), B+ (Battery Positive), ILL (Illumination), REVERSE (Reverse Gear Signal), GND (Ground).
- Speaker Outputs: Connect FL+/FL- (Front Left), FR+/FR- (Front Right), RL+/RL- (Rear Left), RR+/RR- (Rear Right).
- RCA Output Sockets: Connect external amplifiers, subwoofers, or additional video displays.
- Antennas: Connect GPS Antenna, DAB Antenna, 4G Antenna, and Radio Antenna to their respective ports.
- USB Cables: Connect the provided USB cables for external storage or device charging.
- External Microphone: Connect for improved hands-free calling audio quality.
- Rear Camera: Connect the RCA video input for the included rear camera.
- CANBUS: Connect the CANBUS decoder if your vehicle requires it for steering wheel controls or other vehicle data integration.
- Cooling Fan: Ensure the cooling fan is properly connected for optimal performance and longevity.
4. Operating Instructions
4.1 Basic Operation
Power On/Off: Press and hold the power button (usually on the front panel) to turn the unit on or off. A short press typically mutes or unmutes the audio.
Volume Control: Use the physical volume knob or the on-screen controls to adjust the audio level.
Touchscreen Interface: Navigate through menus and applications by tapping, swiping, and pinching on the QLED touchscreen.
4.2 Wireless CarPlay & Android Auto
This unit supports both wireless Apple CarPlay and Android Auto. Connect your smartphone via Bluetooth and Wi-Fi to access navigation, music, calls, and messages directly on the car radio display.
- Ensure Bluetooth and Wi-Fi are enabled on your smartphone.
- On the car radio, open the "CarPlay" or "Android Auto" application.
- Follow the on-screen prompts to pair your phone.
- Once connected, you can use voice commands (e.g., "Hey Siri" or "Ok Google") for hands-free operation.
4.3 GPS Navigation
The unit comes with pre-installed offline maps. You can also download online maps for real-time traffic updates and additional features.
- Tap the "Navigation" icon on the home screen.
- Enter your destination using the on-screen keyboard or voice input.
- Select your preferred route and start navigation.
- To update or download new maps, ensure the unit is connected to Wi-Fi or 4G LTE.
4.4 DAB+ Digital Radio
Enjoy high-quality digital audio broadcasting with a wider selection of channels. The DAB+ feature provides clear sound and displays station information.
- Ensure the DAB antenna is properly connected.
- Open the "DAB" application from the main menu.
- Perform a channel scan to find available DAB+ stations in your area.
- Select your desired station from the list.
4.5 4G LTE Connectivity
The integrated 4G LTE module allows for internet access on the go. Insert a micro SIM card (not included) to enable mobile data.
- Locate the micro SIM card slot (refer to installation diagram or unit casing).
- Carefully insert a micro SIM card with an active data plan.
- The unit should automatically detect the network. If not, check network settings in the Android system menu.
4.6 DSP (Digital Sound Processor)
Customize your audio experience with the built-in DSP. Adjust equalizer settings, speaker volumes, and sound field effects.
- Open the "DSP" or "Sound Settings" application.
- Adjust the 64-band graphic equalizer to match your listening preferences.
- Control the volume of individual speakers (front/rear, left/right).
- If a subwoofer is connected, adjust its output level.
4.7 Bluetooth 5.0
Connect your smartphone or other Bluetooth devices for hands-free calling and audio streaming.
- Enable Bluetooth on your phone and the car radio.
- On the car radio, go to "Bluetooth Settings" and search for devices.
- Select your phone from the list and confirm the pairing code.
- Once paired, you can make/receive calls and play music wirelessly.
4.8 Steering Wheel Control
The unit supports your vehicle's original steering wheel controls, allowing you to manage audio and calls without taking your hands off the wheel.
- After installation, navigate to "Steering Wheel Control Settings" in the unit's menu.
- Follow the on-screen instructions to program each button on your steering wheel to its corresponding function (e.g., volume up/down, track skip, mode).
4.9 Rear Camera Functionality
When the vehicle is shifted into reverse gear, the unit will automatically display the view from the connected rear camera, providing parking guidelines.
Image 4.1: Visual representation of key operating features such as CarPlay, Android Auto, GPS, DAB, 4G, DSP, Steering Wheel Control, and Rear Camera.
5. Maintenance
To ensure the longevity and optimal performance of your car radio, follow these maintenance guidelines:
- Cleaning the Screen: Use a soft, lint-free cloth to gently wipe the QLED touchscreen. For stubborn smudges, slightly dampen the cloth with water or a screen-safe cleaner. Avoid harsh chemicals or abrasive materials.
- Software Updates: Periodically check for available software updates through the unit's system settings. Updates can improve performance, add new features, and fix bugs. Ensure a stable internet connection during updates.
- Cooling System: The unit features a built-in cooling fan and aluminum heat sink. Ensure that the ventilation areas are not obstructed to allow for proper airflow.
- Environmental Conditions: Avoid exposing the unit to extreme temperatures, direct sunlight for prolonged periods, or excessive moisture.
6. Troubleshooting
If you encounter issues with your car radio, refer to the following common problems and solutions:
| Problem | Possible Cause | Solution |
|---|---|---|
| Unit does not power on. | Incorrect power wiring, blown fuse, vehicle battery low. | Check power cable connections (B+, ACC, GND). Inspect vehicle fuses. Ensure battery has sufficient charge. |
| No sound from speakers. | Incorrect speaker wiring, volume too low, mute activated, DSP settings. | Verify speaker connections. Increase volume. Check if mute is active. Adjust DSP settings. |
| GPS signal is weak or unavailable. | GPS antenna not properly connected or obstructed. | Ensure GPS antenna is securely connected and placed in an unobstructed location (e.g., dashboard). |
| Bluetooth connection issues. | Bluetooth not enabled, device not paired, interference. | Ensure Bluetooth is on for both devices. Re-pair the device. Move closer to the unit. |
| Rear camera not displaying. | Camera not connected, reverse trigger wire not connected, faulty camera. | Check RCA video input and reverse trigger wire connection. Test camera if possible. |
| Unit is slow or unresponsive. | Too many apps running, low storage, software glitch. | Close unnecessary apps. Clear cache. Perform a system restart. Consider a factory reset if issues persist (backup data first). |
If the problem persists after trying these solutions, please contact customer support.
7. Warranty and Support
7.1 Warranty Information
Please refer to your purchase documentation or the retailer's website for specific warranty terms and conditions. The warranty typically covers manufacturing defects for a specified period from the date of purchase.
Note: Damage caused by improper installation, misuse, accidents, or unauthorized modifications is generally not covered under warranty.
7.2 Customer Support
For technical assistance, troubleshooting beyond this manual, or warranty claims, please contact your retailer or the YUNTX customer support team. Have your product model number and purchase details ready when contacting support.
Manufacturer: YUNTX
ASIN: B0D7PFHP4Z
Contact information (e.g., website, email, phone) can usually be found on the product packaging or the retailer's product page.