1. Important Safety Information
Please read all instructions carefully before assembly and use. Keep this manual for future reference.
- Ensure all components are present and undamaged before beginning assembly.
- Assemble the desk on a soft, clean surface to prevent scratches.
- Do not overtighten screws during assembly to avoid damaging components.
- Keep small parts away from children to prevent choking hazards.
- Do not exceed the maximum weight capacity of the desk or shelves.
- Ensure the desk is placed on a level surface to prevent instability.
- For electrical components (RGB lights, power outlets, USB ports), ensure proper connection to a suitable power source. Do not overload the outlets.
2. Package Contents
Verify that all parts listed below are included in your package. If any parts are missing or damaged, please contact customer support.
- Desk tabletop (carbon fiber surface)
- Monitor stand
- Metal frame components (legs, support bars)
- Upper storage shelves and mesh panel
- Integrated power strip with 2 AC outlets and 2 USB ports
- RGB LED light strip
- Remote control for RGB LED light strip
- Assembly hardware (screws, bolts, Allen wrench)
- Instruction manual

Figure 2.1: Product Dimensions and Key Components. This image illustrates the overall dimensions of the desk, including the tabletop (120cm x 60cm), monitor stand, and upper storage shelves, along with the height of the desk (75cm) and the total height with shelves (162cm).
3. Assembly Instructions
Assembly typically takes 20-30 minutes. Follow the numbered steps in the included assembly guide for detailed instructions. A general overview is provided below:
- Unpack and Identify: Carefully unpack all components and verify against the package contents list.
- Assemble the Frame: Attach the desk legs to the main support bars using the provided hardware. Ensure all connections are secure but do not fully tighten until the frame is complete.
- Attach the Tabletop: Secure the carbon fiber tabletop to the assembled metal frame.
- Install Monitor Stand: Place the monitor stand on the designated area of the tabletop.
- Assemble Upper Storage: Attach the upper shelf frame and mesh panel to the main desk frame. Secure the shelves.
- Install Power Strip: Integrate the power strip with AC outlets and USB ports into the designated cutout on the tabletop.
- Apply RGB LED Strip: Adhere the RGB LED light strip to the underside of the upper shelf or desired location, ensuring the cable can reach the power source.
- Final Tightening: Once all components are in place, carefully tighten all screws and bolts to ensure stability.

Figure 3.1: Fully Assembled Desk. This image shows the complete desk setup, including the monitor stand and upper storage shelves, ready for use.
4. Operating Instructions
4.1. RGB LED Light Strip
The desk features an integrated RGB LED light strip for customizable ambiance.
- Power On/Off: Use the remote control to turn the LED strip on or off.
- Color Selection: Select from various monochrome colors or multicolor modes using the remote.
- Brightness/Speed Adjustment: Adjust the brightness of the lights or the speed of color changes using the dedicated buttons on the remote control.

Figure 4.1: RGB LED Light Strip Operation. This image displays the LED strip and its remote control, highlighting the different light emission modes, adjustable speed, and remote control adjustment capabilities.
4.2. Integrated Power Outlets and USB Ports
The desk includes 2 AC power outlets and 2 USB charging ports for convenient device connectivity.
- Connecting to Power: Plug the desk's main power cord into a standard wall outlet.
- Using AC Outlets: Plug your devices (e.g., monitor, laptop charger) into the 2 AC outlets.
- Using USB Ports: Connect your mobile devices, headphones, or other USB-powered accessories to the 2 USB ports for charging.
- Overload Protection: Avoid plugging in high-power devices simultaneously to prevent overloading the integrated power strip.
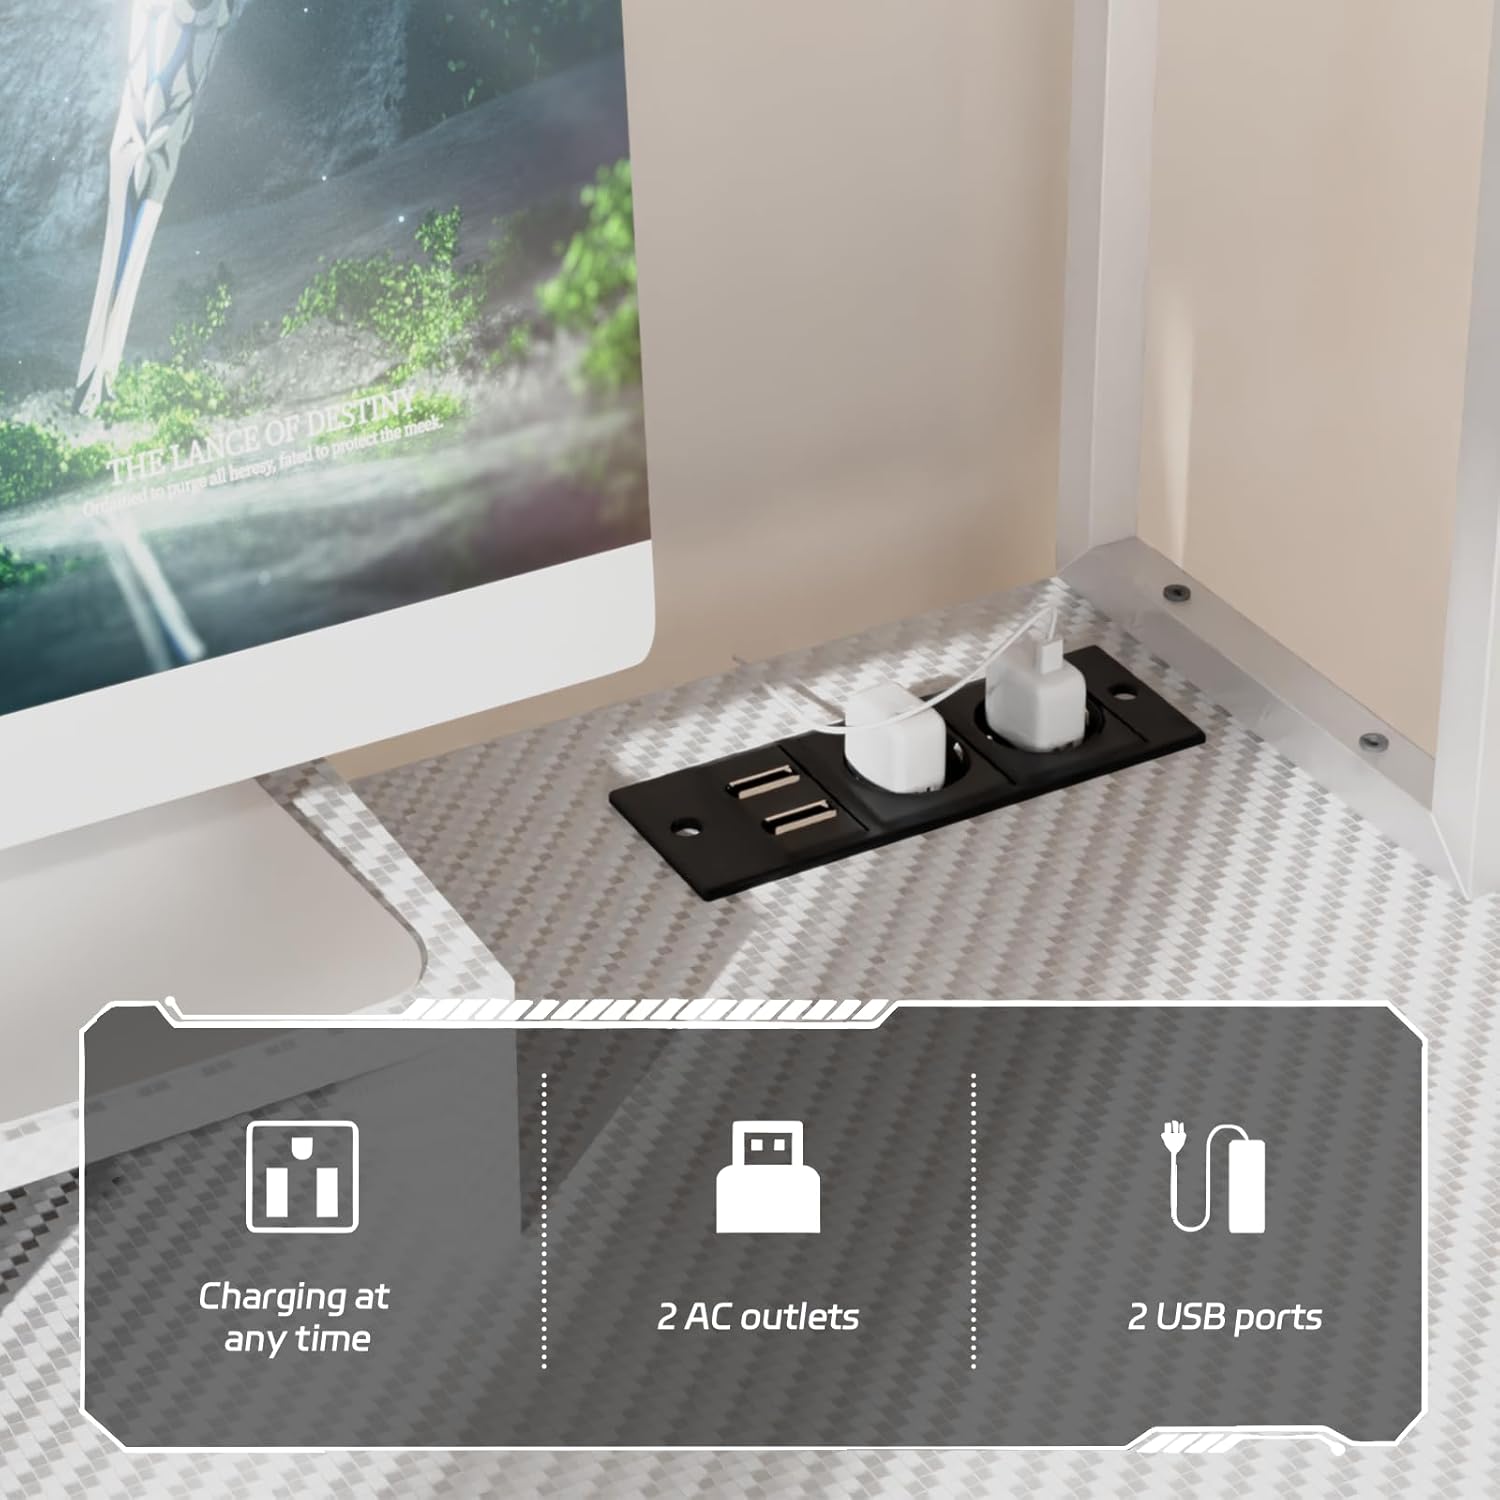
Figure 4.2: Integrated Power and USB Ports. This image shows the convenient placement of the 2 AC outlets and 2 USB ports, allowing for easy charging and powering of devices directly from the desk.
4.3. Monitor Stand
The elevated monitor stand helps maintain an ergonomic posture.
- Positioning: Place your monitor(s) on the stand to raise them to eye level, reducing neck and back strain.
- Cable Management: Utilize the space beneath the monitor stand for cable routing to keep your workspace tidy.
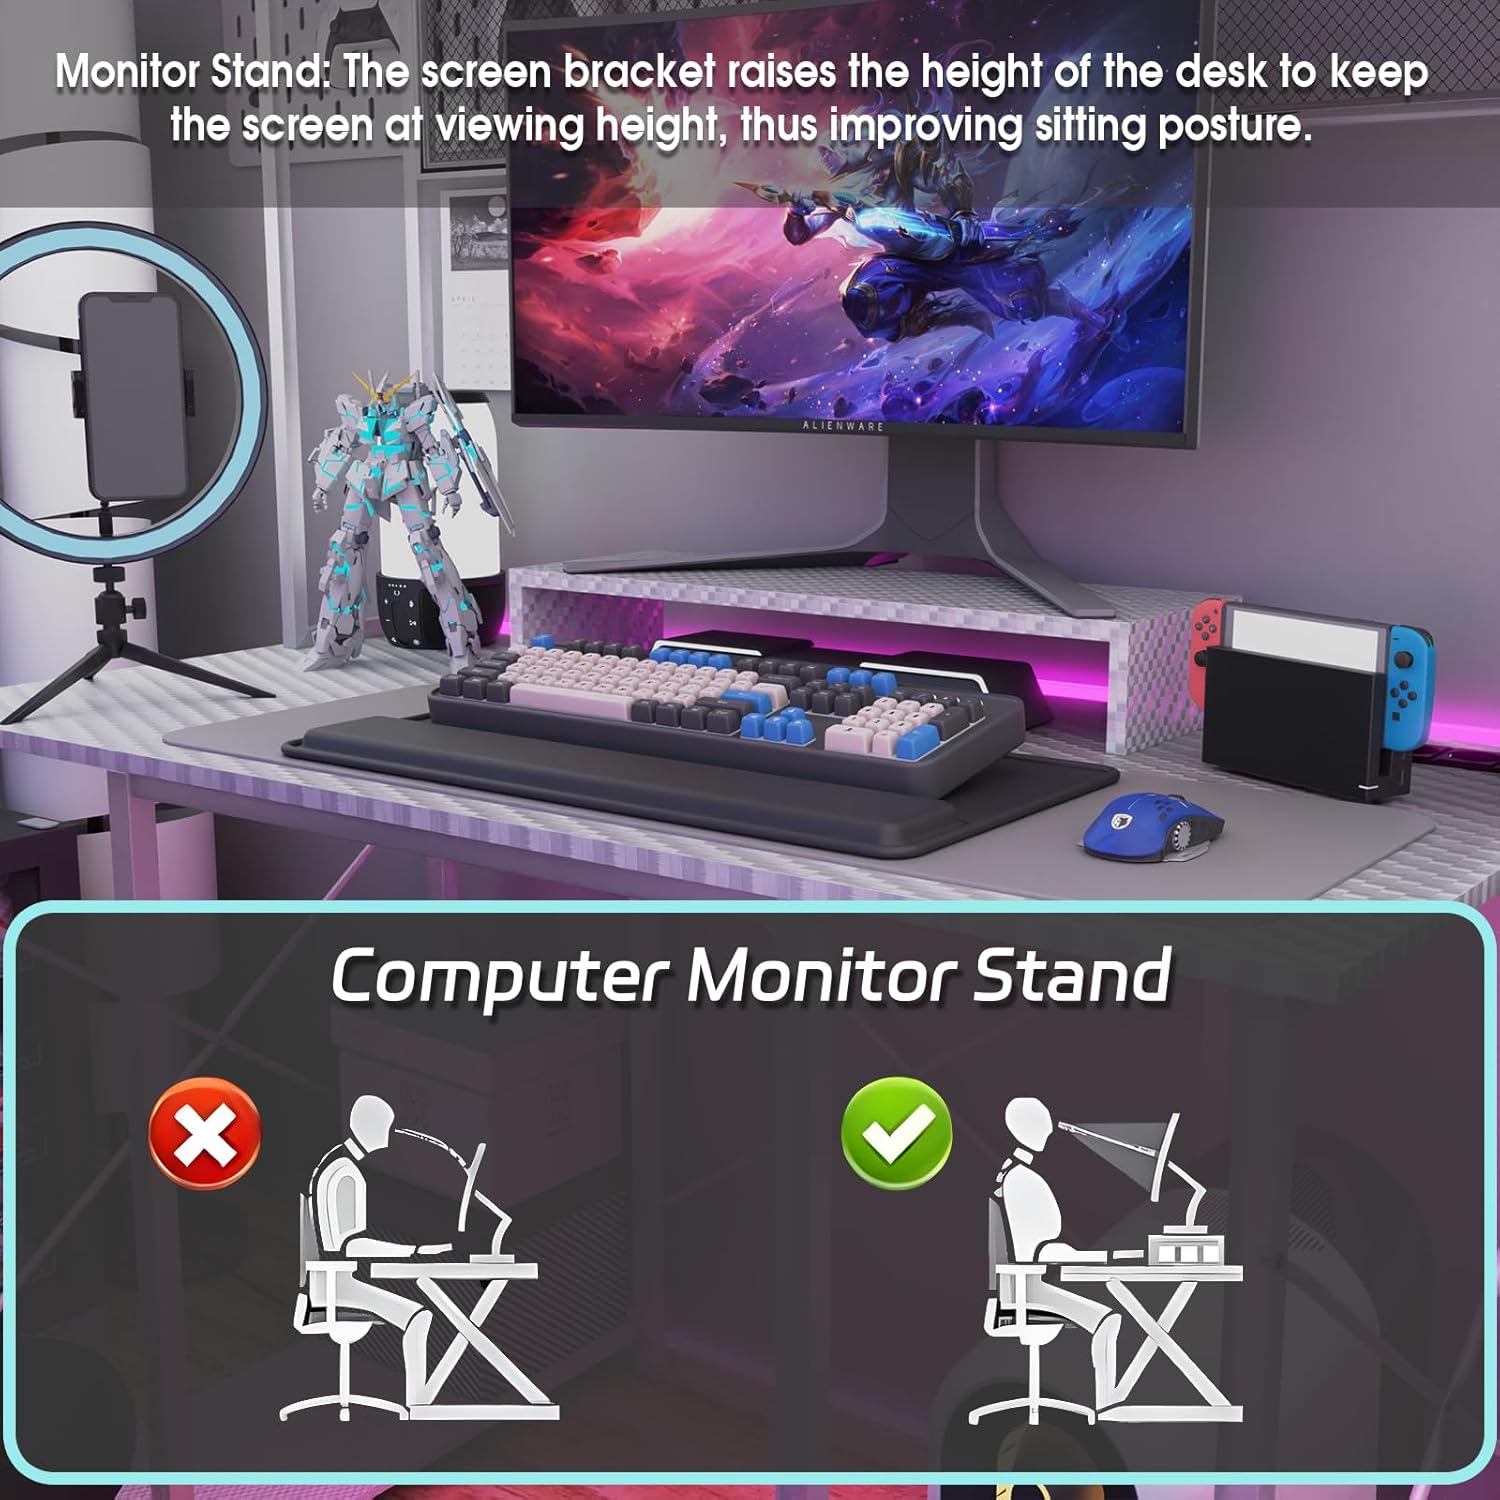
Figure 4.3: Monitor Stand Ergonomics. This image demonstrates how the monitor stand helps improve sitting posture by raising the screen to an optimal viewing height, preventing neck and back pain.
4.4. Storage Features
The desk is designed with multiple storage options to keep your workspace organized.
- Upper Shelves: Use the top shelves for books, files, decorative items, or small plants.
- Mesh Panel with Hooks: The iron mesh panel above the desk includes multiple hooks for hanging headphones, cables, or other accessories.
- Lower Shelves: The lower shelves provide space for your computer tower, storage boxes, or other equipment.
5. Maintenance
Proper care will extend the life and appearance of your Airfish Computer Desk.
- Cleaning the Surface: Wipe the carbon fiber tabletop and metal frame with a soft, damp cloth. Avoid abrasive cleaners or harsh chemicals that could damage the finish.
- Spills: Clean up spills immediately to prevent staining, especially on the carbon fiber surface.
- Dusting: Regularly dust all surfaces to prevent buildup.
- Hardware Check: Periodically check all screws and bolts to ensure they remain tight. Retighten if necessary.
- Electrical Components: Ensure the power strip and LED lights are kept dry. Do not attempt to repair electrical components yourself.
6. Troubleshooting
If you encounter issues with your desk, refer to the following common problems and solutions:
| Problem | Possible Cause | Solution |
|---|---|---|
| Desk is wobbly/unstable. | Loose screws or uneven floor. | Check and tighten all assembly screws. Ensure the desk is on a level surface. |
| RGB LED lights not working. | Power connection issue, remote battery dead, or LED strip malfunction. | Ensure the LED strip is properly plugged into the power source. Check the remote control battery. If issues persist, contact support. |
| Power outlets/USB ports not functioning. | Desk not plugged in, power strip not connected correctly, or overloaded. | Verify the desk's main power cord is securely plugged into a wall outlet. Ensure the integrated power strip is correctly installed. Unplug some devices if overloaded. |
| Missing or damaged parts during assembly. | Packaging error or transit damage. | Do not proceed with assembly. Contact customer support immediately for replacement parts. |
7. Specifications
| Feature | Detail |
|---|---|
| Brand | Airfish |
| Model Number | AG-0423-L-122WTA |
| Color | White |
| Dimensions (L x W x H) | 120 x 60 x 162 cm (60P x 120l x 162H centimeters) |
| Desk Design | Computer Desk |
| Material | Wood, Metal (Carbon Fiber top, Powder-coated steel frame) |
| Special Features | Integrated USB Port, Monitor Stand, RGB LED Light Strip, 2 AC Outlets |
| Shape | Rectangular |
8. Warranty and Support
8.1. Warranty Information
Airfish products are manufactured to high-quality standards. For specific warranty details regarding your Airfish Computer Desk, please refer to the warranty card included in your package or visit the official Airfish website. The warranty typically covers manufacturing defects under normal use.
8.2. Customer Support
If you have any questions about assembly, operation, missing parts, or require technical assistance, please contact Airfish customer support. Contact information can usually be found on the product packaging, the official Airfish website, or through your retailer's support channels.
When contacting support, please have your model number (AG-0423-L-122WTA) and purchase date available.