1. Product Overview
The USX MOUNT XAS010 is a universal soundbar mounting bracket designed to securely attach your soundbar to a wall, either above or below your television. This mount is constructed from high-quality metal, ensuring durability and stability for soundbars weighing up to 30 lbs. Its design aims to optimize sound projection and save space in your entertainment area.
Key Features:
- Universal Compatibility: Designed to fit most soundbars within 3.5 inches wide, compatible with major brands such as Samsung, Sony, LG, Vizio, Bose, Onn, TCL, JBL, Polk Audio, Roku, Harman Kardon, Denon, RCA, Nakamichi, Klipsch, Insignia, Panasonic, and Hisense.
- Sturdy Construction: Made from high-quality metal, capable of safely supporting soundbars up to 30 lbs.
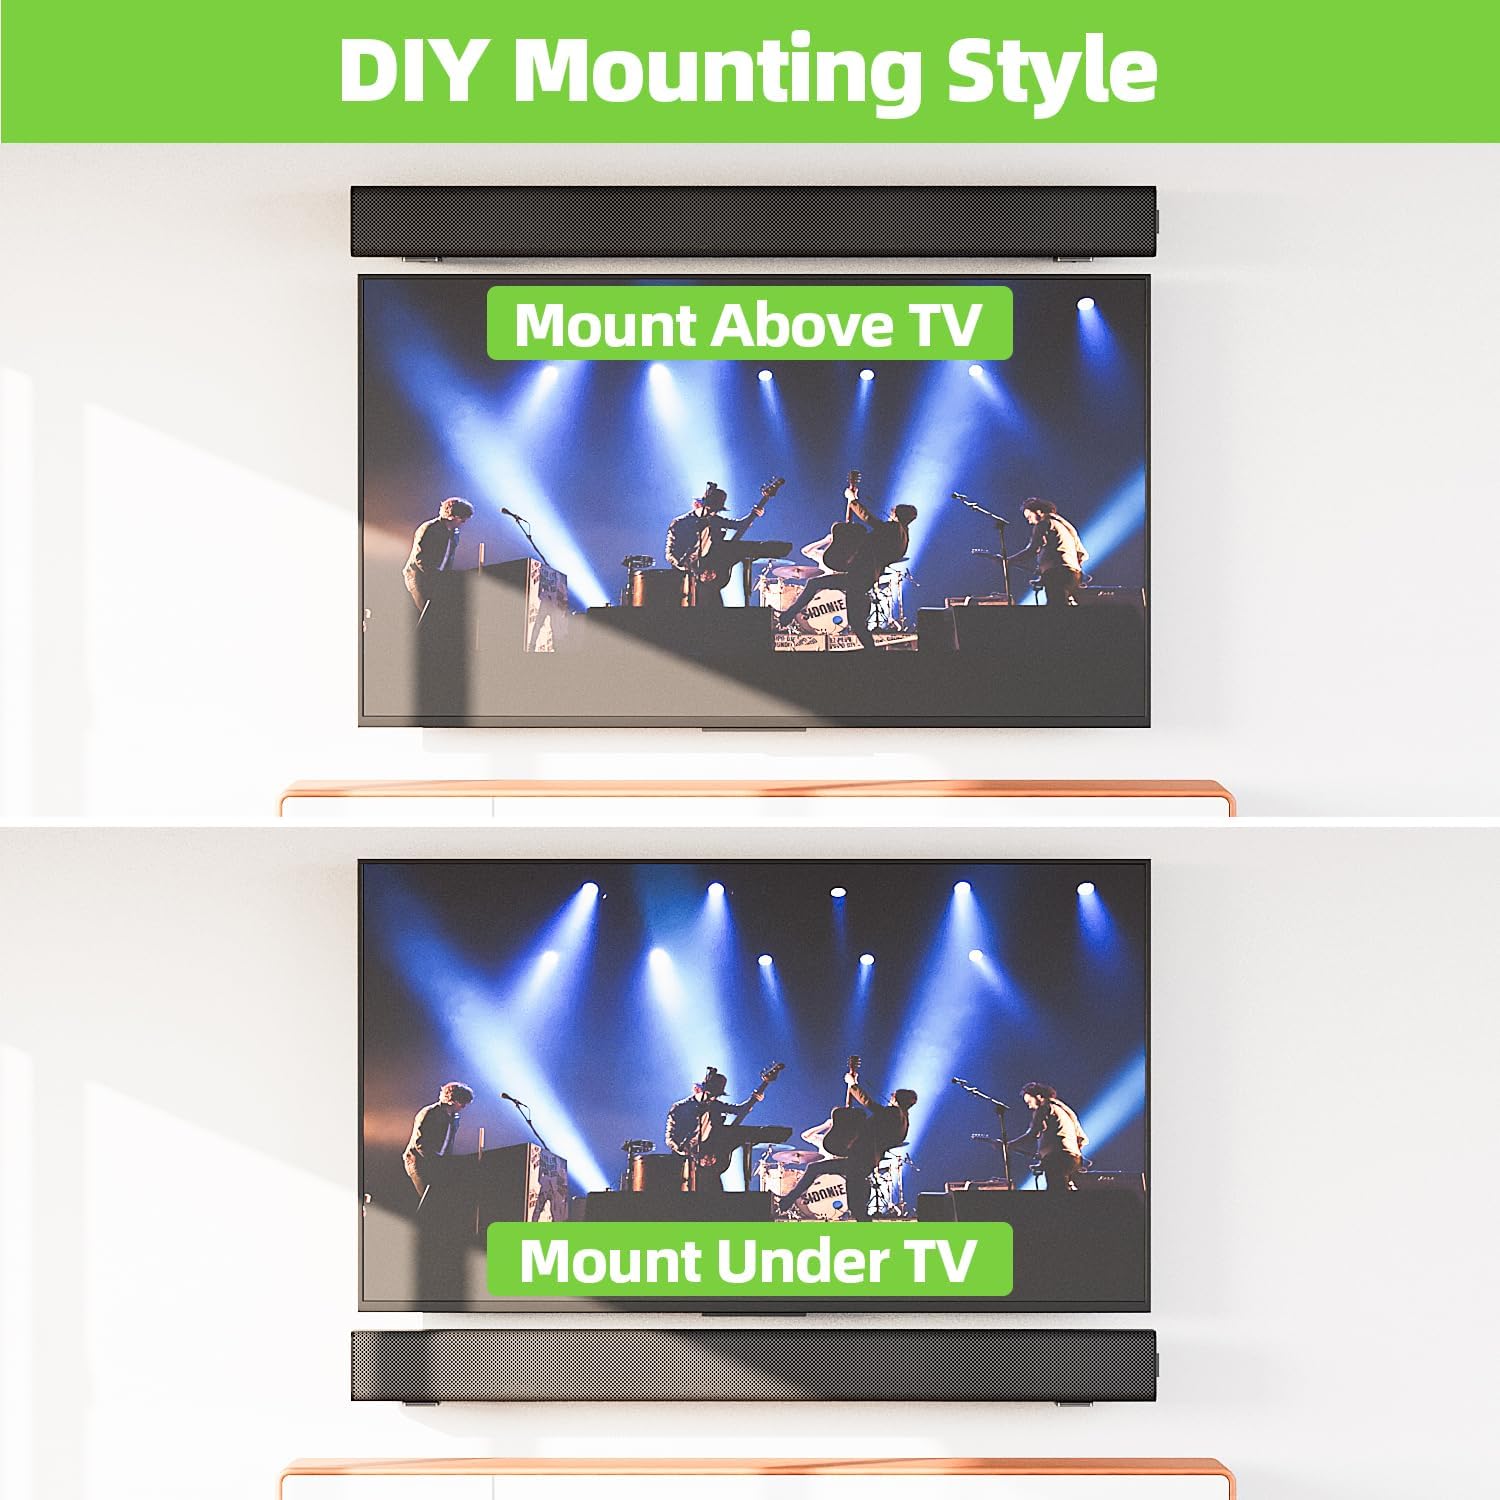
- Space-Saving Design: Allows for mounting above or below the TV, freeing up desk or cabinet space.
- Enhanced Sound Quality: Wall mounting can improve audio clarity and provide a more immersive listening experience.
- Easy Installation: Includes all necessary hardware for quick setup on various wall types.
- Non-Slip Protection: Features EVA material to protect the soundbar and prevent movement.
2. Package Contents
Please verify that all components are present before beginning installation.

- 2 x L-shaped Soundbar Mounting Brackets
- Mounting Hardware (screws, wall anchors)
- EVA Non-Slip Pads
- Instruction Manual
3. Specifications
| Model Number | XAS010 |
| Product Dimensions | 3.66 x 2 x 2.99 inches |
| Item Weight | 10.8 ounces |
| Weight Capacity | Up to 30 lbs (13.6 kg) |
| Material | High-Quality Metal |
| Color | Black |
| Mounting Type | Wall Mount |
4. Setup and Installation
Before You Begin:
- Read all instructions carefully before installation.
- Ensure your soundbar's weight does not exceed 30 lbs.
- Identify your wall type (wood stud, concrete, or brick) to use the correct mounting hardware. Do not install on drywall alone.
- Gather necessary tools: pencil, drill, level, screwdriver, tape measure.

Installation Steps:
- Measure Soundbar Length: Measure the length of your soundbar to determine the appropriate spacing for the mounting brackets. The installation distance between the two wall plates should be less than the soundbar's total length.
- Mark Drilling Positions: Hold the brackets against the wall at your desired height and position (above or below the TV). Use a level to ensure they are straight and mark the drilling points with a pencil.
- Drill Holes: For wood studs, drill pilot holes. For concrete or brick walls, drill holes with a 1/4 inch (6mm) diameter and 1.38 inch (35mm) depth, then insert the wall anchors.
- Attach Brackets: Securely fasten the L-shaped brackets to the wall using the provided screws. Ensure they are firmly attached.
- Apply EVA Pads: Place the non-slip EVA pads onto the top surface of the brackets where the soundbar will rest. This protects your soundbar and prevents it from sliding.
- Place Soundbar: Carefully place your soundbar onto the mounted brackets, ensuring it is centered and stable.
Installation Video Guide:
This official video provides a step-by-step guide on how to properly install the USX MOUNT XAS010 Soundbar Mount, covering measurement, drilling, and securing the brackets.
5. Operating Instructions
Once installed, the USX MOUNT XAS010 requires minimal operation. The primary adjustment feature is the soundbar leveling. The brackets allow for minor adjustments to ensure your soundbar is perfectly level.
Soundbar Leveling Adjustment:
- The brackets feature adjustable slots. If your soundbar appears unlevel after initial placement, you can slightly loosen the screws holding the soundbar to the bracket (if applicable) or the bracket to the wall.
- Gently adjust the soundbar's position until it is level.
- Retighten all screws to secure the soundbar and brackets in the desired position.
6. Maintenance
To ensure the longevity and continued performance of your USX MOUNT XAS010 Soundbar Mount, follow these simple maintenance guidelines:
- Regular Cleaning: Wipe the mount with a soft, dry cloth to remove dust. Avoid abrasive cleaners or solvents that could damage the finish.
- Check Fasteners: Periodically inspect all screws and fasteners to ensure they remain tight. Over time, vibrations or minor shifts can cause them to loosen. Retighten as necessary.
- Inspect for Damage: Check the brackets for any signs of wear, corrosion, or damage. If any damage is observed, contact customer support for assistance.
- EVA Pad Condition: Ensure the EVA non-slip pads are intact and providing adequate cushioning and grip for your soundbar. Replace if they show signs of significant wear.
7. Troubleshooting
If you encounter any issues with your USX MOUNT XAS010 Soundbar Mount, refer to the following common troubleshooting tips:
- Soundbar is not level: Loosen the screws slightly, adjust the soundbar until level using a spirit level, and then retighten the screws firmly.
- Mount feels unstable: Ensure all wall screws are fully tightened. Verify that the correct wall anchors were used for your specific wall type. If mounted on wood studs, confirm screws are properly engaged in the stud. If the issue persists, consult a professional installer.
- Soundbar slides on the mount: Check if the EVA non-slip pads are correctly placed and in good condition. If they are worn, consider replacing them. Ensure the soundbar is not excessively heavy for the mount's capacity.
- Difficulty with installation: Review the installation video and steps carefully. Ensure you are using the correct tools and hardware for your wall type. If you are unsure, seek professional assistance.
8. Warranty and Support
USX MOUNT products are manufactured with quality and customer satisfaction in mind. For specific warranty information, please refer to the product packaging or the official USX MOUNT website. If you require technical support, have questions about installation, or need assistance with any product-related issues, please contact USX MOUNT customer service.
Manufacturer: USX MOUNT
For further assistance, please visit the USX MOUNT Store.


