Introduction
This manual provides detailed instructions for the setup, operation, and maintenance of your W IN-MIX UHF 4 Channel Wireless Microphone System, Model UW140 4B. Please read this manual thoroughly before using the system to ensure optimal performance and longevity.

Image: The W IN-MIX UW140 4B system, showing the main receiver unit, four bodypack transmitters, and four headset microphones. This system is designed for multi-user audio applications.
Package Contents
Verify that all components are present in your package:
- 1x Receiver Unit
- 4x Bodypack Transmitters
- 4x Headset Microphones
- 4x Lavalier Microphones (optional, if included in your specific package)
- 1x Power Adapter
- 1x 6.35mm Audio Cable
- 1x User Manual

Image: An illustration detailing the complete contents of the W IN-MIX UW140 4B wireless microphone system package, including the receiver, four bodypack transmitters, four headset microphones, four lavalier microphones, power adapter, 6.35mm audio cable, and the user manual.
System Overview
The W IN-MIX UW140 4B is a UHF 4-channel wireless microphone system designed for clear audio transmission. It features adjustable frequencies and a robust build for various applications.
Receiver Unit Features:
- Four Independent Displays: Each channel has a dedicated LCD showing frequency, signal strength, and battery level.
- Individual Volume Control: Rotary knobs for precise volume adjustment per channel.
- UHF Anti-Interference System: Intelligently avoids signal interference for clear audio.
- True Diversity Reception: Dual antennas improve signal sensitivity and stability.
- Memory Switch: Resumes the last set channel after power cycling.
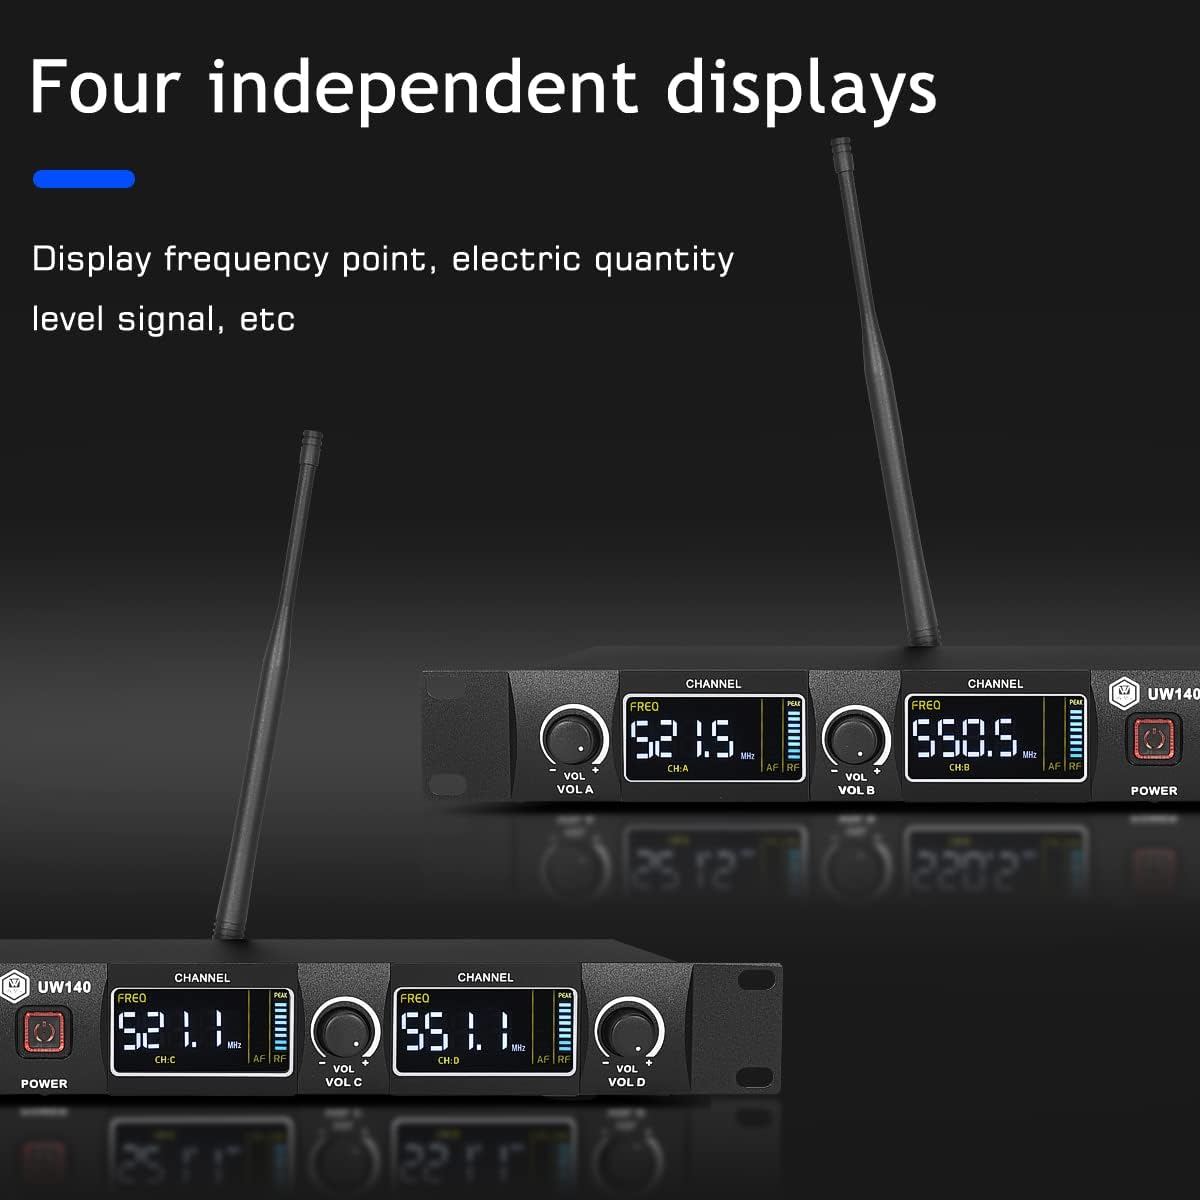
Image: The receiver unit's front panel, highlighting the four independent displays that show frequency, signal strength, and battery status for each of the four channels.
Bodypack Transmitter Features:
- Durable ABS Construction: Designed for reliability in various environments.
- Adjustable Frequency: Each bodypack can be set to one of 30 available frequencies per group.
- Battery Powered: Uses 2x AA batteries (not included).
- Connectivity: Compatible with lavalier and headset microphones.

Image: A bodypack transmitter with its battery compartment open, illustrating the placement for two AA batteries and the frequency adjustment button.
Setup
- Receiver Placement: Position the receiver unit in a central location, away from large metal objects or other wireless devices that may cause interference. Ensure the antennas are fully extended and positioned vertically for optimal signal reception.
- Power Connection: Connect the provided power adapter to the receiver's DC input and plug it into a power outlet.
- Audio Output Connection:
- For individual channel output: Use XLR cables (not included) to connect the balanced XLR outputs (CH A, CH B, CH C, CH D) on the receiver's rear panel to your mixer or amplifier.
- For mixed output: Use the provided 6.35mm audio cable to connect the MIX OUT jack on the receiver's rear panel to your mixer or amplifier's input.
- Transmitter Battery Installation: Open the battery compartment on each bodypack transmitter. Insert two AA batteries, ensuring correct polarity. Close the compartment securely.
- Microphone Connection: Connect the desired lavalier or headset microphone to the 3.5mm input jack on each bodypack transmitter.

Image: The rear panel of the receiver unit, illustrating the various connection points including power, antenna sockets, individual XLR outputs for each channel, and a combined 6.35mm mixed output.

Image: An illustration demonstrating the wide compatibility of the wireless microphone system, showing connections to mixers, power amplifiers, outdoor speakers, and karaoke machines.
Operation
- Power On: Turn on the receiver unit using the power button. Then, turn on each bodypack transmitter.
- Automatic Frequency Sweeping (Initial Setup): With the receiver on, turn on a bodypack transmitter. It will automatically sweep for an available frequency and pair with the receiver. No manual frequency comparison is needed for initial setup.
- Changing Frequencies: Each channel has 30 available frequency points. To change the frequency for a specific bodypack transmitter, press the 'Channel' button (frequency change key) on the transmitter. The transmitter will then automatically sweep and select a new frequency point, which will be automatically matched with the receiver.
- Switching Channels (A/B and C/D): To switch between channel A or B, or channel C or D, press and hold the frequency switch on the bodypack transmitter for approximately 8 seconds. This allows you to assign a transmitter to a different channel group.
- Using Multiple Sets of Machines:
- First, power on one receiver.
- Press the frequency change key on a bodypack transmitter.
- Then, press and hold the power button on the bodypack transmitter for about 8 seconds, pointing it towards the receiver antenna.
- The receiver's display will show a 'lock' indicator, confirming successful pairing. This indicates that the reception of one channel is locked, and other transmissions cannot enter the same frequency point. Repeat this process for all channels.
- After locking all channels on the first receiver, turn off both the receiver and all paired transmitters.
- You can then set up another system following the same procedure. Note that multiple sets of machines can be used simultaneously, but they must operate on different frequency points to avoid interference. If interference occurs, you can change the frequency of the affected bodypack transmitter after unlocking it.
- Adjusting Volume: Use the individual volume knobs on the receiver unit to adjust the output level for each microphone channel.

Image: A detailed view of the bodypack transmitter, highlighting the 'Channel' button which is used to manually change the frequency point.

Image: An illustration showing the frequency selection capabilities, indicating 8x15 frequency groups that allow for the operation of up to 100 transmitters, emphasizing dynamic frequency adjustment and multi-device stacking.
Maintenance
- Cleaning: Use a soft, dry cloth to clean the receiver and transmitters. Avoid using liquid cleaners or solvents, as they may damage the finish or internal components.
- Battery Replacement: Replace batteries in the bodypack transmitters when the low battery indicator appears on the receiver's display or the transmitter's screen. Always use fresh AA batteries. Remove batteries if the system will not be used for an extended period to prevent leakage.
- Storage: Store the system in a cool, dry place away from direct sunlight and extreme temperatures.
- Cable Care: Avoid sharp bends or kinks in cables. Store cables neatly to prevent damage.
Troubleshooting
| Problem | Possible Cause | Solution |
|---|---|---|
| No sound output |
|
|
| Interference or static |
|
|
| Weak signal or dropouts |
|
|
Specifications
| Feature | Detail |
|---|---|
| Model Number | UW140 4B |
| Brand | W IN-MIX |
| Connectivity Technology | UHF |
| Number of Channels | 4 |
| Frequency Range | Adjustable (4x30 channels) |
| Operating Range | Up to 260ft (80m) in open areas |
| Signal-to-Noise Ratio | 60 dB |
| Microphone Form Factor | Headset, Lavalier |
| Polar Pattern | Unidirectional |
| Power Source (Transmitter) | 2x AA Batteries (per bodypack) |
| Receiver Material | Aluminum Alloy |
| Transmitter Material | ABS Plastic |
| Item Weight | 6.39 pounds (total package) |
| Package Dimensions | 21 x 11 x 5 inches |
| UPC | 788081870971 |

Image: Technical drawing with dimensions for both the receiver unit and a single bodypack transmitter, providing precise measurements for installation and reference.
Warranty and Support
For warranty information and technical support, please refer to the contact details provided with your product packaging or visit the official W IN-MIX website. Keep your purchase receipt as proof of purchase for any warranty claims.
Online Resources: For additional support, FAQs, and product updates, please visit the W IN-MIX Store on Amazon.