1. Introduction
Thank you for purchasing the Lancoon Wooden Digital Alarm Clock. This device combines a modern aesthetic with practical features, including an LED time display, wireless charging capability, real-time temperature and humidity monitoring, adjustable brightness, and sound control. Please read this manual carefully to ensure proper use and optimal performance of your alarm clock.

Image: The Lancoon Wooden Digital Alarm Clock displaying the time, humidity percentage, and temperature in Celsius. The top surface shows a wireless charging icon, indicating its charging capability.
2. Safety Information
- Do not expose the device to extreme temperatures, direct sunlight, or high humidity.
- Avoid dropping or subjecting the device to strong impacts.
- Keep the device away from water or other liquids.
- Use only the provided USB cable for power.
- Do not attempt to disassemble or repair the device yourself. Contact customer support if issues arise.
3. Package Contents
Please check the package for the following items:
- Lancoon Wooden Digital Alarm Clock
- USB Power Cable
- User Manual

Image: The product packaging box, the Lancoon Wooden Digital Alarm Clock, a USB power cable, and the user manual are shown together, illustrating the typical contents of the package.
4. Product Overview
Familiarize yourself with the main components of your alarm clock:
- Front Display: Shows time, temperature, and humidity.
- Top Surface: Integrated wireless charging pad.
- Rear Panel: USB power input, battery compartment (for backup).
- Control Buttons: Typically located on the rear or bottom for setting time, alarms, and other functions. (Specific button labels and functions will be detailed in the 'Operating Instructions' section).
5. Setup
5.1 Powering the Device
The alarm clock can be powered via USB or batteries for backup.
- USB Power: Connect the provided USB cable to the USB input port on the back of the clock and plug the other end into a USB power adapter (not included) or a powered USB port.
- Battery Backup: For time memory during power outages, insert 4 AAA batteries (not included) into the battery compartment on the back. Note that batteries alone will not power the display continuously; they are for backup only.

Image: The rear view of the alarm clock, highlighting the USB cable connection point and the battery compartment where four AAA batteries can be inserted for backup power.
5.2 Initial Time and Date Setting
Upon first power-up, the clock may display a default time. Refer to the 'Operating Instructions' section for detailed steps on setting the correct time and date.
6. Operating Instructions
6.1 Setting Time and Date
Press the 'SET' button (or equivalent) to enter time setting mode. Use the 'UP' and 'DOWN' buttons to adjust hours, minutes, and date. Press 'SET' again to confirm each setting and move to the next. The display supports 12-hour and 24-hour formats.
6.2 Setting Alarms (3 Groups)
The clock allows setting up to three independent alarms.
- Press the 'ALARM' button (or equivalent) to cycle through Alarm 1, Alarm 2, and Alarm 3 settings.
- When an alarm is selected, use 'UP' and 'DOWN' to set the desired alarm time.
- Press 'ALARM' again to confirm and move to the next alarm or exit setting mode.
- To activate/deactivate an alarm, press the 'ALARM' button briefly when the clock is in normal display mode. An indicator light or icon will show if an alarm is active.

Image: An illustration showing the versatility of the three alarm settings. Icons depict a person running (for morning exercise), a dog sleeping (for a pet's schedule or a nap), and people eating (for meal times or appointments), demonstrating how different alarms can be used for various daily activities.
6.3 Brightness Adjustment
The display brightness can be adjusted to three levels.
- Long press the 'UP' or 'DOWN' button to cycle through the three brightness levels (High, Medium, Low).
- Release the button when the desired brightness is achieved.
6.4 Sound Control Mode
In sound control mode, the display will turn off automatically and can be activated by sound.
- To activate sound control: Press the 'DOWN' button. The display will show "ON: sd". This means sound control is active.
- When sound control is active, the display will turn off after a short period of inactivity.
- To wake the display, tap the alarm clock or make a sound louder than 60dB (e.g., a clap).
- To deactivate sound control: Press the 'DOWN' button again. The display will show "---: sd".
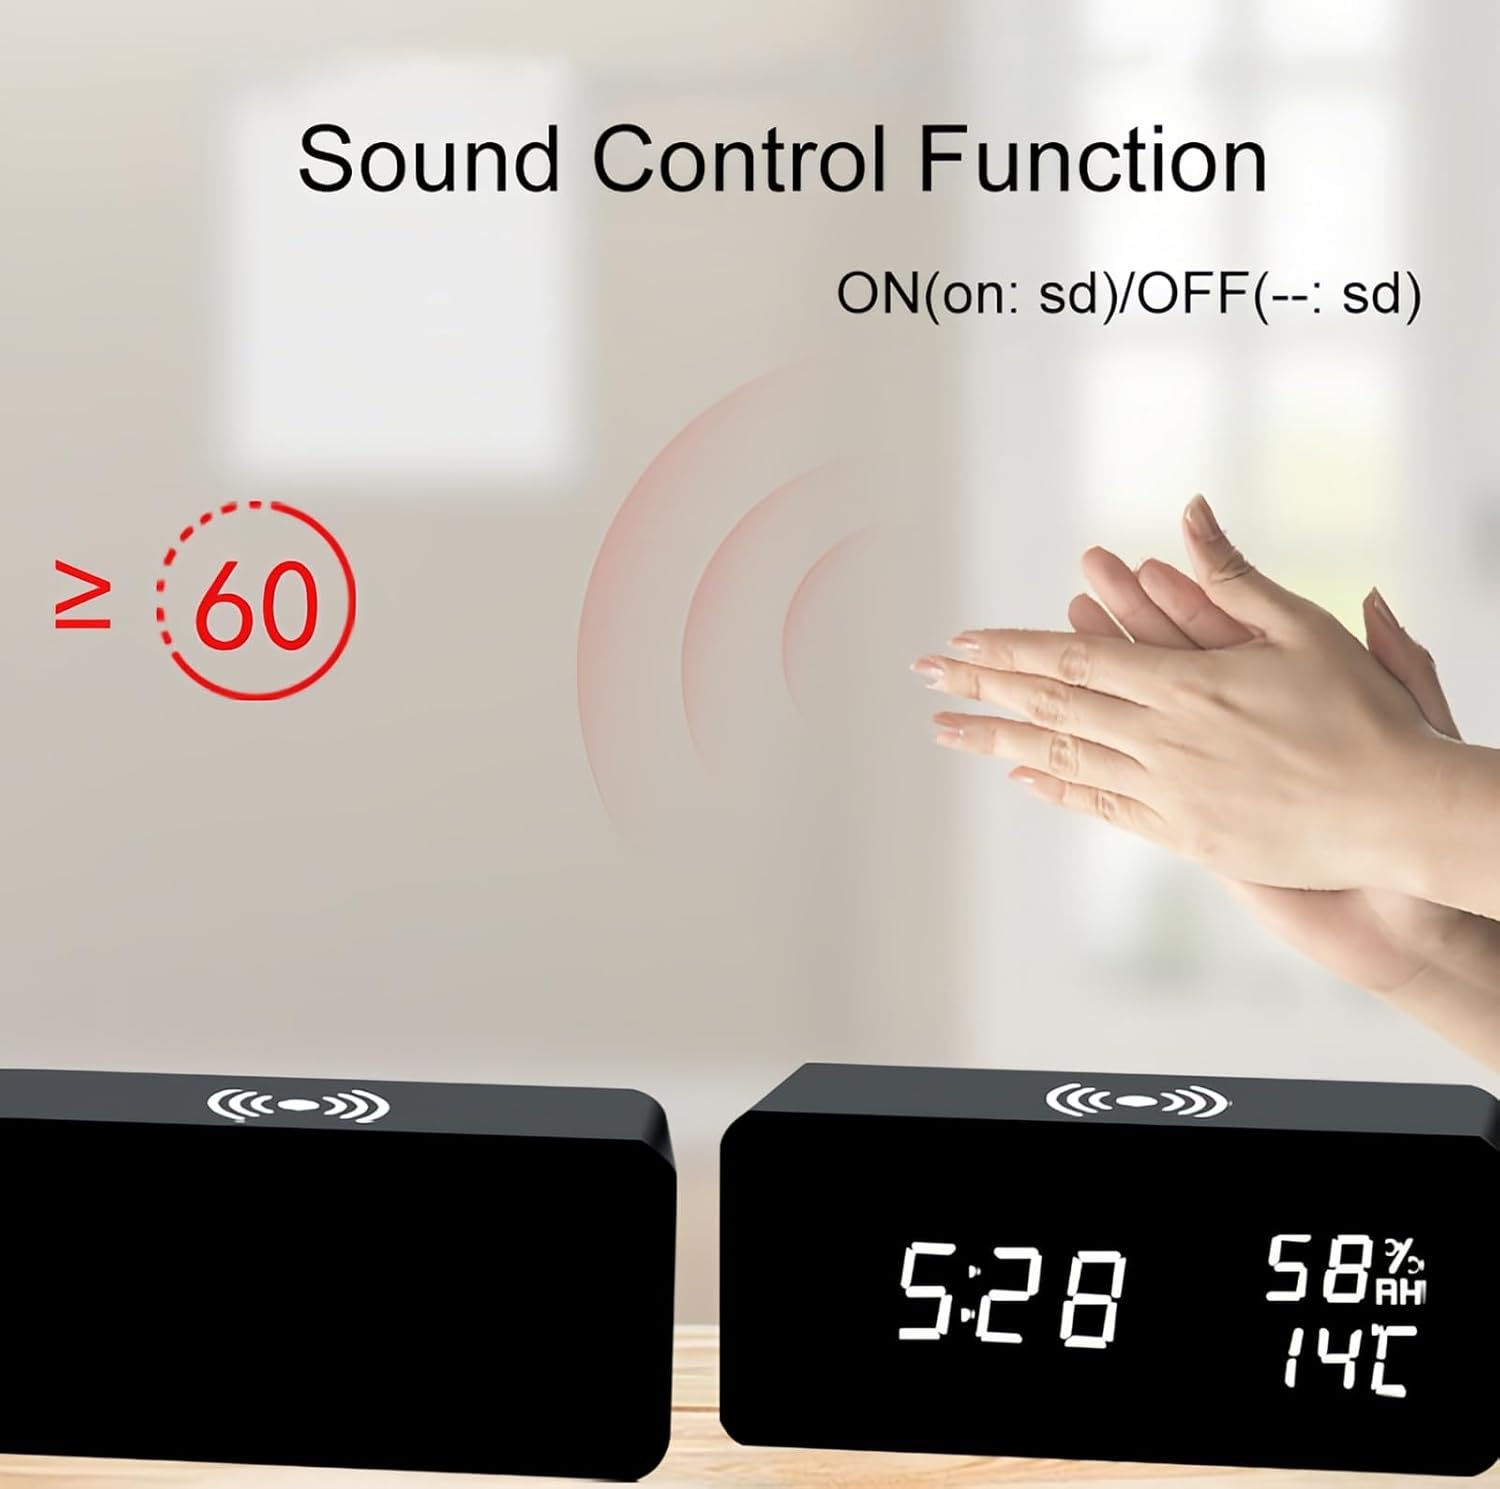
Image: Two alarm clocks are shown, one with its display off and another with its display on after a pair of hands clap. Text indicates that a sound greater than or equal to 60dB will activate the display in sound control mode, with 'ON: sd' and 'OFF: sd' options.
6.5 Temperature and Humidity Display
The clock continuously displays the ambient temperature and humidity. No specific action is required to view these readings.
6.6 Wireless Charging Function
The top surface of the alarm clock features a wireless charging pad.
- Place your wireless charging compatible smartphone directly on the center of the charging pad.
- Ensure the phone is properly aligned for optimal charging. A charging indicator (if available on your phone) will confirm charging has begun.
- Remove any thick cases or metallic objects from your phone that may interfere with wireless charging.

Image: A hand is shown placing a smartphone onto the top surface of the Lancoon Wooden Digital Alarm Clock, demonstrating the wireless charging function. The clock displays time, humidity, and temperature.
7. Maintenance
- Clean the clock with a soft, dry cloth. Do not use abrasive cleaners or solvents.
- Ensure the device is unplugged before cleaning.
- Avoid blocking the ventilation holes (if any) to prevent overheating.
8. Troubleshooting
| Problem | Possible Cause | Solution |
|---|---|---|
| Display is off / Clock not working | No power; Sound control mode active. | Ensure USB cable is securely connected to a power source. Tap the clock or make a sound to activate display if in sound control mode. |
| Wireless charging not working | Phone not compatible; Misalignment; Obstruction. | Ensure your phone supports wireless charging. Realign phone on the charging pad. Remove phone case or metallic objects. |
| Alarm does not sound | Alarm not activated; Volume too low. | Check if the alarm is set and activated (indicator icon). Ensure the alarm volume is not muted or set too low (if adjustable). |
| Incorrect time/date | Not set correctly; Power interruption. | Re-set the time and date following section 6.1. Ensure backup batteries are installed for power interruptions. |
9. Specifications
- Brand: Lancoon
- Model Number: LK-AE27Black_White
- Colour: Black
- Product Dimensions: 8 x 3.81 x 7.5 cm
- Item Weight: 280 g
- Material: Engineered Wood, Polyvinyl Chloride (PVC), Wood
- Display Type: Digital
- Special Features: Wireless Charging, Temperature Display, Humidity Display, Adjustable Brightness, Sound Control, 3 Alarm Groups
10. Warranty and Support
For warranty information or technical support, please refer to the contact details provided with your purchase or visit the official Lancoon website. Keep your purchase receipt as proof of purchase.


