1. Introduction
Thank you for choosing the Lancoon LK-AE27White LED Wooden Alarm Clock. This device combines a digital alarm clock with a wireless charging pad, temperature and humidity display, and sound control features. This manual provides comprehensive instructions for its setup, operation, and maintenance to ensure optimal performance.
2. Product Features
- Wireless Charging Function: Supports mobile phones with wireless charging capability.
- Temperature and Humidity Display: Shows real-time indoor temperature and humidity.
- Sound Control Mode: Activates the display by touch or sounds above 60 dB.
- Multiple Alarms: Allows setting up to 3 independent alarms.
- Adjustable Brightness: Offers 3 levels of display brightness.

Image: Overview of the alarm clock's key features, including wireless charging, date, temperature/humidity, sound control, 3 alarms, and brightness adjustment.
3. Package Contents
- 1 x Lancoon LK-AE27White LED Wooden Alarm Clock
- 1 x USB Power Cable
- 1 x User Manual

Image: The alarm clock, USB cable, and user manual as included in the product packaging.
4. Setup
4.1 Powering the Device
- Connect the provided USB power cable to the DC 5V port on the back of the alarm clock.
- Plug the other end of the USB cable into a compatible USB power adapter (not included). A 5V/2A or higher adapter is recommended for stable operation, especially when using wireless charging.
- The display will light up, indicating the device is powered on.
4.2 Installing Backup Batteries (Optional)
For retaining time and alarm settings during a power outage, install 4 AAA batteries (not included) into the battery compartment on the back of the clock. These batteries are for memory backup only and will not power the display continuously.

Image: Rear view of the alarm clock showing the USB power input and the battery compartment for 4 AAA batteries.
5. Operating Instructions
5.1 Button Functions
- SET Button: Enters setting mode for time, date, and alarms.
- UP Button: Adjusts values upwards in setting mode; long press to adjust brightness.
- DOWN Button: Adjusts values downwards in setting mode; long press to adjust brightness; short press to toggle sound control mode.
5.2 Setting Time and Date
- Press the SET button to enter time setting mode. The year will flash.
- Use UP or DOWN to adjust the year. Press SET to confirm and move to the next setting (Month, Day, 12/24-hour format, Hour, Minute).
- Repeat step 2 for each parameter.
- After setting the minutes, press SET to exit time/date setting mode.
5.3 Setting Alarms
The clock supports up to 3 alarms (A1, A2, A3).
- From normal display mode, press SET repeatedly until A1, A2, or A3 appears.
- Press SET again when the desired alarm (e.g., A1) is displayed. The hour will flash.
- Use UP or DOWN to set the alarm hour. Press SET to confirm.
- Use UP or DOWN to set the alarm minute. Press SET to confirm.
- Use UP or DOWN to enable (ON) or disable (OFF) the alarm. Press SET to confirm and exit alarm setting.
- Repeat for A2 and A3 if needed.
5.4 Adjusting Brightness
In normal display mode, long press the UP or DOWN button to cycle through the 3 brightness levels.
5.5 Sound Control Mode
This mode allows the display to turn off automatically and activate when a sound louder than 60 dB is detected (e.g., a clap or tap on the clock).
- Short press the DOWN button to toggle between sound control ON (display shows "ON:sd") and OFF (display shows "---:sd").
- When "ON:sd" is active, the display will turn off after a few seconds of silence.

Image: Illustration of the sound control mode, showing a hand clapping to activate the display when the mode is enabled (ON:sd).
5.6 Wireless Charging
The top surface of the alarm clock features a wireless charging pad.
- Ensure the alarm clock is powered by a 5V/2A or higher USB adapter.
- Place your wireless charging compatible smartphone directly on the center of the clock's top surface.
- The phone should indicate that it is charging. If not, adjust its position slightly.
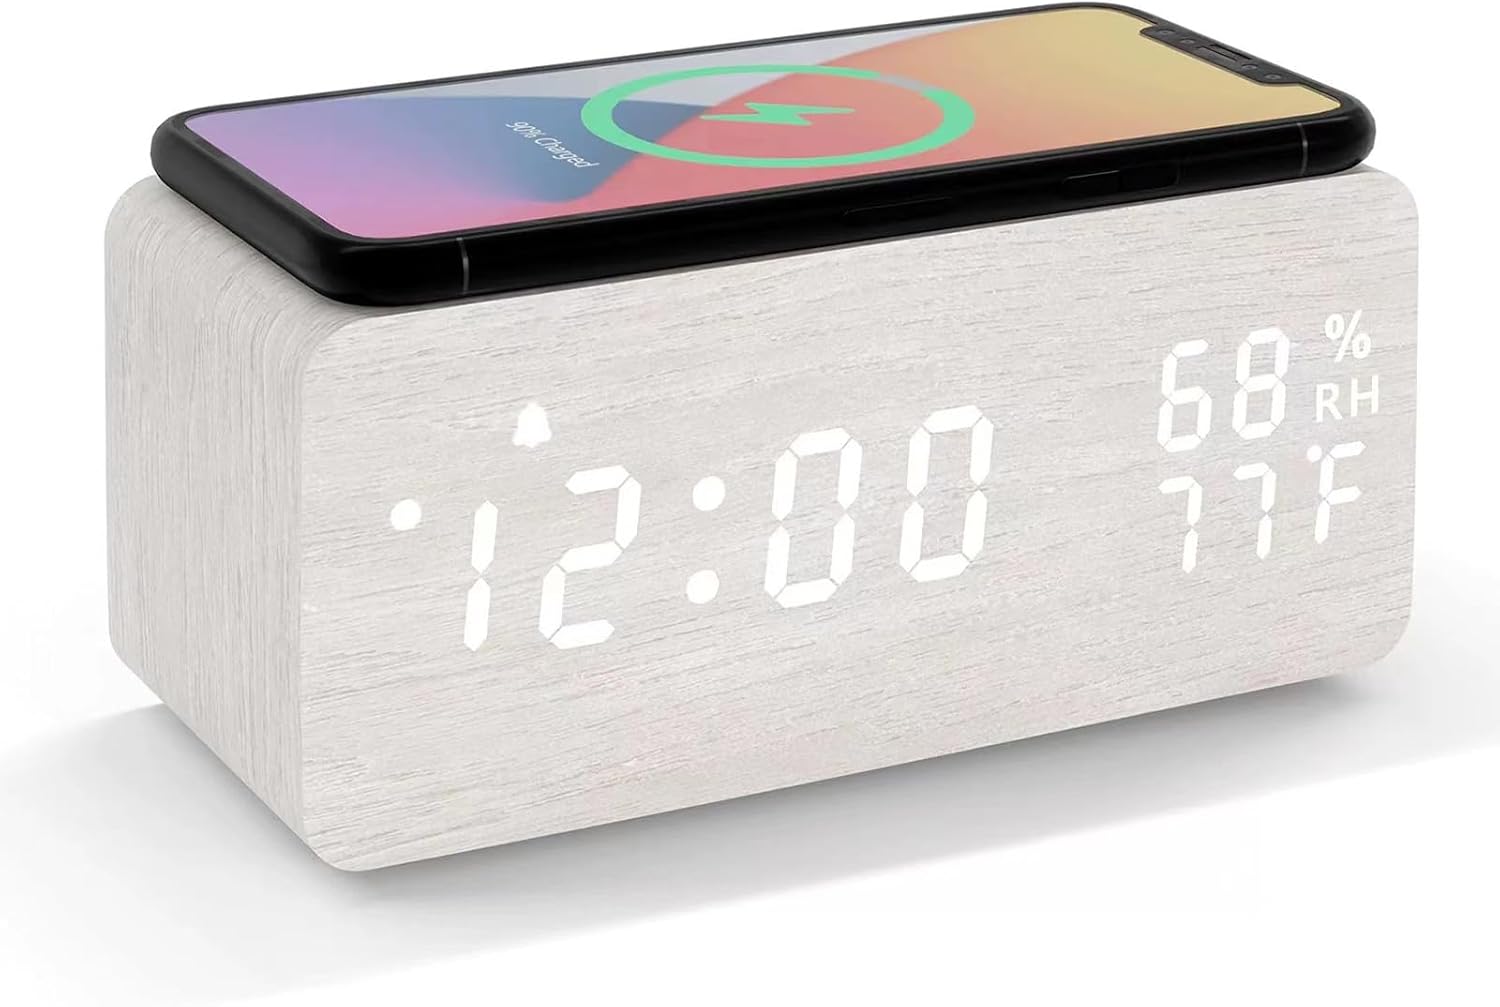
Image: The Lancoon LED Wooden Alarm Clock with a smartphone placed on top, indicating active wireless charging.
6. Maintenance
- Clean the clock's surface with a soft, dry cloth. Avoid abrasive cleaners or solvents.
- Keep the device away from direct sunlight, high temperatures, and high humidity.
- If not using the clock for an extended period, remove the backup batteries to prevent leakage.
7. Troubleshooting
- Clock not turning on: Ensure the USB cable is securely connected to both the clock and a working power adapter. Verify the power adapter is supplying sufficient power (5V/2A recommended).
- Wireless charging not working:
- Confirm your smartphone supports wireless charging.
- Ensure the phone is centered on the charging pad.
- Check that the clock is powered by a 5V/2A or higher power adapter. Lower power adapters may not provide enough current for wireless charging.
- Remove any thick phone cases that might interfere with charging.
- Time resets after power loss: Install 4 AAA backup batteries in the compartment to maintain settings during power interruptions.
- Temperature/Humidity readings seem inaccurate: The internal sensors may be affected by the device's own heat or external factors. Allow the clock to stabilize in its environment for accurate readings.
- Display is too dim or too bright: Long press the UP or DOWN button to adjust the brightness level.
8. Specifications
| Feature | Detail |
|---|---|
| Brand | Lancoon |
| Model | LK-AE27White |
| Color | White |
| Dimensions | 8 x 3.81 x 7.5 cm (3.15 x 1.5 x 2.95 inches) |
| Weight | 280 grams |
| Material | Wood, Engineered Wood, PVC |
| Display Type | Digital LED |
| Power Source | USB (DC 5V), Battery (4x AAA for backup) |
| Special Features | Wireless Charging, Temperature Display, Humidity Display, Sound Control, Adjustable Brightness |

Image: Dimensions of the Lancoon LED Wooden Alarm Clock, showing measurements in centimeters and inches.
9. Warranty and Support
For warranty information or technical support, please refer to the contact details provided with your purchase or visit the official Lancoon website. Keep your purchase receipt as proof of purchase.


