
1. Introduction
This manual provides detailed instructions for the installation, operation, and maintenance of your Avtech DGD2017AX 16-Channel XVR Pentabrid Video Recorder. Please read this manual thoroughly before using the device to ensure proper functionality and safety. Keep this manual for future reference.
2. Product Overview
The Avtech DGD2017AX is a versatile 16-channel XVR (eXtreme Video Recorder) designed for advanced surveillance systems. It supports a pentabrid configuration, functioning as both a Digital Video Recorder (DVR) for analog cameras and a Network Video Recorder (NVR) for IP cameras. This device is capable of recording high-resolution video up to 8MP and utilizes H.265 video compression for efficient storage.
Key Features:
- 16-Channel Pentabrid Support: Compatible with Analog HD, TVI, CVI, and 960H analog signals, as well as IP cameras.
- H.265 Video Compression: Advanced compression for optimized storage and bandwidth usage.
- High Resolution Recording: Supports up to 8MP Lite resolution in analog mode and 5MP in IP mode.
- Multiple Video Outputs: Features BNC, VGA, and HDMI (4K2K display) outputs for versatile monitoring.
- Remote Access: Access your surveillance system remotely via web browsers (Windows Edge, Google Chrome, Mozilla Firefox, Opera on Windows 10+; Google Chrome, Mozilla Firefox on Mac) and the dedicated mobile app.
- Mobile Surveillance: Utilize the EagleEyes app for iOS and Android devices, including Push Video (16 channels) and Push Status notifications.
- Recording Modes: Manual, Timer, Motion Detection, Alarm, and Remote Control.
- Motion Detection: Configurable 16 x 12 grid per channel.
- Event Notification: Push Video (1CH), Push Status, FTP, and E-mail.
- PTZ Support: Pan/Tilt/Zoom camera control.
- Digital Zoom: 2x digital zoom capability.
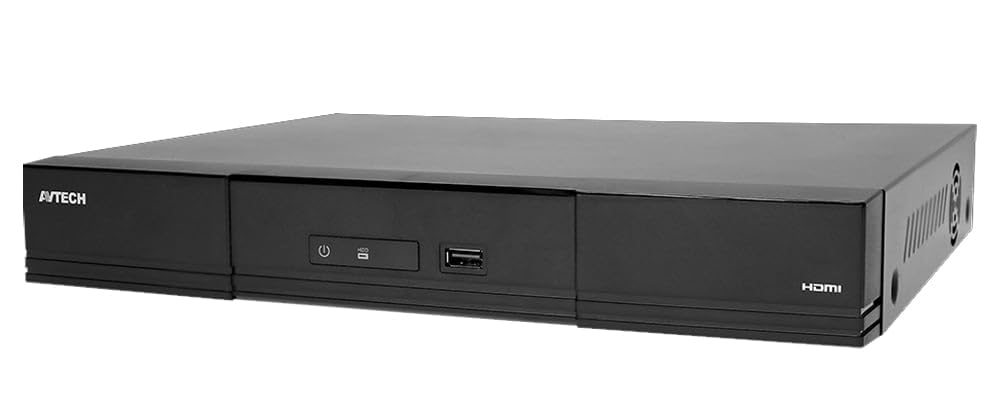
Figure 1: Front view of the Avtech DGD2017AX 16-Channel XVR Pentabrid Video Recorder. This image shows the compact design and front panel indicators of the device.
3. Setup and Installation
Before beginning installation, ensure all components are present and undamaged. It is recommended to install the XVR in a secure, well-ventilated area, away from direct sunlight, heat sources, and moisture.
3.1 Package Contents
Verify that your package contains the following items:
- Avtech DGD2017AX XVR Unit
- Power Adapter (12V 5Ah)
- User Manual (this document)
- Mounting Screws (if applicable for HDD installation)
- Remote Control (optional, if included)
- USB Mouse
3.2 Hardware Connections
- Connect Cameras: Connect your analog HD, TVI, CVI, or 960H cameras to the BNC video input ports on the rear panel. For IP cameras, ensure they are connected to the same network as the XVR.
- Connect Display: Connect a monitor to the XVR using either the VGA or HDMI output port. For 4K resolution, use the HDMI output with a compatible 4K monitor.
- Connect Network: Connect an Ethernet cable from the XVR's LAN port to your network router or switch.
- Connect USB Devices: Plug in the included USB mouse to a USB port for local control. Additional USB devices (e.g., for backup) can be connected to other available USB ports.
- Install Hard Drive (Optional): If not pre-installed, open the XVR casing, connect the SATA data and power cables to a compatible 3.5-inch surveillance hard drive, and secure it with screws. Close the casing.
- Connect Power: Connect the 12V 5Ah power adapter to the XVR's power input port, then plug the adapter into a power outlet. The device will power on automatically or via the front panel power button.
3.3 Initial Configuration
Upon first power-on, the system will guide you through an initial setup wizard. This typically includes setting the date/time, network settings, and creating an administrator password. Follow the on-screen prompts.
4. Operating Instructions
This section covers the basic operation of the Avtech DGD2017AX XVR, including live view, recording, playback, and remote access.
4.1 Live View
After successful setup, the XVR will display the live feed from connected cameras on the connected monitor. You can switch between single-camera view, multi-camera grid view, and use the digital zoom function (2x) as needed.
4.2 Recording Management
The XVR supports various recording modes:
- Manual Recording: Start and stop recording manually.
- Timer Recording: Schedule recording for specific times and days.
- Motion Detection Recording: Recording starts automatically when motion is detected in the configured areas.
- Alarm Recording: Recording triggered by external alarm inputs (if connected).
Configure recording settings, including resolution, frame rate, and quality, through the system's menu interface.
4.3 Playback
Access recorded footage through the playback menu. You can search by date, time, and event type. The system allows for fast forward, rewind, and frame-by-frame playback.
4.4 Remote Access
The Avtech DGD2017AX supports remote viewing and management:
- Web Browser: Open a compatible web browser (Windows Edge, Google Chrome, Mozilla Firefox, Opera on Windows 10+; Google Chrome, Mozilla Firefox on Mac) and enter the XVR's IP address or domain name. Log in with your credentials.
- Mobile App (EagleEyes): Download the "EagleEyes" app from the iOS App Store or Google Play Store. Add your XVR device using its ID or IP address. The app provides live view, playback, and Push Video/Status notifications.
Ensure your network is properly configured for remote access, including port forwarding if necessary, or use cloud services provided by Avtech for easier setup.
5. Maintenance
Regular maintenance ensures the longevity and optimal performance of your Avtech DGD2017AX XVR.
- Cleaning: Periodically clean the exterior of the XVR with a soft, dry cloth. Do not use liquid or aerosol cleaners. Ensure ventilation openings are free from dust and obstructions.
- Firmware Updates: Check the official Avtech website for firmware updates. Keeping your firmware updated can improve performance, add new features, and enhance security. Follow the update instructions carefully to avoid damaging the device.
- Hard Drive Health: Monitor the health of your hard drive through the system's menu. Replace the hard drive if any errors or warnings are reported to prevent data loss.
- Password Security: Regularly change your administrator password and use strong, unique passwords to protect your system from unauthorized access.
6. Troubleshooting
This section addresses common issues you might encounter with your Avtech DGD2017AX XVR.
| Problem | Possible Cause | Solution |
|---|---|---|
| No video output on monitor. | Loose cable connection, incorrect input selected on monitor, XVR not powered on. | Check VGA/HDMI cable connections. Ensure monitor is set to the correct input source. Verify XVR power. |
| No camera image. | Camera not powered, cable issue, incorrect camera type selected, IP camera not configured. | Check camera power and video cables. Ensure camera is compatible with XVR. For IP cameras, verify network connection and configuration. |
| Cannot access XVR remotely. | Network configuration issues, incorrect IP address/port, firewall blocking. | Verify network cable connection. Check XVR's IP address and port settings. Ensure port forwarding is correctly configured on your router or use Avtech's cloud service. Disable local firewall temporarily for testing. |
| Recording not working. | Hard drive not installed/formatted, recording schedule not set, motion detection not configured. | Ensure a hard drive is installed and formatted. Check recording schedule and motion detection settings. Verify hard drive health. |
If you encounter issues not listed here or if the suggested solutions do not resolve the problem, please contact Avtech technical support.
7. Specifications
| Feature | Detail |
|---|---|
| Model | DGD2017AX |
| Video Input | 16 Channels (Pentabrid: Analog HD / TVI / CVI / Analog HD / 960H) |
| Video Compression | H.265 |
| Video Output | BNC, VGA, HDMI (4K2K display) |
| Analog Resolution | 8MP Lite / 5MP / 5MLITE / 4MP / 4MLITE / FHD (1080P) / HD / 960H / Frame / CIF |
| IP Resolution | 2592 x 1944 (5MP) / 2048 x 1536 (3MP) / 1920 x 1080 (FHD) / 1280 x 720 (HD) / 720 x 480 / 352 x 240 |
| Max. Analog Recording Speed | Up to 112 IPS @ 8MP Lite, 96 IPS @ 5MP, 120 IPS @ 4MP, 240 IPS @ FHD (1080P) |
| Max. IP Recording Speed | Up to 480 IPS @ 2592 x 1944 (5MP) / 2048 x 1536 (3MP) / 1920 x 1080 |
| Recording Modes | Manual / Timer / Motion / Alarm / Remote Control |
| Motion Detection Area | 16 × 12 grids per channel |
| Event Notification | Push Video (1CH) / Push Status / FTP / E-mail |
| Digital Zoom | 2x |
| PTZ Support | Yes |
| Remote Access (PC) | Windows Edge, Google Chrome, Mozilla Firefox & Opera on Windows 10+; Google Chrome & Mozilla Firefox on MAC |
| Mobile Surveillance App | EagleEyes (iOS & Android) with Push Video (16 channels) & Push Status |
| Max. Online Users | 40 |
| Power Supply | 12V 5Ah |
| Dimensions (L x P x A) | 319.5 mm x 254.9 mm x 52 mm |
| Software Updates Guaranteed Until | Unknown |
8. Warranty and Support
For warranty information, please refer to the warranty card included with your product or visit the official Avtech website. Avtech provides technical support for its products. If you require assistance with installation, configuration, or troubleshooting, please contact Avtech customer service through their official channels. Ensure you have your product model number (DGD2017AX) and serial number ready when contacting support.
For the latest information and support resources, please visit: www.avtech.com.tw


