1. Introduction
Thank you for choosing the ZELCAN MDP-E Magnetic Drill. This powerful and versatile tool is designed for precision drilling in various metal applications, including shipbuilding, bridge construction, industrial steel fabrication, railway construction, power plant projects, equipment installation, and home renovation. This manual provides essential information for the safe and efficient operation, setup, maintenance, and troubleshooting of your magnetic drill. Please read this manual thoroughly before initial use and keep it for future reference.

Figure 1: ZELCAN MDP-E Magnetic Drill Overview
2. Safety Instructions
Always follow basic safety precautions to reduce the risk of fire, electric shock, and personal injury when operating power tools. Failure to follow these instructions may result in serious injury or property damage.
General Safety
- Work Area Safety: Keep the work area clean and well-lit. Cluttered or dark areas invite accidents. Do not operate power tools in explosive atmospheres, such as in the presence of flammable liquids, gases, or dust.
- Electrical Safety: Power tool plugs must match the outlet. Never modify the plug. Avoid body contact with earthed or grounded surfaces (e.g., pipes, radiators, ranges, refrigerators).
- Personal Safety: Always wear eye protection. Use hearing protection when operating for extended periods. Wear appropriate clothing; avoid loose clothing or jewelry. Secure long hair.
- Tool Use and Care: Do not force the power tool. Use the correct power tool for your application. Disconnect the plug from the power source before making any adjustments, changing accessories, or storing power tools.
Magnetic Drill Specific Safety
- Magnetic Base: Ensure the magnetic base is clean, flat, and free of debris or paint before engaging. The magnetic force requires a minimum material thickness for proper adhesion.
- Workpiece Security: Always ensure the workpiece is securely clamped or supported in addition to the magnetic base, especially when drilling through thin materials or in unusual positions.
- Coolant: Use appropriate cutting fluid or coolant to prevent overheating of the drill bit and workpiece, which can extend tool life and improve drilling performance.
- Drill Bits: Use only sharp, undamaged drill bits suitable for the material being drilled.
- Emergency Stop: Familiarize yourself with the location and operation of the emergency stop switch.
3. Package Contents
Carefully unpack the box and ensure all items are present and undamaged. If any items are missing or damaged, please contact your retailer.
- 1x ZELCAN Magnetic Drill
- 6x Core Drills (12mm, 15mm, 18mm, 21mm, 24mm, 27mm)
- 1x Coolant Tank (250 ml capacity)
- 1x Coolant Hose
- 3x Feed Handles
- 1x Safety Rope
- 2x Spare Carbon Brushes
- 2x Spare Screws
- 1x 75mm Pilot Pin
- 1x 90mm Pilot Pin
- 1x Arbor
- 1x Adjustable Chuck for Twist Drills
- 1x T-Wrench
- 1x 5mm Hex Key
- 1x Instruction Manual

Figure 2: Included Components and Drill Dimensions
4. Specifications
| Feature | Specification |
|---|---|
| Motor Power | 1550W |
| No-load Speed Range | 0-580 rpm (Variable) |
| Magnetic Force | 13,000 N |
| Max. Travel Distance | 230 mm |
| Max. Core Drilling Diameter | 50 mm |
| Max. Core Drilling Depth | 50 mm |
| Max. Twist Drilling Diameter | 1.5-13 mm |
| Max. Twist Drilling Depth | 100 mm |
| Coolant Tank Capacity | 250 ml |
| Operating Temperature | 10-50°C |
| Product Dimensions (L x W x H) | 25 x 12.5 x 33 cm |
| Net Weight | 10.8 kg |
| Voltage | 220 Volts |
| Amperage | 16 A |
| Power Source | Corded Electric |
5. Setup
5.1 Attaching the Feed Handles
Insert the three feed handles into the designated threaded holes on the drill's feed mechanism. Tighten them securely by hand.
5.2 Installing the Drill Bit
For Core Drills: Insert the arbor into the drill spindle. Secure the core drill onto the arbor. Ensure the pilot pin is correctly inserted into the core drill.
For Twist Drills: Attach the adjustable chuck to the drill spindle. Insert the twist drill bit into the chuck and tighten it using the provided T-wrench.
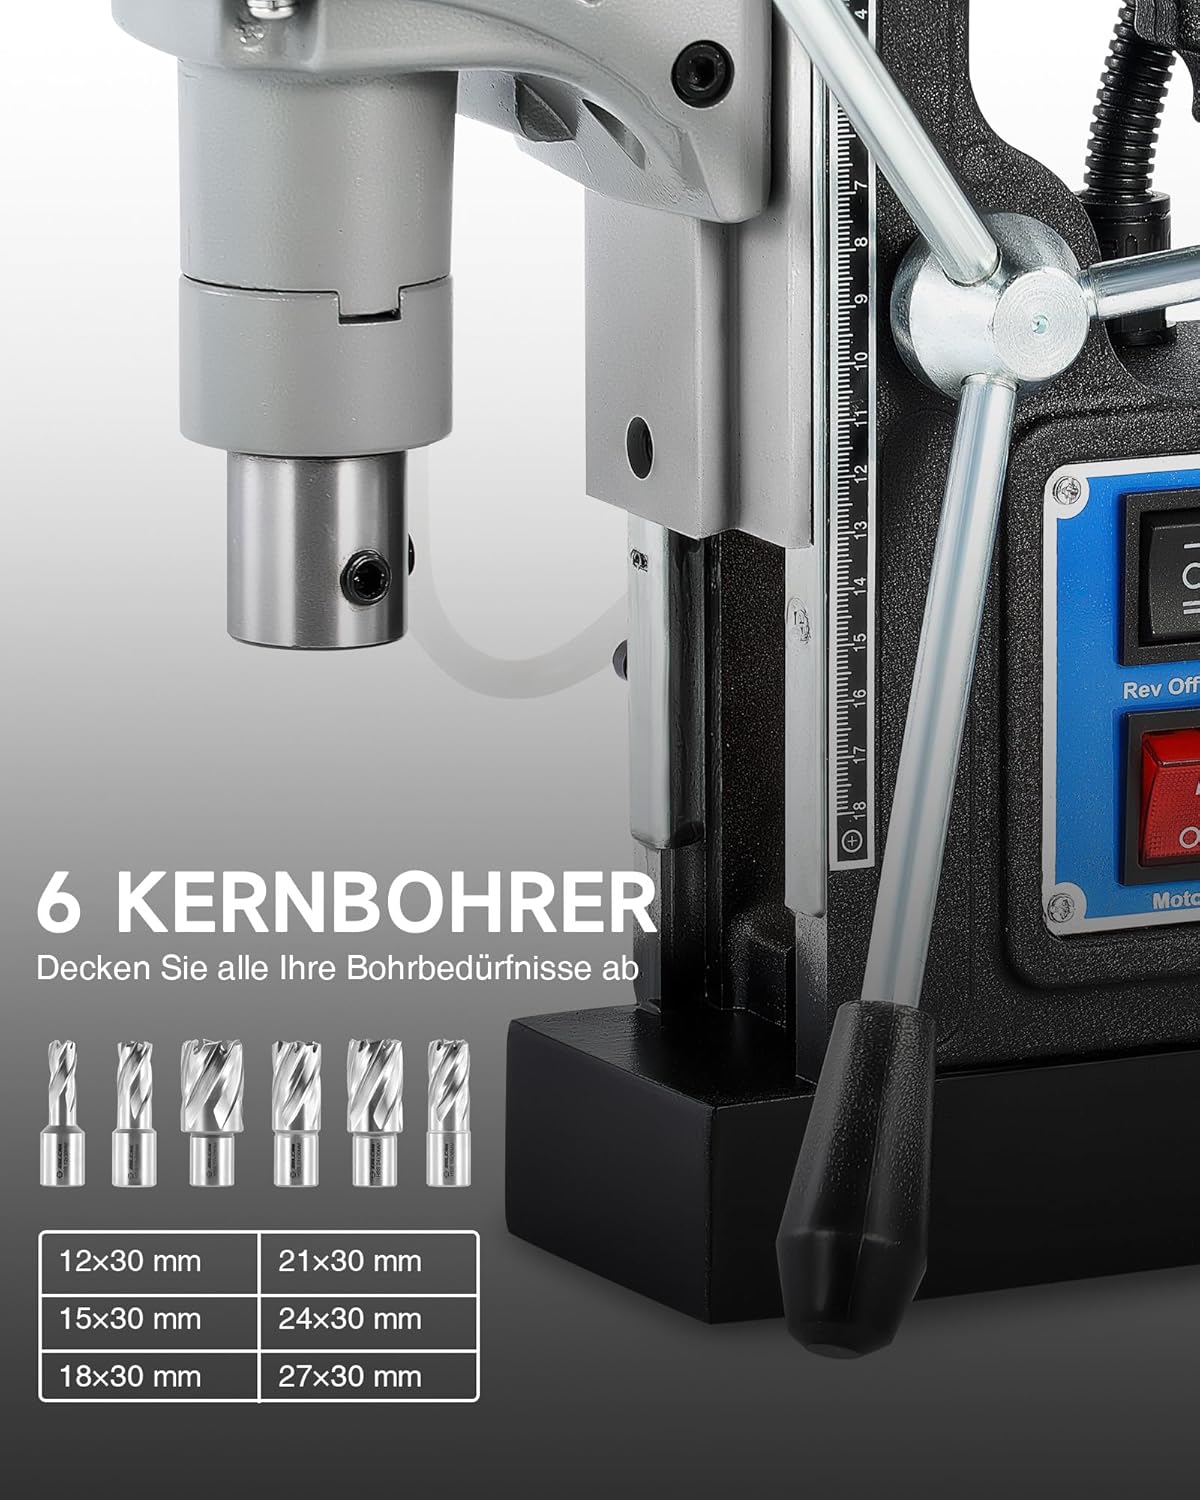
Figure 3: Core Drill Bits and Depth Scale
5.3 Connecting the Coolant System
Fill the 250 ml coolant tank with appropriate cutting fluid. Connect the coolant hose to the tank and the drill's coolant inlet. Ensure the hose is securely attached to prevent leaks.

Figure 4: Efficient Cooling System
5.4 Securing the Safety Rope
Attach the safety rope to the designated anchor point on the drill and to a secure, stable structure near the workpiece. This provides an additional safety measure in case of magnetic base failure.
6. Operating Instructions
6.1 Workpiece Preparation
Ensure the metal surface where the magnetic base will be placed is clean, flat, and free of rust, paint, or debris. The surface must be ferromagnetic for the magnet to engage properly.
6.2 Positioning and Engaging the Magnet
Position the magnetic drill over the desired drilling location. Press the 'Magnet' switch to engage the powerful 13,000 N electromagnet. Verify that the drill is firmly secured to the workpiece before proceeding.

Figure 5: Magnetic Drill Positioning Flexibility
6.3 Powering On and Speed Adjustment
Connect the drill to a suitable 220V power supply. Use the variable speed control dial to set the desired rotation speed (0-580 rpm) appropriate for the drill bit size and material. Press the 'Motor' switch to start the drill motor.

Figure 6: Control Panel with Speed and Direction Switches
6.4 Drilling Process
Slowly feed the drill bit into the workpiece using the feed handles. Apply steady, even pressure. Ensure the coolant system is active during drilling to prevent overheating and prolong bit life. Monitor the depth using the integrated scale.
6.5 Using the Reversible Function
The drill features a reversible function (forward/reverse) for enhanced versatility, such as tapping or easier bit removal. Use the 'Rev/Off/Fwd' switch to select the desired rotation direction.
6.6 Disengaging the Magnet
Once drilling is complete, retract the drill bit fully from the workpiece. Turn off the motor using the 'Motor' switch. Then, press the 'Magnet' switch to disengage the magnetic base. Carefully remove the drill from the workpiece.
7. Maintenance
Regular maintenance ensures the longevity and optimal performance of your ZELCAN Magnetic Drill.
- Cleaning: After each use, clean the drill, especially the magnetic base and spindle area, to remove metal chips and debris. Use a dry cloth or compressed air.
- Coolant System: Regularly check and clean the coolant tank and hose to prevent blockages. Replace coolant as needed.
- Carbon Brush Replacement: The carbon brushes are wear parts. If the motor performance decreases or sparks are visible, replace the carbon brushes with the provided spare set. Disconnect power before attempting replacement.
- Lubrication: Periodically apply a small amount of grease to the feed mechanism and other moving parts as indicated in the detailed service manual (if available) to ensure smooth operation.
- Storage: Store the drill in a dry, clean, and secure location, out of reach of children.
8. Troubleshooting
This section addresses common issues you might encounter. For problems not listed here, please contact customer support.
| Problem | Possible Cause | Solution |
|---|---|---|
| Drill motor does not start | No power supply; Faulty switch; Worn carbon brushes | Check power connection; Inspect switch; Replace carbon brushes |
| Magnetic base not holding | Surface is not clean/flat; Material too thin; Power failure to magnet | Clean surface; Ensure adequate material thickness; Check power connection |
| Excessive vibration or noise | Loose components; Dull or damaged drill bit; Incorrect feed pressure | Tighten all fasteners; Replace drill bit; Adjust feed pressure |
| Drill bit overheating | Insufficient coolant; Incorrect speed; Excessive feed pressure | Ensure coolant flow; Adjust speed; Reduce feed pressure |
| Poor drilling performance | Dull drill bit; Incorrect speed setting; Material too hard | Replace or sharpen drill bit; Adjust speed; Use appropriate bit for material |
9. Warranty and Support
For warranty information, please refer to the documentation provided with your purchase or visit the official ZELCAN website. If you require technical support, spare parts, or have any questions regarding the operation or maintenance of your ZELCAN MDP-E Magnetic Drill, please contact ZELCAN customer service or your authorized dealer.
Please have your model number (MDP-E) and purchase date ready when contacting support.