1. Introduction
This manual provides detailed instructions for the installation, operation, and maintenance of your Denash 4 Channel Car Recorder. Please read this manual thoroughly before using the device to ensure proper functionality and to maximize its performance. Keep this manual for future reference.
2. Package Contents
Carefully unpack the box and ensure all items listed below are present and in good condition. If any items are missing or damaged, please contact your retailer.
- 1 x Front and Left and Right Integrated Camera (Main Unit)
- 1 x Rear Camera
- 1 x Suction Cup Bracket
- 1 x Cigarette Lighter Port Power Cable
- 1 x Rear Camera Connection Cable
- 1 x Sticker
- 2 x Screws

Image: All components included in the Denash 4 Channel Car Recorder package, including the main unit, rear camera, cables, and mounting accessories.

Image: A different perspective of the Denash 4 Channel Car Recorder's package contents, showing the main unit, rear camera, suction cup mount, power cable, and other accessories.
3. Product Overview
The Denash 4 Channel Car Recorder is designed to provide comprehensive video surveillance for your vehicle. It features a main unit with a 3-inch HD display and integrated front, left, and right cameras, complemented by a separate rear camera. Key features include:
- 360-Degree Panoramic Video Recording: Captures video from the front, back, left, and right, covering the entire driving process.
- HD Picture Quality: 5MP camera with 1080P image resolution for clear video.
- Emergency Save Function (G-Sensor): Automatically saves recordings during sudden impacts or collisions, preventing overwriting.
- Automatic On/Off: Powers on and off automatically with the vehicle's ignition.
- Infrared Night Vision: Enhances recording clarity in low-light conditions and at night.

Image: The main unit of the car recorder, highlighting its central 3-inch HD display and the two rotatable side cameras.

Image: Front and rear views of the main camera unit, showing the primary lens, ventilation, and connection ports.

Image: A detailed view of the main unit's front-facing camera lens and surrounding ventilation slots.
4. Setup
Follow these steps to properly install your Denash 4 Channel Car Recorder in your vehicle.
4.1 Insert Memory Card
Before installation, insert a compatible memory card (up to 32GB, not included) into the designated slot on the main unit. Ensure the card is inserted correctly until it clicks into place.
4.2 Mount the Main Unit
- Clean the area on your windshield where you intend to mount the recorder.
- Attach the suction cup bracket to the main unit.
- Press the suction cup firmly against the windshield and engage the locking mechanism to secure it. Adjust the angle of the main unit for optimal front view.
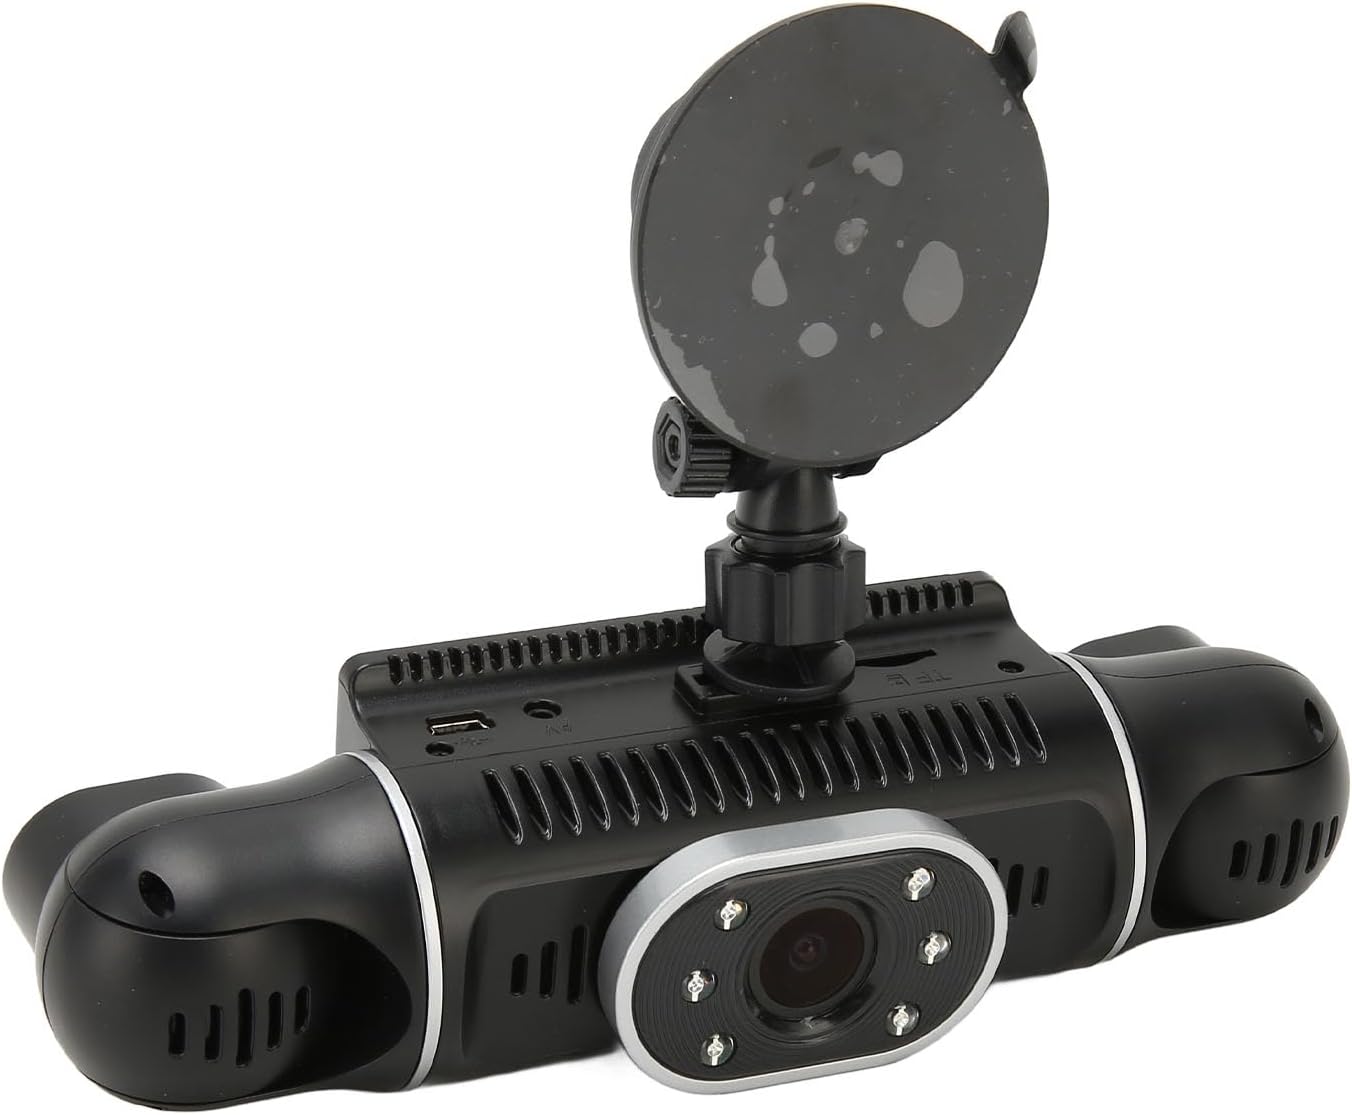
Image: The main unit of the car recorder with the suction cup bracket securely attached, ready for mounting.
4.3 Connect the Rear Camera
- Identify a suitable location for the rear camera, typically on the rear windshield or near the license plate.
- Use the provided rear camera connection cable to link the rear camera to the main unit. Route the cable discreetly along the vehicle's interior trim.
- Secure the rear camera using the provided sticker or screws.
4.4 Power Connection
- Connect the cigarette lighter port power cable to the main unit.
- Plug the other end of the power cable into your vehicle's 12V cigarette lighter socket.

Image: The car recorder mounted on the windshield, showing the view from the driver's seat, with the road ahead visible on the display.
5. Operating Instructions
Once installed and powered, the Denash 4 Channel Car Recorder operates largely automatically.
5.1 Automatic Recording
The device supports automatic ignition on and off. When your vehicle's ignition is turned on, the recorder will automatically power on and begin recording. When the ignition is turned off, it will save the current recording and power off.
5.2 G-Sensor (Emergency Save)
The built-in G-sensor detects sudden impacts or rapid deceleration/acceleration. In such events, the current video segment will be automatically locked and saved to a protected folder, preventing it from being overwritten by normal loop recording. This ensures critical footage from accidents is preserved.
5.3 Motion Detection
If enabled in the settings, the motion detection function allows the recorder to start recording automatically when motion is detected in front of the vehicle while parked. This feature requires continuous power supply.
5.4 Time Synchronization
The device supports time synchronization (Y/M/D/H/M). Ensure the date and time are set correctly in the device settings for accurate timestamps on your recordings.
5.5 Viewing Recordings
You can view recorded videos directly on the 3-inch HD display of the main unit. Navigate through the menu using the device's buttons. For larger viewing or backup, remove the memory card and insert it into a computer or compatible device.

Image: The car recorder actively displaying the road view, as seen from the driver's perspective during operation.
6. Maintenance
Regular maintenance helps ensure the longevity and optimal performance of your car recorder.
- Cleaning: Use a soft, dry cloth to clean the camera lenses and the display screen. Avoid using abrasive cleaners or solvents.
- Memory Card Management: Periodically format the memory card (at least once a month) to prevent data corruption and ensure smooth recording. Back up important files before formatting. Replace old or slow memory cards as needed.
- Temperature: Avoid exposing the device to extreme temperatures for extended periods.
- Firmware Updates: Check the manufacturer's website periodically for any available firmware updates to improve performance or add features.
7. Troubleshooting
If you encounter issues with your Denash 4 Channel Car Recorder, refer to the following common problems and solutions:
- Device does not power on:
- Ensure the power cable is securely connected to both the device and the vehicle's cigarette lighter socket.
- Check if the vehicle's cigarette lighter socket is functioning (e.g., by testing with another device).
- The internal battery might be depleted; connect to power and allow it to charge for a few minutes.
- Recording stops or freezes:
- The memory card may be full. Format the memory card (after backing up important files).
- The memory card may be too slow or corrupted. Try using a high-speed (Class 10 or U1/U3) memory card or replace the existing one.
- Ensure the device's firmware is up to date.
- Poor video quality:
- Clean the camera lenses and the windshield area.
- Ensure the protective film has been removed from the lenses.
- Check settings to confirm 1080P resolution is selected.
- G-sensor is too sensitive/not sensitive enough:
- Adjust the G-sensor sensitivity setting in the device's menu.
- Rear camera not displaying:
- Check the connection cable between the main unit and the rear camera for proper seating and damage.
8. Specifications
| Feature | Specification |
|---|---|
| Camera Resolution | 5MP |
| Image Resolution | 1080P |
| LCD Screen Size | 3 Inch HD Display |
| G Sensor | Built-in (Emergency Save) |
| File Format | MOV |
| Recorded Video Format | H.264 |
| Sound | AAC (Built-in Stereo Sound) |
| Auto On/Off | Support Auto Ignition On/Off |
| Motion Detection Function | Support |
| Time Synchronization | Support (Y/M/D/H/M) |
| Photo Format | JPEG |
| Memory Card | Memory Card (Up to 32GB, Not Included) |
| Microphone | Support |
| Infrared Night Vision | Support |
| Battery Type | Built-in 200mAh Lithium Ion Battery |
| Product Dimensions | 7.87 x 4.33 x 2.76 inches |
| Item Weight | 1.04 pounds |
| Model Number | Denashx4y37hmq02 |
| Manufacturer | Denash |
9. Warranty Information
Specific warranty details for the Denash 4 Channel Car Recorder are not provided within this manual. Please refer to the product packaging, the retailer's purchase terms, or the official Denash website for comprehensive warranty information.
10. Support Information
For technical assistance, customer service, or further inquiries regarding your Denash 4 Channel Car Recorder, please consult the contact information provided on the product packaging or visit the official Denash support website. Keep your purchase receipt handy when contacting support.