TechBrix GS-X2Pro
X2 Pro 4K Retro Game Stick User Manual
Model: GS-X2Pro | Brand: TechBrix
1. Product Overview
The TechBrix X2 Pro 4K Retro Game Stick is a compact, high-definition video game console designed for an immersive retro gaming experience. It connects directly to your TV, monitor, or projector via HDMI, offering a vast library of pre-installed games and support for multiple emulators. The system comes with two wireless controllers for convenient gameplay.
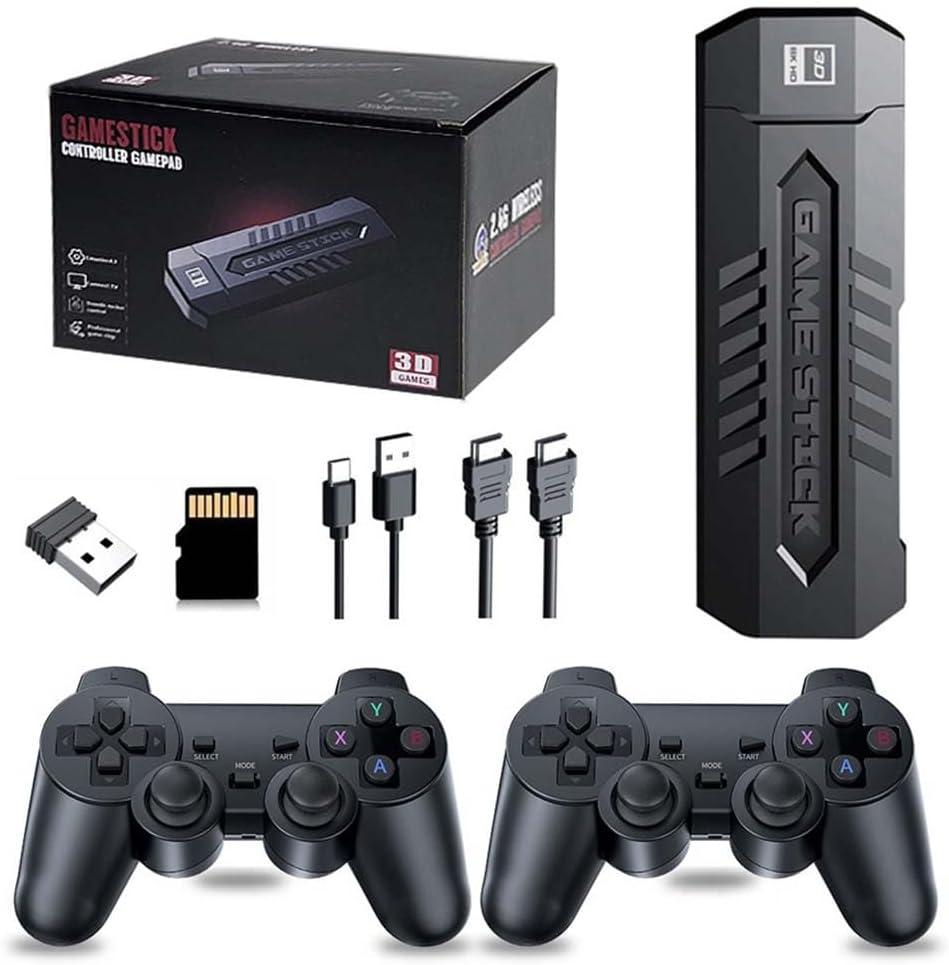
Image 1.1: The X2 Pro 4K Retro Game Stick, including the console stick, two wireless controllers, USB receiver, TF card, and various cables.
2. Package Contents
Please verify that all items listed below are included in your package:
- 1 x X2 Pro Game Stick Console
- 2 x 2.4G Wireless Controllers
- 1 x USB Wireless Receiver
- 1 x HDMI Extension Cable
- 1 x USB Power Cable
- 1 x TF Card (64GB, pre-installed with games)
- 1 x User Manual (this document)
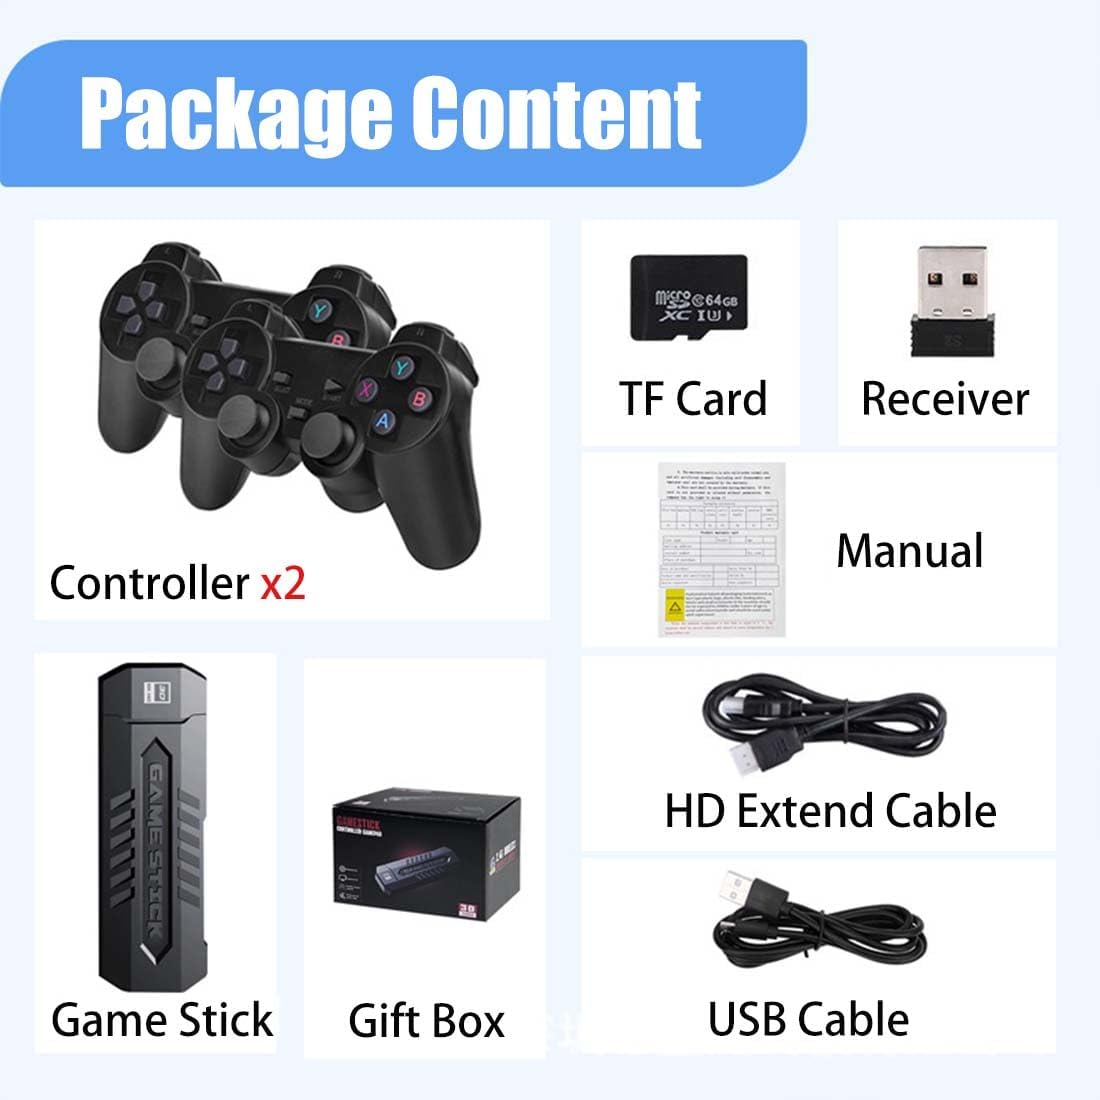
Image 2.1: Visual representation of the X2 Pro Game Stick package contents, including controllers, TF card, receiver, manual, HD extend cable, USB cable, game stick, and gift box.
3. Setup Guide
Follow these steps to set up your X2 Pro Game Stick:
- Insert TF Card: Ensure the TF card is securely inserted into the Game Stick's designated slot.
- Connect Game Stick to Display: Plug the Game Stick directly into an available HDMI port on your TV, monitor, or projector. If space is limited, use the included HDMI Extension Cable.
- Connect Power: Connect the USB Power Cable to the Game Stick and then to a USB power source (e.g., a TV USB port, a USB wall adapter, or a power bank). The Game Stick requires 5V/1A power input.
- Insert Controller Batteries: Open the battery compartment on the back of each wireless controller and insert 2 AAA batteries (not included) into each controller, observing polarity.
- Connect USB Receiver: Plug the USB Wireless Receiver into a USB port on the Game Stick. This receiver facilitates communication between the controllers and the console.
- Select HDMI Input: On your TV or display, switch the input source to the corresponding HDMI port where the Game Stick is connected.
- Power On: The Game Stick should power on automatically once connected to power. The controllers will automatically pair with the receiver.

Image 3.1: The Game Stick's HDMI output, illustrating its direct connection capability to a TV or monitor for clear display.

Image 3.2: The Game Stick's omnidirectional compatibility, supporting connection to various display devices such as TVs, computers, and other display screens.
4. Operating Instructions
4.1. Navigating the Menu
- Use the directional pad (D-pad) on the controller to move between menu options.
- Press the A button (or equivalent action button) to select an option or enter a game.
- Press the B button (or equivalent back button) to return to the previous menu.
- The START and SELECT buttons may have specific functions within games or for system shortcuts.
4.2. Playing Games
The console comes pre-loaded with over 30,000 retro games across various emulators. You can browse games by emulator or use the search function.
- Game Search: Use the search feature to quickly find specific titles within the extensive game library.
- Game Collection: Add your favorite games to a "collection" for easy access.
- Saving and Loading Progress: The system supports instant archive (save state) and read (load state) functions. This allows you to save your game progress at any point and resume later. Consult the on-screen prompts or the system's internal menu for specific save/load commands.
- Pausing Games: Games can be paused directly from the system menu.

Image 4.1: Key features of the Game Stick, including 4K HD quality, built-in emulators, high-performance chip, and overall support for an enjoyable gaming experience.

Image 4.2: The Game Stick's extensive emulator support, compatible with 14 major emulators, and its capability for memory expansion up to 256 GB.
5. Maintenance
- Cleaning: Use a soft, dry cloth to clean the Game Stick and controllers. Do not use liquid cleaners or abrasive materials.
- Storage: Store the device in a cool, dry place away from direct sunlight and extreme temperatures.
- Battery Replacement: Replace controller batteries when performance degrades. Always use new AAA batteries and dispose of old batteries responsibly.
- TF Card Care: Avoid removing the TF card while the device is powered on or actively accessing data to prevent data corruption.
6. Troubleshooting
| Problem | Possible Cause | Solution |
|---|---|---|
| No display on TV/monitor. | Incorrect HDMI input selected; Game Stick not powered; loose HDMI connection. | Ensure TV input matches the HDMI port used. Check USB power connection. Re-plug HDMI cable securely. |
| Controllers not responding. | Low or dead batteries; USB receiver not plugged in; controllers not paired. | Replace AAA batteries in controllers. Ensure USB Wireless Receiver is plugged into the Game Stick. Power cycle the Game Stick and controllers to re-establish connection. |
| Games are slow or laggy. | TF card issues; system overload. | Ensure TF card is properly inserted and not corrupted. Restart the Game Stick. |
| Cannot save game progress. | TF card full or corrupted; incorrect save procedure. | Check TF card storage. Refer to the system's on-screen instructions for saving game states. |
7. Specifications
- Model: GS-X2Pro
- Brand: TechBrix
- Output: HDMI (4K HD compatible)
- Storage: 64GB TF Card included, expandable up to 256GB via external TF card
- Controllers: 2 x 2.4G Wireless Controllers
- Controller Power: 2 x AAA batteries per controller (not included)
- Emulators: Supports 50+ emulators (including 14 major emulators)
- Pre-installed Games: 30,000+
- Product Dimensions: 7.87 x 4.72 x 4.72 inches
- Item Weight: 1.1 pounds
8. Warranty and Support
For technical support or warranty inquiries, please contact TechBrix customer service through the retailer's platform or the official TechBrix website. Please have your product model number (GS-X2Pro) and purchase details ready when contacting support.
Note: Specific warranty terms and conditions may vary by region and retailer. Please refer to your purchase documentation for detailed warranty information.