1. Introduction
This manual provides detailed instructions for the assembly, operation, and maintenance of your PARTPHONER PAFP088AZ1 Floor Lamp Glass Display Shelf. This product features integrated LED lighting with remote and application control, allowing for adjustable brightness and color temperature (2700K-6000K).
Please read this manual thoroughly before installation and use to ensure proper function and safety.

Image 1.1: The PARTPHONER PAFP088AZ1 Floor Lamp Glass Display Shelf, showcasing its design and control options.
2. Important Safety Instructions
- Read all instructions: Before assembling or operating the lamp, carefully read and understand all instructions.
- Indoor use only: This product is designed for indoor use in dry locations. Do not expose to water or moisture.
- Electrical safety: Ensure the power outlet voltage matches the lamp's requirements. Do not use if the power cord or plug is damaged. Do not modify the plug.
- Handle glass with care: The shelves are made of tempered glass. Handle them carefully to prevent breakage and injury.
- Stable placement: Place the lamp on a flat, stable surface to prevent tipping.
- Cleaning: Disconnect power before cleaning. Use a soft, dry cloth. Do not use abrasive cleaners.
- Children and pets: Keep packaging materials and small parts away from children and pets.
3. Package Contents
Verify that all components are present and undamaged before beginning assembly. If any parts are missing or damaged, contact customer support.
- Lamp Frame Components (Wood poles)
- Tempered Glass Shelves (5 pieces)
- LED Light Strips (Integrated)
- Remote Control (Batteries not included)
- Power Adapter
- Assembly Hardware (Screws, Allen wrench)
- Instruction Manual
4. Assembly Instructions
Assembly typically takes approximately 10 minutes. Follow these steps carefully:
- Unpack Components: Carefully remove all parts from the packaging and lay them out on a clean, soft surface to prevent scratches.
- Identify Parts: Familiarize yourself with the lamp frame sections, glass shelves, and hardware.
- Assemble Frame: Connect the wooden frame sections according to the diagrams provided in the included printed manual. Secure them using the provided screws and Allen wrench.
- Install Glass Shelves: Gently slide each tempered glass shelf into its designated slot within the frame. Ensure they are seated securely and level.
- Connect Power: Once the frame and shelves are assembled, connect the power adapter to the lamp's power input and then to a wall outlet.

Image 4.1: The fully assembled floor lamp, illustrating its overall dimensions.
5. Operating Instructions
Your PARTPHONER floor lamp offers two primary control methods: a dedicated remote control and a smartphone application.

Image 5.1: Overview of the two available control methods for the lamp.
5.1 Remote Control Operation
The included remote control allows for convenient adjustment of the lamp's settings. Ensure batteries (not included) are inserted correctly.
- Power On/Off: Press the Power button to turn the lamp on or off.
- Brightness Adjustment: Use the Brightness + and Brightness - buttons to increase or decrease light intensity (0-100%).
- Color Temperature Adjustment: Use the Warm Tone and Cool Tone buttons to cycle through color temperatures from 2700K (warm) to 6000K (cool).
- Pre-set Modes: Select from various pre-programmed lighting modes such as Nursery Mode, Night Mode, Work Mode, and Study Mode.
- 1-Hour Timer: Press the 1H button to set the lamp to automatically turn off after one hour.

Image 5.2: Detailed view of the remote control and its functions.
5.2 Application (APP) Control Operation
For advanced control and customization, download the dedicated smartphone application.
- Download App: Scan the QR code located on the power cable or refer to the printed manual for app download instructions.
- Pairing: Follow the in-app instructions to pair your smartphone with the lamp.
- Brightness and Color Temperature: Adjust brightness (0-100%) and color temperature (2700K-6000K) using the intuitive interface.
- Dynamic Lighting Modes: Access additional lighting modes such as Jump, Strobe, Breathe, and Warning for personalized ambiance.
- Scheduling and Timer: Set custom on/off schedules and timers directly from the app.
- Memory Function: The lamp retains the last used settings when powered off and on.

Image 5.3: App interface for precise color temperature control.

Image 5.4: App interface for adjusting brightness levels.
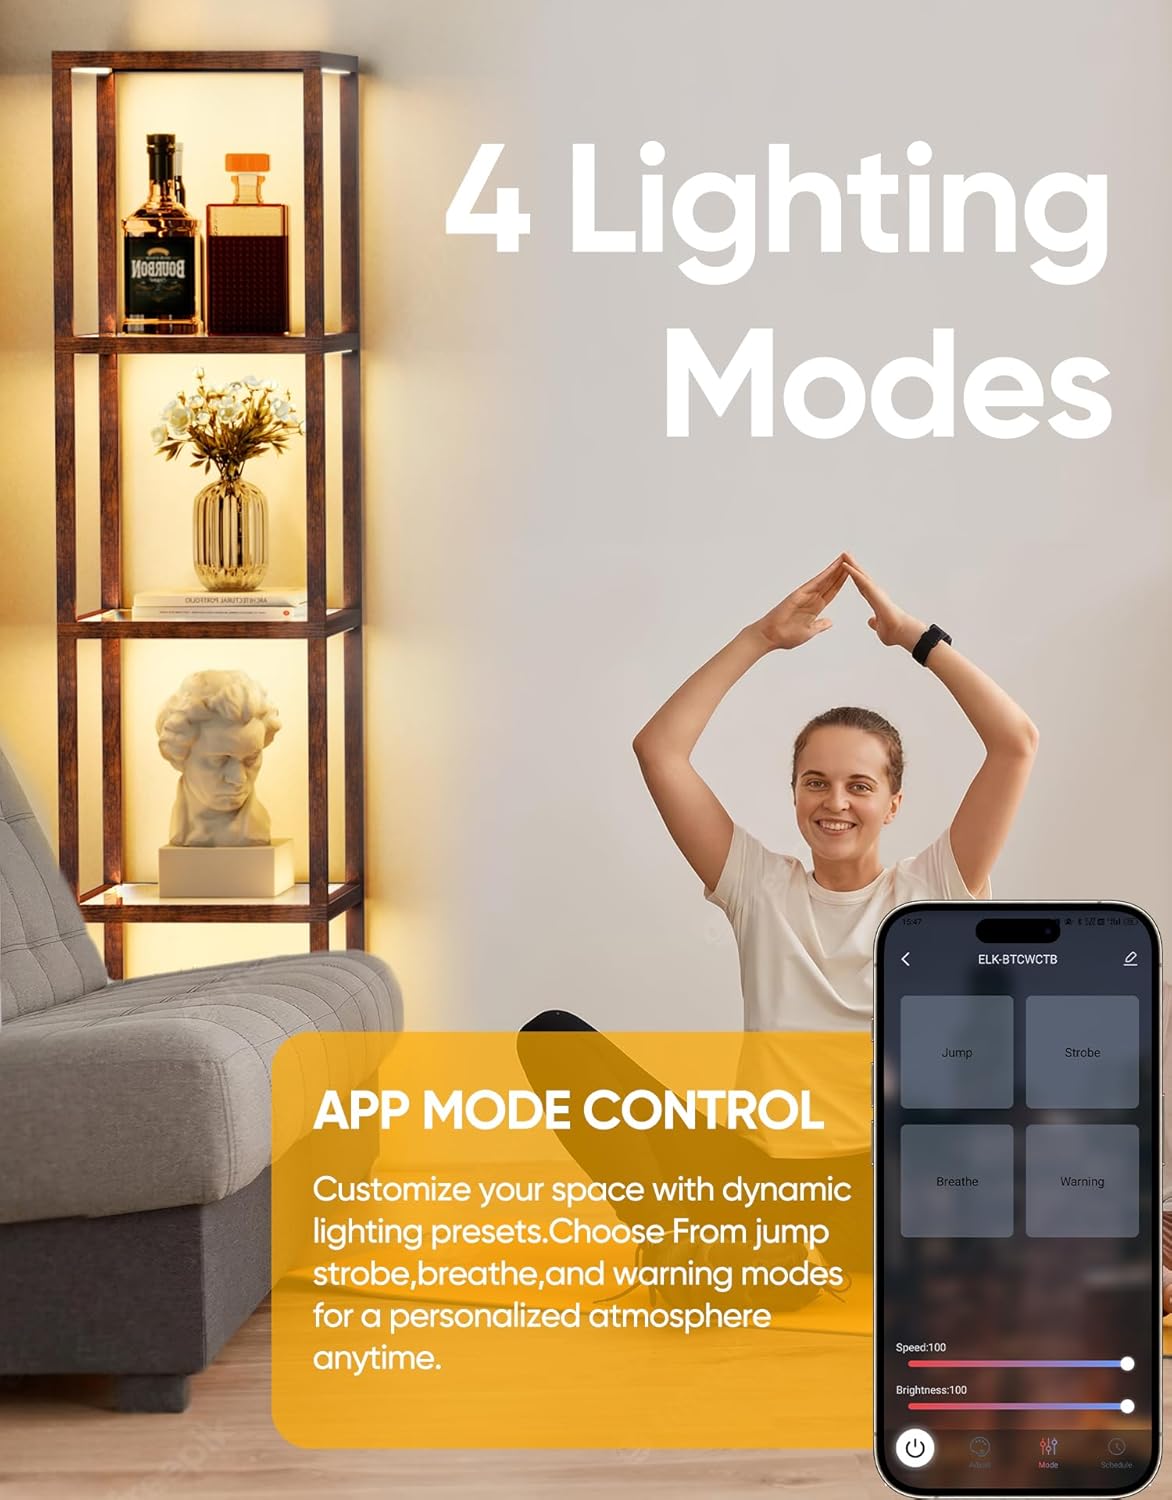
Image 5.5: App interface for selecting dynamic lighting modes.

Image 5.6: App interface for setting on/off timers and schedules.
6. Maintenance
Regular maintenance ensures the longevity and optimal performance of your floor lamp.
- Cleaning the Frame: Wipe the wooden frame with a soft, dry cloth. For stubborn marks, a slightly damp cloth followed by a dry one can be used. Avoid harsh chemicals.
- Cleaning the Glass Shelves: Use a glass cleaner and a soft, lint-free cloth to clean the tempered glass shelves. Spray cleaner onto the cloth, not directly onto the glass, to prevent liquid from seeping into electrical components.
- LED Lights: The integrated LED lights are designed for long life and do not require replacement. If a light strip malfunctions, contact customer support.
- Remote Control: Replace batteries in the remote control when its range or responsiveness decreases.
7. Troubleshooting
Refer to the following table for common issues and their solutions.
| Problem | Possible Cause | Solution |
|---|---|---|
| Lamp does not turn on. | No power, loose connection, faulty adapter. | Check if the power adapter is securely plugged into the lamp and the wall outlet. Test the outlet with another device. Ensure the power button on the remote or app is pressed. |
| Remote control not responding. | Dead batteries, remote out of range, obstruction. | Replace remote batteries. Ensure you are within effective range (approx. 49.2 ft). Remove any obstructions between the remote and the lamp. |
| App control not working. | Bluetooth/Wi-Fi issue, app not paired, outdated app. | Ensure your device's Bluetooth/Wi-Fi is enabled. Re-pair the lamp with the app. Update the app to the latest version. Check for any app permissions required. |
| Light intensity or color temperature is inconsistent. | Loose connection, internal component issue. | Check all power connections. If the issue persists, contact customer support. Do not attempt to repair internal components. |
8. Specifications
| Feature | Detail |
|---|---|
| Model Name | PAFP088AZ1 |
| Product Dimensions | 15.35"D x 15.35"W x 66.4"H |
| Item Weight | 3 Pounds |
| Lamp Type | Floor Lamp |
| Light Source Type | LED |
| Number of Light Sources | 5 |
| Material | Glass, Wood |
| Shade Material | Tempered Glass |
| Finish Type | Rustic |
| Control Method | App, Remote |
| Special Feature | Dimmable |
| Color Temperature Control | 2700K-6000K |
| Brightness Control | 0-100% |
| Power Source | Corded Electric (Adapter included) |
| Voltage | 3 Volts (DC) |
| Indoor/Outdoor Usage | Indoor |
9. Warranty and Support
This PARTPHONER product is covered by a manufacturer's warranty. Please refer to the warranty information provided with your purchase or contact the seller for specific details regarding warranty terms and conditions.
For technical support, troubleshooting assistance, or inquiries about replacement parts, please contact PARTPHONER customer service through the retailer's platform or the contact information provided in your purchase documentation.