Important Safety Information
WARNING: Do not exceed the maximum weight capacity of 1200 lbs. Follow assembly instructions carefully to ensure stability and prevent collapse. Keep children away from the area due to potential small parts hazards. Ensure proper use of the charging station to avoid electrical risks. Use caution when adjusting or moving the bed frame to prevent injury from metal components or pinch points.
Introduction
Thank you for choosing the CollaredEagle Twin Bed Frame. This manual provides detailed instructions for the assembly, operation, maintenance, and troubleshooting of your new bed frame. Please read this manual thoroughly before assembly and retain it for future reference.
This bed frame features a sturdy metal construction, a comfortable headboard, integrated LED lighting, and a convenient charging station. It is designed to provide a comfortable and functional sleeping solution.
Package Contents
Before beginning assembly, verify that all parts listed below are present and undamaged. If any parts are missing or damaged, please contact customer support.
- Headboard with integrated LED lights and charging station
- Footboard
- Side Rails (2)
- Steel Slats
- Support Legs
- Assembly Hardware (screws, bolts, washers, Allen wrench)
- Remote Control for LED lights
- Instruction Manual
Note: Mattress and bedding are not included.
Setup and Assembly
Assembly of the CollaredEagle Twin Bed Frame is designed to be straightforward. It is recommended to have two people for assembly. Please follow these steps carefully.
- Unpack Components: Carefully remove all parts from the packaging and lay them out on a clean, soft surface (e.g., a carpet or blanket) to prevent scratches.
- Identify Parts: Refer to the included parts list and diagrams to identify each component. All parts are labeled for easy identification.
- Assemble Headboard: Attach the headboard support legs to the main headboard panel using the provided hardware. Ensure all connections are secure.
- Attach Side Rails: Connect the side rails to the headboard and footboard. Ensure the hooks or connectors are fully engaged and secured with bolts if applicable.
- Install Center Support: If your model includes a center support beam and legs, install them now according to the diagrams.
- Place Steel Slats: Lay the steel slats across the side rails. Ensure they are evenly spaced and securely fastened to the frame. Some slats may have pre-drilled holes for screws or snap-in mechanisms.
- Tighten All Connections: Once the frame is fully assembled, go back and tighten all screws and bolts. Do not overtighten.
- Position Bed Frame: Carefully move the assembled bed frame to its desired location.


Operating Instructions
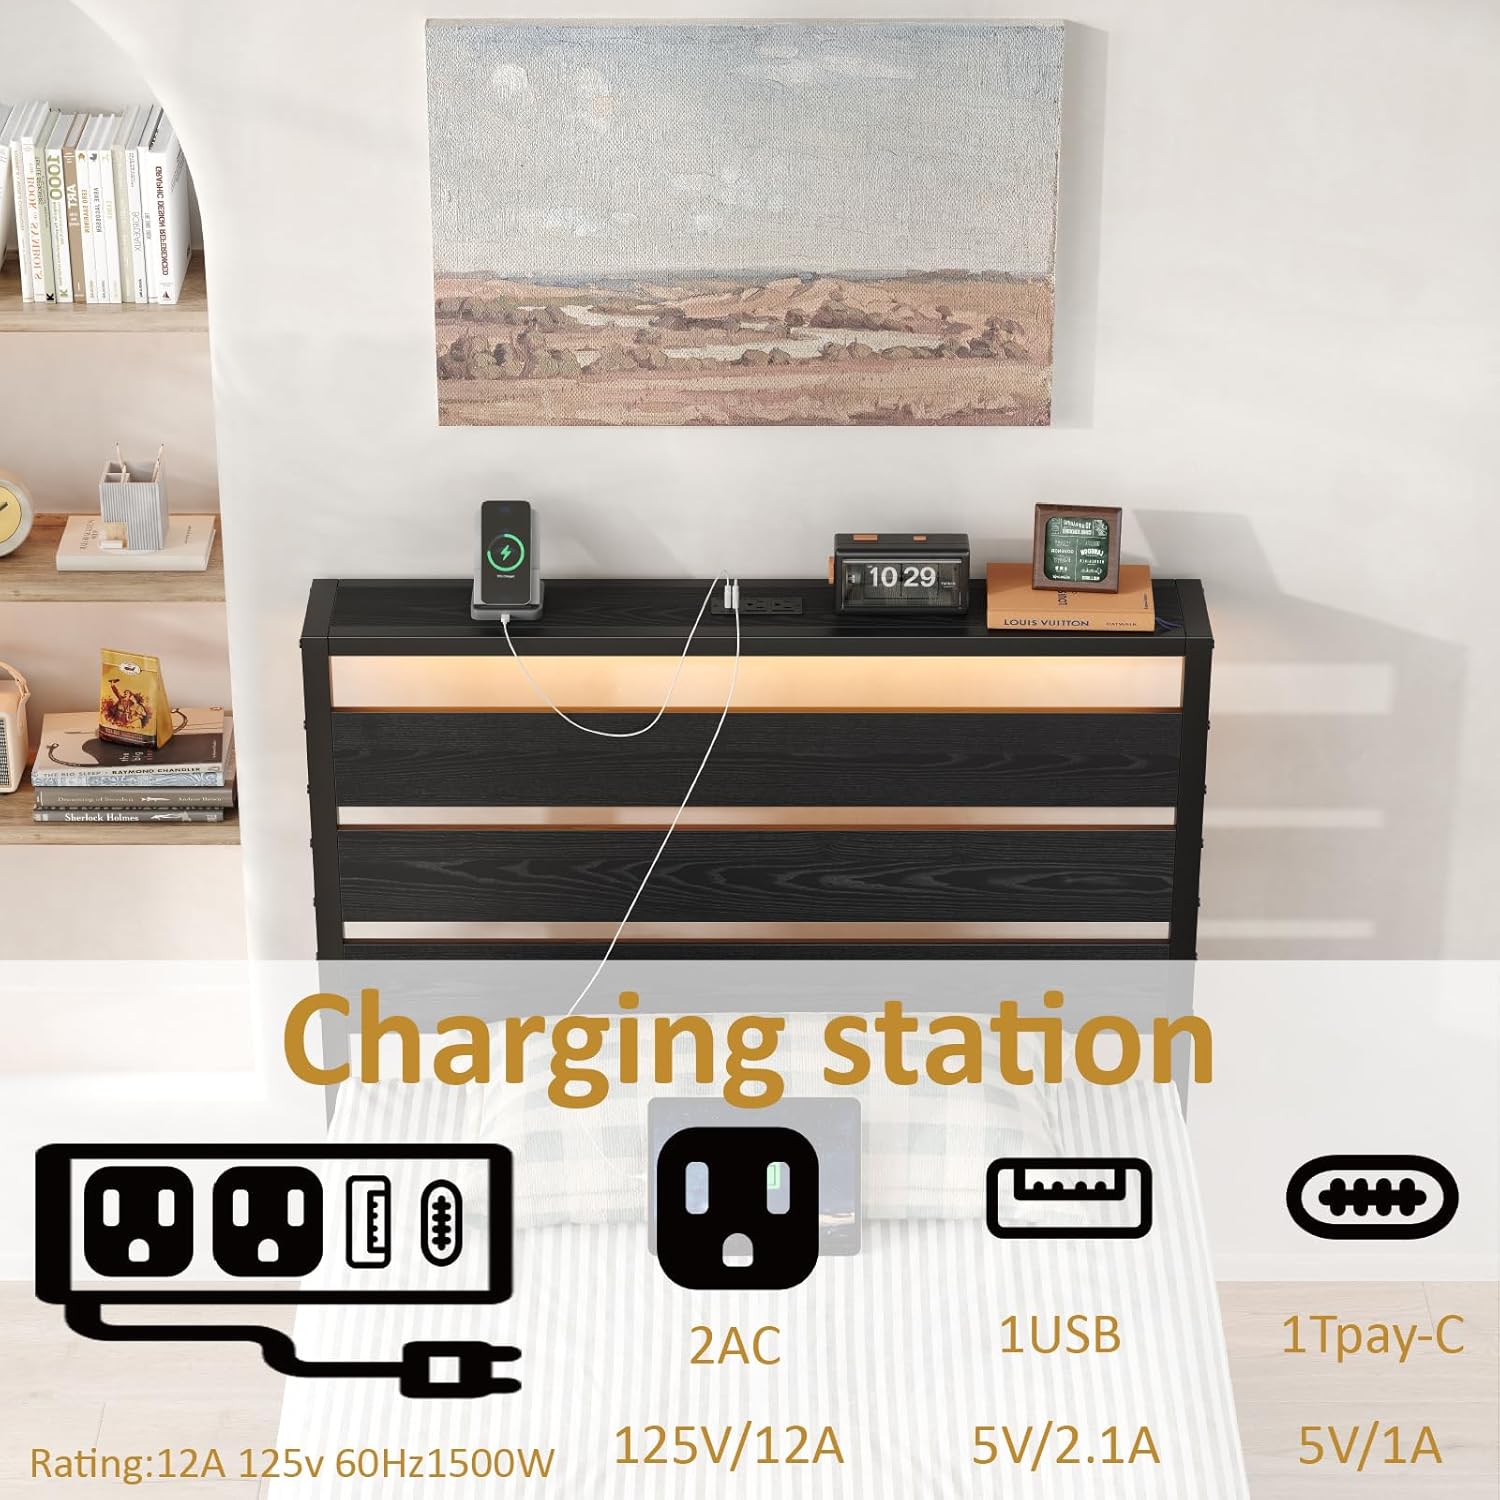
A. Charging Station
The integrated charging station is located on the headboard and provides convenient power access for your electronic devices.
- Power Connection: Plug the bed frame's power cord into a standard wall outlet.
- AC Outlets: Two standard AC outlets (125V/12A) are available for larger electronics.
- USB Port: One USB-A port (5V/2.1A) is provided for charging compatible devices.
- Type-C Port: One USB Type-C port (5V/1A) is available for modern devices.
Ensure devices are compatible with the provided voltage and current ratings. Do not overload the charging station.
B. LED Lighting System
The headboard and footboard feature integrated LED lights to enhance your room's ambiance. The lights can be controlled via a remote control or a mobile application.
- Remote Control: Use the provided remote control to power the lights on/off, change colors, adjust brightness, and select various lighting modes (e.g., static, fade, strobe).
- Mobile App Control: Download the designated mobile application (refer to the app store or QR code in packaging for download instructions). The app allows for advanced control, including over 60,000 color options, music synchronization, microphone mode (lights react to sound), and timing functions.
Ensure the LED lights are properly connected to the power source. Avoid direct exposure to water or excessive moisture.

Maintenance
Regular maintenance will help prolong the life and appearance of your bed frame.
- Cleaning: Wipe down the metal frame and headboard surfaces with a soft, damp cloth. Avoid abrasive cleaners or harsh chemicals that could damage the finish.
- Hardware Check: Periodically check all bolts and screws to ensure they remain tight. Retighten if necessary to maintain stability and prevent squeaking. Do not overtighten.
- LED Lights: If LED lights malfunction, check the power connection. Do not attempt to repair the LED strips yourself; contact customer support.
- Charging Station: Keep the charging ports free of dust and debris. Do not insert foreign objects into the ports.
Troubleshooting
| Problem | Possible Cause | Solution |
|---|---|---|
| Bed frame is wobbly or squeaks. | Loose hardware connections. | Check and tighten all bolts and screws. Ensure all slats are properly seated. |
| LED lights are not turning on. | Power cord not plugged in; remote control battery dead; LED strip connection loose. | Ensure the power cord is securely plugged into a working outlet. Replace remote control batteries. Check connections to the LED strip. |
| Charging station is not working. | Power cord not plugged in; device not compatible; charging station malfunction. | Verify the bed frame's power cord is plugged in. Ensure your device is compatible with the charging station's output. Try a different device. |
| Under-bed storage space is insufficient. | Incorrect storage solution used. | Utilize storage bins or containers that fit within the 9.44-inch clearance. Consider flat-pack items. |

Specifications
- Model: BF016
- Size: Twin
- Color: Modern Black
- Material: High-quality Alloy Steel (Powder Coated Finish)
- Dimensions (L x W x H): 81.3" x 38.26" x 39.8" (approximate)
- Under-bed Clearance: 9.44 inches
- Weight Capacity: 1200 lbs
- Item Weight: 38.1 pounds
- Special Features: Integrated LED Lighting, Charging Station (2 AC Outlets, 1 USB-A, 1 Type-C)
- Assembly Required: Yes
- Manufacturer: CollaredEagle
- Date First Available: July 30, 2024
Warranty and Support
CollaredEagle products are manufactured with quality and durability in mind. For specific warranty details, please refer to the warranty card included with your purchase or contact CollaredEagle customer support.
If you have any questions, require assistance with assembly, or need to report a missing/damaged part, please contact CollaredEagle customer service. You can find contact information on the official CollaredEagle website or through your purchase platform.
Visit the official CollaredEagle store for more information: CollaredEagle Store