1. Introduction
Thank you for choosing the PHIXTON PA160 Rechargeable Flashlight. This manual provides essential information for the safe and efficient operation, maintenance, and troubleshooting of your new flashlight. Please read this manual thoroughly before use and retain it for future reference.
2. Package Contents
The PHIXTON PA160 Rechargeable Flashlight package includes the following items:
- 1x PHIXTON PA160 Ultra Bright Flashlight (with 6000mAh rechargeable battery installed)
- 3x AAA Alkaline Batteries
- 1x AAA Battery Holder
- 1x USB-C Charging Cable
- 1x Hard Shell Gift Box

3. Product Overview
The PHIXTON PA160 is a high-performance rechargeable flashlight designed for durability and versatility. It features an upgraded PH-L330 30W LED, offering up to 10,000 lumens of brightness and a long-range beam up to 3280 feet. The flashlight is constructed from aviation-grade aluminum alloy, ensuring impact and water resistance.
4. Setup
4.1 Battery Installation and Initial Use
Your PHIXTON PA160 flashlight comes with a 6000mAh rechargeable battery pre-installed. Before first use, ensure the protective blue disc is removed from the battery's negative terminal (if present). It is recommended to fully charge the flashlight before its initial operation to ensure optimal performance.
4.2 Alternative AAA Battery Use
In situations where the rechargeable battery is depleted and charging is not immediately available, you can use three AAA alkaline batteries with the provided battery holder.
- Unscrew the tail cap of the flashlight.
- Remove the rechargeable battery.
- Insert three AAA batteries into the AAA battery holder, ensuring correct polarity.
- Place the loaded AAA battery holder into the flashlight body.
- Screw the tail cap back on securely.

5. Operating Instructions
5.1 Power On/Off
Press and hold the power button located on the side of the flashlight for approximately 2 seconds to turn the flashlight ON or OFF.
5.2 Changing Lighting Modes
Once the flashlight is ON, short press the power button to cycle through the 5 available lighting modes:
- High: Maximum brightness (up to 10,000 lumens).
- Middle: Moderate brightness.
- Low: Reduced brightness for extended battery life.
- Strobe: Flashing light for signaling or disorientation.
- SOS: International Morse code signal for emergencies.

5.3 Adjusting Focus (Zoom Function)
The flashlight features an adjustable focus mechanism. To change the beam from a wide floodlight to a narrow spotlight, simply slide the head of the flashlight forward or backward.
- Narrow Beam (Spotlight): Concentrates light for long-range illumination up to 3280 feet.
- Wide Beam (Floodlight): Spreads light to illuminate a broad area, such as a room up to 500 square meters.

5.4 Power Bank Function
The PHIXTON PA160 can also function as a power bank to charge other USB devices. Lift the protective rubber cover on the side of the flashlight to reveal the USB output port. Connect your device using its USB cable to begin charging.
5.5 Battery Level Indicator
The flashlight features a 4-level LED power indicator next to the power button, displaying the remaining battery charge:
- 4 lights: 75-100% charge
- 3 lights: 50-75% charge
- 2 lights: 25-50% charge
- 1 light: Below 25% charge (recharge recommended)
6. Charging
To charge the flashlight, lift the protective rubber cover on the side to expose the USB-C input port. Connect the provided USB-C cable to the flashlight and plug the other end into a compatible USB power source (e.g., USB wall adapter, computer, power bank). The 4-level power indicator will show charging progress.

7. Maintenance
7.1 Cleaning
Wipe the flashlight body with a soft, damp cloth. Do not use abrasive cleaners or solvents. Keep the lens clean for optimal light output.
7.2 Battery Care
To prolong battery life, avoid completely draining the rechargeable battery. Recharge it regularly, especially if not used for extended periods. The built-in smart chip provides overcharging protection.
7.3 Water Resistance
The flashlight is IPX7 water-resistant, meaning it can withstand immersion in water up to 1 meter for 30 minutes. Ensure all caps and covers are securely closed before exposing the flashlight to water. It is not designed for prolonged underwater use.

8. Troubleshooting
| Problem | Possible Cause | Solution |
|---|---|---|
| Flashlight does not turn on. | Battery depleted. Protective disc not removed. Loose battery connection. | Charge the battery. Remove the blue protective disc. Ensure battery is inserted correctly and connections are secure. |
| Light output is dim. | Low battery charge. Lens is dirty. | Recharge the battery. Clean the lens with a soft cloth. |
| Flashlight turns off unexpectedly. | Loose internal connection (rare). | Ensure battery is securely seated. If problem persists, contact customer support. |
| Cannot charge external device. | Flashlight battery too low. Incorrect cable/port. | Charge the flashlight. Ensure using the USB-A output port and a compatible cable for your device. |
9. Specifications
| Feature | Detail |
|---|---|
| Model | PA160-2 |
| Brand | PHIXTON |
| Light Source Type | LED (PH-L330 30W) |
| Brightness | Up to 10,000 Lumens |
| Beam Range | Up to 3280 feet |
| Lighting Modes | High, Middle, Low, Strobe, SOS |
| Power Source | 6000mAh Rechargeable Battery (included), 3x AAA Alkaline Batteries (included, with holder) |
| Charging Interface | USB-C Input |
| Discharging Function | USB-A Output (Power Bank) |
| Material | Aviation-grade Aluminum Alloy |
| Water Resistance | IPX7 (Water Resistant) |
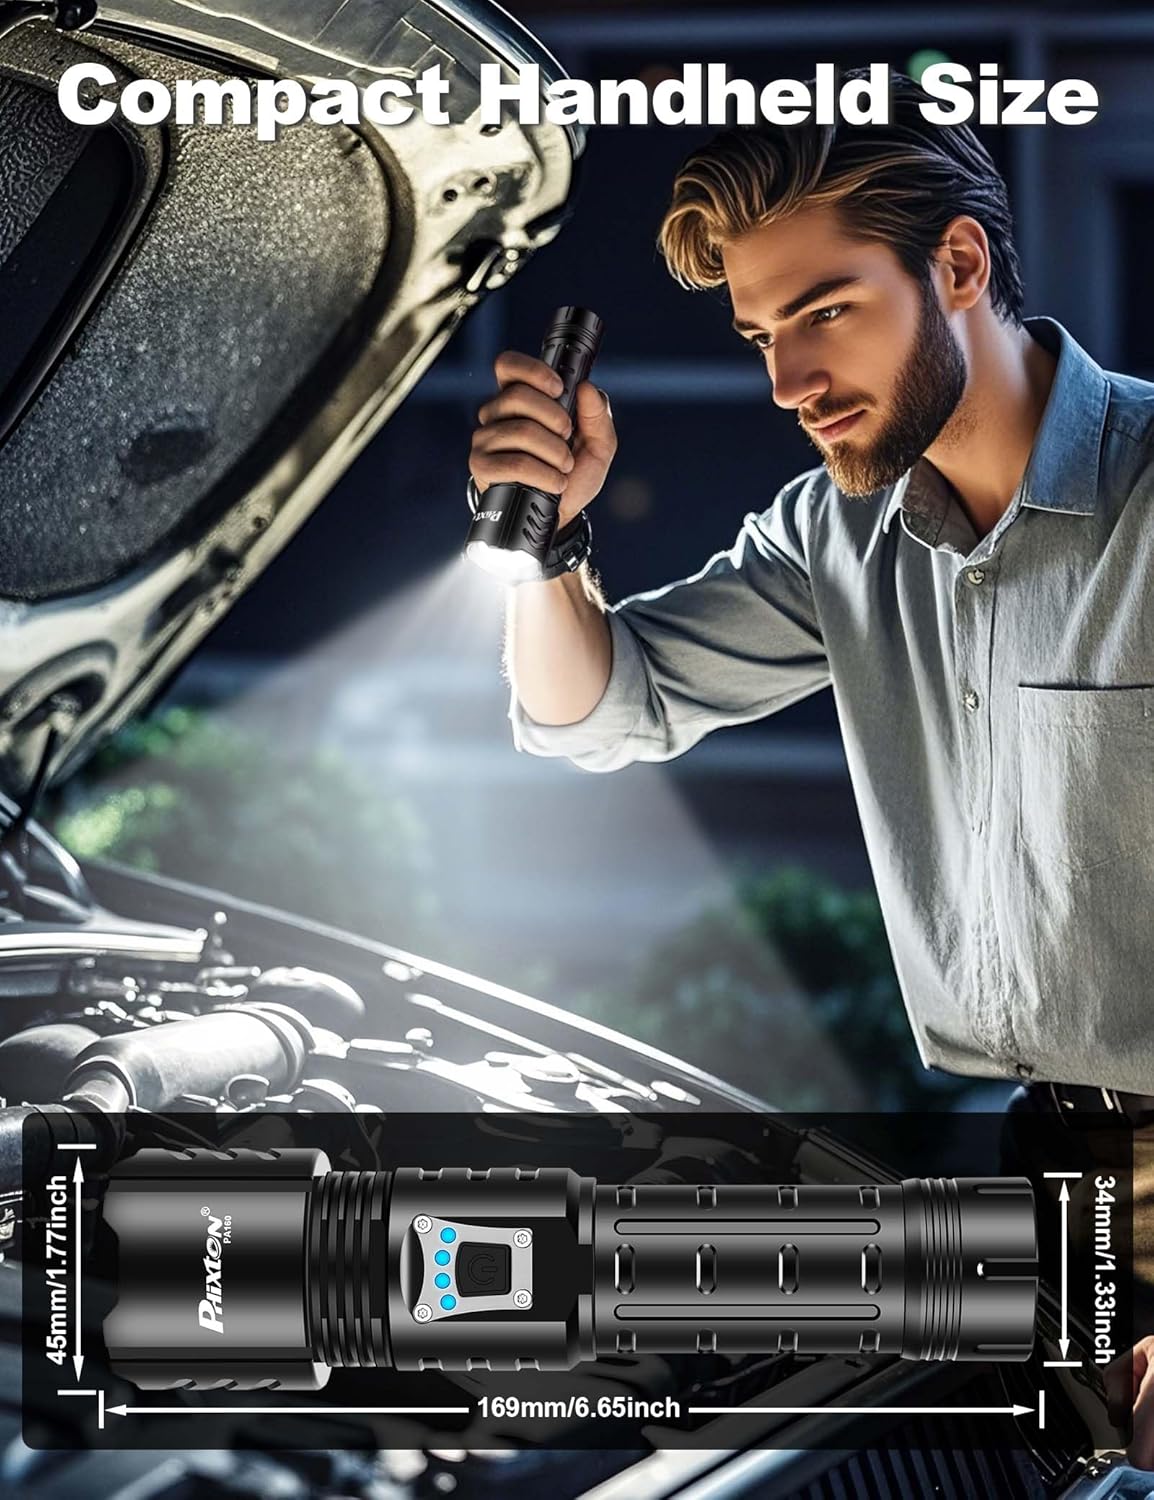
| Dimensions | 6.73"D x 1.26"W x 1.73"H |
| Weight | 1.03 pounds |
10. Warranty and Support
PHIXTON provides a limited warranty for this product. For detailed warranty information, please refer to the documentation included in your package or visit the official PHIXTON website. If you encounter any issues or have questions regarding your PHIXTON PA160 flashlight, please contact our customer service team for assistance. We are committed to providing high-quality products and excellent customer service.
Contact information can typically be found on the product packaging or the PHIXTON brand store page.