Product Overview
This Oxygen Regulator is designed for use with CGA870 oxygen tanks, providing a reliable and adjustable flow of oxygen. It features a durable green anodized aluminum body, a brass high-pressure conduit, and a dual-mode DISS outlet for versatile connection options. The regulator is engineered for ease of use and precise control of oxygen delivery.
The package includes the CGA 870 O2 extended regulator, a cylinder valve wrench, brass yoke washer seals, and an oxygen tubing swivel nipple, ensuring you have the necessary components for immediate use and maintenance.
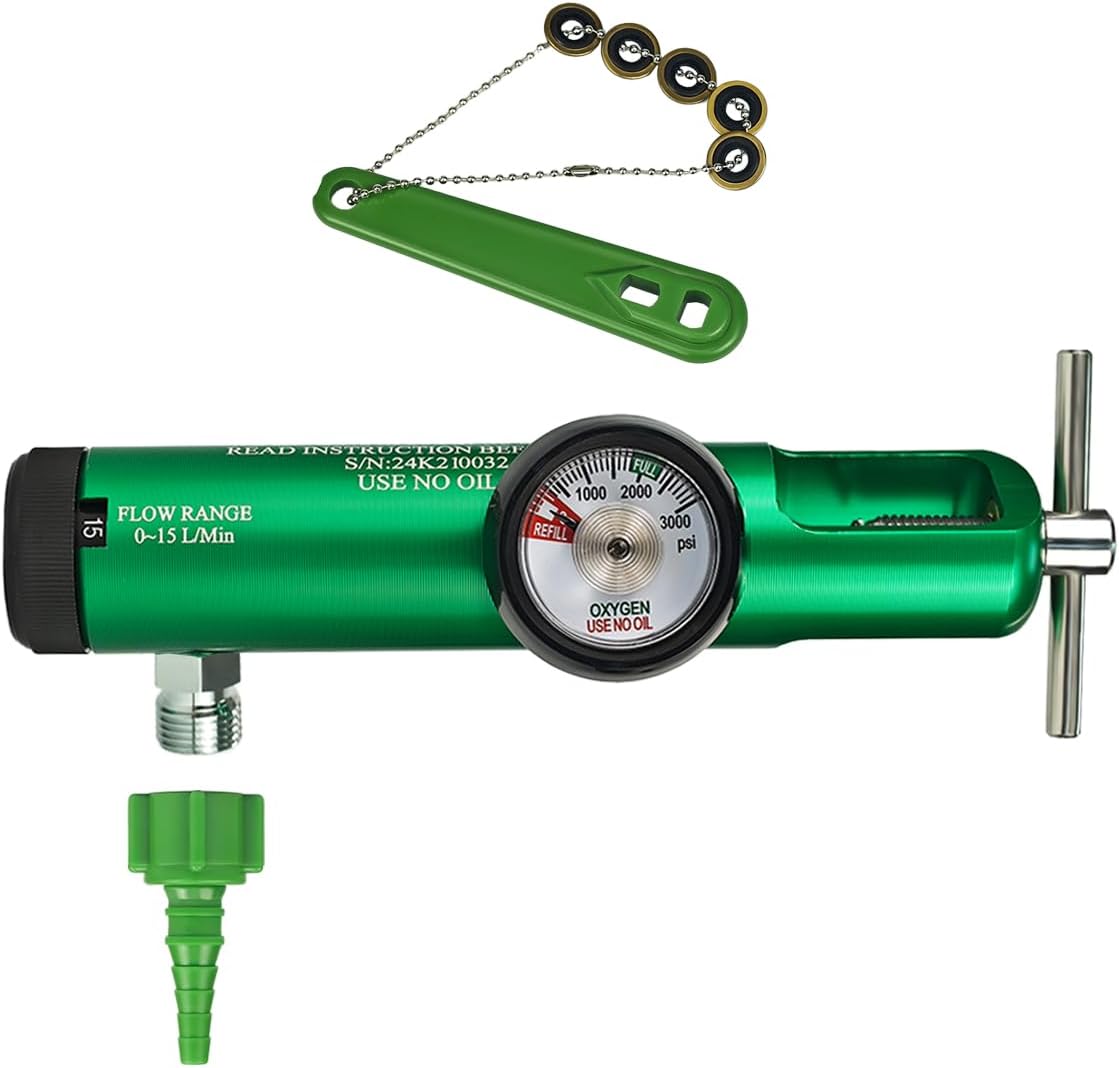
Image: The Oxygen Regulator, showing its main body, pressure gauge, flow selector, and included accessories: a wrench, brass yoke washer seals on a chain, and an oxygen tubing swivel nipple.
Setup Instructions
Follow these steps to properly set up your Oxygen Regulator with an oxygen tank and accessories.
- Inspect Components: Before installation, ensure all components are present and free from damage. Verify the regulator, wrench, brass yoke washer seals, and oxygen tubing swivel nipple are in good condition.
- Prepare Oxygen Tank: Ensure the oxygen tank valve is clean and free of debris. Use the provided cylinder valve wrench to slightly open and then close the tank valve to clear any dust or particles.
- Install Yoke Washer Seal: Place one of the brass yoke washer seals into the inlet connection of the regulator. This seal is crucial for preventing leaks.
- Attach Regulator to Tank: Align the regulator's CGA 870 inlet connection with the oxygen tank's valve. Hand-tighten the yoke screw securely. Then, use the provided cylinder valve wrench to tighten the yoke screw further until the regulator is firmly attached and no gas leaks are detected.
- Connect Accessories (Optional):
- Humidifier Bottle: If using a humidifier bottle, connect it to the DISS outlet on the regulator. Ensure it is securely threaded and upright.
- Oxygen Tubing Swivel Nipple: To convert the DISS outlet to a barb outlet for direct tubing connection, thread the oxygen tubing swivel nipple onto the DISS outlet. Ensure it is tightly secured.

Image: Diagram illustrating the dual DISS outlet connection modes: one for a humidifier bottle and another for a barb adapter using the swivel nipple.

Image: The oxygen regulator attached to an oxygen tank, with a humidifier bottle connected to its DISS outlet, demonstrating a typical setup for humidified oxygen delivery.
Operating Instructions
Once the regulator is securely attached to the oxygen tank, you can begin operation.
- Open Tank Valve: Slowly turn the oxygen tank valve counter-clockwise to open it. The pressure gauge on the regulator will indicate the tank's internal pressure (operating inlet pressure 300 to 3000 PSI).
- Set Flow Rate: Locate the flow selector knob on the regulator. Rotate the knob to select the desired oxygen flow rate. The available flow settings for the 0-15 LPM model are: 0, 0.5, 1, 1.5, 2, 3, 4, 5, 6, 8, 10, 15 LPM. Ensure the selector clicks into place at the chosen setting.
- Monitor Flow: The clear flow rate window will instantly display your selected LPM. The pressure gauge continuously shows the tank pressure.
- Close Tank Valve: When oxygen therapy is complete, turn the oxygen tank valve clockwise to close it completely.
- Bleed Regulator: After closing the tank valve, allow the remaining oxygen in the regulator to bleed out by leaving the flow selector open until the pressure gauge reads zero. Then, turn the flow selector to '0' or off.

Image: Close-up views of the regulator's features, including the adjustable flow control knob, the clear window displaying the flow rate, and the pressure gauge for accurate monitoring of tank pressure.
Maintenance
Regular maintenance ensures the longevity and safe operation of your oxygen regulator.
- Yoke Washer Seals: The brass yoke washer seals are consumable items and should be inspected regularly for wear or damage. Replace them as needed to ensure a leak-free connection. The product includes 5 replaceable brass yoke washer seals.
- Cleaning: Wipe the exterior of the regulator with a clean, damp cloth. Do not use oil, grease, or any petroleum-based products on or near the regulator, as these can react violently with oxygen.
- Storage: Store the regulator in a clean, dry place away from direct sunlight and extreme temperatures when not in use.

Image: Illustration of the chain-smart design for the wrench and seals, and a close-up of the replaceable brass yoke washer seals, highlighting their importance for maintenance.
Specifications
| Feature | Detail |
|---|---|
| Product Dimensions | 7.1 x 2.4 x 1.38 inches; 1 Pound |
| Item Model Number | 52010003 |
| Inlet Connection | CGA 870 |
| Outlet Connection | DISS Outlet (with option for Barb via swivel nipple) |
| Flow Rate Range | 0-15 LPM (0, 0.5, 1, 1.5, 2, 3, 4, 5, 6, 8, 10, 15 LPM) |
| Operating Inlet Pressure | 300 to 3000 PSI |
| Body Material | Green Anodized Aluminum 6061-T6 |
| Internal Conduit | Brass High Pressure Conduit |
| Manufacturer | YangYuan Medical Technology Co., Ltd |
| Country of Origin | China |

Image: Detailed diagram showing the dimensions of the oxygen regulator and key features like the flow range and pressure gauge.
Warranty and Support
Specific warranty details are not provided within this manual. For information regarding warranty coverage, technical support, or service, please contact the manufacturer directly:
Manufacturer: YangYuan Medical Technology Co., Ltd
Please refer to the product packaging or the retailer's website for contact information or additional support resources.
Legal Disclaimer: Statements regarding dietary supplements have not been evaluated by the FDA and are not intended to diagnose, treat, cure, or prevent any disease or health condition. This product is intended for medical use as an oxygen regulator.


