DAGESVGI DAGESVGI-648648-23
DAGESVGI Dual Vortex Car Fan User Manual
Brand: DAGESVGI | Model: DAGESVGI-648648-23
1. Product Overview
The DAGESVGI Dual Vortex Car Fan is designed to enhance your in-car comfort by providing efficient and adjustable airflow. Its compact, space-saving design integrates seamlessly into any vehicle interior, offering a quiet yet powerful cooling solution for all passengers.
Key Features:
- Efficient Comfort: Improves travel experience with optimal airflow and a modern design that complements car interiors.
- Unique Airflow: Features three individual fans with adjustable speeds, allowing customization for each passenger's comfort.
- Wide Range of Uses: Suitable for various vehicle types including sedans, SUVs, RVs, and mini cars. Includes a Type-C power cable for easy connection.
- Quiet and Powerful: Delivers a refreshing breeze with strong wind power while maintaining silent operation, ensuring a relaxing environment.
- Compact Size: Innovative space-saving design that fits perfectly on the rear seat headrest without occupying valuable car space, providing optimal heat dissipation.
2. Package Contents
Please check the package for the following items:
- 1 x DAGESVGI Rear Seat Fan
- 1 x Type-C Power Cable
3. Specifications
| Product Color | Black/White |
| Wind Speed Levels | 3 |
| Charging Input | 5V/2A |
| Charging Interface | Type-C |
| Net Weight | Approx. 118 g (0.26 lbs) |
| Package Weight | Approx. 177 g (0.39 lbs) |
| Built-in Battery | None (requires external power via Type-C) |
| Motor Type | Brushless Motor |
| Fan Blade Number | None (bladeless design) |
| Product Dimensions (L x W x H) | Approx. 175 x 75 x 34 mm (6.89 x 2.95 x 1.34 inches) |
| Package Dimensions (L x W x H) | Approx. 104 x 179 x 36.5 mm (4.09 x 7.05 x 1.44 inches) |
4. Setup and Installation
Follow these steps to install your DAGESVGI Car Fan:
- Identify Mounting Location: The fan is designed to attach to the headrest poles of your car seat. Ensure there is sufficient space and the headrest is adjustable if needed.
- Attach the Fan: Gently open the clips on the back of the fan and secure it firmly onto the metal poles of the car seat headrest. Ensure it is stable and does not wobble.
- Connect Power: Insert the Type-C end of the provided power cable into the fan's charging interface. Connect the other end (USB-A) to a compatible USB power source in your car (e.g., USB port, car charger adapter).
- Positioning: Adjust the fan's angle if possible to direct the airflow towards the desired area for optimal cooling.

Image: The DAGESVGI Car Fan securely mounted on the back of a car seat headrest, demonstrating its compact and integrated design.
5. Operating Instructions
Operating your DAGESVGI Car Fan is simple:
- Power On/Off: Locate the power button on the side of the fan. Press it once to turn the fan on. Press it again to cycle through wind speeds or to turn it off.
- Adjust Wind Speed: The fan features 3 adjustable wind speed levels:
- Level 1 (Natural Wind): A soft, delicate breeze for gentle circulation.
- Level 2 (Comfortable Wind): A refreshing wind to drive away moderate heat.
- Level 3 (Strong Wind): A powerful airflow for instant cooling.
- Air Circulation: The dual vortex design ensures efficient air circulation throughout the car cabin, helping to dissipate heat and provide a comfortable environment.
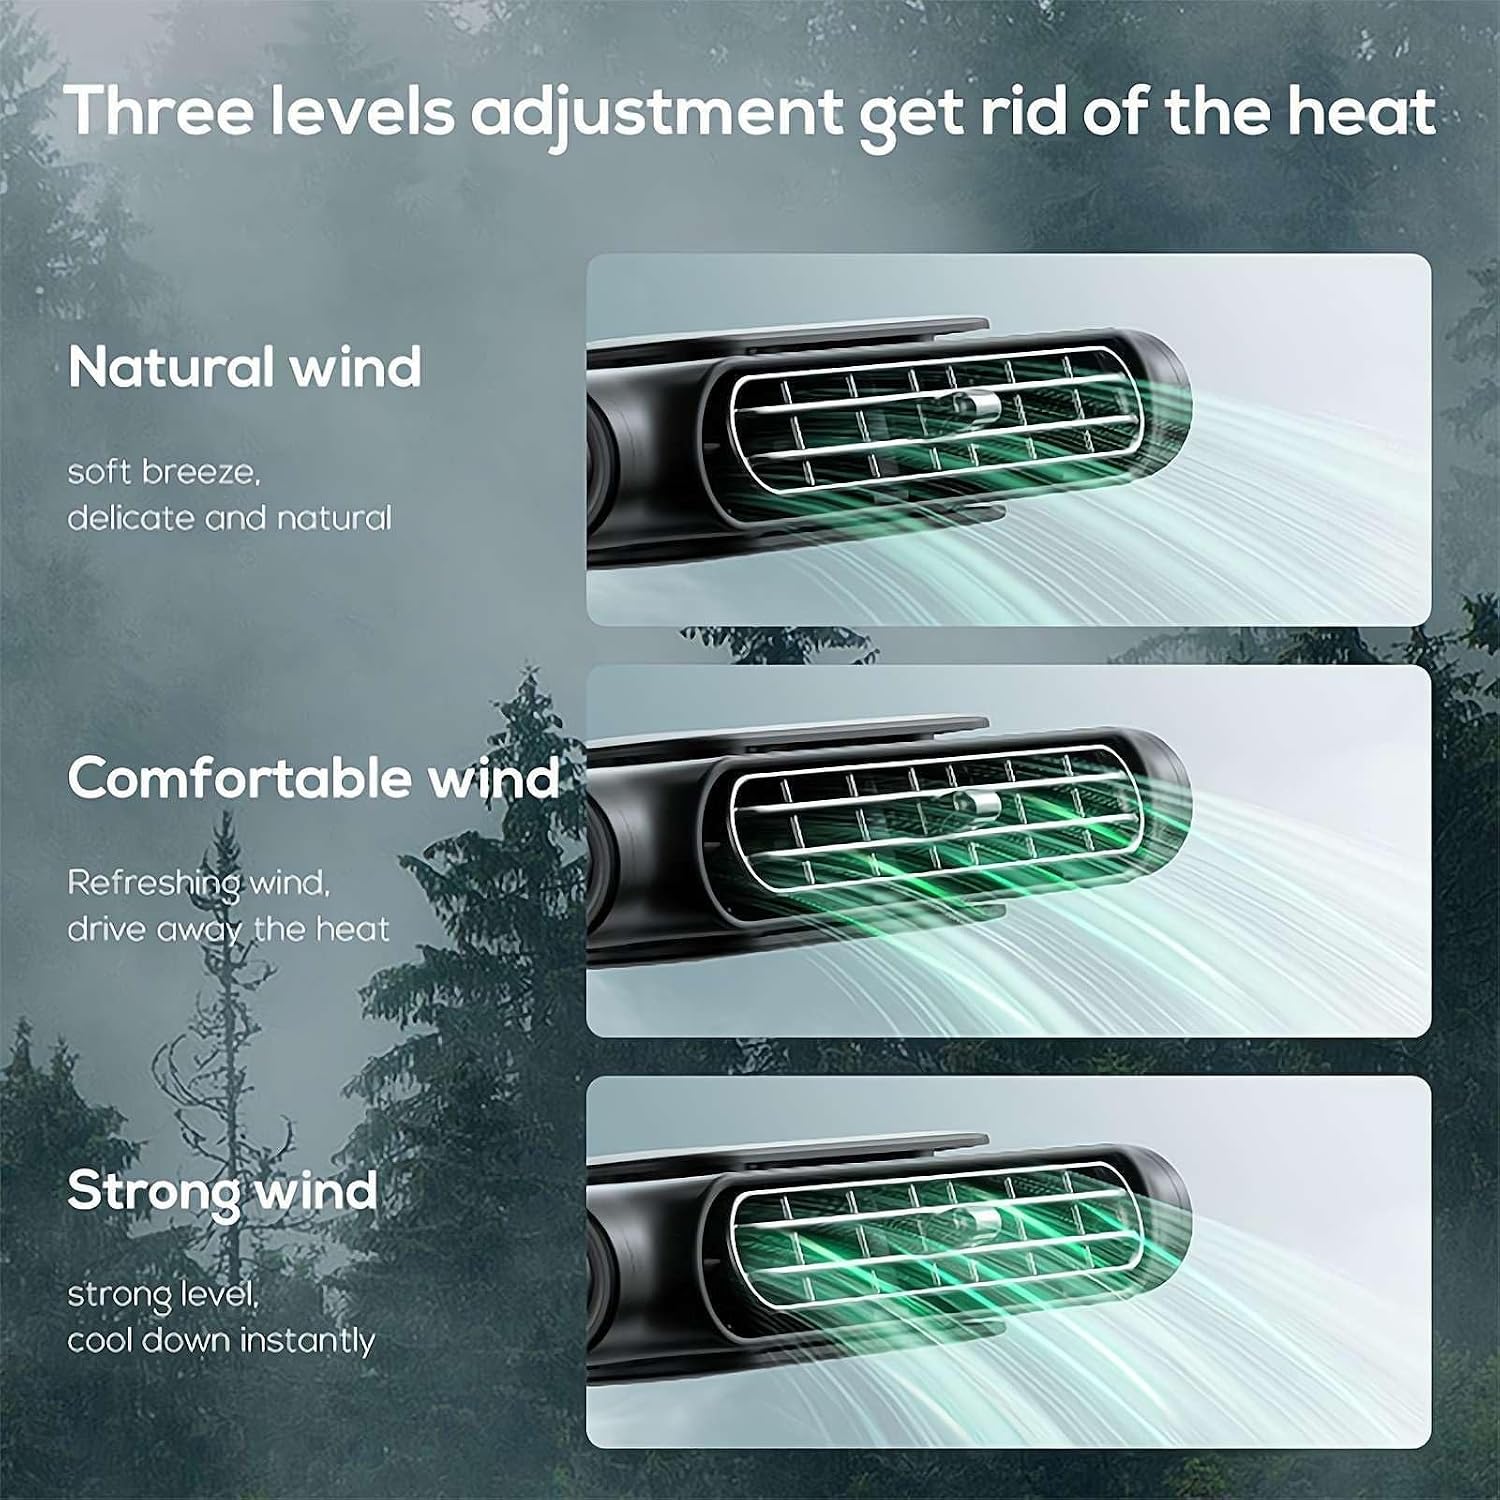
Image: Visual representation of the three adjustable wind speed levels: Natural, Comfortable, and Strong wind, illustrating the varying airflow intensity.
6. Maintenance and Care
To ensure the longevity and optimal performance of your DAGESVGI Car Fan, follow these maintenance guidelines:
- Cleaning: Regularly wipe the exterior of the fan with a soft, dry cloth to remove dust and debris. Do not use abrasive cleaners or solvents.
- Air Vents: Ensure the air intake and output vents are clear of obstructions to maintain efficient airflow. Use a soft brush or compressed air to gently clean any accumulated dust from the vents.
- Storage: If storing the fan for an extended period, disconnect it from the power source and store it in a cool, dry place away from direct sunlight and extreme temperatures.
- Cable Care: Handle the Type-C power cable with care. Avoid bending or crimping it excessively, which can damage the internal wires.
7. Troubleshooting
If you encounter any issues with your DAGESVGI Car Fan, please refer to the following common problems and solutions:
| Problem | Solution |
|---|---|
| Fan does not turn on. |
|
| Weak or no airflow. |
|
| Fan makes unusual noise. |
|
8. Warranty and Support
DAGESVGI is committed to providing high-quality products. For specific warranty information, please refer to the documentation included with your purchase or contact your retailer.
If you require further assistance, have questions, or encounter issues not covered in this manual, please contact DAGESVGI customer support through the retailer where you purchased the product or visit the official DAGESVGI website for contact information.
Please have your product model number (DAGESVGI-648648-23) and purchase details ready when contacting support.
Ask a question about this manual
Ask about setup, troubleshooting, compatibility, parts, safety, or missing instructions. Manuals+ will review the question and use this page’s manual context to help answer it.