
1. Introduction
This manual provides comprehensive instructions for the assembly, setup, and operation of your MechPuConToy DM119 1/10 Scale Dual-Spool Turbofan Engine Model Kit. This meticulously crafted metal model offers a realistic and educational experience, demonstrating the internal workings of a modern aircraft turbofan engine. Designed for enthusiasts and educational purposes, it serves as an excellent tool for understanding aerospace engineering principles.
2. Safety Information
Please read and understand all safety warnings before beginning assembly or operation. Failure to follow these instructions may result in injury or damage to the product.
- Small Parts: This kit contains numerous small parts. Keep out of reach of small children to prevent choking hazards.
- Sharp Edges: Some metal components may have sharp edges. Handle with care during assembly.
- Electrical Components: Ensure the model is powered off and disconnected from any power source before performing maintenance or adjustments. Do not expose electrical components to water or moisture.
- Battery Safety: Use only the specified battery type (3.7V 800mAh Lithium Battery). Do not mix old and new batteries, or different types of batteries. Dispose of batteries properly.
- Ventilation: Assemble in a well-ventilated area.
3. Package Contents
Verify that all components listed below are present in your kit before starting assembly.
- Engine Kit (1000+ pieces, including 400+ components and 600+ screws & nuts)
- Tools Set (screwdriver, tweezers, etc.)
- Instruction Manual (this document)
- 3.7V 800mAh Lithium Battery
- DC 5V USB Charging Cable
- Display Stand

Figure 3.1: Overview of the Turbofan Engine Model Kit components as received in the package.
4. Assembly Instructions
The assembly process for the DM119 Turbofan Engine Model is intricate and requires attention to detail. It is estimated to take approximately 10 hours. Follow the steps carefully, referring to the included tools and visual aids.
4.1 Core Engine Assembly
Begin by assembling the core components of the engine, including the compressor and turbine stages. Pay close attention to the orientation of each part.
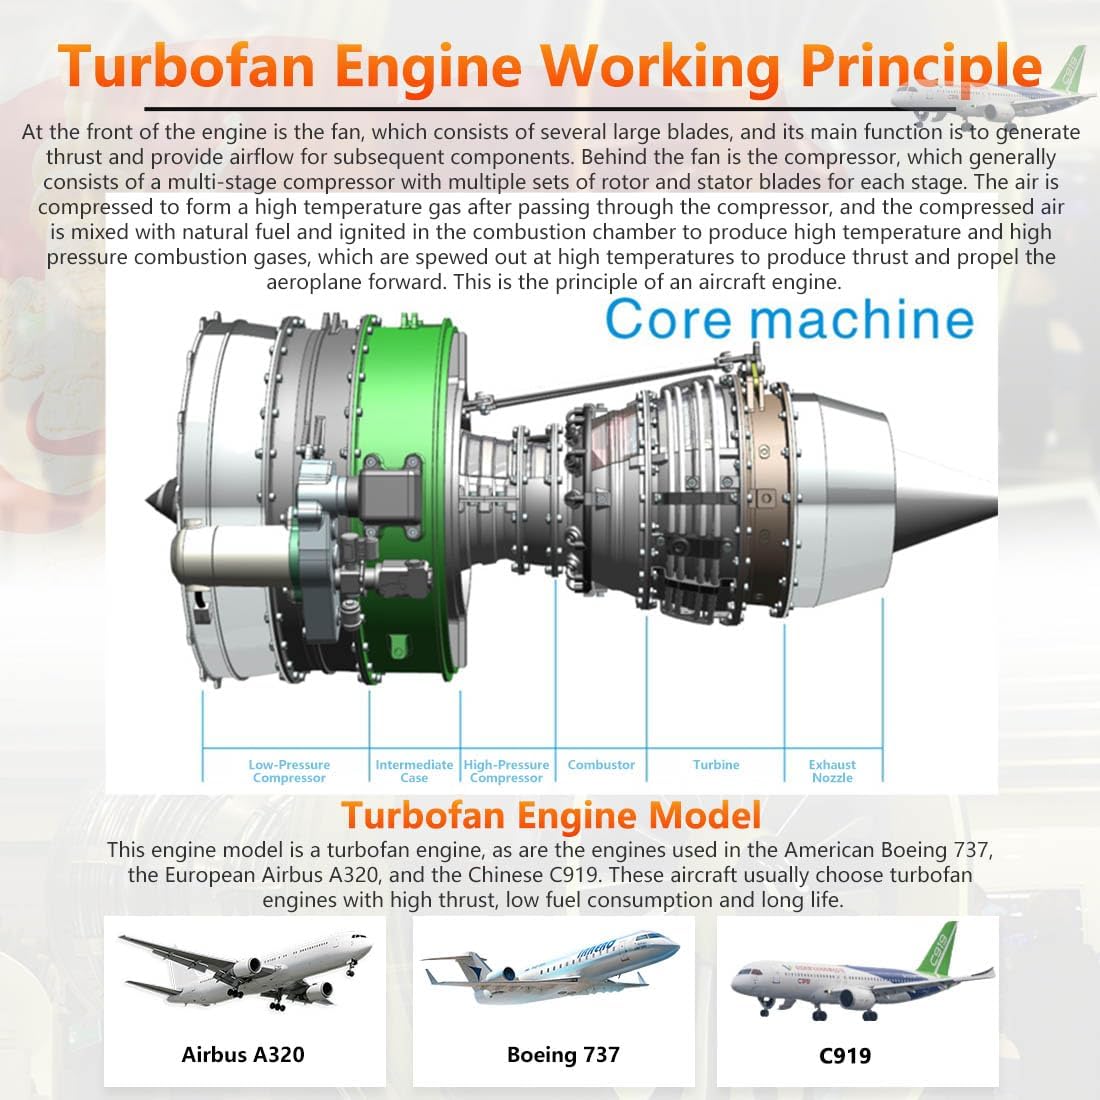
Figure 4.1: Detailed view of assembling the internal compressor and turbine sections.
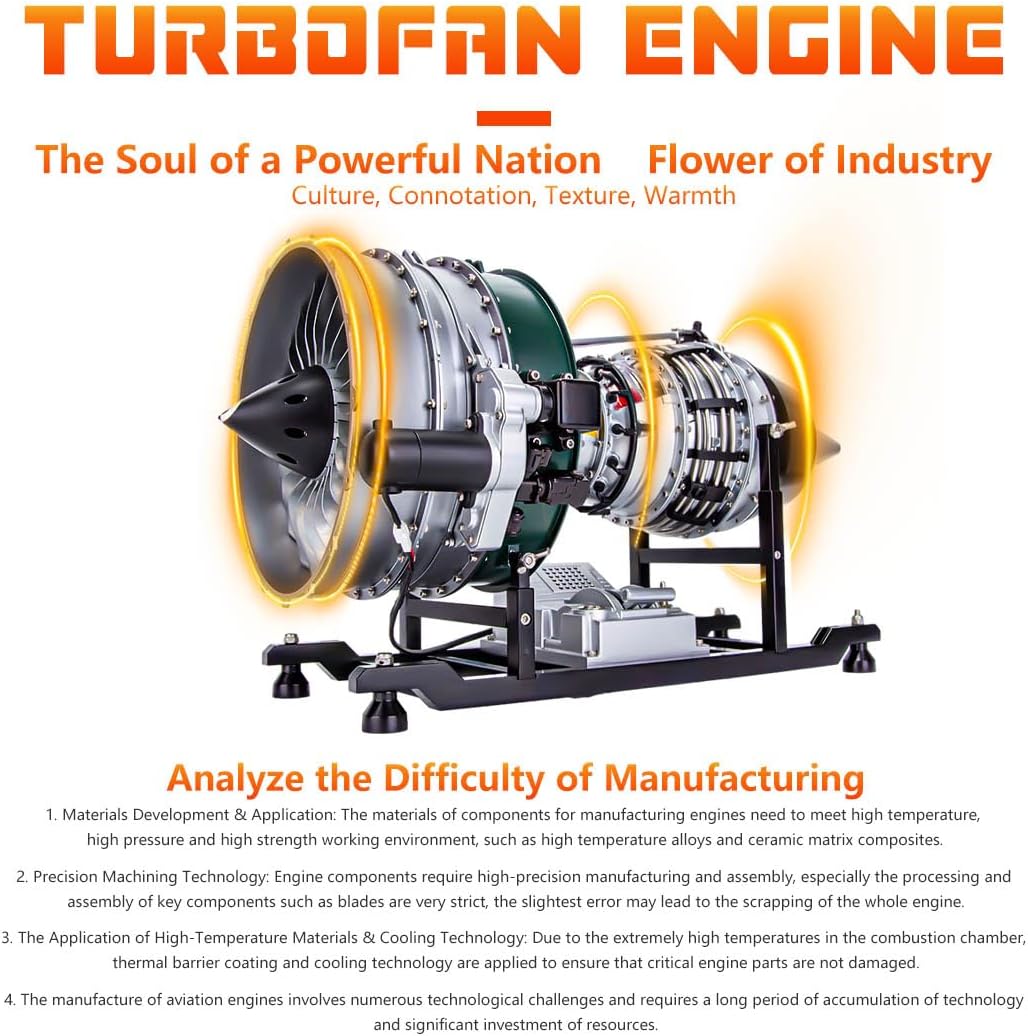
Figure 4.2: Using the provided tools to secure the various internal components.
4.2 Fan and Casing Integration
Once the core engine is assembled, integrate the large front fan and the external casing sections. Ensure all connections are secure.

Figure 4.3: Attaching the large fan and the outer casing to the main engine body.
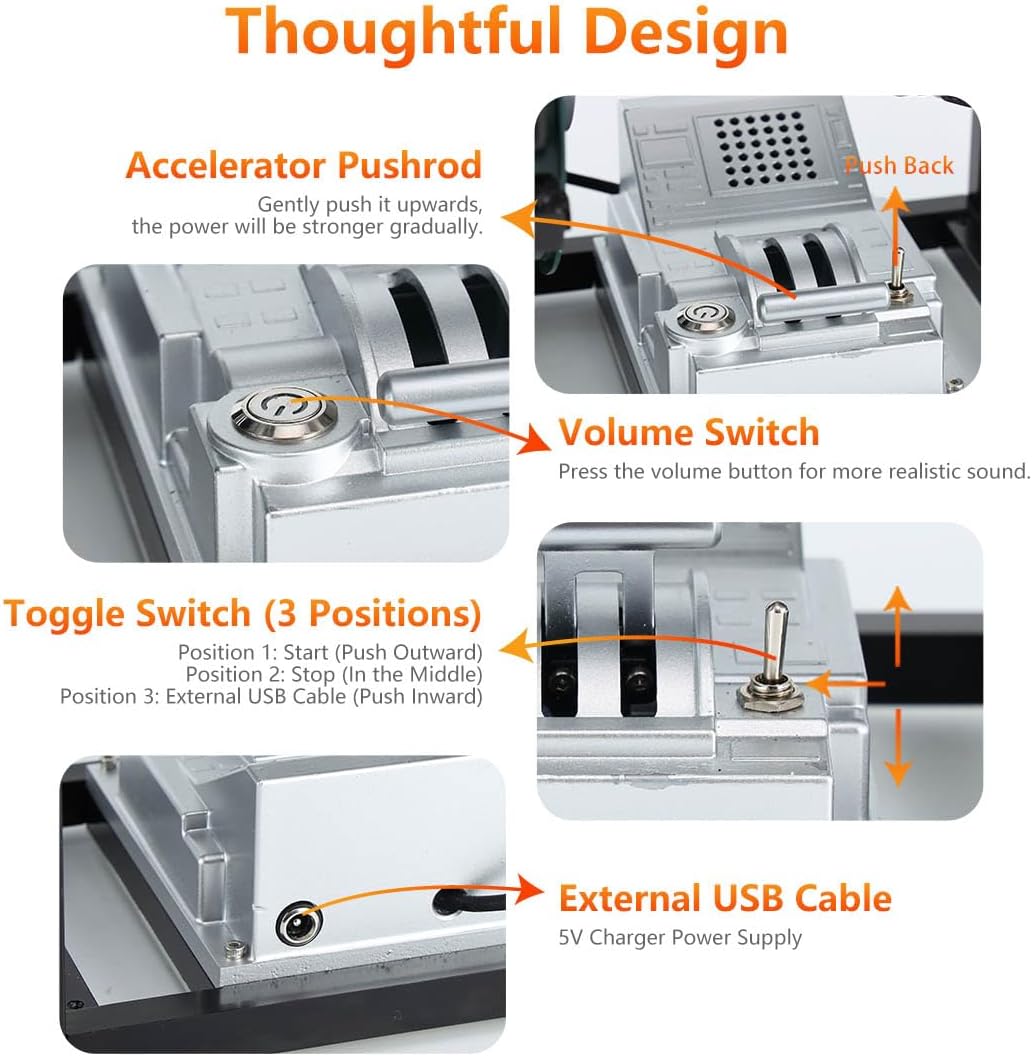
Figure 4.4: The fully assembled turbofan engine model, ready for placement on its stand.
4.3 Visual Assembly Guide
For a step-by-step visual guide on the assembly process, please refer to the video below:
Video 4.1: A detailed assembly guide for the MechPuConToy Turbofan Engine Model Kit, demonstrating the construction process from unboxing to final assembly.
5. Setup
Before operating your turbofan engine model, ensure it is properly set up.
5.1 Battery Installation
The model is powered by a 3.7V 800mAh Lithium Battery. Locate the battery compartment on the display stand and insert the battery, ensuring correct polarity. Connect the battery to the model's power input.

Figure 5.1: The display stand with the battery compartment and power connection point.
5.2 Placement on Display Stand
Carefully place the assembled engine model onto the designated slots on the display stand. Ensure it is stable and securely seated.
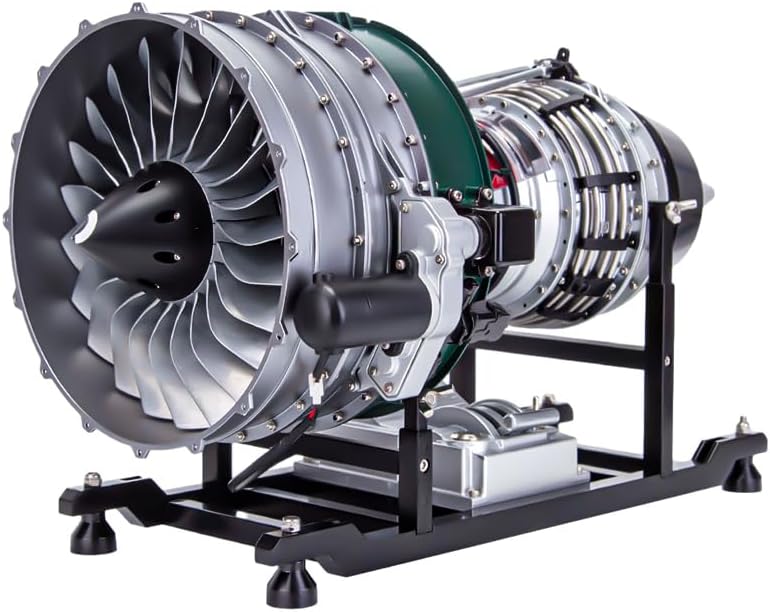
Figure 5.2: The MechPuConToy DM119 Turbofan Engine Model securely placed on its display stand.
6. Operating Instructions
The display stand features controls for operating the model. Familiarize yourself with these controls before use.

Figure 6.1: The control panel on the display stand, showing the accelerator, volume, and toggle switches.
- Toggle Switch (3 Positions):
- Position 1 (Push Outward): Starts the engine operation.
- Position 2 (In the Middle): Stops the engine.
- Position 3 (Push Inward): Activates external USB power supply.
- Accelerator Pushrod: Gently push this rod upwards to gradually increase the engine's speed and power.
- Volume Switch: Press this button to activate or adjust the realistic engine sound effects.
- External USB Cable Port: Connect the DC 5V USB Cable here for continuous power or charging.
To operate, ensure the battery is installed or the USB cable is connected. Move the Toggle Switch to Position 1 to start the engine. Adjust speed with the Accelerator Pushrod and sound with the Volume Switch.
Video 6.1: Demonstration of the Turbofan Engine Model in operation, showcasing its moving parts and sound effects.
7. Maintenance
Regular maintenance will ensure the longevity and optimal performance of your model.
- Cleaning: Use a soft, dry cloth to gently wipe down the model. Avoid abrasive cleaners or solvents that could damage the finish.
- Dust Removal: Periodically use a soft brush or compressed air to remove dust from intricate areas and moving parts.
- Battery Care: If storing the model for an extended period, remove the battery to prevent leakage. Recharge the battery fully every few months if not in use.
- Component Check: Occasionally inspect screws and connections to ensure they remain tight. Re-tighten as necessary.
8. Troubleshooting
If you encounter any issues with your MechPuConToy DM119 model, refer to the following common problems and solutions:
| Problem | Possible Cause | Solution |
|---|---|---|
| Model does not turn on. | Battery is low or not installed correctly. Power cable is disconnected. Toggle switch is not in "Start" position. | Charge or replace the battery. Ensure correct polarity. Verify the USB power cable is securely connected. Move the toggle switch to Position 1 (Push Outward). |
| Moving parts are not rotating smoothly or at all. | Obstruction in the mechanism. Loose or incorrectly assembled part. Insufficient power. | Inspect for any foreign objects or debris. Review assembly steps, particularly for the compressor and turbine stages. Ensure all screws are tight. Ensure the battery is fully charged or use external USB power. |
| No sound from the model. | Volume switch is off or malfunctioning. | Press the Volume Switch to activate sound. Check battery level. |
9. Specifications
| Feature | Detail |
|---|---|
| Model | DM119 (Dual Rotor Turbofan Engine) |
| Scale | 1/10 |
| Material | Aluminum alloy + Stainless Steel |
| Number of Parts | 1000+ (400+ components, 600+ screws & nuts) |
| Product Dimensions | 38 x 16.5 x 23.5 cm (14.96 x 6.5 x 9.25 inches) |
| Product Weight | 5220g |
| Drive System | Motor-driven |
| Battery | 3.7V 800mAh Lithium Battery |
| Power Charging | DC 5V USB Cable (Charging Time: 3 hours) |
| Battery Life | Approx. 1 hour (at full charge) |
| Assembly Time | Approx. 10 hours |
| Recommended Age | 6 years and up (Note: Difficulty level is high, ★★★★★) |
10. Warranty and Support
For any questions, technical assistance, or warranty claims, please contact MechPuConToy customer support. Refer to the product packaging or the official MechPuConToy store on Amazon for contact details.
Visit the official MechPuConToy store: MechPuConToy Store