1. Introduction
This manual provides essential instructions for the safe assembly, operation, and maintenance of your Rovibek 11 FT Drywall Lift. Please read this manual thoroughly before using the product to ensure proper function and user safety. Retain this manual for future reference.
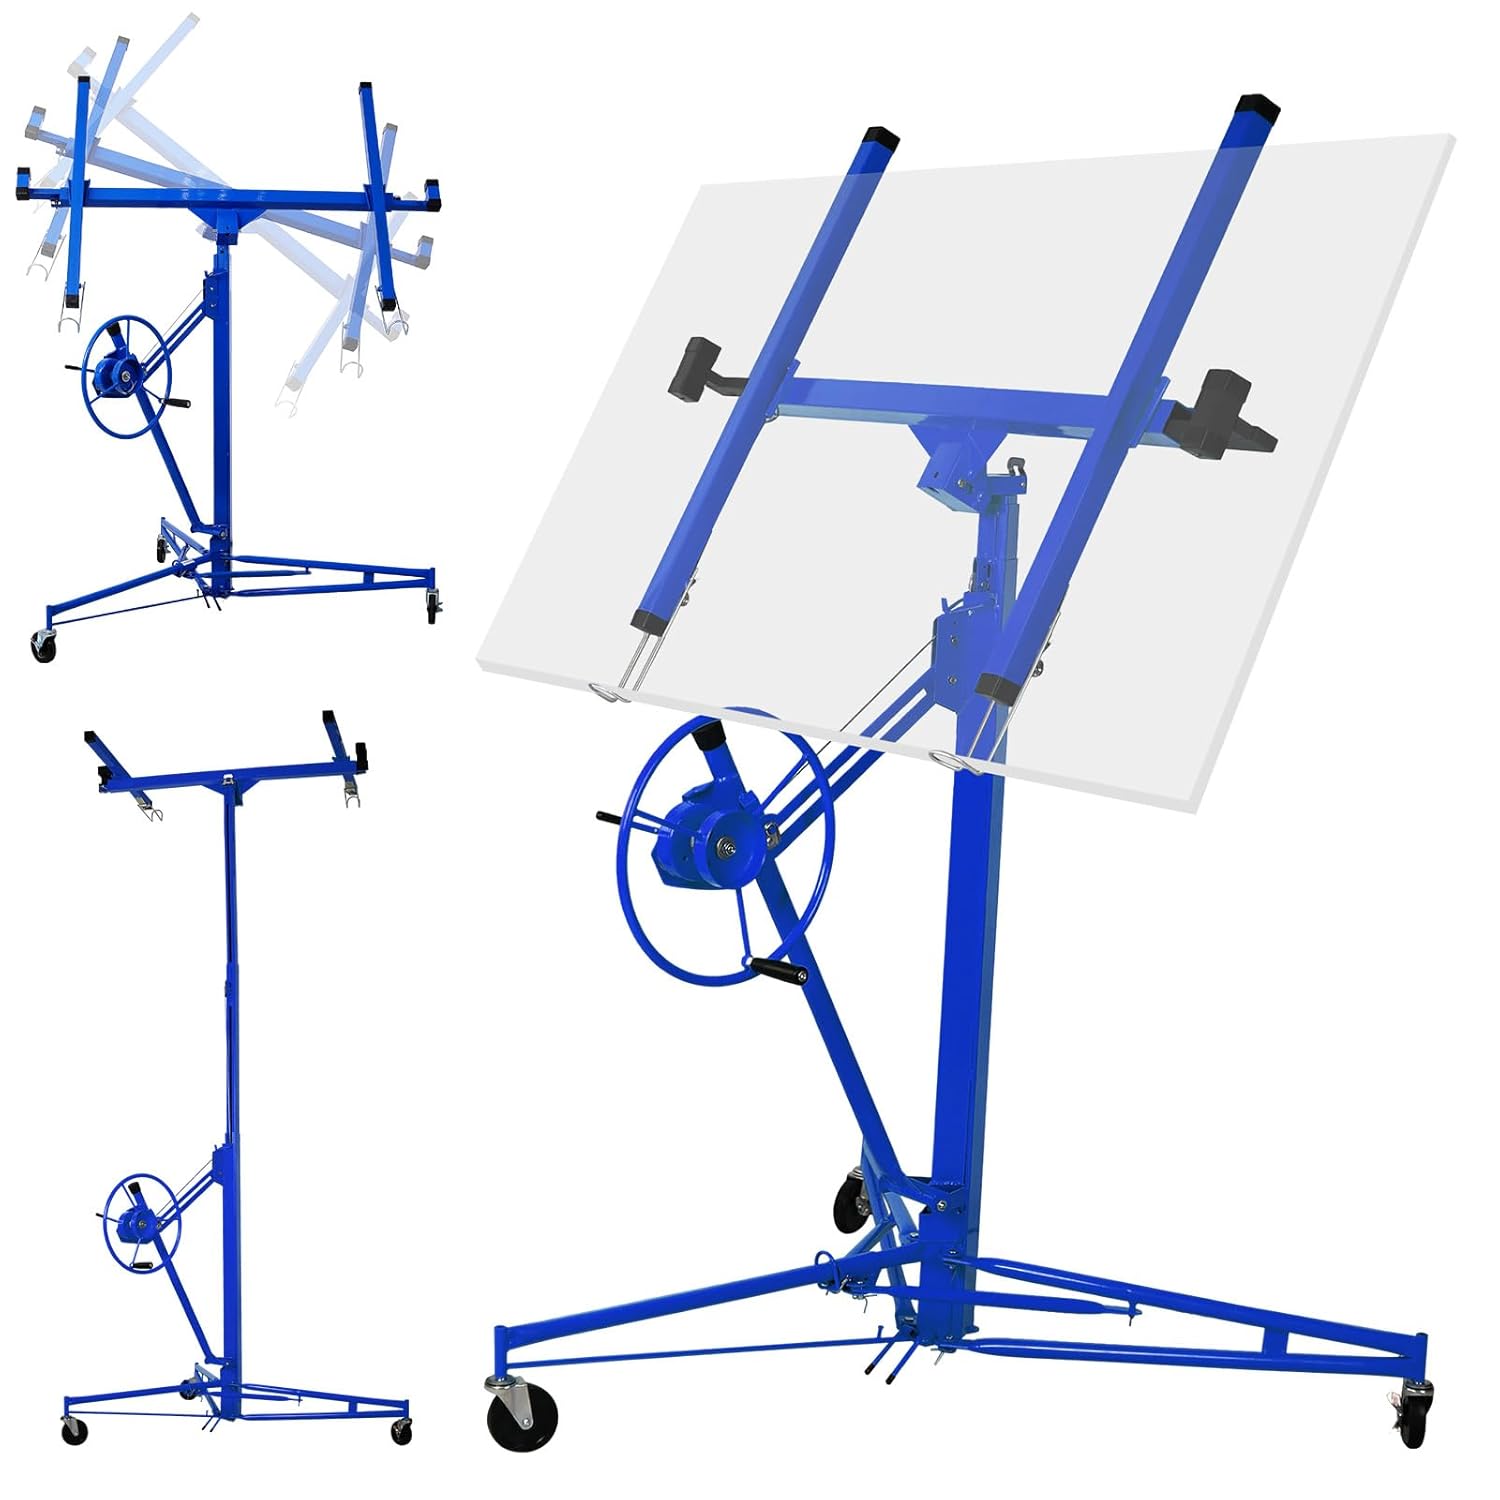
Image 1.1: Rovibek 11 FT Drywall Lift overview.
2. Safety Information
WARNING: Failure to follow these safety instructions may result in serious injury or property damage.
- Maximum Load Capacity: Do not exceed the maximum load capacity of 150 lbs (68 kg). Overloading can cause instability and equipment failure.
- Stable Surface: Always operate the drywall lift on a flat, stable, and level surface.
- Lock Wheels: Ensure all wheels are locked before loading or operating the lift to prevent unintended movement.
- Inspect Before Use: Before each use, inspect the lift for any signs of damage, loose parts, or wear. Do not use if damaged.
- Clear Area: Keep the work area clear of obstructions and other personnel during operation.
- Proper Attire: Wear appropriate safety gear, including gloves and safety glasses.
- Secure Panels: Ensure drywall panels are securely seated on the cradle before lifting.
- Controlled Movement: Operate the winch slowly and with control when lifting or lowering panels.
- Adult Use Only: This equipment is intended for use by adults only.
3. Components List
The Rovibek 11 FT Drywall Lift includes the following main components:
- Main Support Bar with Winch Assembly
- Foldable Tripod Base with Locking Wheels
- Cradle Assembly
- Dual Support Rods (2)
- Extension Levers (2)
- Control Handle
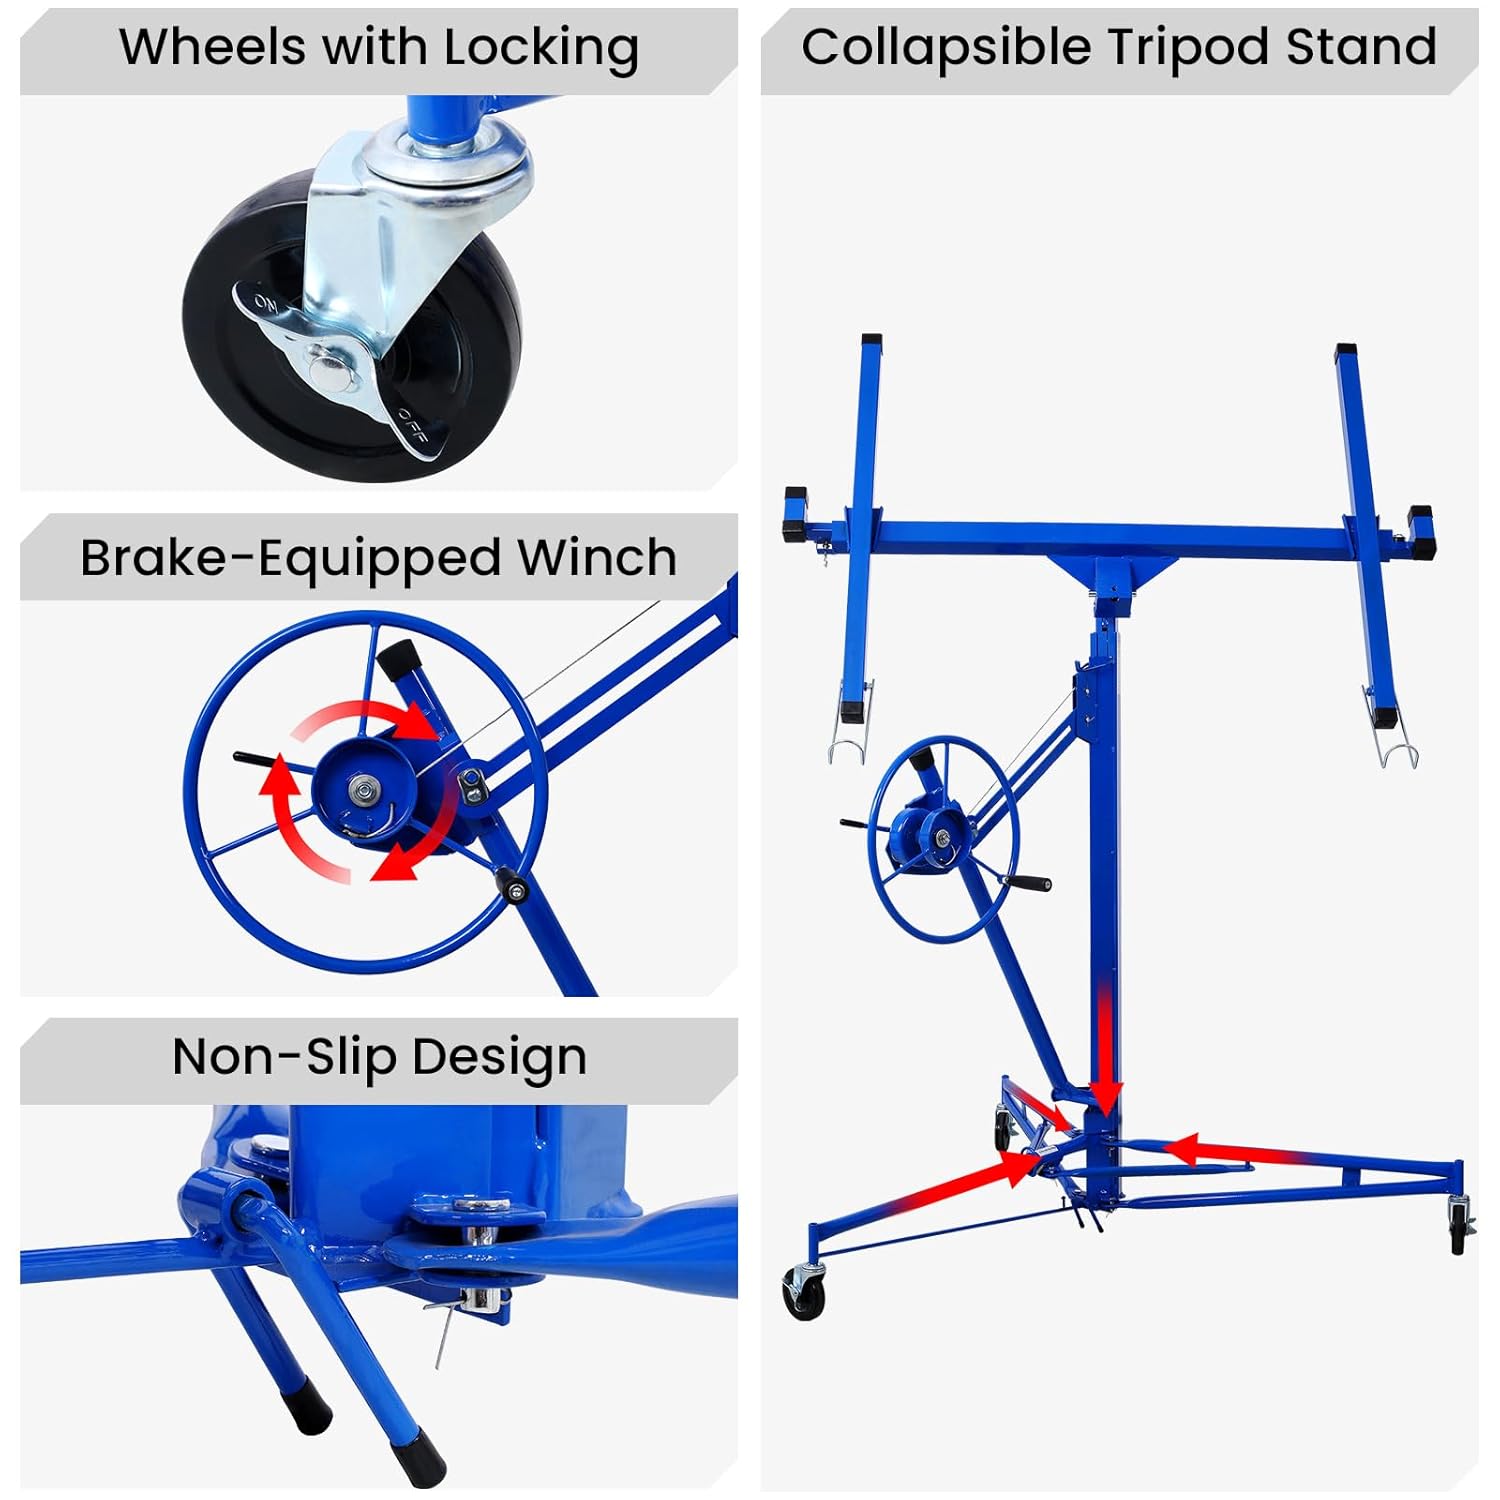
Image 3.1: Key features including locking wheels and winch.
4. Setup Instructions
Follow these steps to assemble your drywall lift:
- Assemble the Tripod Base: Extend the support legs of the tripod base until they are fully open and stable. Ensure the locking pins are engaged. Lock the universal wheels to prevent movement during assembly.
- Assemble the Main Support Bar: Carefully lift the main support bar and insert its base into the designated slot on the assembled tripod base. Secure it with the provided fasteners.
- Mount the Cradle: Attach the cradle assembly onto the top of the main support bar. Ensure it clicks securely into place.
- Install Dual Support Rods: Slide the dual support rods into the ends of the cradle crossarm. These rods provide additional support for the drywall panel.
- Install Extension Levers: Insert the extension levers into the designated holes on the cradle assembly. These allow for easier panel manipulation.
- Attach the Control Handle: Secure the control handle to the winch wheel. Ensure it is firmly attached for safe operation.

Image 4.1: Visual guide for drywall lift assembly.
Setup Video Guide
Video 4.1: Detailed installation instructions for the drywall lift.
5. Operating Instructions
This section details the steps for safely operating your drywall lift.
5.1. Loading Drywall Panels
- Ensure the lift is on a stable surface and all wheels are locked.
- Lower the cradle assembly to its lowest position (approximately 54 inches off the floor) using the winch.
- Carefully place the drywall panel onto the cradle, ensuring it is centered and stable on the support rods. The lift accommodates panels up to 4 ft x 16 ft.
- Verify the panel's weight does not exceed 150 lbs.
5.2. Lifting and Positioning
- Once the panel is loaded, slowly turn the winch handle to raise the panel to the desired height. The lift can extend up to 11 ft.
- The cradle features a 360° rotatable design, allowing you to orient the panel as needed for ceiling or wall installations.
- The cradle also supports a 60° tilt, which can be adjusted to match sloped ceilings or specific wall angles.
- Use the locking mechanism on the winch to hold the panel securely in place at the desired height.

Image 5.1: Adjustable features for precise panel placement.

Image 5.2: Examples of drywall lift applications.
6. Maintenance
Regular maintenance ensures the longevity and safe operation of your drywall lift.
- Cleaning: Wipe down all metal surfaces with a clean, dry cloth after each use to remove dust and debris.
- Lubrication: Periodically apply a light lubricant to moving parts, such as the winch mechanism and wheel axles, to ensure smooth operation.
- Inspection: Regularly check all bolts, nuts, and pins for tightness. Tighten any loose fasteners. Inspect cables and pulleys for wear or fraying.
- Storage: When not in use, store the drywall lift in a dry, protected area. The lift can be folded for compact storage.
7. Troubleshooting
This section addresses common issues you might encounter with your drywall lift.
- Issue: Lift is difficult to raise or lower.
Solution: Check for obstructions in the lifting mechanism. Ensure the winch cable is not tangled. Apply lubricant to moving parts if necessary. Verify the load does not exceed the maximum capacity. - Issue: Lift feels unstable.
Solution: Ensure the tripod base is fully extended and all locking pins are engaged. Verify the lift is on a flat, level surface. Check that the wheels are locked. - Issue: Drywall panel slides on the cradle.
Solution: Ensure the panel is properly centered on the support rods. Adjust the extension levers to provide adequate support.
8. Specifications
| Product Dimensions | 49 x 36 x 52 inches (folded); 55 Pounds |
| Item Model Number | Drywall Lift080602 |
| Maximum Height | 11 ft |
| Adjustable Length (Cradle) | 49" to 115" |
| Maximum Load Capacity | 150 lbs |
| Applicable Panel Sizes | Up to 4 ft x 16 ft |
| Material | All welded Steel with powder coating |
| Power Source | Hand Chain Winch |

Image 8.1: Drywall lift dimensions.

Image 8.2: Load capacity and maximum panel dimensions.

Image 8.3: Suitable material boards.
9. Warranty and Support
For warranty information and customer support, please refer to the documentation provided with your purchase or contact Rovibek customer service directly. Contact details can typically be found on the product packaging or the manufacturer's official website.