SubSun BK32171T25F
SubSun Universal Portable Level 2 EV Charger User Manual
Model: BK32171T25F
1. Introduction
This manual provides essential instructions for the safe and efficient use of your SubSun Universal Portable Level 2 EV Charger. Please read this manual thoroughly before operating the device and retain it for future reference.
Package Contents:
- 240V 32A 25FT Universal EV Charger
- J1772 to Tesla Adapter
- Storage Bag
- User Manual
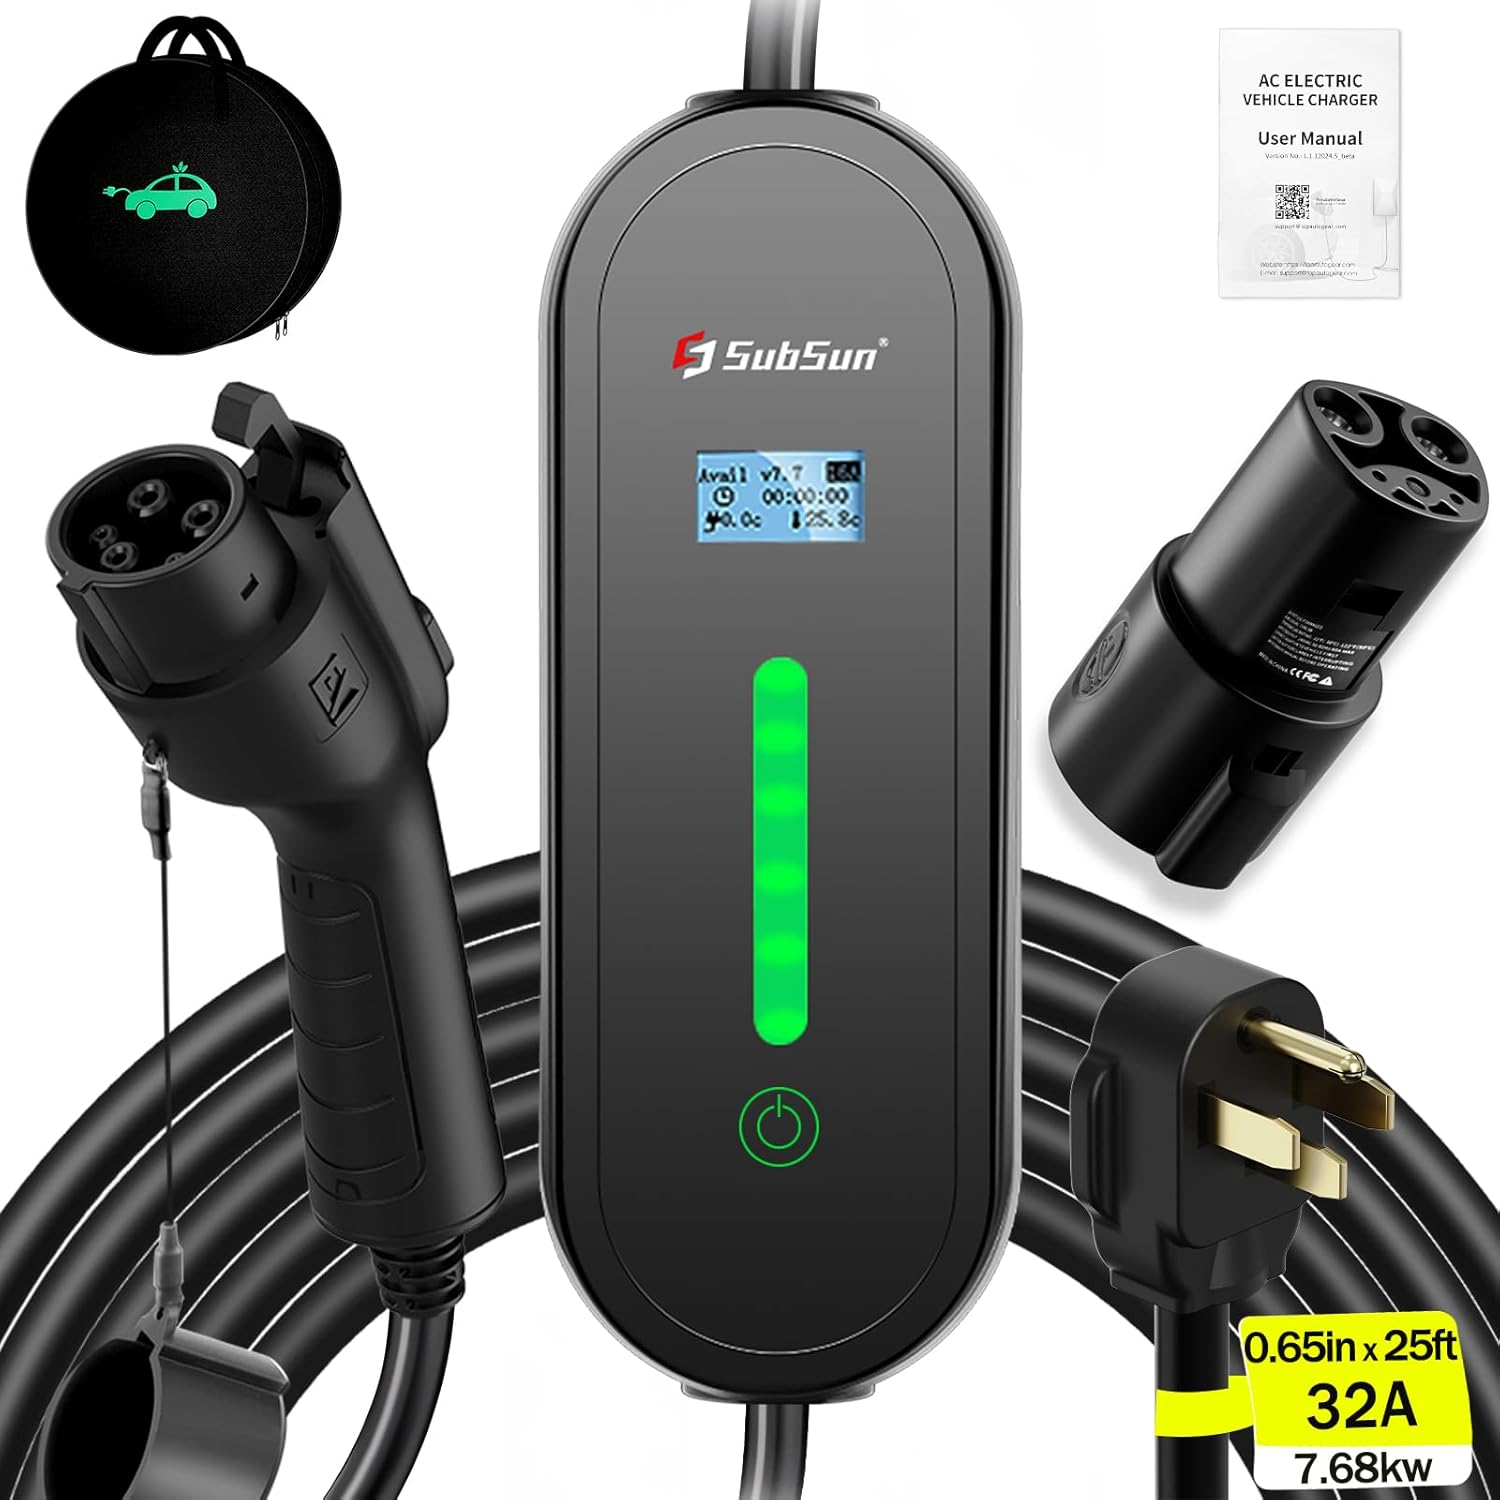
Image 1.1: SubSun Universal Portable Level 2 EV Charger and included accessories.
2. Important Safety Instructions
WARNING: Failure to follow these safety instructions may result in electric shock, fire, or serious injury.
- The charger is FCC certified, ensuring product quality and safety.
- Equipped with an intelligent chipset providing overcharging, overvoltage, overheat, overcurrent, short circuit, and leakage protection.
- IP67 waterproof rating protects internal circuits.
- Operating temperature range: -22°F to 122°F (-30°C to 50°C).
- If the ambient temperature is too high, the charger will automatically reduce the charging speed to protect the product and the vehicle.
- Always ensure the car charging port, charging head, and plug are clean before charging. Stains can affect charging efficiency and safety.
- Do not use in extreme weather conditions such as heavy rainstorms. Ordinary rainy days will not affect normal use.
- The charger includes a locking mechanism to prevent accidental disconnection during charging.
- The cable is 100% copper wire with TPU insulation.

Image 2.1: Overview of safety features and adjustable current options (8A, 10A, 13A, 16A, 32A).
3. Setup and Installation
Power Requirements:
This EV charger is designed for use with a standard NEMA 14-50 plug. It requires a Level 2 (220V-240V) outlet. Ensure your home is equipped with appropriate 240V outlets and a NEMA 14-50 socket. It is recommended to use a 40A circuit breaker for the 32A charger.

Image 3.1: Proper connection of the NEMA 14-50 plug to a compatible outlet for EV charging.
Initial Connection:
- Ensure the car's handbrake is engaged.
- Insert the charging head into the vehicle's charging port. You should hear a "clicking" sound, indicating it is securely inserted.
- If charging a Tesla, first connect the included J1772 to Tesla adapter to the charging head, then insert the adapter into the Tesla charging port.
4. Operating Instructions
Charging Speed:
This 32A Level 2 EV charger provides a charging rate of approximately 30 miles per hour, depending on the vehicle model. The maximum power output is 7.68kW. For example, charging a Chevy Bolt EV (65 kWh battery) from 0% to 50% takes approximately 4.5 hours.

Image 4.1: Comparison of charging times for various EV models using 16A and 32A Level 2 chargers.
Vehicle Compatibility:
The SubSun portable EV charger is compatible with all J1772 electric vehicles and plug-in hybrids in North America. This includes brands such as Chevrolet, Nissan, VW, KIA, BMW, Ford, Honda, Hyundai, and others. With the included J1772 to Tesla adapter, all Tesla models (3/Y/S/X/Cybertruck) are also compatible.

Image 4.2: Visual guide to compatible Tesla and SAE J1772 electric vehicles.
Adjusting Current and Timed Charging:
The charger offers 5 adjustable current settings: 8A, 10A, 13A, 16A, and 32A. For safety, the current can only be changed before charging begins. It also features a timed charging function, allowing you to delay charging by 2, 4, 6, or 8 hours. Setting it to 0H initiates immediate charging.
- To adjust current or set timed charging: Long press the control button. Wait for the indicator light to complete the progress bar. The display will show options for current adjustment and timed charging.
- Press the control button once to select either current setting or timer setting.
- Long press again (wait for the indicator light to complete the progress bar) to enter the selected regulation or timer setting.
- Press the control button to switch between current sizes or timed charging options (2/4/6/8 hours).
- Press and hold again (wait for the indicator light to complete the progress bar) to confirm the settings. The screen will display "SUCCESS".

Image 4.3: Step-by-step guide for starting, stopping, and adjusting charger settings.
Delay Charging Function:
The delay charging feature allows you to schedule charging during off-peak hours, potentially reducing electricity costs. Once fully charged, the unit will automatically stop charging.

Image 4.4: Information on delay charging to optimize costs during off-peak hours.
To cancel a charging delay time:
Unplug the charger for 2 seconds, then plug it back in to return to normal charging status.
5. Maintenance
- Keep the charging cable and connectors clean and free from dust, dirt, and moisture.
- Regularly inspect the cable for any signs of damage, fraying, or wear. Do not use if damaged.
- Store the charger in its provided storage bag in a dry, cool place when not in use.
- Ensure the charging gun tip and charging interface are clean before each use to prevent charging issues.
6. Troubleshooting
Common Issues and Solutions:
- Doesn't charge my car?
- Check if the car's handbrake is pulled in place.
- Restart the car, lock it, and then attempt to charge again.
- Verify the charging gun tip and charging interface are properly inserted. A crisp clicking sound indicates a secure connection.
- Check the charging interface of the car for any obstructions or damage. Reset if necessary.
- After attempting to charge, check if the car instrument panel shows any alarm faults or if the charging control box is functioning normally.
- If the charging station displays normally but the car is not charging, check if a delay charging time has been set.
- Why does the EV Charger feel a bit hot when charging?
It is normal for the EV charger to feel warm to the touch during operation due to the current passing through it. The product has overheating protection. If the temperature becomes too high, the charger will automatically reduce the current to cool down. The current will automatically increase once the temperature has decreased. This is a normal protective function.
- The actual charging current is different from the description.
First, verify that the correct current setting is selected on the charger. Second, confirm that the maximum charging power of your electric vehicle matches the set charging current. For example, if your vehicle only supports 13A charging, even if the charger is set to 16A, it will only charge at 13A.
Circuit Breaker Requirements:
Ensure your electrical setup meets the following requirements for safe operation:
| Max Charging Current | Required Circuit Breaker |
|---|---|
| 16A | 20A |
| 32A | 40A |
| 40A | 50A |
| 50A | 60A |

Image 6.1: Frequently asked questions regarding charging issues and circuit breaker requirements.
7. Specifications
- Model Number: BK32171T25F
- Product Dimensions: 16.9 x 13.4 x 6.3 inches
- Item Weight: 10.16 pounds
- Input Voltage: 240V AC
- Max Current: 32A
- Max Power: 7.68 kW
- Cable Length: 25 feet
- Plug Type: NEMA 14-50
- Charging Connector: J1772 (with Tesla adapter)
- Waterproof Rating: IP67
- Operating Temperature: -22°F to 122°F (-30°C to 50°C)
- Certifications: FCC

Image 7.1: Detailed diagram of the EV charger's components and approximate dimensions.
8. Warranty and Customer Support
SubSun provides 2 years of customer service for this product. If you encounter any problems or have questions, please contact our customer support team. Our engineering team is available to provide satisfactory solutions within 24 hours.
For support, please refer to the contact information provided with your purchase or visit the official SubSun website.