WONNIE W-1106D
WONNIE 12" Dual Car DVD Players User Manual
Model: W-1106D
Introduction
Thank you for choosing the WONNIE 12" Dual Car DVD Players. This manual provides essential information for setting up, operating, and maintaining your new portable DVD players. Designed for in-car entertainment, these players offer versatile playback options, including the ability to watch the same or different movies simultaneously, and feature a long-lasting rechargeable battery. Please read this manual thoroughly before use to ensure proper function and longevity of your device.
What's in the Box

The package includes the following items:
- 2 x Headrest DVD Players
- 2 x Remote Controls
- 4 x AAA Batteries
- 1 x User Manual
- 1 x AC Adapter
- 1 x Car Charger
- 1 x AV Cable
- 1 x 3.5mm-RCA Cable
- 2 x 5 Pairs Plastic Buckles (various sizes)
- 4pcs U Shape Metal
- 2 x Detachable Brackets
- 4 x Mounting Straps
Image description: A visual representation of all components included in the WONNIE 12" Dual Car DVD Players package, neatly arranged. This includes the two main DVD player units, remote controls, various cables (AC adapter, car charger, AV, RCA), mounting hardware (brackets, straps, buckles, U-shaped metal), batteries, and the user manual.
Setup and Installation
The WONNIE Dual Car DVD Players offer two primary installation methods to fit most car headrests: using the customized mounting brackets or the headrest straps. The clamshell design allows for easy disc changes without removing the player.
Using Detachable Brackets:
- Prepare the Bracket: Get one correct pair of plastic buckles together. Connect the U-shape metal to the two combined buckles and the plastic plate. Choose the correct pair of plastic buckles according to the size of your vehicle's headrest pole.
- Attach to Headrest: Put the plastic stand into the round hole on the bracket and slide it into the suitable position. Tighten the screws to secure it firmly to the headrest poles.
- Mount the Player: Insert the player's stand into the plastic plate on the bracket and lock the stand. Adjust the screen angle for optimal viewing. Ensure the bracket is locked before use by sliding the lock switch.

Image description: A nine-panel image illustrating the detailed steps for installing the DVD player onto a car headrest using the provided detachable bracket. It shows how to assemble the plastic buckles and U-shaped metal, attach them to the headrest posts, and then slide and lock the DVD player onto the bracket.
Video Guide: Bracket Installation
Video description: A short instructional video demonstrating the process of installing the mounting bracket for the WONNIE car DVD player onto a car headrest. It shows the selection of appropriate plastic buckles, their attachment to the headrest posts, and the final securing of the bracket.
Using Mounting Straps:
Alternatively, you can use the provided mounting straps to secure the players to the headrests. Wrap the straps around the headrest and through the designated loops on the player, then fasten securely.
Operating Instructions
Powering On/Off and Charging:
The players are equipped with high-capacity rechargeable batteries, providing approximately 5 hours of playback. They can be powered via the included AC adapter (for home use) or the 2-in-1 car charger (for 12V car outlets).

Image description: An illustration detailing the three power options for the WONNIE DVD players: an internal rechargeable battery, a car charger, and an AC wall adapter, highlighting their versatility for different power sources.
Disc Playback:
The players support all region discs including DVD, DVD±R, DVD±RW, CD, CD±R, CD±RW, VCD, and SVCD. Simply open the clamshell design, insert your disc, and the player will begin playback automatically.
USB/SD Playback:
Insert a USB drive (max 32GB FAT32, 720*576 pixels) into the USB port or an SD card into the card slot. The players support various formats: images (JPG, JPEG), audio (MP3, WMA), and videos (VOB, AVI, MPEG 1, MPEG 2). Note: Blu-ray discs, MP4, and Bluetooth are not supported.
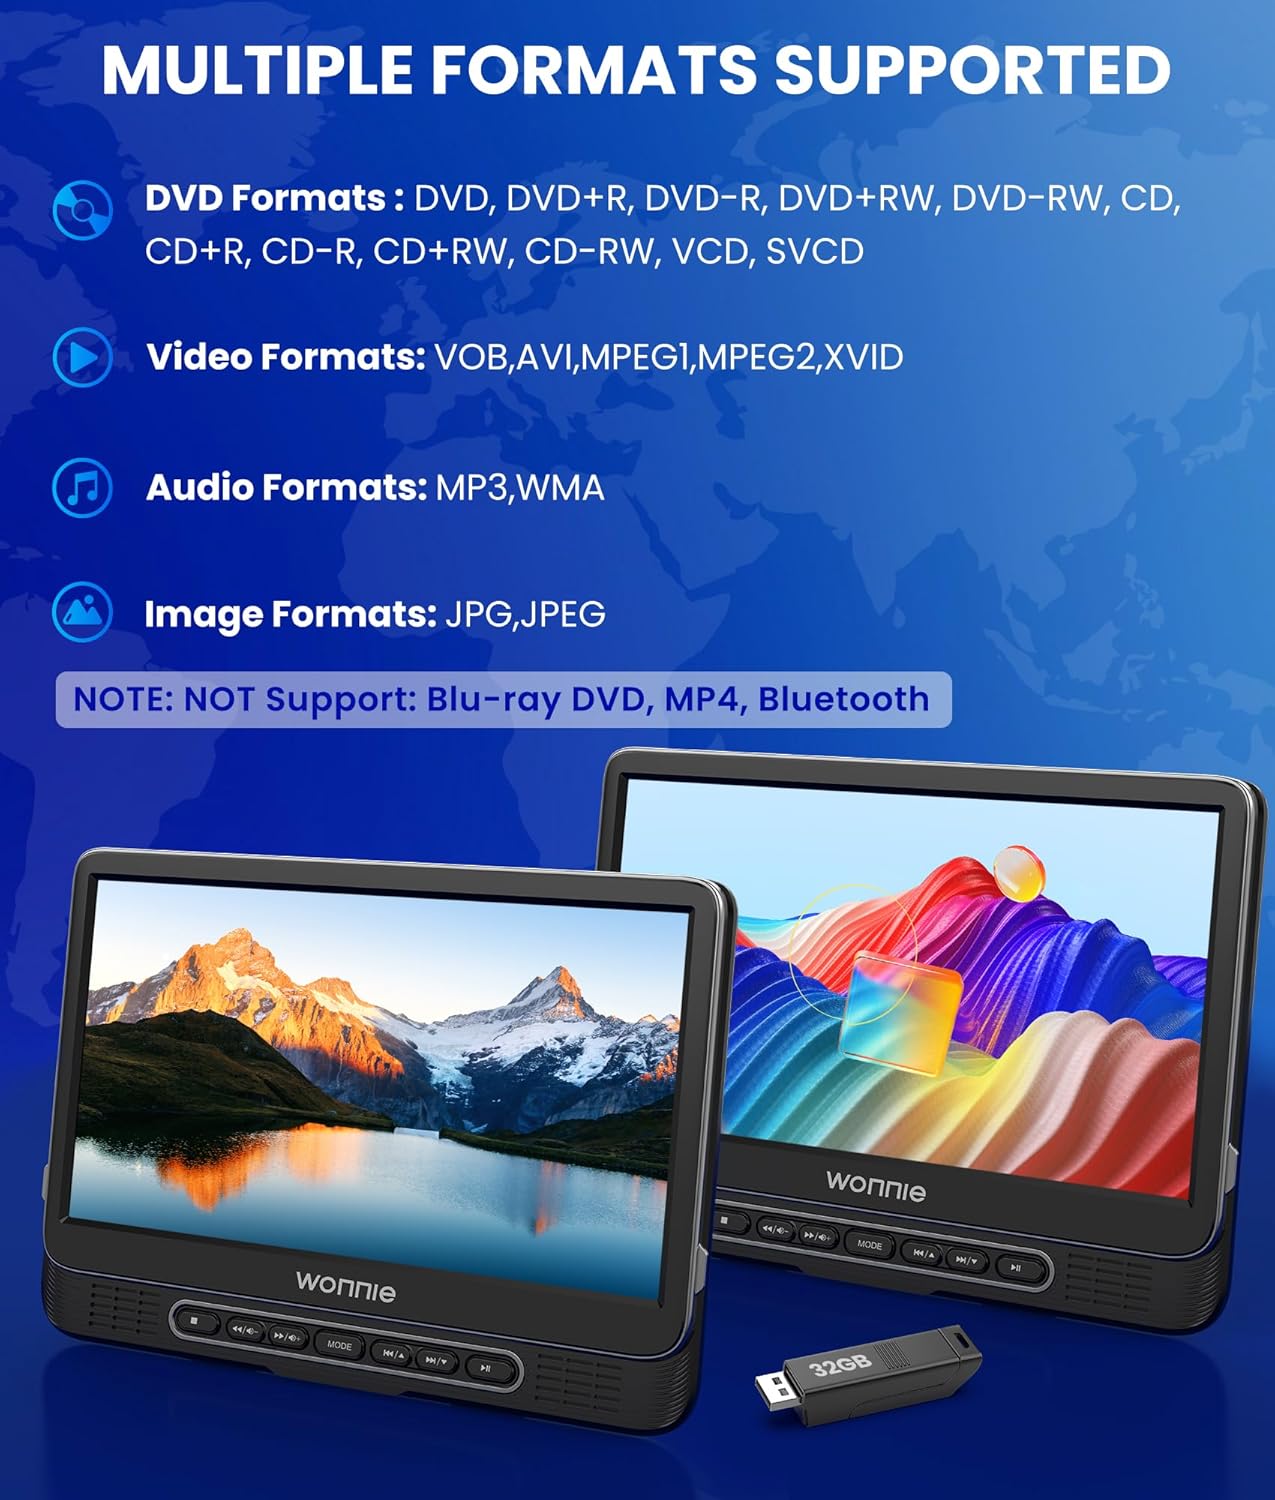
Image description: A graphic illustrating the wide range of media formats supported by the WONNIE DVD players, including various DVD types, video formats like VOB, AVI, MPEG, audio formats like MP3, WMA, and image formats like JPG, JPEG. It also explicitly states that Blu-ray, MP4, and Bluetooth are not supported.
Volume Control and Navigation:
Each unit has built-in stereo speakers and a headphone jack. You can connect wired earphones/headphones or external speakers. Adjust volume using the remote controls. During playback, long press VOL+/VOL- on the player to increase/decrease the volume. Short press VOL+/VOL- to fast-forward/rewind.

Image description: A visual demonstrating the