lifoarey RL-HD082YC-HD2053
lifoarey 1080P Full Time Color CCTV Camera User Manual
Model: RL-HD082YC-HD2053
Brand: lifoarey

Figure 1: lifoarey 1080P Full Time Color CCTV Camera.
Introduction
This manual provides comprehensive instructions for the installation, operation, and maintenance of your lifoarey 1080P Full Time Color CCTV Camera. This 2MP wired outdoor security camera offers 24/7 recording surveillance with 4-in-1 compatibility (TVI/CVI/AHD/CVBS) and 100 ft colorful night vision, designed for home security applications.
What's in the Box
- Security Camera
- Manual Instruction
- Pack of Screws
Note: BNC cable and power supply are not included and must be purchased separately.
Key Features
- 4-in-1 Compatibility: Compatible with 1080P COAX DVRs, supporting TVI, CVI, AHD, and CVBS video outputs. Factory default is 1080P@30fps HD-TVI. Ensure your DVR supports 1080p or higher.
- 1080P HD Resolution: Captures clear and colorful images with 1920 × 1080P resolution. Features a 3.6mm lens with two 3500k warm supplemental lights, providing an 82.2° viewing angle and 85ft color night vision range.
- 24/7 Full Time Color Night Vision: Built-in 2pcs warm light LEDs enable clear color images in low light conditions, enhancing recognition of people and objects at night.
- IP66 Waterproof: Constructed from premium ABS material, designed for outdoor use and functional in all weather conditions including rain, storm, snow, and frost.
- Easy Installation: Designed for wall or ceiling mounting with 3-axis adjustment for flexible positioning.
Setup Guide
1. Pre-Installation Checklist
- Ensure you have a compatible 1080P COAX DVR (TVI/CVI/AHD/CVBS).
- Obtain a BNC cable of appropriate length for your installation.
- Acquire a 12V DC power supply for the camera.
- Identify suitable mounting locations (wall or ceiling) that provide optimal viewing angles and are within reach of power and video cables.
2. Mounting the Camera
The camera can be mounted on a wall or ceiling. Use the included pack of screws for secure installation.
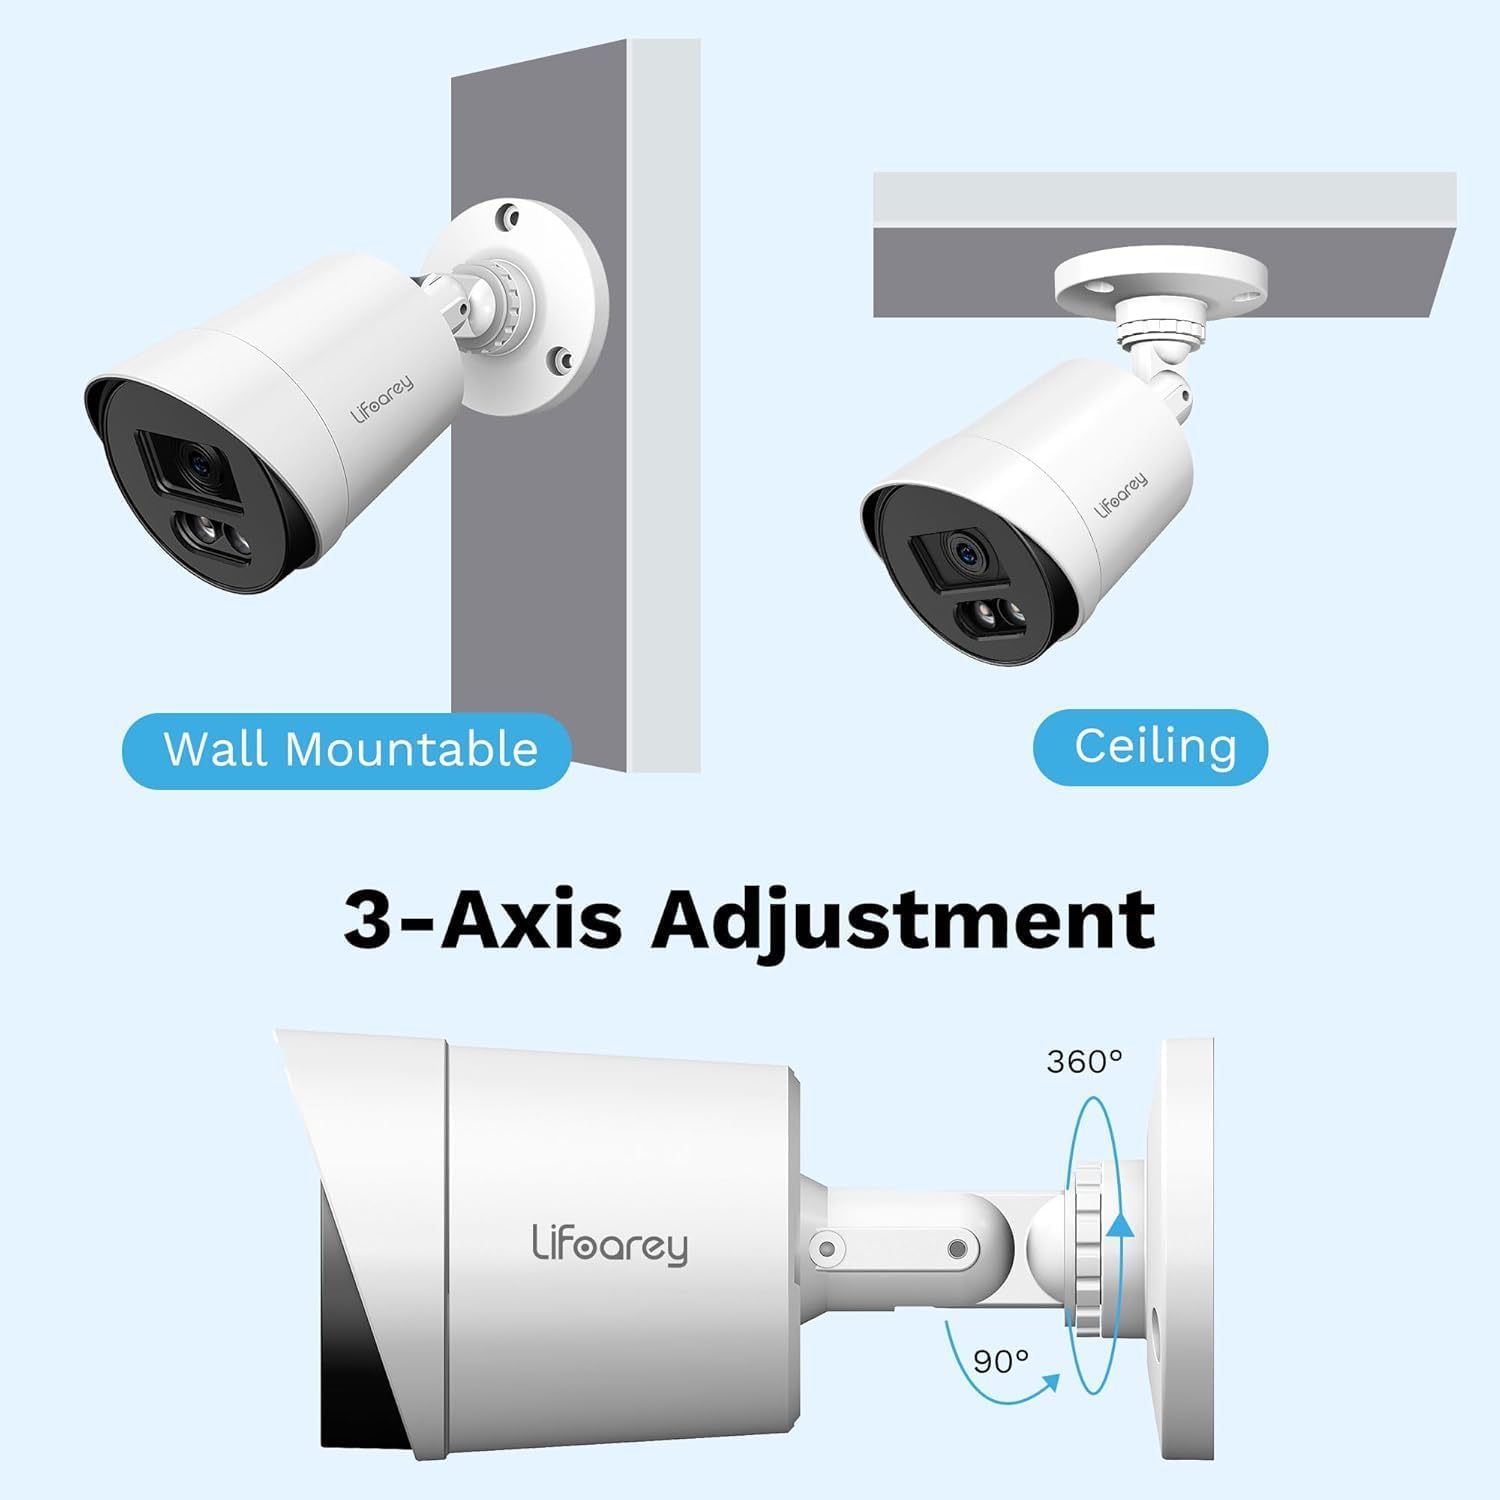
Figure 2: Mounting Options and 3-Axis Adjustment. The camera offers flexible positioning with 360-degree rotation and 90-degree tilt capabilities.
- Choose a mounting surface that is stable and can support the camera's weight.
- Mark the drilling points using the camera's base as a template.
- Drill pilot holes at the marked points.
- Secure the camera base to the surface using the provided screws.
- Adjust the camera's angle using the 3-axis adjustment mechanism to achieve the desired viewing area.
3. Connecting the Camera
- Connect one end of the BNC cable to the camera's video output port.
- Connect the other end of the BNC cable to an available video input port on your DVR.
- Connect the 12V DC power supply to the camera's power input port and plug it into a power outlet.
- Once connected, the camera should power on.
4. Switching Video Output Mode (if necessary)
By factory default, the camera is set to 1080P@30fps HD-TVI. If your DVR uses a different format (CVI, AHD, or CVBS), you may need to switch the camera's video output mode. This is typically done via the DVR's OSD (On-Screen Display) menu or a physical switch on the camera cable (if available, consult your DVR manual for specific instructions on accessing camera OSD).

Figure 3: 4-in-1 CCTV Camera Compatibility. This camera supports TVI, CVI, AHD, and CVBS formats, ensuring broad compatibility with various DVR systems.
Operating Instructions
1. Viewing Live Footage
After successful connection and power-up, access your DVR system. The camera's live feed should appear on the corresponding channel. Refer to your DVR's user manual for specific instructions on viewing live feeds and navigating channels.
2. Understanding Night Vision
This camera features 24/7 Full Time Color Night Vision, utilizing two built-in warm light LEDs. In low-light conditions, these LEDs automatically activate to provide vivid color images, unlike traditional IR cameras that produce black and white footage.

Figure 4: Color Night Vision in Operation. The camera's warm lights provide full-color visibility even in low-light nighttime conditions.

Figure 5: Full-Time Color vs. Ordinary IR Night Vision. Experience superior nighttime clarity with full-color imaging compared to standard black and white infrared cameras.
3. Recording and Playback
The camera provides continuous 24/7 recording when connected to a compatible DVR. All recording and playback functions are managed through your DVR system. Consult your DVR's manual for detailed instructions on setting up recording schedules, motion detection, and reviewing recorded footage.
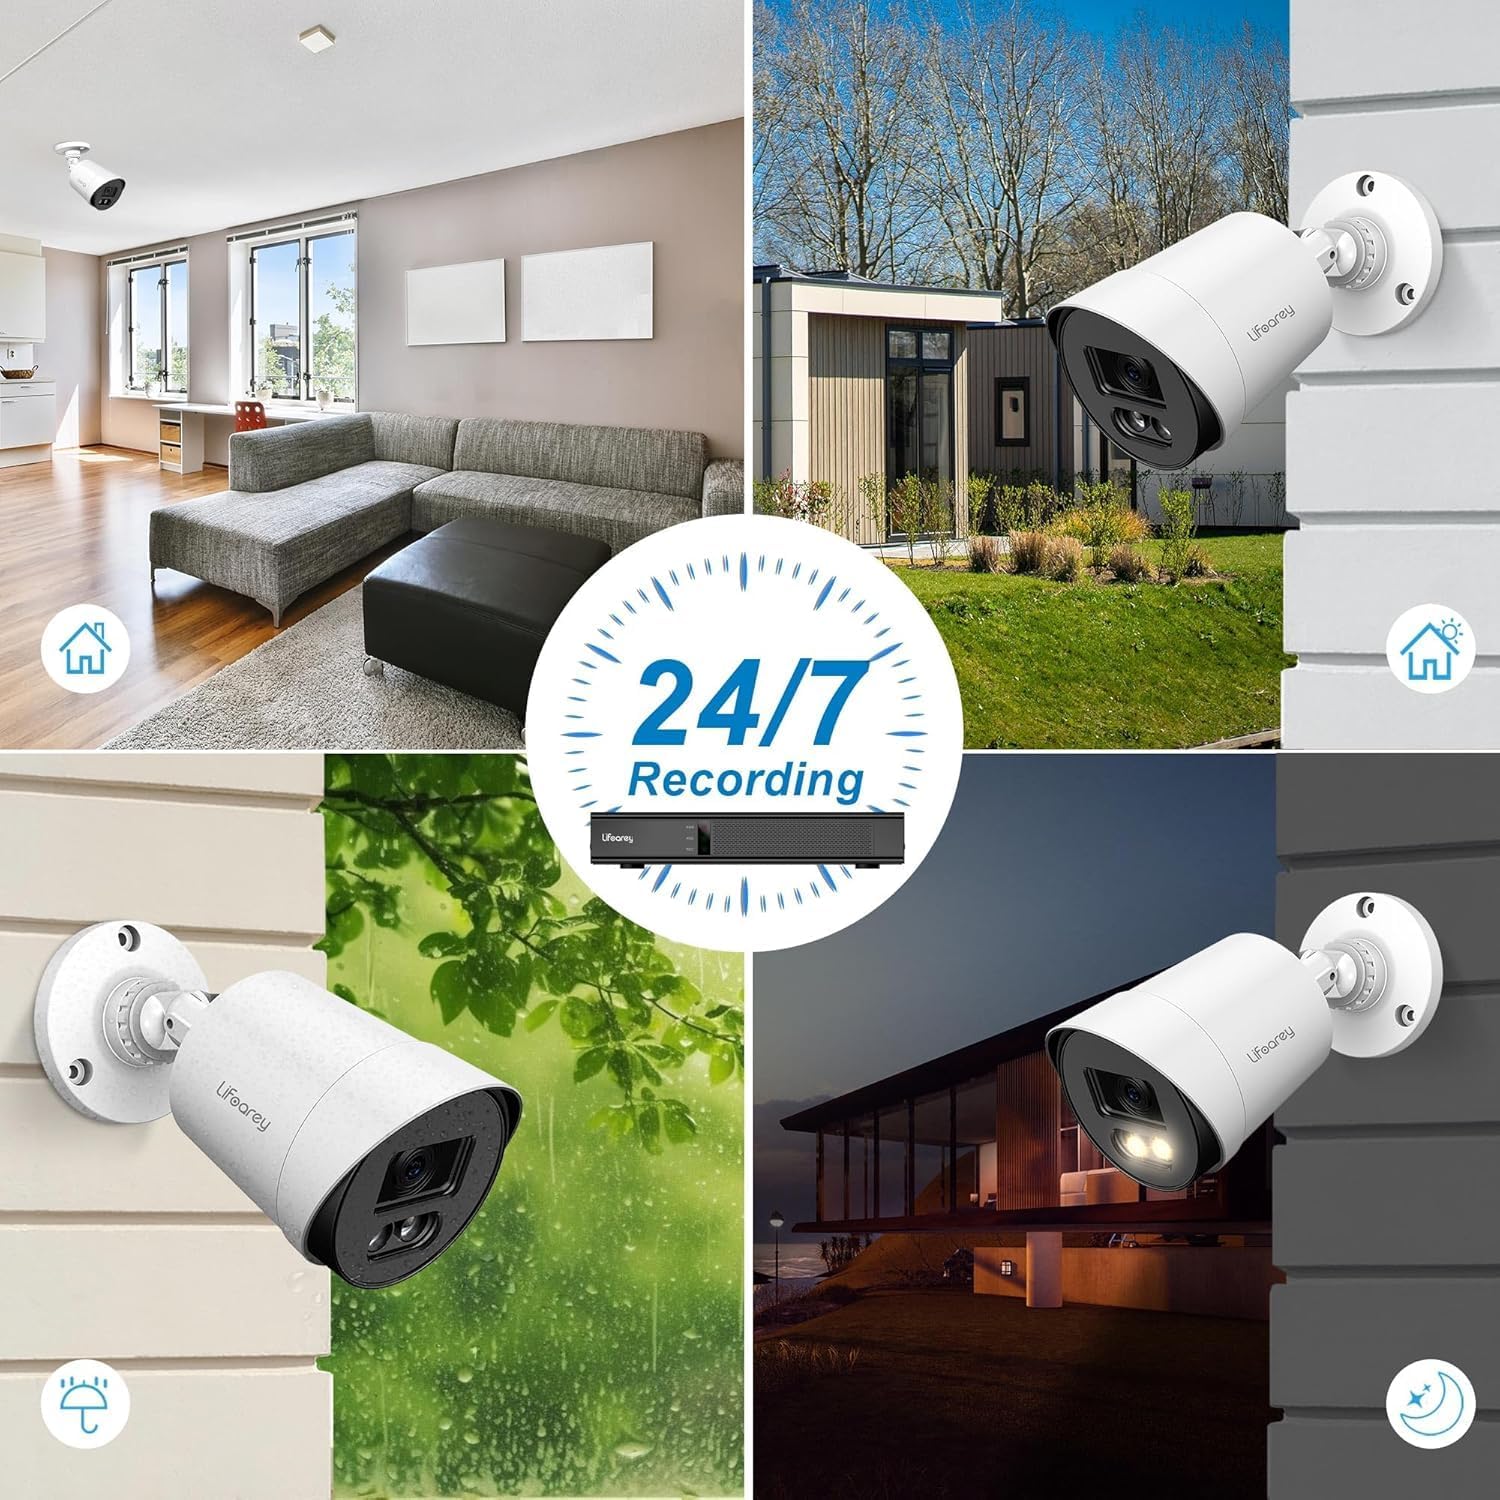
Figure 6: 24/7 Recording Capability. The camera is designed for continuous surveillance in various conditions, day and night.
Maintenance
1. Cleaning the Camera
Regularly clean the camera lens and housing to ensure optimal image clarity. Use a soft, damp cloth to wipe away dust and dirt. Avoid abrasive cleaners or solvents that could damage the camera's finish or lens.
2. Weather Resistance
The camera is IP66 waterproof, designed to withstand various weather conditions. However, ensure that all cable connections are properly sealed and protected from direct water exposure to prevent damage.
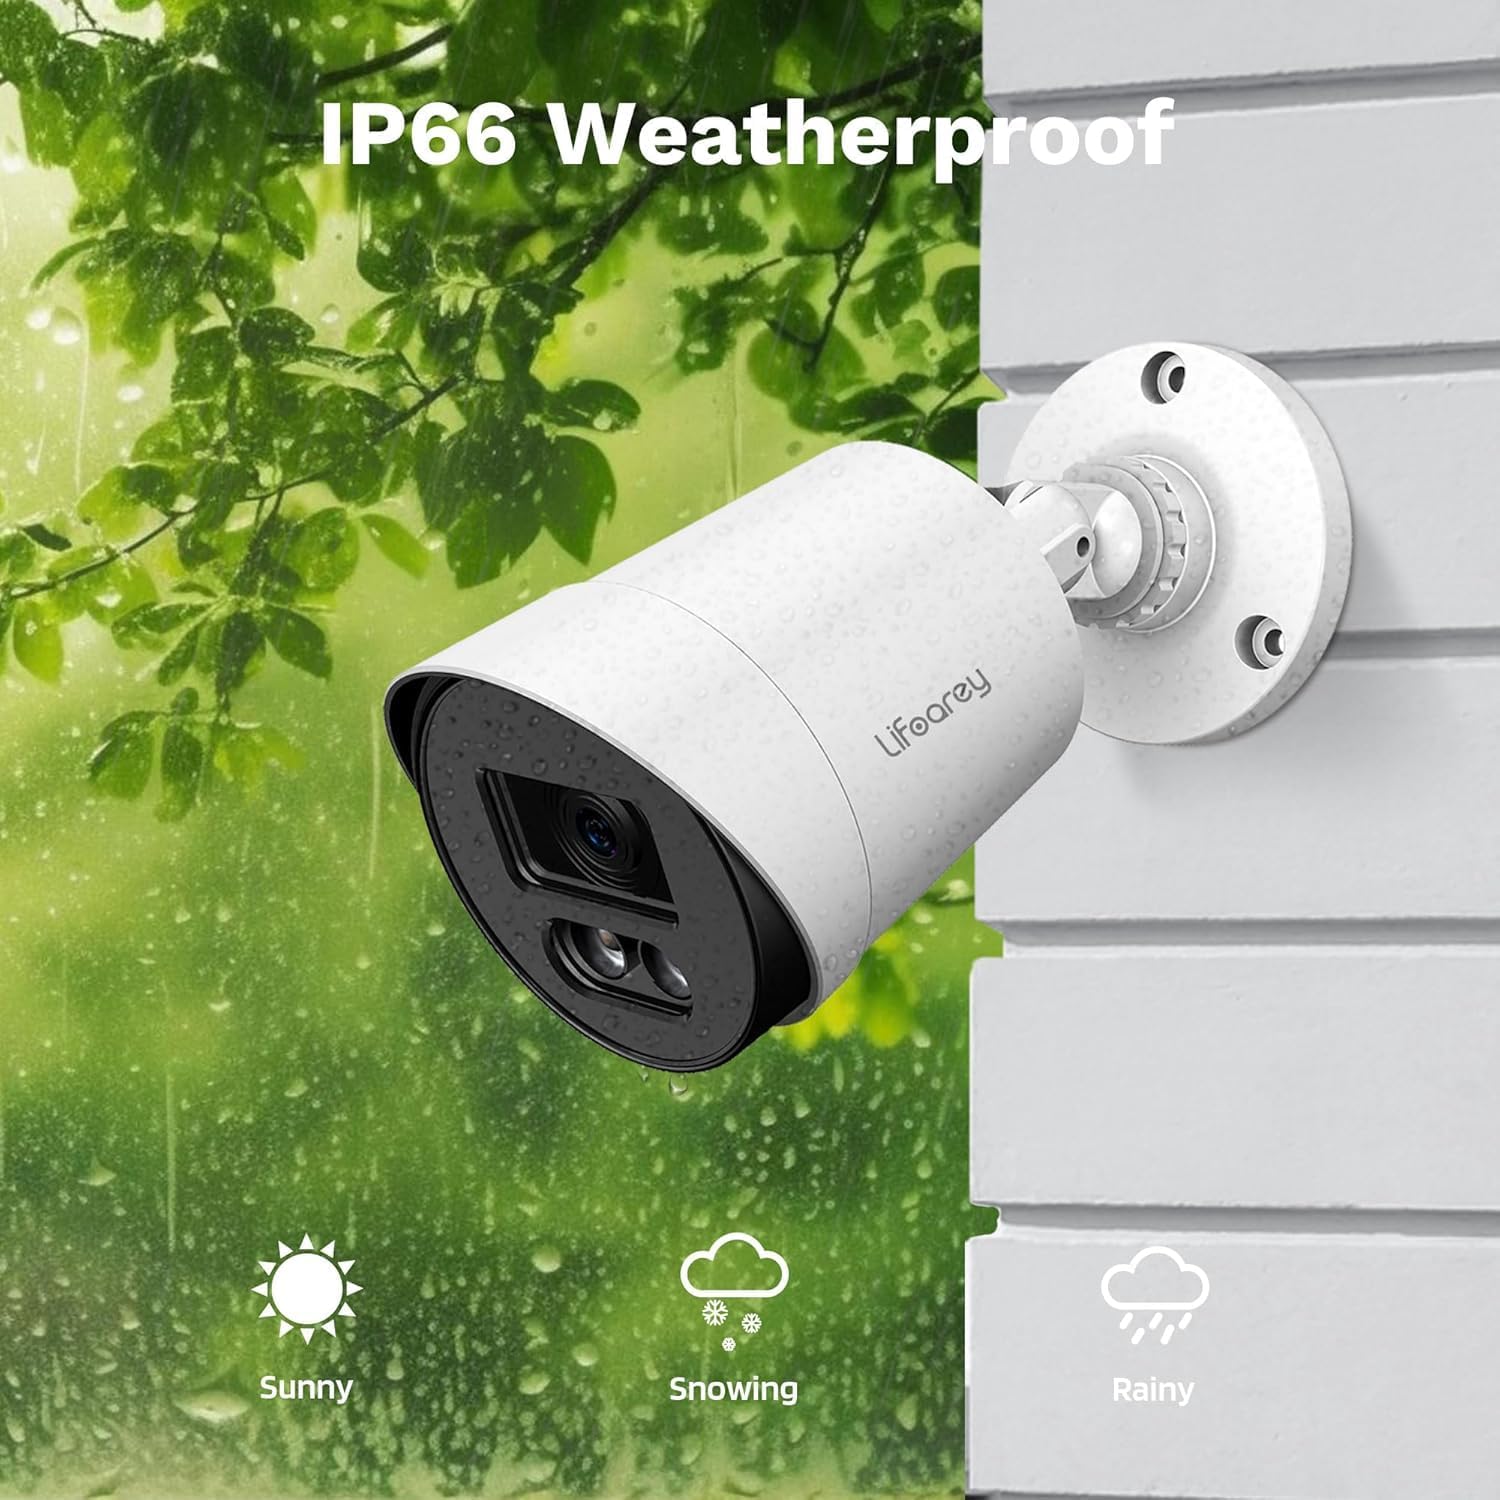
Figure 7: IP66 Weatherproof Design. The camera is built to endure diverse outdoor elements, ensuring reliable performance.
3. Cable and Connection Checks
Periodically inspect all cables and connections for any signs of wear, corrosion, or damage. Secure any loose connections to maintain stable video transmission and power supply.
Troubleshooting
| Problem | Possible Cause | Solution |
|---|---|---|
| No image on DVR | No power to camera; Loose BNC cable connection; Incorrect video format; DVR channel not selected. | Check power supply and connections; Ensure BNC cable is securely connected; Verify camera video output matches DVR input (TVI/CVI/AHD/CVBS); Select correct DVR channel. |
| Poor image quality / Flickering | Dirty lens; Loose cable connection; Cable interference; Insufficient power. | Clean the camera lens; Secure all cable connections; Use shielded cables or relocate cables away from power lines; Ensure power supply meets camera requirements. |
| Night vision not working or dim | Insufficient ambient light for color vision; Warm LEDs not activating. | Ensure there is some ambient light for full-color night vision (e.g., streetlights, porch lights); Check camera settings via DVR OSD to ensure warm LEDs are enabled (if applicable). |
| Camera not recognized by DVR | Incompatible DVR; Incorrect video mode. | Confirm DVR supports 1080p resolution and the camera's video formats (TVI/CVI/AHD/CVBS); Switch camera's video output mode to match DVR. |
Specifications
| Feature | Detail |
|---|---|
| Model Number | RL-HD082YC-HD2053 |
| Video Capture Resolution | 1080p (1920 x 1080) |
| Frame Rate | 30 frames per second |
| Lens | 3.6mm |
| Viewing Angle | 82.2 Degrees |
| Night Vision Range | 100 Feet (Colorful Night Vision) |
| Connectivity Technology | Powerline, Wired (BNC) |
| Compatible Devices | DVR/TVI/CVI/AHD/CVBS |
| Power Source | Corded Electric (12 Volts DC) |
| Indoor/Outdoor Usage | Indoor, Outdoor |
| Water Resistance Level | IP66 Waterproof |
| Material | Acrylonitrile Butadiene Styrene (ABS) |
| Dimensions (L x W x H) | 3.2 x 3.2 x 6.5 inches |
| Item Weight | 8.1 ounces |
| Light Source Type | LED (Warm Light) |
| Mounting Type | Ceiling Mount, Wall-Mounted |
Warranty and Support
This lifoarey security camera comes with a Two-Year Warranty from the date of purchase. This warranty covers manufacturing defects and malfunctions under normal use.
For technical support, warranty claims, or any questions regarding your product, please contact lifoarey customer support:
- Email: support@lifoarey.com
- Online Support: Visit the official lifoarey website for FAQs and additional resources.
Please have your model number (RL-HD082YC-HD2053) and purchase details ready when contacting support.