
1. Introduction
This manual provides essential information for the safe and effective operation of your RILAND MMA160SE 160A Stick Welder. This portable inverter welding machine supports both 110V and 220V input voltages and offers ARC (MMA) and Lift TIG welding modes. It incorporates IGBT inverter technology for stable performance, featuring Hot Start, Arc Force, and Anti-Stick functions. Please read this manual thoroughly before use and retain it for future reference.
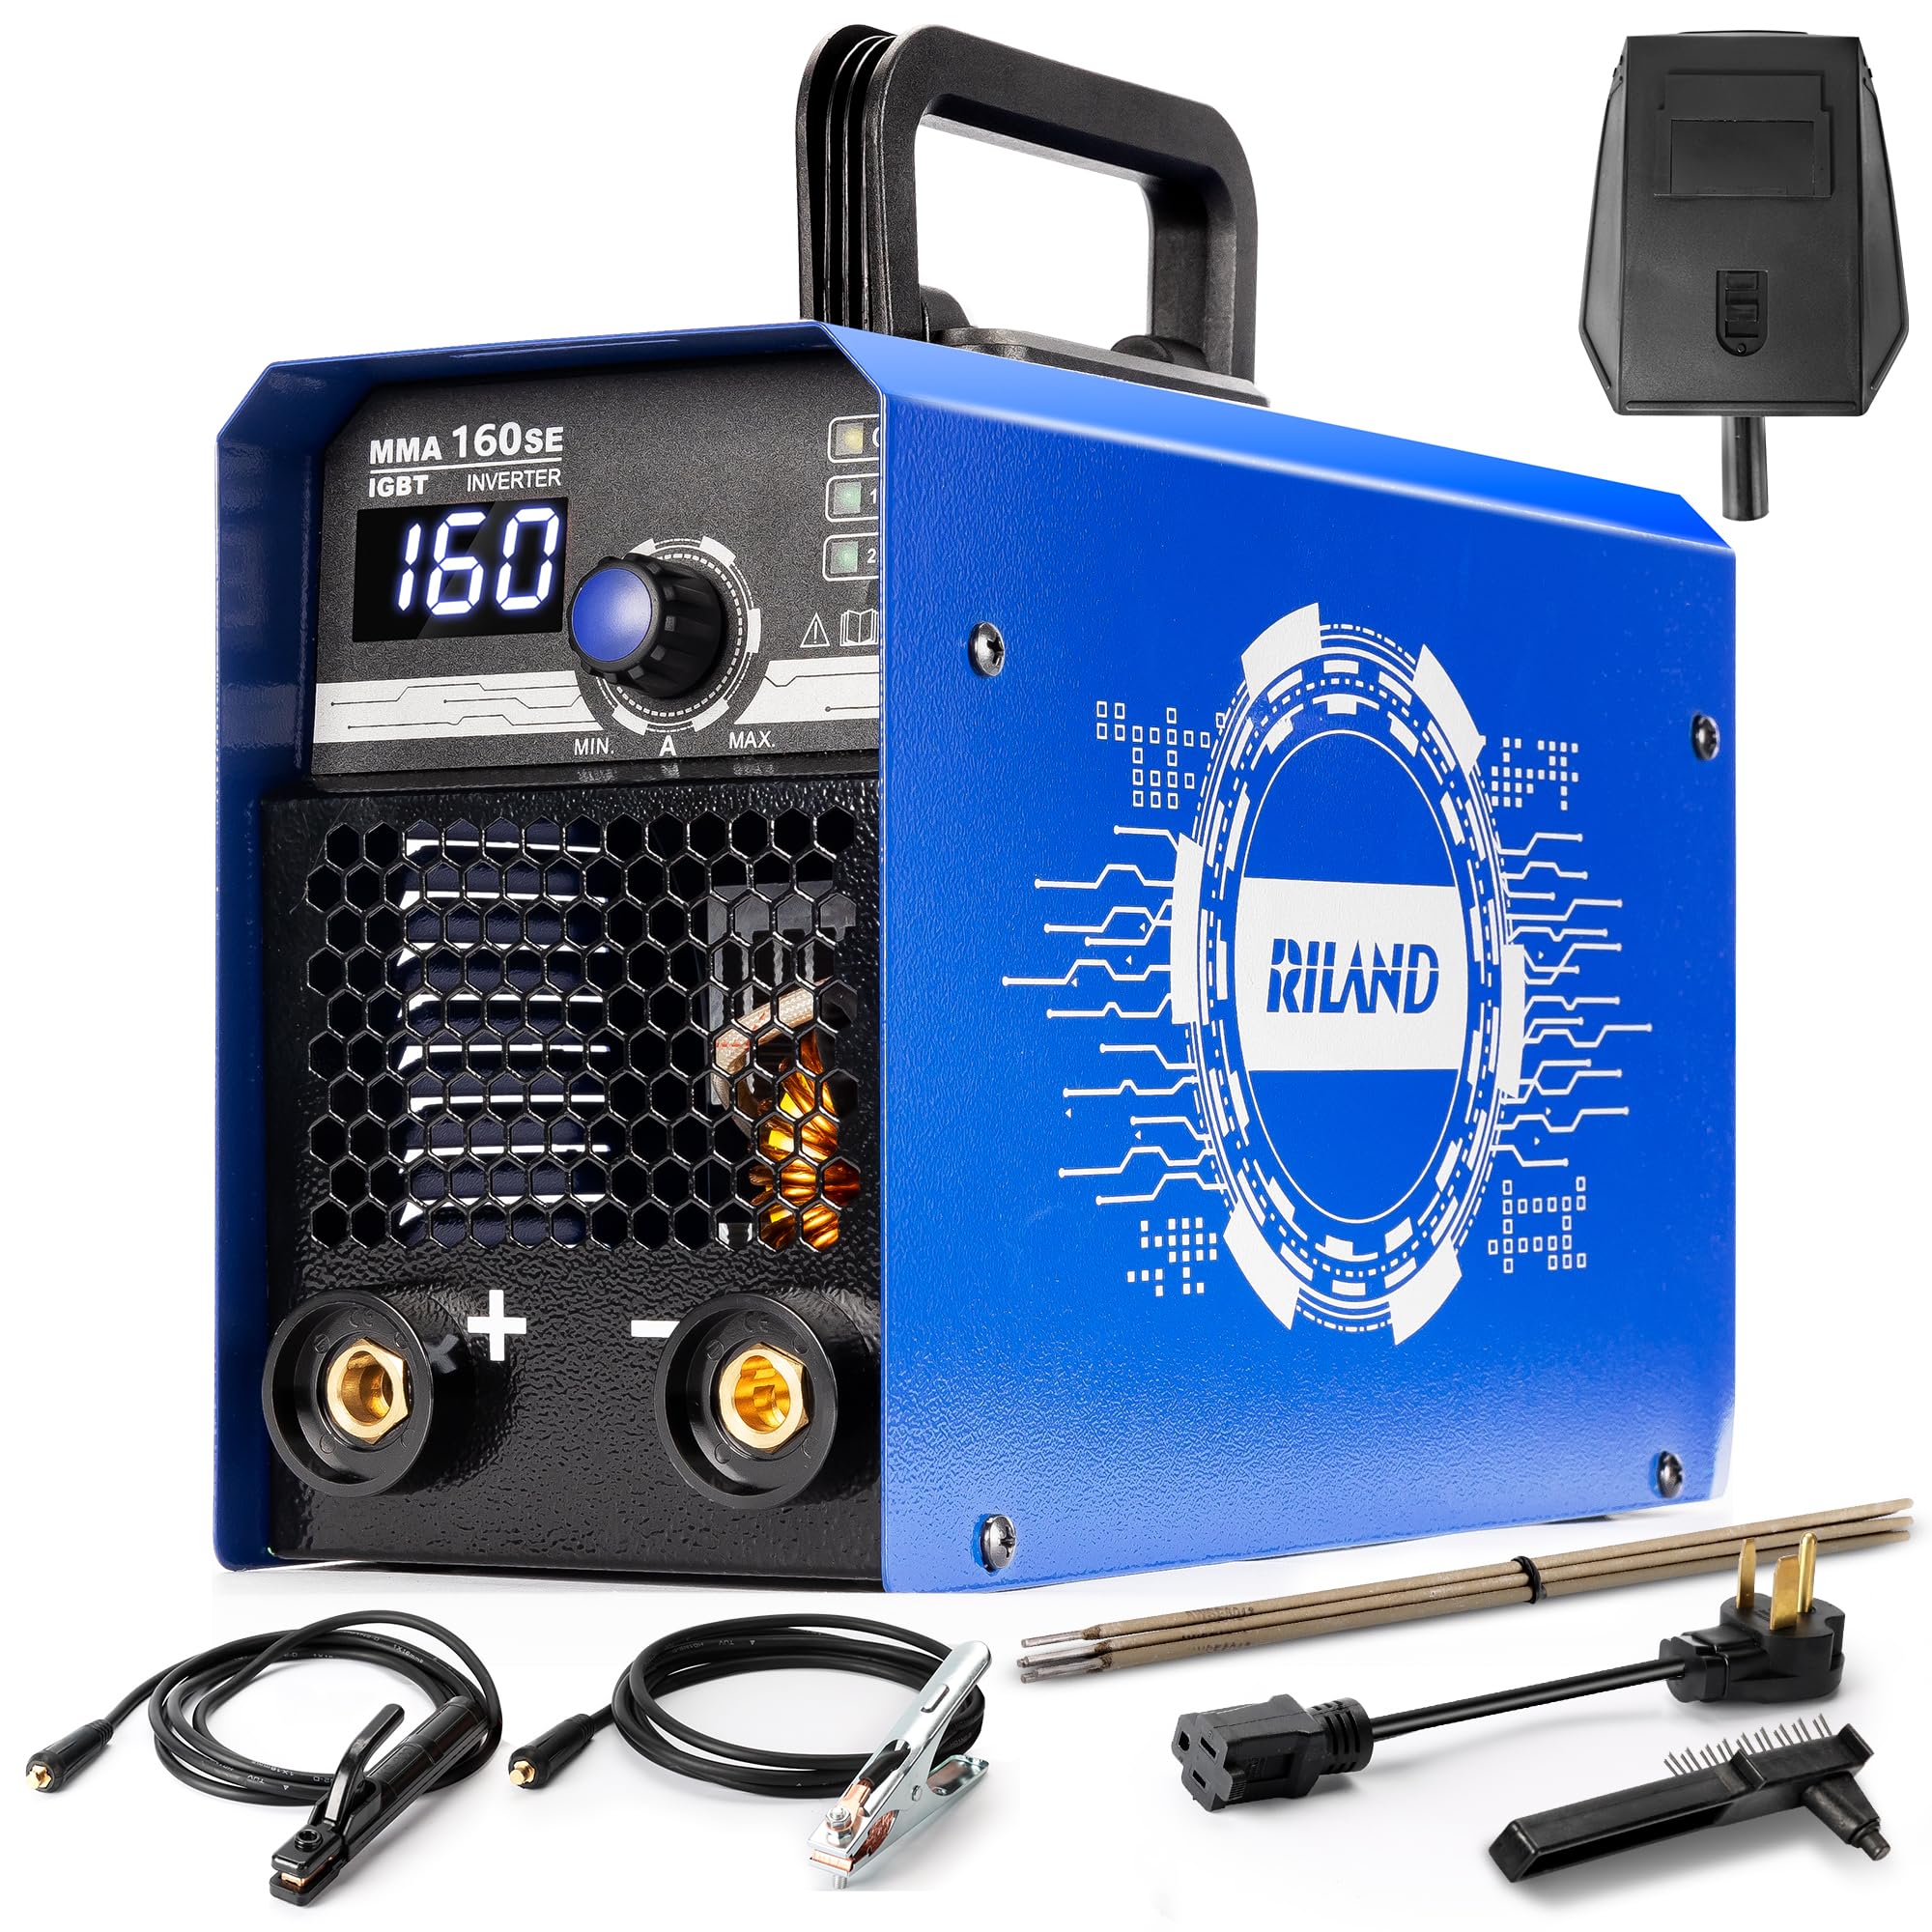
Figure 1: RILAND MMA160SE 160A Stick Welder
2. Safety Information
Welding operations involve significant risks. Adherence to safety precautions is critical to prevent injury or damage. Always follow local and national safety regulations.
2.1 Personal Protective Equipment (PPE)
- Welding Helmet: Always wear a welding helmet with appropriate shade lenses to protect eyes and face from arc rays and sparks.
- Welding Gloves: Use heavy, flame-resistant welding gloves to protect hands from heat, sparks, and electrical shock.
- Protective Clothing: Wear flame-resistant clothing, long sleeves, and trousers to cover all exposed skin. Avoid synthetic fabrics.
- Safety Footwear: Wear sturdy, closed-toe shoes, preferably steel-toed, to protect feet from falling objects and sparks.
2.2 Work Area Safety
- Ensure the welding area is well-ventilated to disperse fumes and gases.
- Remove all flammable materials from the welding area.
- Keep a fire extinguisher readily available.
- Ensure the work area is dry and free from moisture to prevent electrical shock.
2.3 Electrical Safety
- Never touch live electrical parts.
- Ensure the welding machine is properly grounded.
- Inspect cables and connections for damage before each use. Replace damaged components immediately.
- Do not operate the welder in wet conditions.
3. Package Contents
Upon unpacking, verify that all items listed below are present and undamaged:
- 1 x RILAND MMA160SE ARC Welder
- 1 x Stick Electrode Holder
- 1 x Ground Clamp
- 1 x Steel Brush-Hammer
- 1 x Handheld Welding Face Shield
- 1 x User Manual (this document)

Figure 2: Welder and included accessories
4. Product Features
- Dual Voltage Versatility: Operates on both 110V and 220V power supplies, with a wide voltage design (90V-260V) for stable performance across various electrical environments. Current is steplessly adjustable from 20A to 160A.
- 2-IN-1 Welding Modes: Supports both MMA (Stick) and Lift TIG welding modes. (Note: A Lift TIG Torch must be purchased separately for TIG welding).
- High-Efficiency IGBT Inverter Technology: Features an advanced MCU control system and IGBT inverter technology for digital control of the welding process. This ensures continuous arc stability and efficient welding.
- Integrated Welding Functions: Includes Hot Start for quick arc ignition, Anti-Stick to prevent electrodes from sticking, and Arc Force for optimizing arc stability.
- Lightweight & Portable Design: Compact dimensions (7.9''x 4.6''x11.4'') and a weight of 2.9kg (6.4LB) with an easy-carrying handle make it ideal for on-site and outdoor repairs.
- Wide Application: Suitable for most E6013 and E7018 welding rods and various metals including cast iron, mild steel, sheet metal, metal cages, square pipes, and stainless steel.

Figure 3: Advanced IGBT Inverter Technology

Figure 4: Hot Start function in action

Figure 5: Arc Force for stable welding

Figure 6: Anti-Sticking feature
5. Setup
Follow these steps to set up your RILAND MMA160SE welder:
- Power Connection: Connect the power cord to the appropriate 110V or 220V power outlet. The machine automatically detects the voltage. Ensure the power switch on the back of the unit is in the OFF position before connecting.
- Ground Clamp Connection: Connect the ground clamp cable to the negative (-) terminal on the front panel of the welder. Securely attach the ground clamp to the workpiece or a clean, bare metal part of the welding table. A good ground connection is essential for safe and effective welding.
- Electrode Holder Connection: Connect the electrode holder cable to the positive (+) terminal on the front panel of the welder for standard DC electrode positive (DCEP) welding. For DC electrode negative (DCEN), connect to the negative (-) terminal.
- Electrode Insertion: Insert the welding electrode into the electrode holder, ensuring it is held firmly.
Video 1: RILAND 160A Stick Welder setup and operation overview. This video demonstrates the connection of cables and basic welding.
6. Operating Instructions
6.1 Powering On and Current Adjustment
- After connecting all cables, turn the power switch to the ON position. The digital display will illuminate.
- Use the current adjustment knob on the front panel to set the desired welding current (Amperage). Refer to electrode manufacturer specifications for recommended current settings for your specific electrode and material thickness.

Figure 7: Smart Chip Welder with digital display for current adjustment
6.2 MMA (Stick) Welding
MMA welding uses a consumable electrode coated with flux. The flux creates a shielding gas and slag to protect the weld pool.
- Ensure proper PPE is worn.
- Strike the arc by lightly scratching the electrode against the workpiece, similar to striking a match.
- Maintain a consistent arc length and travel speed to achieve a stable weld bead.
- The Hot Start, Arc Force, and Anti-Stick features will automatically assist in arc ignition, stability, and preventing electrode sticking.
6.3 Lift TIG Welding
Lift TIG welding provides a cleaner weld and is suitable for thinner materials. A separate TIG torch is required.
- Connect the TIG torch (purchased separately) to the appropriate terminal.
- Select the Lift TIG mode on the welder.
- Touch the tungsten electrode lightly to the workpiece to initiate the arc, then lift it slightly to establish the arc.
- Maintain a consistent arc length and feed filler rod manually if required.
Video 2: Demonstration of ARC welding with a portable machine.

Figure 8: Wide range of metal applications
7. Maintenance
Regular maintenance ensures the longevity and safe operation of your welder.
- Cleaning: Periodically clean the internal components of the welder using compressed air to remove dust and metal particles. Ensure the machine is unplugged before cleaning.
- Cable Inspection: Regularly inspect all welding cables, electrode holder, and ground clamp for cuts, cracks, or loose connections. Replace any damaged parts immediately.
- Ventilation: Ensure the ventilation openings on the welder are clear and unobstructed to prevent overheating.
- Storage: Store the welder in a dry, clean environment, away from excessive dust and moisture, when not in use.
8. Troubleshooting
Refer to the table below for common issues and their potential solutions:
| Problem | Possible Cause | Solution |
|---|---|---|
| No arc or difficult arc starting | Poor ground connection, incorrect current setting, damp electrode, power supply issue. | Check ground clamp connection, adjust current, use dry electrodes, verify power supply. |
| Unstable arc | Incorrect arc length, improper electrode angle, insufficient current. | Maintain consistent arc length, adjust electrode angle, increase current. |
| Electrode sticks frequently | Low current setting, improper striking technique. | Increase current, improve striking technique. The Anti-Stick function should help. |
| Welder overheats and shuts off | Exceeded duty cycle, poor ventilation, high ambient temperature. | Allow welder to cool down, ensure clear ventilation, operate in a cooler environment. |
9. Specifications
| Specification | Value |
|---|---|
| Model Number | MMA160SE |
| Manufacturer | RILAND |
| Item Weight | 6.4 pounds (2.9 kg) |
| Product Dimensions | 7.9 x 4.6 x 11.4 inches (20.07 x 11.68 x 28.96 cm) |
| Input Voltage | 110V/220V (90V-260V wide voltage) |
| Current Adjustment Range | 20A-160A |
| Welding Modes | MMA (Stick), Lift TIG |
| Technology | IGBT Inverter, MCU Control |
| Included Components | Electrode Holder, Ground Clamp, Power Cord, Steel Brush-Hammer, Handheld Welding Face Shield, User Manual |
| Material | Metal |
10. Warranty and Support
For warranty information, technical support, or service inquiries, please contact RILAND customer service through the official RILAND website or your point of purchase. Ensure you have your product model number (MMA160SE) and purchase details available when contacting support.
