
1. Introduction
Thank you for choosing the Uniclife 2100 GPH Aquarium Wave Maker. This device is designed to create adjustable water circulation within your aquarium, simulating natural aquatic environments. Proper water movement is crucial for the health of your fish and corals in both marine and freshwater setups. This manual provides essential information for the safe and efficient operation and maintenance of your wave maker.
2. Important Safety Instructions
- Read all instructions carefully before use.
- Ensure the power supply voltage matches the specifications of the device.
- Do not operate the pump out of water. Always ensure the pump is fully submerged.
- Disconnect power before performing any maintenance or cleaning.
- Keep the controller dry and away from water.
- This product is designed for indoor aquarium use only.
- Keep out of reach of children.
3. Package Contents
Please verify that all components are present:
- Uniclife Aquarium Wave Maker Pump
- External Controller
- Magnet Mount
- Power Adapter
4. Setup Instructions
- Positioning the Pump: Select a suitable location inside your aquarium for the wave maker. The pump features a strong magnetic base for flexible positioning. Place the pump unit inside the tank and align the external magnet on the outside of the tank glass. The magnets will secure the pump in place.
- Connecting the Controller: Connect the wave maker pump cable to the designated port on the external controller.
- Power Connection: Plug the power adapter into the controller, then plug the adapter into a standard electrical outlet. Ensure all connections are secure.
- Initial Operation: Once powered on, the wave maker will begin operating according to its default settings. Refer to the Operating Instructions section to customize settings.
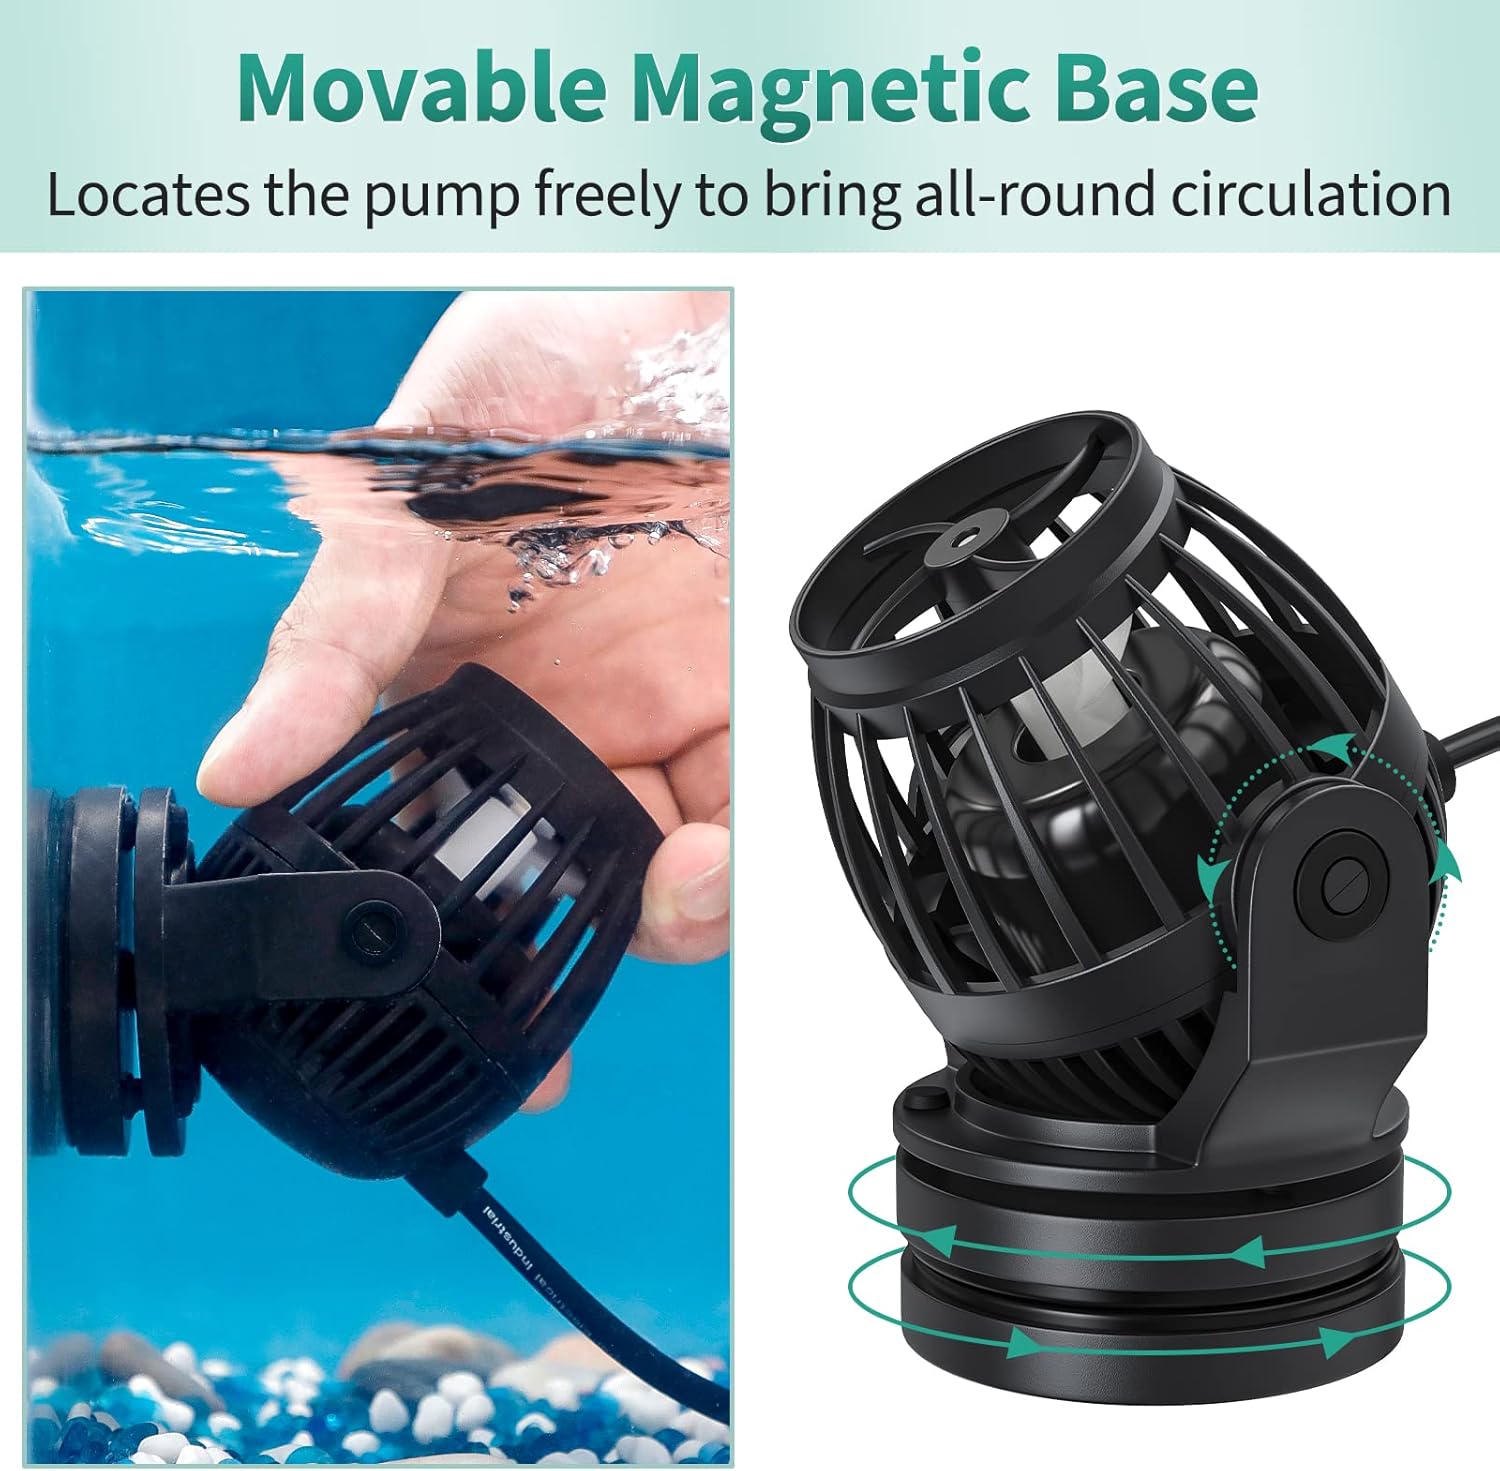
Image: The wave maker pump is secured to the aquarium glass using its magnetic mount, allowing for easy repositioning without submerging hands.

Image: The Uniclife wave maker pump is shown submerged in an aquarium, generating significant water movement.
5. Operating Instructions
The external controller allows for easy adjustment of the wave maker's performance.
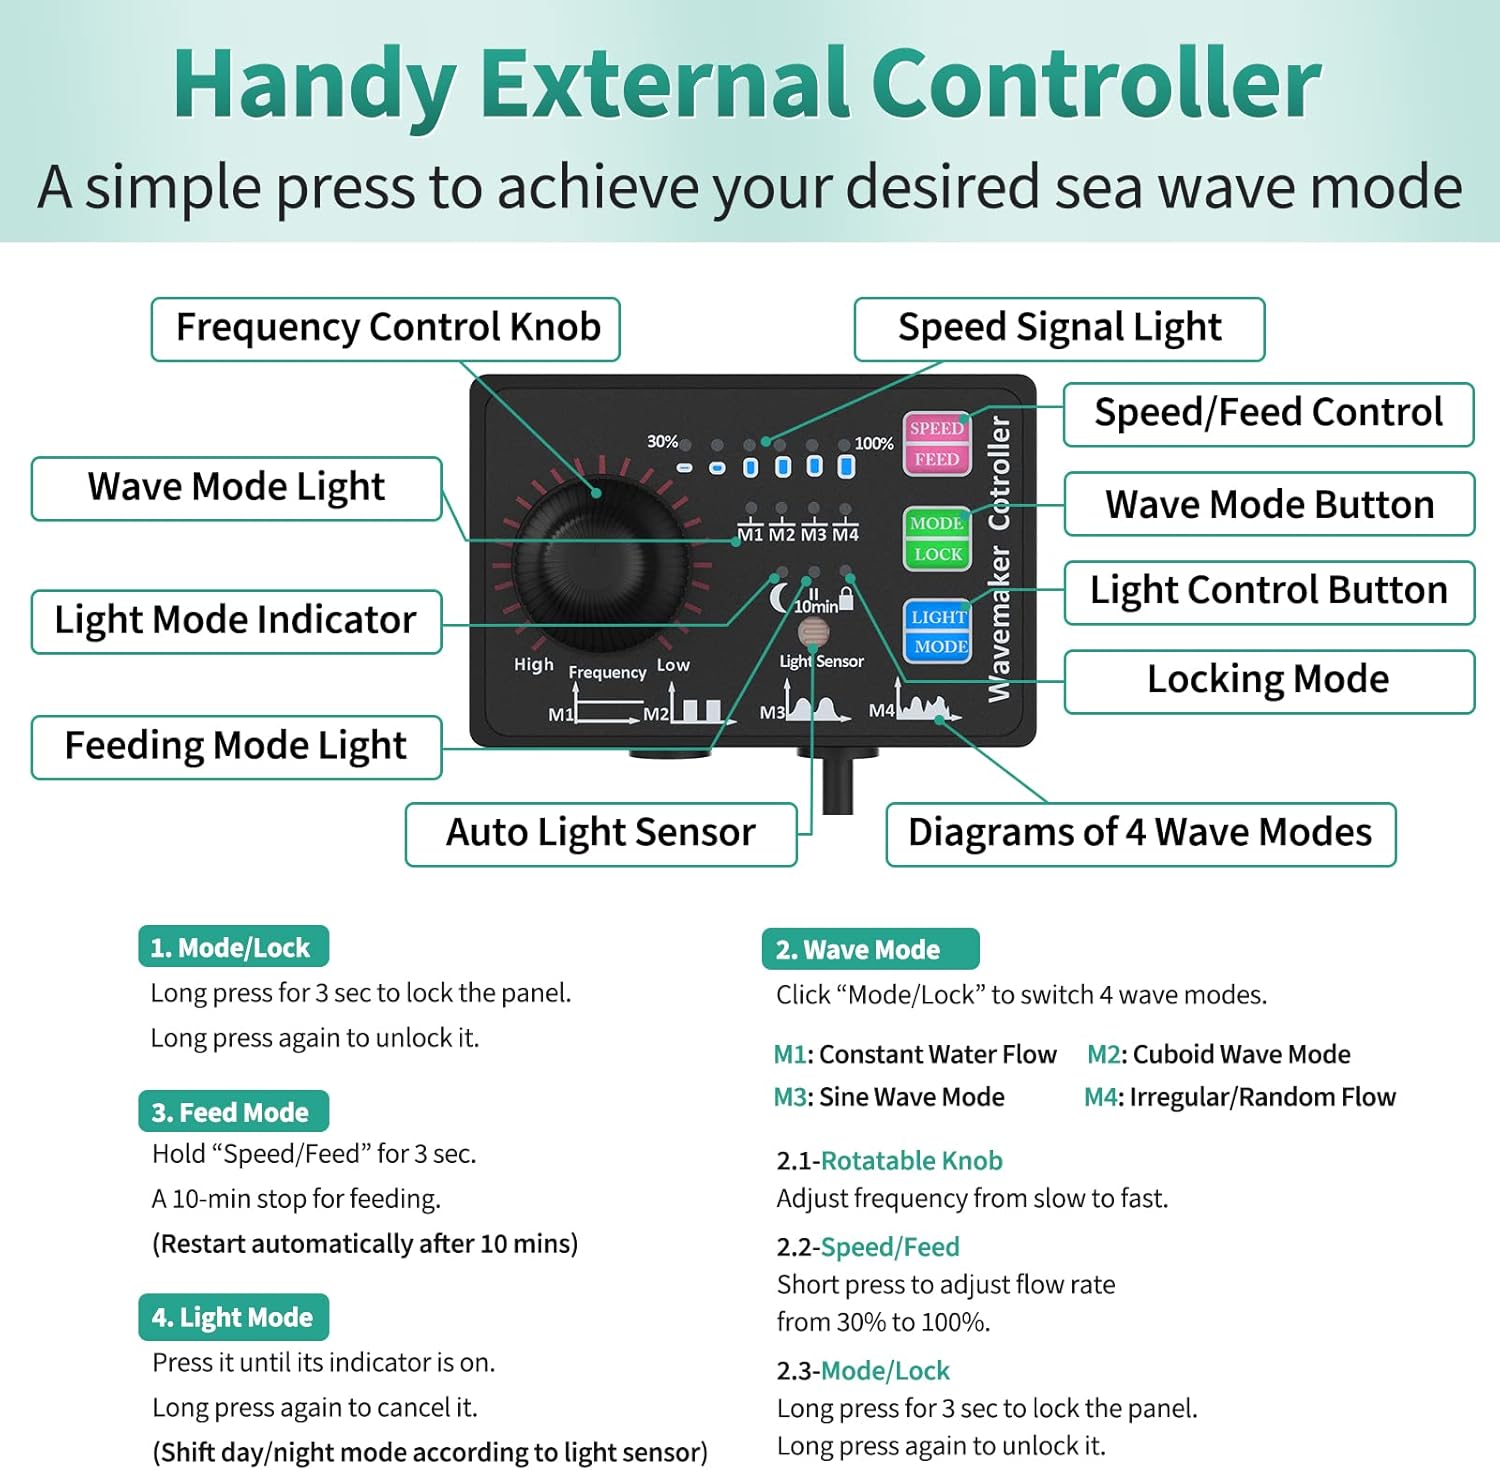
Image: A detailed view of the wave maker's external controller, highlighting the frequency control knob, speed/feed button, mode/lock button, and light mode button.
Controller Functions:
- Speed/Feed Button:
- Short press to adjust the flow rate (speed) from 30% to 100%.
- Hold for approximately 3 seconds to activate the 10-minute feeding mode. The pump will stop for 10 minutes to allow fish to feed without food being dispersed too quickly. It will restart automatically.
- Mode/Lock Button:
- Short press to cycle through the 4 wave modes (M1, M2, M3, M4).
- Hold for approximately 3 seconds to lock the control panel, preventing accidental changes. Hold again for 3 seconds to unlock.
- Light Mode Button: Press to activate or deactivate the light sensor function, which adjusts pump operation based on ambient light (day/night mode).
- Frequency Control Knob: Rotate this knob to adjust the frequency of the wave patterns, from high to low, within the selected mode.
Wave Modes:
- M1 (Constant Water Flow): Provides a steady, continuous water flow.
- M2 (Cuboid Wave Mode): Generates a pulsing flow, creating cuboid-like wave patterns.
- M3 (Sine Wave Mode): Produces smooth, oscillating sine wave patterns.
- M4 (Irregular/Random Flow): Creates varied and unpredictable flow patterns, mimicking natural ocean currents.
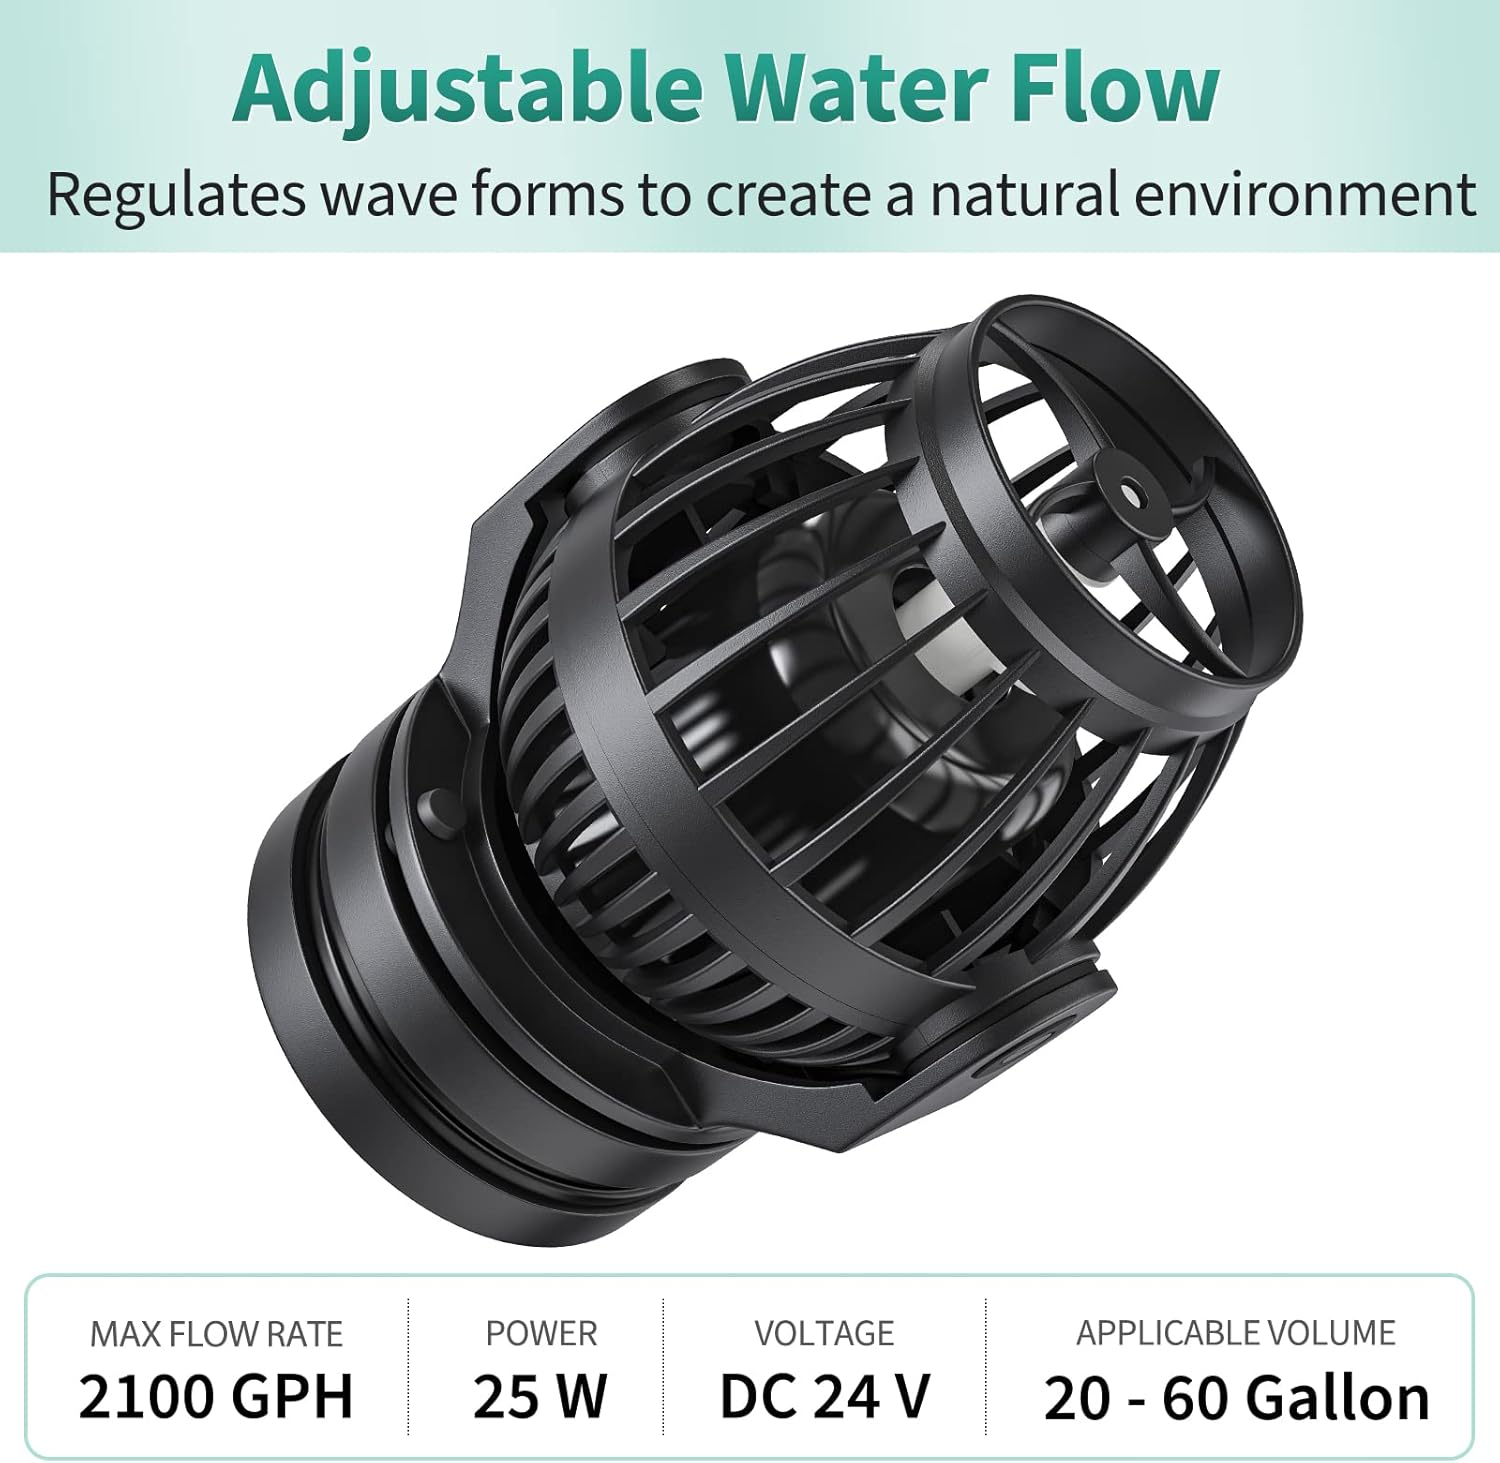
Image: The wave maker is highlighted with its adjustable water flow feature, regulating wave forms to create a natural environment. Specifications include Max Flow Rate: 2100 GPH, Power: 25 W, Voltage: DC 24 V, Applicable Volume: 60-120 Gallon.
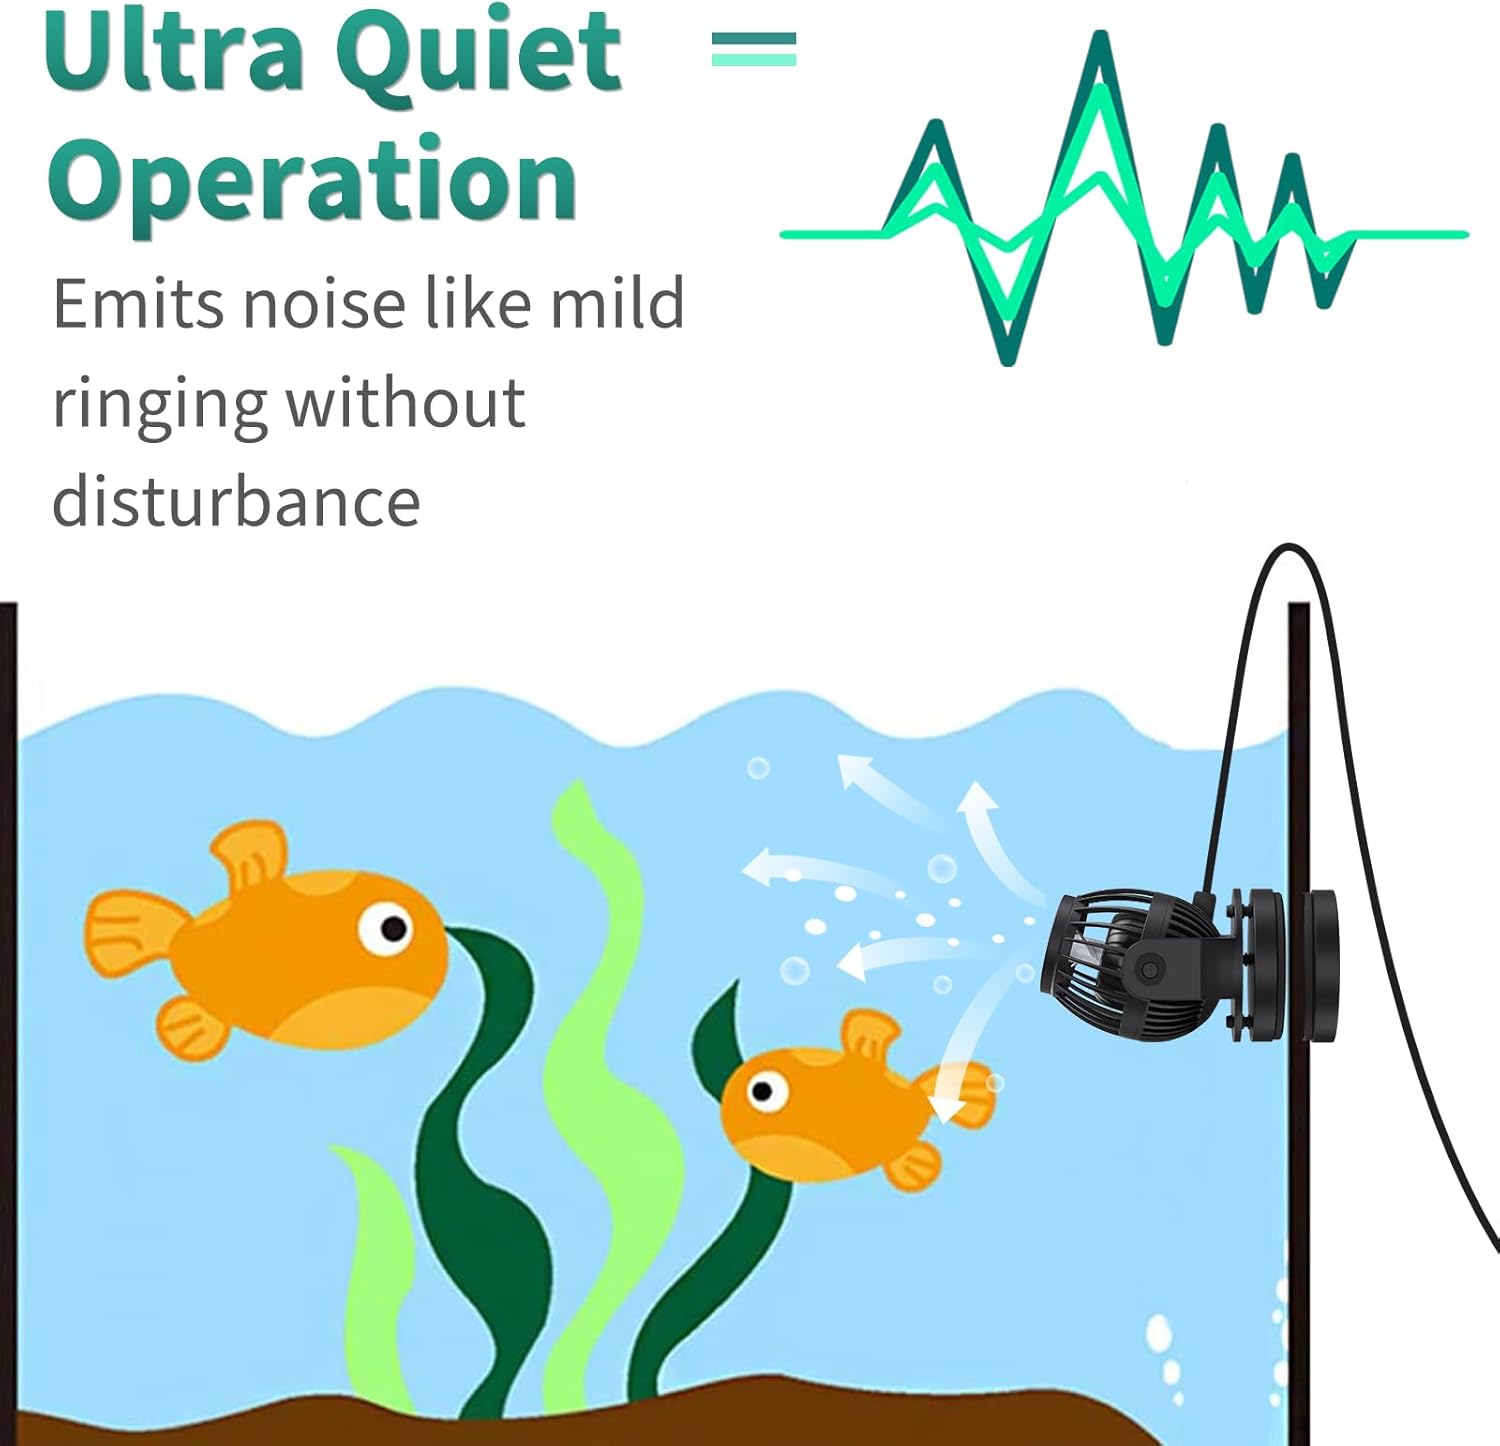
Image: The wave maker is shown in an aquarium, emphasizing its ultra-quiet operation, emitting only a mild ringing sound.
6. Maintenance
Regular cleaning ensures optimal performance and longevity of your wave maker.
- Disconnect Power: Always unplug the power adapter before attempting any maintenance.
- Disassembly: The wave maker features a detachable design for easy cleaning. Carefully detach the front cover and impeller unit.
- Cleaning: Rinse all components under clean water. Use a soft brush to remove any algae, debris, or mineral buildup from the impeller, impeller housing, and protective cover. Ensure the impeller spins freely.
- Reassembly: Reassemble the components, ensuring they fit snugly.
- Reinstallation: Reattach the wave maker to the aquarium glass using the magnetic mount and reconnect the power.

Image: An exploded diagram illustrates how the wave maker can be easily disassembled into its main components for cleaning without requiring special tools.
7. Troubleshooting
- Pump not starting:
- Check if the power adapter is securely plugged into the outlet and the controller.
- Ensure the pump cable is properly connected to the controller.
- Verify that the control panel is not in 'Lock' mode.
- Weak or no water flow:
- Check for blockages in the impeller or pump housing. Clean as per maintenance instructions.
- Ensure the pump is fully submerged and not drawing air.
- Adjust the speed setting on the controller.
- Excessive noise:
- Inspect the impeller for debris or damage. Clean or replace if necessary.
- Ensure the pump is securely mounted and not vibrating against the tank glass.
- Controller unresponsive:
- Disconnect and reconnect the power to reset the controller.
- Ensure the controller is dry and free from moisture.
8. Specifications
| Feature | Specification |
|---|---|
| Model Number | WM-206 |
| Max Flow Rate | 2100 GPH |
| Power | 25 W |
| Voltage | DC 24 V |
| Recommended Tank Size | 60-120 Gallons |
| Item Weight | 1.87 pounds |
| Package Dimensions | 9.09 x 6.3 x 3.98 inches |
| Material | Metal, Plastic |

Image: The wave maker is shown with its compact dimensions (3.9 in height, 4.2 in width, 2.4 in base diameter), indicating its suitability for various tank sizes.
9. Warranty and Support
For warranty information or technical support, please refer to the product packaging or contact Uniclife customer service directly. Keep your purchase receipt for warranty claims.